
“You know, the lasagna song!”
Several years ago, a friend shared a funny story about her youngest. Her daughter was in preschool at the time, and one day she asked her mom to help her sing the lasagna song from church. My friend was a bit confused, and she explained to her daughter that she didn’t know what song her daughter was referring to. Her daughter got exasperated and said, “You know, the lasagna song! The one we sing every Sunday at the end.” My friend finally figured out that her daughter was talking about the “Hosannah” song which to her daughter’s young ears sounded like “lasagna”.
Ever since my friend related that story, I can’t think about, make or eat lasagna without chuckling and singing to myself, “Lasagna in the highest!”
As funny as my friend’s anecdote is, people don’t tend to laugh when they are trying to make something as wonderfully rich and gooey and tasty as traditional lasagna with substitute ingredients. Often they get frustrated because “it’s just not the same”, which is what the email I received this week said.
When it comes to substituting for anything, whether it’s lasagna or something else, the two main things people look for are whether the taste and the texture resemble the original. If one or both don’t, then folks consider it a failure. While I would argue in general against this litmus test for success, the fact remains that people continue to judge food on these two criteria. As such, if you are going to serve someone lasagna that is dairy and gluten free, you want to be sure that people will enjoy it. Below I’ll share some tips for making delicious allergy friendly lasagna. The tips are helpful for making traditional lasagna as well.
Tips for Allergy Friendly Lasagna:
1. The pan: You can make any type of lasagna in just about any size, depth or shape pan, but if you want to make your life easier, invest in a nice lasagna pan which usually is 11 by 14 x 3. This is the perfect size for lasagna noodles. They fit both width-wise and length-wise, and perfectly fits a lasagna made with two boxes of noodles. You’ll save yourself the hassle of having to cut and size your noodles which will also save time in your assembly of the lasagna.
2. The noodles: Whether you are using regular, whole wheat, or gluten free lasagna noodles, the tips remain the same.
a) For the best taste and texture, you do want to cook the noodles on the stove top first. Yes, you can use the no-cook method (which I do indeed utilize sometimes!), but the texture and the taste definitely will reap the consequences. The better method is to cook the noodles before using them.
b) Do not overcook the noodles. You want to actually under cook your noodles by two minutes. When your lasagna is cooking in the oven, the noodles will continue to cook, so if you don’t under cook your noodles on the stove top, they’ll become mushy while cooking in the oven.
c) To preserve the texture of the noodles, you should immediately rinse your lasagna noodles with cold water to stop the cooking when you’ve drained them from the stove top water. Pat them lightly dry and line the noodles on a surface for easy use when assembling the lasagna. You don’t want to leave the noodles on top of each other, because then they’ll stick to one another and you’ll have a big mess on your hands. What I do is I line one of my large cookie sheets with plastic wrap or parchment paper and line the noodles side by side on the cookie sheet so I can simply reach for them as needed.
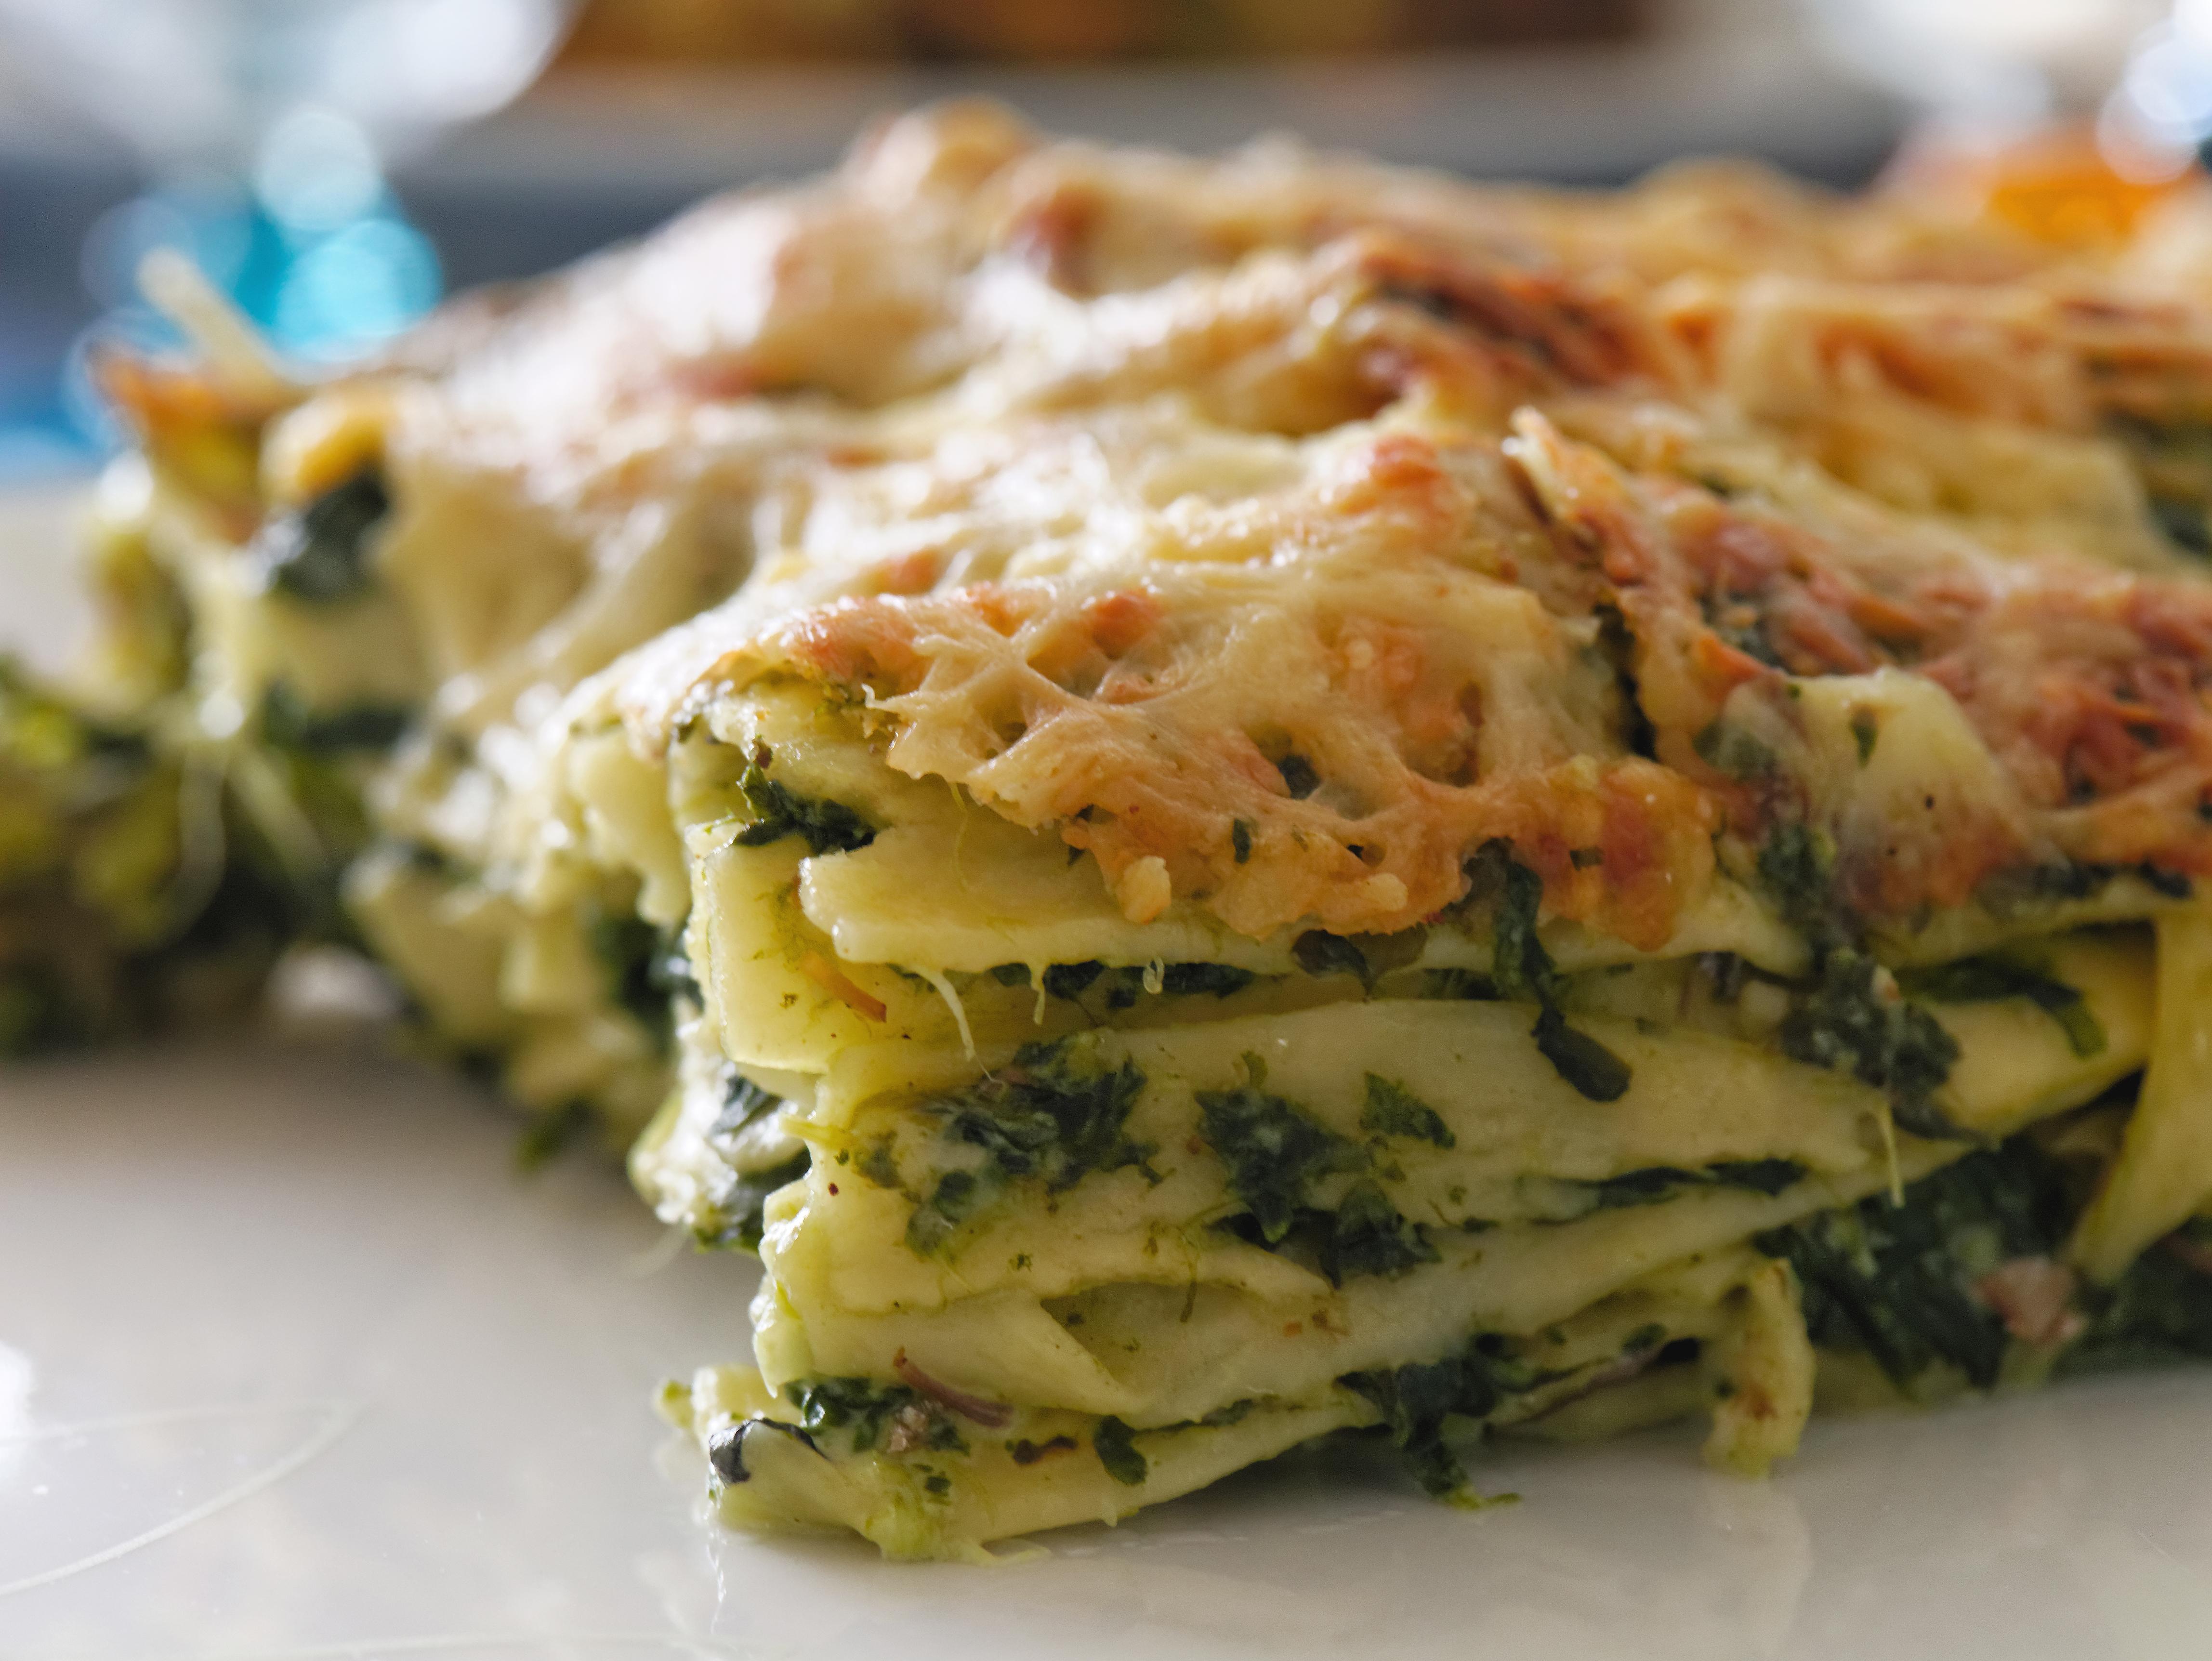
3. The filling: Traditionally folks use ricotta cheese or cottage cheese or a combination of both as the lasagna filling. For folks who have dairy allergies, though, you can use tofu or a nut “cheese”. I like to use the silken tofu, because when I mash it with my potato masher, the silken tofu has as similar texture as the ricotta and cottage cheese. Also, I’m allergic to nuts. If you aren’t allergic to nuts, though, and are allergic instead to soy, there are some good recipes online for nut “ricotta cheeses” which are basically pureeing soaked nuts such as cashews, almonds and walnuts (about 1 1/2 to 2 cups) with water (1/2 cup), lemon juice (1tbsp) and garlic and herbs.
Regardless of whether you’re using real ricotta or tofu or a nut cheese, the hint for creating delicious lasagna is to flavor the “cheese”. I cook up a small amount of Italian chicken sausage and make a paste in my food processor with fresh basil, oregano, garlic, black pepper, and onions. I add both the sausage and the herb paste to the tofu and let it sit covered in the fridge while I’m working on the noodles, vegetables and sauce, so the flavors can meld.
If you’re like me and want something a little more to your lasagna, you can also add vegetables to the “cheese” before you assemble your lasagna. I like to roast vegetables like zucchini, squash and eggplant or saute spinach and mushrooms. After the flavors have had a chance to meld in the tofu, I gently mix the vegetables into the tofu. If I want a meat lasagna, then I cook up more than just a small amount of chicken sausage or some ground turkey and add that instead of the vegetables. For both the meat and vegetables, you should be sure to season and flavor them with spices, herbs, garlic or onions and black pepper as you cook them. Even though your “cheese” has flavor, adding bland vegetables and meat to the cheese will simply dilute the flavor you worked to incorporate.
Finally, if you are not allergic to eggs or are not vegan, if you mix up a couple of eggs with a fork and then blend it well with the tofu or nut cheese mixture, it will make your filling a bit creamier like ricotta as well as lend some stability to the lasagna.
4. The sauce: I like to make my own tomato sauce when I can, but I also use a no-sugar added jar sauce on occasion, too. The important tip to keep in mind for a good lasagna is to make sure your sauce is a thick sauce. A thin, runny spaghetti sauce is a definite no-no for lasagna. Since I’m of the opinion that more vegetables are always better, I tend to keep aside some of the lovely roasted or sauteed vegetables I made for the cheese, chop it more finely, and add it to the sauce as well. This not only adds more texture, but more taste — especially if you’re using a jarred sauce.
If you are making your own sauce, be sure to cool it before assembling your lasagna. Since we don’t want to affect the texture of our cooled noodles, we want all our ingredients to be at least at room temp before assembling so that the only additional cooking of the noodles will occur in the oven.
5. The assembling process: It’s important to “build” your lasagna so it’ll be stable for eating. The best way to do this is to alternately lay each layer of noodles opposing to one another. So, if you put all your noodles width-wise the first time, then layer them length-wise the second and so on. I find that the best lasagnas follow the pattern of sauce, noodles, sauce, noodles, then half of the filling, noodles, second half of filling, noodles, sauce, cheese.
For the sauce, it’s important that you completely cover the bottom layer of the lasagna pan with sauce before laying down your first set of noodles. Whether you want to have sauce on top of your cheese filling or not is up to you. If you don’t add sauce on top of the cheese filling, you’ll have a drier lasagna, which a lot of people prefer. If you want a moister lasagna or like the flavor of the tomato sauce melding with your cheese filling, which is the way I like it, then you should layer the tomato sauce on top of the filling before layering another set of noodles.
It’s also important to put sauce on top of the last layer of noodles. You can certainly simply put your cheese on top, but then the top layer of noodles will cook into a crispy top layer instead of being moist and soft for eating.
6. The cheese: Most people put mozzarella on top of the last layer of noodles and sauce. For folks with dairy allergies, Daiya makes a mozzarella which tends to melt almost like mozzarella. Taste-wise, though, it can have a little off-flavor which puts people off. So, what I do is I flavor the Daiya cheese with the same herb paste I used for the filling. I puree a blend of fresh basil, oregano, garlic, onions, and black pepper and mix it in well with the “mozzarella” cheese. I put it in the fridge while I’m working on the other parts of the lasagna, so that when I’m ready, I have a nice flavored cheese for the top of my lasagna.
The tip for the top layer of cheese is to put the cheese on when you’re done assembling your lasagna so it can be melting while the lasagna cooks, but to be sure to grease the aluminium foil before placing it down on the lasagna. This will prevent the mozzarella from sticking to the foil when you remove it.
After you’ve cooked your lasagna, if you’re using the Daiya cheese, you should broil it for 2 to 4 minutes, watching it closely, because this will give your “cheese” that golden brown toasty top that you would normally get from mozzarella cheese.
7. Cooking the lasagna: Most lasagnas will cook for about 45 minutes in a 350 degree oven. You should double-fold a piece of aluminium foil and cover your lasagna, being sure to grease the underside before putting it on top of your mozzarella. This will insulate your lasagna more evenly by matching the sides and bottom of your pan in width. After 45 minutes, you should remove the foil and cook the lasagna for another ten minutes to help the cheese brown. If you are using the Daiya cheese, be sure to broil it after those 10 minutes.
When your lasagna is done, it’s important to let it sit for ten to 15 minutes before serving. You can absolutely serve it immediately if you want, but be warned that your pieces will fall apart as you remove them from the pan. If you let the lasagna sit before serving, however, you’ll be able to cut nice solidified squares or rectangle pieces.

You must be logged in to post a comment.