Going “Nutty”: Nut and Peanut Allergies

website nuts

Are we going to have to cancel our trip?

My husband and I didn’t get to celebrate our tenth wedding anniversary because I was in labor with my third child, so a few years later, we decided we deserved a weekend away just by ourselves.

Unfortunately as our weekend approached, one night after a gathering with some friends, I was violently ill with GI symptoms.  We figured I must have caught a stomach bug and prayed it was simply a 24 hour sickness.  I did recover, and we were able to leave for our trip.

While away, though, one evening after going out to eat, I began to feel decidedly unwell again and once again had some not so fun symptoms.  We chalked it up, though, to me not waiting long enough after the stomach flu before resuming heavier foods.

After we returned, however, I once again had the same symptoms, only they were even worse this time.  So, being someone who’s had allergies her entire life, I decided to jot down all the foods I had eaten before I was ill, and I discovered that on all three occasions I had eaten something with dairy and almonds.

I made an appointment with my pulmonologist, and lo and behold, I had developed an allergy to both casein and almonds, as well as hazelnuts.  Since I already cooked, baked and ate around an egg allergy and a wheat and sugar sensitivity, I figured it wouldn’t be too much of an issue to add dairy and nuts  to the list of foods to avoid.

The Issues with Having a Nut Allergy

I hadn’t counted on the fact that so many foods I would eat — gluten free breads, soy milks, coconut yogurts, etc… –would be processed on machines that have been contaminated with tree nuts.  Suddenly my eating “world” seemed to shrink and much more of my precious time was being “eaten” up by the constant reading of labels.

The good news for you, if you are only allergic to peanuts or nuts, is that the world acknowledges peanut and nut allergy these days.  Most labels visibly have “may contain traces of peanuts or nuts” or “processed on machines using peanuts or tree nuts” written on the product.

The not so good news is that you really do have to become a label reader, because peanuts and tree nuts find their way into foods you wouldn’t even think of checking.  While it makes sense that items with nuts are to be avoided, you might not think to check your salad dressing, that enchilada sauce you like, the cereal you’ve always eaten, or your favorite pudding, but all of those and more might have peanuts or tree nuts contaminating them.

Some sample phrases that might show up on a label which you wouldn’t know to be a peanut or nut are arachidic acid, hydrolyzed plant protein, mandelonas, marzipan and nougat.  You can find complete lists by googling, and it would be best if you were at least familiar with what’s on those lists and used them to check the labels of anything you’re uncertain about eating.

Peanut Concerns

For folks allergic to peanuts, you should remember that peanuts are legumes, and sometimes people who are allergic to peanuts have problems with other legumes like peas, lentils, beans, soybeans, and etc… or develop an allergy to those items later.  So always be sure to be careful as you eat those foods.

Nut Concerns:

For folks allergic to one type of tree nut, you need to know that almost all nuts processed these days are contaminated by other tree nuts.  So even if you’re just allergic to almonds, the chance of the Brazil nuts, walnuts, hazelnuts, macadamias, pistachios, pecans, or cashews you want to eat being contaminated by almonds is quite high.

Peanut Oil

For all folks with either a nut or peanut allergy, if you’re going out to eat, make sure to ask your waiter about sauces and oils used, because peanut oil is a very commonly used restaurant oil.

Mexican Casserole

My middle daughter made this recipe tonight for dinner for the family with store bought peanut/nut free ingredients. 

Ingredients:

1 tablespoon safflower oil

1/2 cup frozen chopped onions

2 zucchini, chopped into 1/2 inch squares

2 carrots, finely chopped

16 ounces 93% lean ground turkey

one 14.5 ounce can diced tomatoes, undrained

1/2 of a 15.5 ounce jar of salsa

1 teaspoon dried oregano

1/4 teaspoon salt

1 tablespoon ground cumin

2 tablespoons minced cilantro

1/2 teaspoon ground black pepper

multi-grain tortilla chips (my daughter used 3/4 of a 9 oz bag)

1/2 cup Tofutti sour cream

10 oz thawed frozen green chopped peppers

second 1/2 of the 15.5 ounce jar of salsa

Cooking Instructions:

1. Preheat the oven to 350 degrees.

2.  Pour the oil into a large skillet and turn the heat to medium.

3.  Saute the onions, zucchini, and carrots until soft, about five minutes.

4.  Add the ground turkey and saute until browned.  Drain the fat and put into a large bowl.

5.  Add the diced tomatoes, 1/2 of the jar of salsa, oregano, salt, cumin, black pepper, and cilantro.  Mix well.

6.  Mix the green peppers with the sour cream.

7.  Layer a third of the meat mixture in a 9 x 13 pan.

8.  Drop a third of the sour cream/pepper mixture by spoonfuls in rows on top of the meat.

9.  Cover the meat and sour cream with a single layer of tortilla chips.

10.  Repeat the layer of meat, sour cream and tortilla chips two more times.

11.  Drop the remaining 1/2 of the salsa by spoonfuls in rows on top of the last layer of chips .

12.  Bake in the preheated oven for 10-15 minutes until the casserole is warm.

Making the Changes

OLYMPUS DIGITAL CAMERA

Look how far I’ve come with my split, Mommy!”

My middle daughter is a dancer. Not only does she look exactly like a dancer with her natural rail thin length and long, muscular legs and arms, she walks and moves with the grace of a dancer, too. In addition, she acts like a dancer, always thinking in terms of music and dance moves. Since she also likes children as well, it’s no wonder that she wants to be a dance teacher when she grows up.

As such, at almost 13, she’s already begun taking the steps she deems necessary to accomplishing her career goal. She’s taking a variety of dance classes so she can be accomplished in different types of dance. She’s working on her splits and stretches so she can be as flexible as she needs to be to dance, and she’s making plans to be a student aide in the preschool dance classes when she begins her first year of high school.

Step by step, little by little, with achievable goals, my daughter is doing what she needs to follow the course she’s set out for herself.

Adapting to Dietary Changes

Learning how to cook, bake and eat healthier and/or within the confines of dietary restrictions or allergies is just as achievable in the same way through many little changes in habit along the way which lead ultimately to a different eating and cooking lifestyle.

Sometimes a health issue leads to a radical change in diet – a heart attack, a diagnosis of diabetes, a severe allergic reaction to a type of food – which can be a source of frustration, especially if you’ve been eating a certain way for a large part of your life. The instinct is to simply change everything all at once, which can just set you up for disaster.

What’s key to remember is that changing your eating and cooking habits should be viewed as another lesson you’re learning in life. Being able to balance and ride your first bicycle as a child didn’t happen overnight. Neither did you jump into a lake and swim its length your first time out. So, if you’re learning to eat gluten free or with less meat and fat in your diet or without sugar and you’re finding yourself struggling with the recipes, the tips, and desire, cut yourself some slack.

Tips for Changing Your Diet

Some tips to help you on your journey:

1. Make one change at a time. Maybe it’s swapping out olive oil for butter this week and waiting until next week to make a turkey burger instead of hamburger with the goal that by the end of the month you’ll try a salmon burger. Or maybe you’ll try one new gluten free recipe every week or two, learning this week how to make pancakes you can actually eat but waiting until you’ve made those successfully a couple of times before you try to revamp your favorite birthday cake recipe.

2. Seek help. There are so many online blogs and websites, paper cookbooks, and cooking shows these days to turn to for aid for just about every type of cooking that exists. Use them to learn tips and to find tested recipes. Ask a friend who’s a few steps ahead of you what he or she has gleaned from his or her culinary experience. There’s nothing that says you need to go the road alone. Maybe you’ll even find a friend or family member who wants to practice revamping recipes with you or is willing to be your guinea pig for taste testing.

3. If you don’t like it, don’t eat it. Unfortunately, there’s a myth out there that you need to just deal sometimes when it comes to eating food that is healthier for you or which fits into your allergy or dietary restrictions. It’s simply not true. If the texture or taste of the first gluten free brownies you try to make doesn’t appeal to you, don’t settle. Find another recipe to try. If you don’t really like the taste of olive oil in a recipe that calls for butter, try another healthy oil. If really and truly hate ground turkey, don’t use it. If you don’t like the foods you’re eating, you’ll never stick to eating healthier or within your dietary restrictions. Or you’ll force yourself to bear it, but you’ll be sad, craving the foods you’re really rather be eating. Neither is best, so make sure you actually like what you eat.

4. Practice, practice, practice. We all have those memories of failing at something and being riled when someone told us, “If you don’t succeed at first, try, try again,” but honestly, everything in life takes practices. Not just school lessons, sports and musical instruments, but relationships, exercise and cooking, as well. When my son was first diagnosed with an egg allergy, it took months for me to perfect a chocolate cake that the entire family liked. The practice batches weren’t bad. They just weren’t to the standard we wanted in terms of texture and taste. Now, though, I have a recipe that I go back to time and time again and which we all enjoy.

5. Start slowly. Unless you have a food allergy, you can begin a healthy diet by halves and work your way up, so to speak. If your goal is to eat 100% whole grains instead of white flour, but you’re unsure of the taste and texture appeal, try swamping out just half of the white flour in a recipe. If you aren’t quite ready to completely get rid of butter, don’t. Just limit yourself to a certain amount a week on something where the taste really matters to you while you swap it out in everything else. If you don’t think you can go from whole milk to skim, drink 2% for a few weeks, before drinking 1% for another few weeks until you’re drinking the skim and wondering why you were ever concerned in the first place about making the switch.

And if you do have a food allergy, you can still start slowly.  If you’re suddenly allergic to milk, just try one type of a different “milk” this week and wait to try vegan cheeses.  Though we often want to find substitutes for all our usual eating patterns, there’s no need to “fill” every niche of your diet in a short span of time.   It may take months for you to discover which substitute products for milk or wheat or egg or whatever that you like the best.

6. Be willing to experiment. If you come across a recipe or an idea that you think sounds interesting, but you’re unsure, just go for it. What’s the worst that can happen? You don’t really like what you tried or made? Big deal. Now you know that there’s something you won’t do again. That’s a good learned lesson. More likely, you’ll discover something that you really do like and want to try to make or eat again. Or you may be inspired to figure out how to make the recipe better or to try the item again, just made by another company.

Fruit Smoothie

Ingredients:

1 cup frozen strawberries (or peaches or blueberries or mixed berries or mangos or bananas, whatever you like)

4 ounce silken tofu (this is 1/2 cup)

1/2 to 1 cup soy milk, depending on how thick you like your smoothie (you can also use another type of “milk” you’d prefer or a 100% juice of your choice)

2 tablespoons Agave

Preparation Instructions:

1. Blend all ingredients using whatever method you prefer or have:  blender, hand blender, food processor, etc….

2.  Scoop into individual cups and enjoy!

NOTE:  You can also add yogurt to this if you’d like, 4 0unces of a dairy or nondairy type.

Tricks of the Trade: Owning Cooking Tips

website peach shortcake

“Run, Paula, run!”

In middle school our gym year always began with a trip to the town park for a complete “physical”.  Sit ups, push ups, a mile run around the track.  As an overweight pre-teen this was not one of my favorite things to do in life. Unfortunately I had no choice in the matter.

Then came the September of my eighth grade year.  During my seventh grade year I had suddenly and miraculously begun to grow once again and had completely thinned out.  While I had realized this was doing wonders for my social life, I had yet to learn that it could impact my athletic ability.

You can imagine my surprise to discover that with the weight loss, I could actually hold up my thinner weight in a push up, pull in the smaller stomach into a sit up position, and run without losing my breath.  It was an even greater surprise to discover that I was on my way to beating Stephanie, the yearly hands-down “winner” of the mile run.

I had simply been marveling in my ability to breathe and run at the same time as I went around the track the first time, but as I ran the track for the second time, the screams of friends telling me to “run” made their way into my consciousness.  I looked around and discovered that Stephanie was a few paces behind me, which was simply unheard of.

A true confession:  When I realized that I was actually ahead of Stephanie, a surge of adolescent competitive power surged throughout my entire being and all I could think was that I was going to beat Stephanie if it was the last thing I did. Unfortunately, Stephanie had years of running on her side, which I was all to aware of as she began to gain on me.

Since I was determined to win, though, I pictured my dad in my mind.  He had run in numerous marathons, many of which I had watched him run in, so I figured I might be able to gain some tips from him.  I could see him regulating his breathing, keeping his steps heel-toe, and focusing his vision ahead on the finish line.

As I adjusted my breathing, stride and vision, I began to feel like a runner, and I started to think that I actually was a runner.  It occurred to me that I could actually beat Stephanie and before I knew it, a burst of speed had kicked in and I was leaving Stephanie behind by a quarter of a lap, which continued until I crossed the finish line.

New experiences can trump the old

Before that day I would have vehemently denied that I could run, let alone beat the fastest girl in our grade.  That experience proved I was wrong, though, and in many ways changed the trajectory of the next few years to come as I took up long-distance running.

In the same way, too often I hear from people that they can’t cook, that they’ve tried in the past and it didn’t work, so they don’t want to try again.  What I’ve learned over the years is that anyone can cook.  They just have to learn the tricks or tips that will help them to be successful.

Searching out tips

The key is to actually seek out the tricks of the trade, though.  Much of what I’ve learned about what works and what doesn’t in cooking has been through trial and error experience, but just as much has been people sharing their tips with me along the way and me searching out the best tips in cooking magazines, from cooking shows, and online.  Disastrous recipes have miraculously come together once I’ve learned the right tips for those particular recipes.

So, below I’ll share a few tried and true tricks which I’ve learned along the way to get you started, so you, too, can discover that you can “run” when you thought you couldn’t.

Cooking tips

1.  Ever been frustrated that your potato pancakes or crab cakes fall apart?  Mix your bread crumbs or oatmeal or whatever dry mixture you’re using in with the eggs and let it sit for five minutes to absorb the egg before you mix them into the rest of  your ingredients.

2.  Been frustrated by a recipe that calls for buttermilk when you never have buttermilk in the house?  Add one teaspoon lemon juice or vinegar to a cup of whatever milk you use and let is sit for five minutes.  Then just add it to your recipe.  Alternatively, invest in SACO powdered buttermilk which can sit in your pantry or fridge for months without going bad.  You just add water when you need to use it.

3.  Ever wonder why your hamburgers puff up on the grill?  It’s because heat is affecting the cooking of the burger from all directions, making the center of the burger puff.  If you simply put a dimple in the center of your burgers, the burgers will cook more evenly and not be puffed up.

4.  Been trying to figure out how to make your thawed frozen fish taste like fresh? The key to good frozen fish is to thaw it completely, rinse it, and pat it dry with a paper towel before you cook it.  Too often folks just thaw and cook which leaves too much of the watery residue which greatly affects the cooking, the taste and the texture.

5.  Don’t want your pasta to be too soft after the sauce is added?  Cook your pasta one to two minutes less than the package directions, drain, and then add it to your hot sauce so the pasta will finish cooking with the heat of the sauce.   If you are cooking your pasta ahead of time, rinse it in cool water, drain, and toss with a tiny bit of olive oil.  The pasta will keep until you need it later for dinner.

6.  Never been able to roll out that pie crust without problems?  Put the pie dough in between two pieces of wax paper and then roll out with the rolling pin.  You’ll be amazed at how easy it is to roll that pie crust now.

7.  Been trying to figure out how to actually get all of your honey, molasses or otherwise sticky substance out of the measuring cup and into your recipe?  Lightly grease the inside of your measuring cup or line it with plastic wrap.  The sticky liquid will just slide out.

8.  Want to cut your small fruit into equal sizes?  Use your egg slicer.  It works wonders.

9.  Want boiled eggs that aren’t green on the inside or over or undercooked?Cook’s Illustrated has the best method I’ve ever tried:  Put your eggs into cold water, completely covering them up to an inch over with water.  Bring the water to a boil over high heat.  Remove the pan from the heat, cover, and let the eggs sit in the pan for 10 minutes.  Remove the eggs to ice water for five minutes, and then peel.

10.  Tired of your freshly baked quick breads sticking to your loaf pans?  Line your loaf pans with parchment paper so that “ears” are sticking up from the pan, so that you can simply lift the breads out of the pans when they’re done.

11.  Want homemade pizza crusts to be as crispy as the pizza from a brick oven? Preheat your oven to 500 degrees with your pizza stone or pan in the oven.  Put your pizza crust directly onto the hot pizza pan and cook for five minutes before you add your tomato sauce, toppings, and cheese.  Return the pizza to the oven for another five minutes or until the cheese is melted and the crust is browned and crisp.

12.  Been sad that your mashed potatoes which were perfect when you made them are too thick when you serve them?  Potatoes will continue to absorb the milk over time, so after you initially make your potatoes, let them sit for a few minutes before adding more warmed milk to the potatoes.

13.  Ever had difficulty making those pudding recipes because they gum up when you add the cornstarch?  No matter what your recipe tells you, if you simply whisk the cornstarch in from the beginning into your liquid and slowly warm the liquid up over low heat, stirring constantly, your pudding will thicken properly without gumming up.

14.  Wonder how to keep your cheesecake from cracking?  Wrap the outside of your cheesecake pan with aluminum foil and your cheesecake pan into a larger pan which you can add hot water to up to the center of the cheesecake pan.  Bake the cheesecake as instructed.  The moisture from the water will keep your cheesecake from cracking.  Just be careful when you’re removing the pan from the hot water after it’s done!

15.  Tired of trying to cut your cake layers to make enough layers for the cake recipe?  Simply bake thinner cake layers.  For example, I bake a multiple layer cake by putting about a cup of cake batter into a parchment lined 9 in pan and baking two pans at a time for about ten minutes.  Then I have four, six, or eight nicely sized thinner layers without the effort of trying to “cut” the larger cakes into smaller layers.

16.  Want to make great pasta salad?  After you cook your pasta and drain it, transfer the pasta immediately to a large cookie tray so it can cool quickly and evenly.  This will improve the texture of your pasta for your pasta salad and help your pasta marinade to “stick” to the pasta better.

Peach Shortcakes

Shortcake Ingredients:

1/2 cup vegan butter (or real butter if you can have it)

2 cups 100% whole wheat flour

3 teaspoons baking powder

1/4 teaspoon salt

1/2 teaspoon of ground cinnamon

1/4 teaspoon dried orange peel

1/4 teaspoon ground ginger

1/4 teaspoon ground nutmeg

2 tablespoons Agave (if you want to use sugar, it would need 1/4 cup)

1/2 cup soy milk (or whatever type you use)

Cooking Instructions:

1.  Preheat the oven to 400 degrees.  Line a cookie sheet with parchment paper.

2.  In a food processor put the butter, flour, baking powder, salt, cinnamon, orange peel, ginger, nutmeg, and Agave.  Pulse just until the dough is crumbly.

3.  Slowly add the milk and pulse just until the dough clumps together.

4.  Drop lightly filled 1/4 cups of batter onto the parchment paper and gently pat the dough into even biscuit shapes and sizes.  (You may want to lightly grease your measuring cup if you don’t want the dough to stick.  I don’t actually use a measuring cup. I just eyeball a 1/4 cup size.)  

5.  Bake for 10-15 minutes until the biscuits are lightly browned and cooked through.

Peaches Ingredients:

2 16 oz bags of frozen peach slices (you can always use fresh, too!)

4 tablespoons Agave

1 teaspoon cinnamon

1/2 tsp ginger

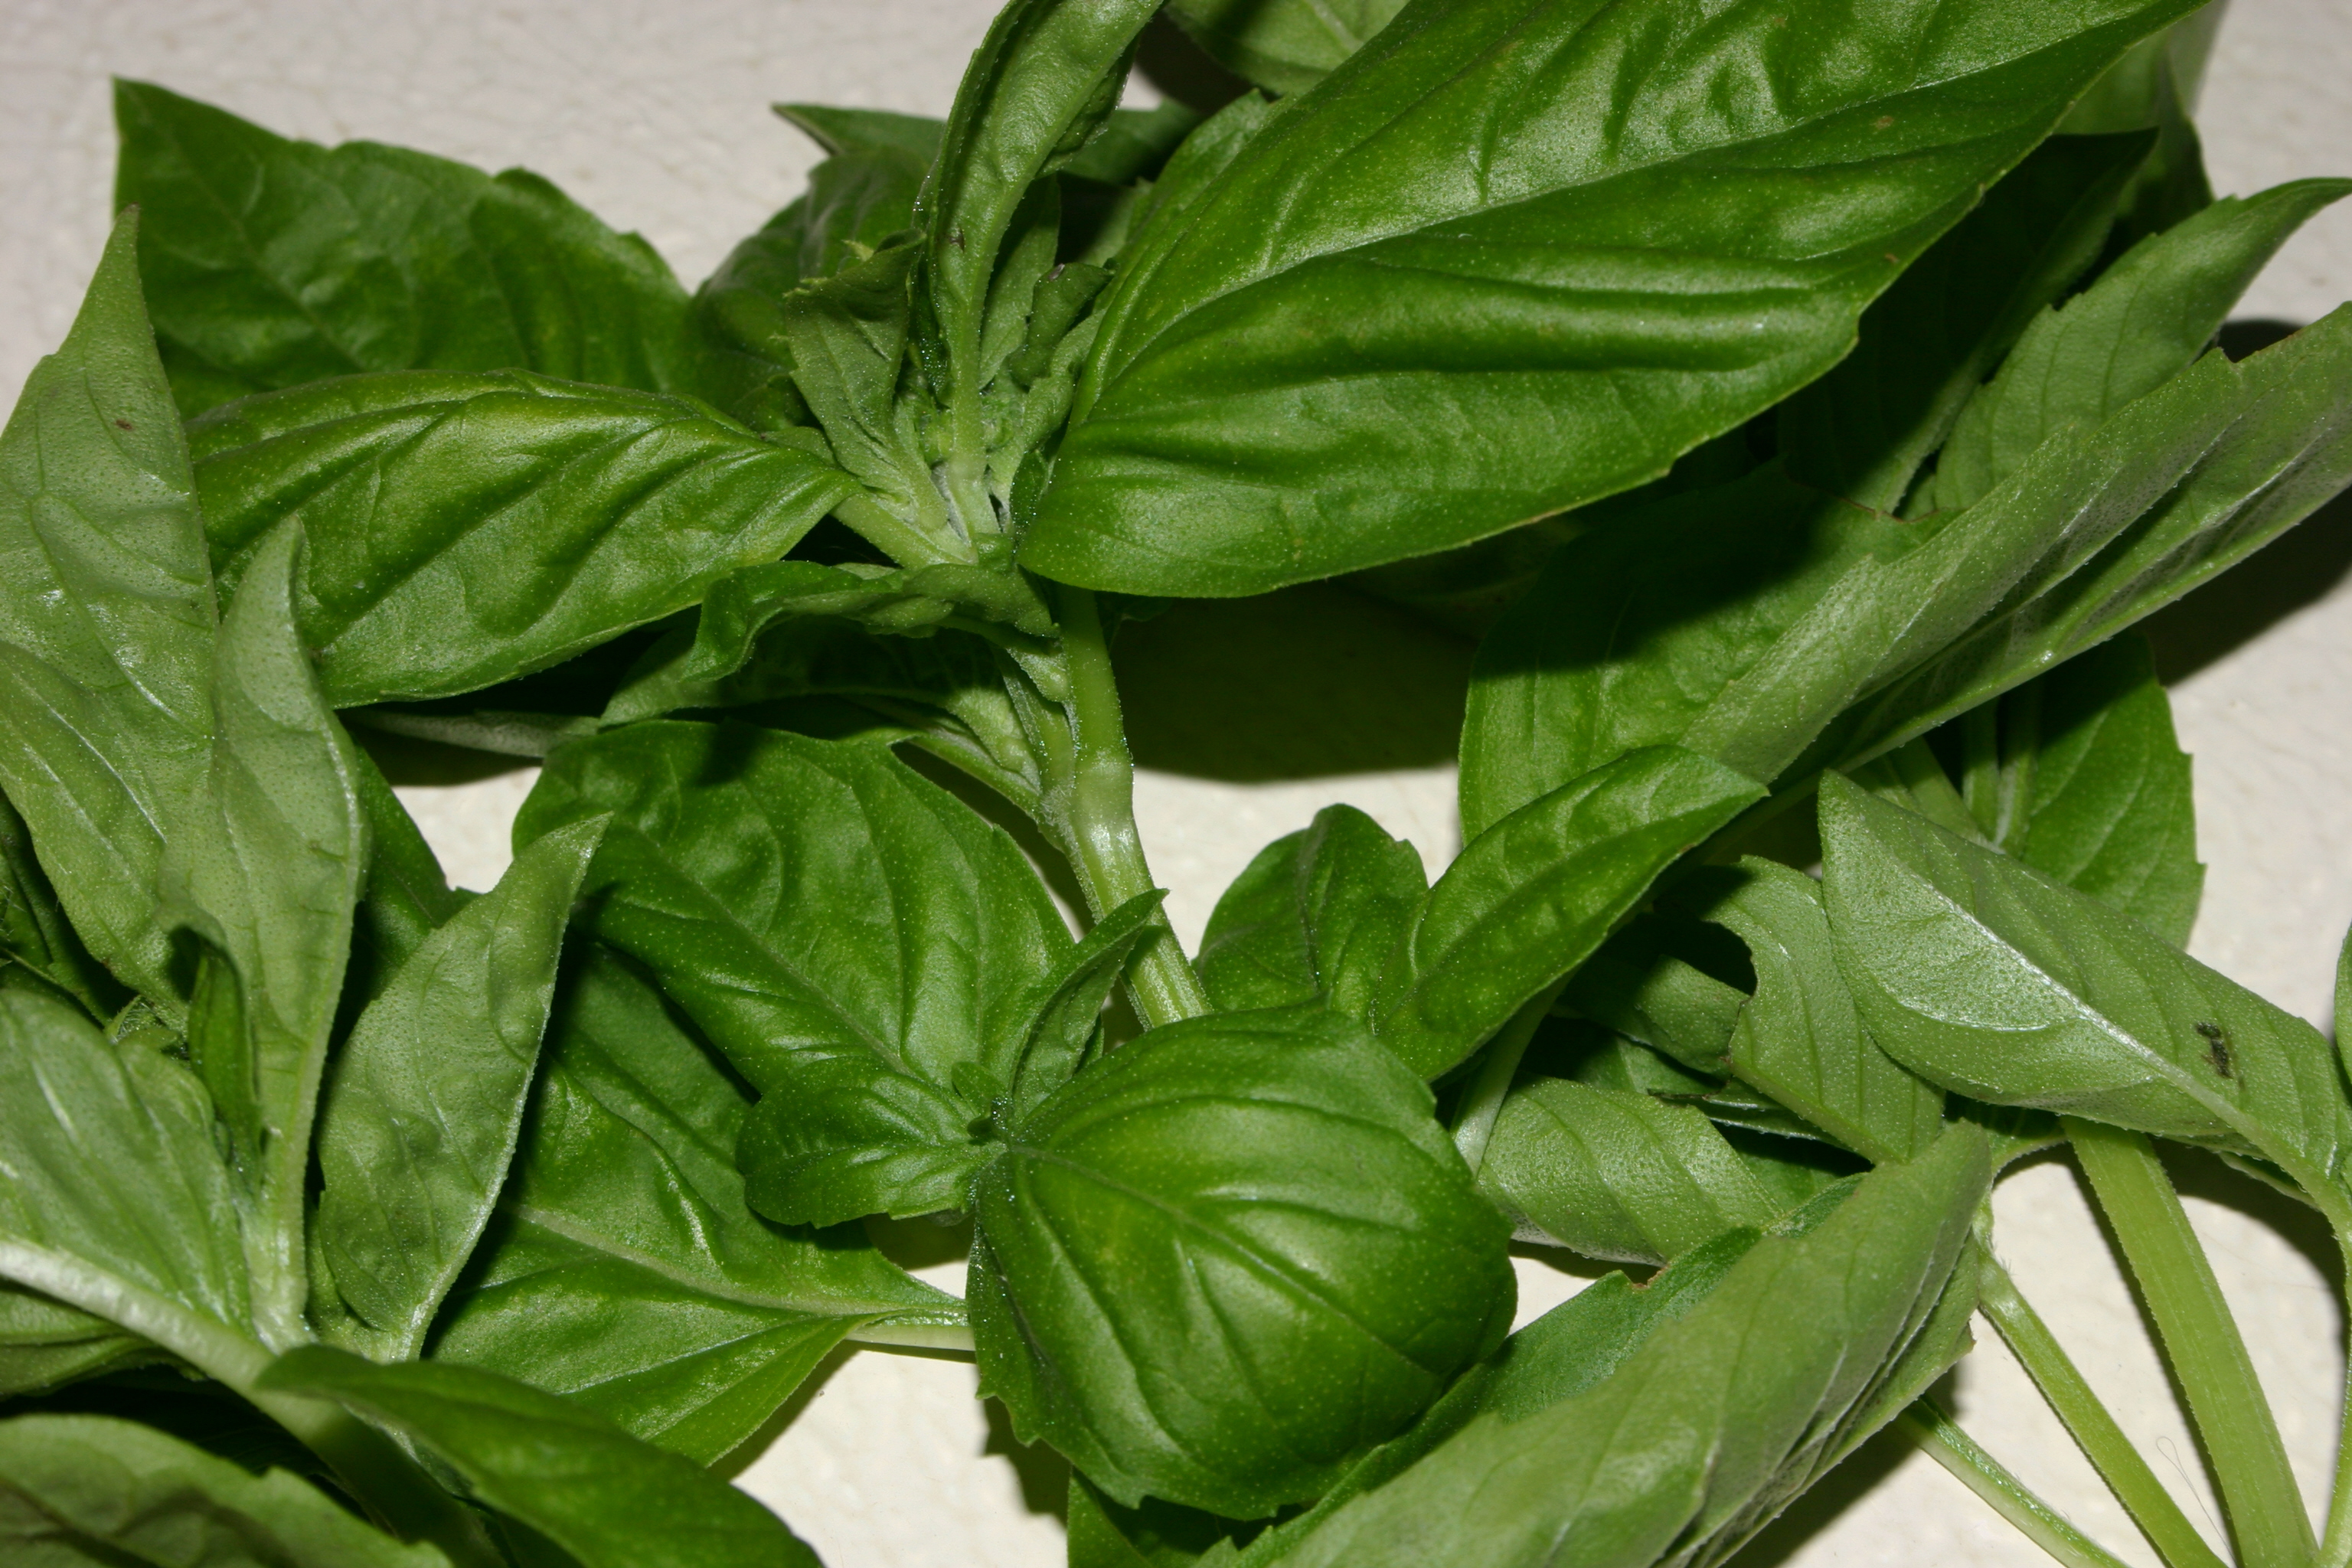
1/4 cup packed ginger mint and/or mint leaves

Cooking Instructions:

1.  Thinly slice the ginger mint and/or mint leaves into strips.

2.  Mix the Agave with the cinnamon and ginger.

3.  In a large bowl, mix the gingermint/mint leaves and the Agave mixture with the peaches.

4.  If using the peaches shortly, let the peaches sit out on the counter for 15 minutes or more until they are thawed.  Be sure to stir the peaches every so often.  If using the peaches later in the day or the next day, put the peaches into the fridge.  Be sure to mix them well before serving.  (You can also thaw the peaches in the microwave before mixing them with the other ingredients, if you need them more immediately.)

Cream Ingredients:

One pint soy creamer

1/2 cup soy sour cream

1/4 cup Agave

2 tablespoons cornstarch

1/4 teaspoon salt

2 teaspoons vanilla

Cooking Instructions:

1.  In a saucepan, mix the soy creamer, the sour cream, the agave, the cornstarch and the salt.

2.  Slowly cook over a low heat, stirring constantly, until the mixture begins to thicken.

3.  Remove from the heat and add in the vanilla.

4.  Pour into a heat safe bowl.  Place a piece of saran wrap directly against the cream to prevent it from forming a “crust”, and cool in the fridge.

5.  When it’s completely cooled, you can simply stir it up with a spoon and serve over the shortcakes or you can whip them in a mixer or with a whisk if you want to incorporate some air and make the cream fluffier.

Assembling the Shortcakes:

1.  Place one shortcake on a plate.

2.  Spoons some peaches on top of the shortcake.

3.  Put a dollop of cream on top of the peaches.

4.  Enjoy!

Comfort Foods: Revamping Them

website mac and cheese

“We need a depression session.”

As high school students, my three best girl friends and I knew exactly how to handle any teenage angst that came our way.  A break-up, issues with our parents, school problems — all could be handled with a carton of ice cream and a package of cookies.  Armed with both, we’d meet up at one of our houses and just dig in — the cookies were sturdy enough to scoop the ice cream so no utensils would be required!

There was something about creamy vanilla ice cream topping a crisp chocolate chip cookie that was satisfying not just to the taste but to the soul as we talked, cried, and laughed our way to the end of both the carton and the package.

Comfort Eating

We don’t have to look far these days to know that “comfort-eating” has been tagged as a no-no.  It’s been linked to obesity.  It encourages consumption of “unhealthy” foods over “healthy”.  And psychologists say it prevents us from tackling what the real issues in our lives are.

Knowing all this, though, we have to admit that most of us do it.  For some, certain foods bring back the comforting memories of a better time.  For others, a little sugar rush helps get through the bump in the day.  For many, the fact that certain foods encourages the release of serotonin is exactly what we need to turn a bad mood into a happy one.

What can we do

While I’ve learned over the years to curtail eating just for comfort, there are still those times when I yearn for one of those traditional comfort meals — just because.  And when I have those moments, I want to be able to eat them without feeling guilty.

So, over the years, I’ve revamped many a recipe so my family and I can enjoy those occasional bouts of comfort eating.  Below is an Emeril recipe for mac and cheese that was just too much of everything which I revamped because my children loved it so much.  I’m including it here so you can see how easy it is to alter a favorite recipe without sacrificing taste and “comfort”.

Macaroni and Cheese

Emeril’s Recipe:

one pound of elbow macaroni

6 slices of bacon

1 tbsp minced garlic

6 large eggs

2 cans evaporated milk

1/2 tsp cayenne pepper

1/4 tsp ground nutmeg

3 cups grated sharp Cheddar cheese

1 cup grated Monterey Jack cheese

1 cup grated Parmesan cheese

Paula’s Revamped Version:

one pound 100% whole wheat pasta (can also use gluten free pasta)

2 links chicken Italian sausages (fully cooked type)

one 16 oz thawed frozen broccoli florets

2 tsp minced garlic

1/4 cup chopped frozen onions (can use fresh, too)

1 tsp ground black pepper

1/2 tsp ground nutmeg

3 cups Cabot 50% reduced fat cheddar cheese (shredded)

2 12 oz cans fat free evaporated milk

4 eggs plus 1/2 cup liquid egg whites

1/2 cup Cabot 50% reduced fat cheddar cheese (shredded)

Cooking Instructions:

1. Preheat oven to 475 degrees and very lightly grease a 9 x 13 pan. (I normally use a little bit of olive or grapeseed oil.)

2. Prepare the whole wheat or gluten free noodles as directed on the package, but cook it one minute less than indicated.  Drained the noodles and put them into a large bowl.

3. In a food processor, chop up the two sausage links into fine pieces and add to the noodles.

4. In a food processor, chop up the thawed broccoli florets into fine pieces and add to the noodles.

5. Add the garlic, onions, black pepper and nutmeg, and 3 cups of the cheese, mixing well with the noodles.

6. Whisk well together the cans of evaporated milk with the eggs and egg whites.  Pour into the noodle bowl and combine.

7.  Using a ladle, scoop out the mac and cheese into the 9 x 13 pan.  When you reach the end of the noodles, pour any leftover milk/egg mixture from the bottom of the bowl onto the noodles in the pan.  Gently tap the noodles to make them even in the pan.

8. Sprinkle the remaining 1/2 cup shredded cheese over the top of the noodles.  (You can increase this to 1 cup if your family really likes a more gooey mac and cheese.)

9. Bake in the preheated oven for 15 minutes or until the sauce is bubbling at the edge and no longer liquidy in the center.  Let the mac and cheese sit for 10 minutes before serving.

Food “Processing”: A Look at Cooking Tools

website processor

We have too much stuff!”

During the first ten years of married life, we moved four times, which helped to keep our material possessions to a minimum.  For the past second ten years, however, we’ve lived in the same house and increased our family to five in number. At the same time, both sets of parents have “de-cluttered” their houses as they’ve moved into smaller places, which has resulted in our home becoming substantially more full.

As a result I’ve become a bit of a manic freak about getting rid of stuff.  Every six months the children and I go through their books and their toys to donate to organizations which help needy children.  Every summer for the past few years, I’ve gone through the continually growing pile of “stuff” in the basement to donate to organizations like the Epilepsy foundation who so wonderfully come to your house and pick up anything and everything you’re willing to donate for them to sell at discount prices.

Even as I write, my youngest is delightfully planning the yard/garage sale I told him we’re going to try to do this summer to rid ourselves of even more “stuff”, all of which are great and wonderful items to have but which we ourselves no longer need.

Useful kitchen equipment

In the heat of the “purger”, however, there are a handful of items which I will never, ever part with or give away.  Those are my few cooking extravagances which I use almost every day.  My slow cookers I’ve already written about, but just as a reminder:  Crockpots are a godsend for getting dinner on the table when life is crazy.

The second item is my Kitchen Aid which I’m still grateful to my in-laws for purchasing as a Christmas present the first year I was married after I mixed up several dozen batches of cookie dough by hand and couldn’t use my right arm for a week after!

The final item which I use all the time and which I would highly recommend to anyone and everyone who wants to cook at all is my food processor.  I’m not talking about one of those large ones which department store wedding registries try to sell you and which seem to have a bad rap for being big, bulky, and hard to clean.  I’m referring to a simple small four cup food processor which you can find at a second hand store for a few bucks and which is more than adequate for any family use.

Benefits of a food processor

If you do any cooking at all, you’ll know that so much of the time consumption is the chopping and preparation.  The beauty of the food processor is that it does all your chopping, shredding, and more while you’re working on something else.  It also chops and cuts and shreds more uniformly than you’ll ever be able to do, which helps for even cooking.  Finally, it can perform tasks such as grinding nuts and whole oats into flour which is truly wonderful if you’re always having to substitute different foods into your cooking and baking due to food allergies or dietary restrictions.

I use my food processor several times a week for almost all my cooking but there are specific recipes for which I’m really grateful to have such a tool on hand. Below are two such recipes.

Company Salmon with Peach Salsa

Ingredients:

16 oz thawed frozen peaches* (you can certainly use fresh)

one 14.5 oz no salt added fire roasted diced tomatoes

1/2 cup frozen chopped onions (you can use fresh if desired)

1 tsp minced garlic

1 tbsp Key West lime juice (can use regular lime juice, too)

1/4 cup fresh cilantro (can use a couple of tsp of dried, too)

1 tsp ground black pepper

1/2 to 1 tsp coarse sea salt (can omit)

10-12 4 oz frozen salmon fillets with no skin** (you can certainly use fresh)

1 tbsp olive oil

1 tbsp vegan butter (or whatever type you need or prefer)

Cooking Instructions:

1. In the food processor chop the peaches to the size and consistency you like for your salsa.  (Some folks prefer their salsa chunky while others like it pureed.  I tend to make mine somewhere in the middle.)  Pour into a bowl.

2. In the food processor chop the diced tomatoes with the onions, garlic, lime juice, and cilantro.  Add to the peaches in the bowl and stir well.  Set aside or put into the fridge so the flavors can meld.

3.  Season with the black pepper and salt, if using.

4. Over medium heat, melt the butter with the olive oil in a pan that will fit your salmon fillets.

5. Carefully place the fillets into the hot pan, and cook for five minutes.  It’s best that you just leave the salmons alone to form a nice browned crust.

6.  Flip the salmon over and cook for two minutes to finish.

7.  Place the salmon on plates with the crust side up and spoon peach salsa over the top.

* If you’re using the frozen peaches, you can simply pull them from the freezer, dump them into a microwave safe bowl and defrost for one to two minutes, just until they’re not frozen solid.  If you’re thinking ahead of time, you can pull them out a few hours before and defrost them in the fridge.  If you’re using fresh, you need to slice the peaches off the core.

** I like to buy wild caught frozen salmon because it’s cheaper, and then it’s ready whenever I need it.  If you’re thinking ahead, you can put the salmon into the fridge the night before to defrost.  If you’re like me and only thinking of dinner at the last minute, simply the salmon in their packages into a bowl of cold water for twenty minutes, turning them halfway through the time.  Then remove them from their packaging, rinse, and pat dry.

Gazpacho

Ingredients:

1/4 cup fresh basil

6-8 green onions

2 cloves garlic or 2 tsp minced garlic

one yellow pepper, cut into large pieces

46 oz 100% tomato juice*

2 cans 14.5 oz no salt added petite diced tomatoes**

1 tsp ground black pepper

4 tbsp balsamic vinegar

2 tbsp extra virgin olive oil

8 baby cucumbers, washed and cut into large pieces***

1/2 tsp fresh ginger****

2 cups to 4 cups reduced sodium fat free broth of choice (beef, chicken or vegetable)

Cooking Instructions:

1. In a food processor puree the basil, green onions, garlic, and yellow pepper.

2.  In a large bowl, add the puree to the tomato juice and blend well.

3.  Add the two cans of petite diced tomatoes, the black pepper, the balsamic vinegar and the olive oil, and mix well.

4.  In the food processor finely chop the cucumbers.  Add to the tomato juice mixture with the ginger.

5.  Add the broth one cup at a time until the gazpacho is at the consistency you like.  We like a thicker soup and only use 2 cups, but I have friends who like it to be of thinner consistency and I have added up to four.

6.  It’s best if you chill the soup for a couple of hours to allow the flavors to meld.

* Make sure you do buy just 100% tomato juice which will just be tomatoes and water.  A lot of the “juices” out there have so much other added “stuff”.

**If you don’t want to use canned tomatoes, you can certainly peel, seed, and dice 4 cups of fresh tomatoes.  You can also use regular diced canned tomatoes, but the chunks will be larger.

*** I like the baby cucumbers because I use them as is, skins and all.  If you use regular cucumbers, you’ll need to peel and seed them.

**** I keep fresh ginger paste/puree in the fridge which is always at the ready for me to use, but you can certainly peel and put in a small sliver of fresh ginger root.

“Herb”ivore: Using Herbs for Flavor

website herbs

“You can’t kill this.  It’s a succulent.”

True Confessions:  I am a plant killer.  Since I have no malicious intent and do not deliberately intend to kill my plants, I am, however, only guilty of involuntary plant-slaughter at most and not actual murder or even voluntary plant-slaughter.

And since I know this about myself, I don’t ever buy plants to have in my house; and friends and family who know me well don’t buy plants for me as gifts.  One day, however, a friend arrived for brunch with a plant in hand called a succulent.  (If you’re not familiar with a succulent, as I was not, it’s what a cactus is, though there are other varieties of succulents which are not cacti.)

My friend, who is absolutely marvelous with plants, assured me that she had brought me a plant that even I could not kill.  As you can imagine, with my track record, I was skeptical.  But my friend was right.  It’s a year and a half later, and the little succulent is still going strong.

It’s probably because you can basically ignore it, and it will still thrive on its own. As long as I remember to water it at least once a month, it’s good to go. Essentially it’s my type of plant, and if my friend had not given me the succulent I would never had learned that I could be free of my identity as a plant killer.

Why use herbs

For some people, they feel similarly about herbs and spices.  They don’t know exactly what to do with them and haven’t used them a lot, so they don’t.  They stick with salt and pepper and bottles of Mrs. Dash which just combine many herbs and spices together for use with anything.

Herbs and spices, however, are wonderful to use in cooking, because they can bring nuanced flavors to your food and allow you to cut back on your sodium use. Today, the variety you can find at the grocery store is remarkable.  You can buy it dried, freeze-dried, frozen, packaged in refrigerator tubes, ground, pureed, as leaves, and of course, fresh.

Fortunately for me, my husband has a green thumb, and he grows wonderful herbs for me in small planters we keep on the back porch which I can just snip as I want. When I don’t have fresh herbs available, though, I freely use the dried, freeze-dried, and refrigerator tube versions as well.  And I always have a variety of ground spices in my pantry for my use.

Tips for using herbs and spices

There are a few things to always keep in mind when using herbs and spices.

1.  Fresh herbs are usually added near the end of your cooking time, because they lose their flavor if cooked for too long, while dried herbs and spices are added at the beginning because they need the heat to bring out their flavor.

2.  Dried herbs have a more concentrated flavor so you use less than you would  of fresh herbs.  1/2 to 1 tsp of a dried herb is usually equal to a tablespoon or two of a fresh herb.

3.  Since the oils in a dried herbs are essentially “trapped” inside, before you add dried herbs to your dish, you should “crush” them a bit between your fingers to release their flavor.

4. Spices such as cloves, cinnamon, nutmeg and ginger are usually associated with baking and fruit dishes, but they add wonderful flavor to meat and seafood dishes and even to soups, beans, and macaroni and cheese.

5. Most herbs go well with just about anything from meat to vegetables to even fruit.  Experiment to see what flavors you like with what.

6. When you really want to bring out the flavors in a recipe, creating a base aromatic is the best way to go.  Simply put a little bit of oil in your pot and add dried herbs or spices, along with chopped onions or peppers or garlic, and slowly cook them over low heat for a little while before adding your meat or vegetables or fish or soup or whatever.

7. If you’re making something like a soup or stew or roast which needs a long time to cook, dried herbs are really better to use than fresh.  If you want to use fresh herbs, you can add those at the end as a garnish.

8. If you buy fresh herbs in a package from the store and don’t use it all up immediately, wrap the leftover herbs in a slightly damp towel and put it in sandwich baggie to keep it fresh a little longer in the fridge.

9. If you buy dried herbs and spices, they will lose their potency after a while, but the length of time varies.  Essentially, the rule of thumb is that if you can’t smell anything when you gently rub the spice or herb and/or they’ve completely lost all their color, most likely they should be tossed.

10. When using dried herbs, you should shake the herbs into your hands and then add them carefully to your dish.  If you shake the container over the dish itself, the steam from the cooking gets into your container and can spoil your dried herbs more quickly.

11. Dried herbs should be kept in a dark, dry, cool place.  Those little spice racks we buy are actually not very good for storing the herbs and spices, because usually those are put on the wall, near the stove where the light, heat and moisture all work together to spoil the herbs and spices.

12. If you want to buy dried spices or herbs but get that “fresh” flavor, buy whole dried spices which you can grind in a spice grinder just before using.

Herbed Shrimp and Vegetables

Ingredients:

1 – 2 tbsp olive oil (depends on how much you prefer to use)

1 cup frozen chopped onions (can use fresh if you have)

1-2 tsp dried herbs of your choosing (depends on how you prefer to use)

1-2 tsp minced garlic (jarred, tube, freeze-dried, fresh, whatever in the amount you prefer)

4-6 zucchini, 5-6 inches long, cut into 1/2 inch half moons*

2 yellow peppers, diced into 1/2 inch squares

1 14.5 oz can no salt added petite diced tomatoes, drained

1 lb thawed frozen deveined cooked shrimp**

4 cups fresh herbs of your choosing, chopped (will reduce to about 2 cups when diced)***

1/2 tsp coarse sea salt (you can add more or just omit altogether)

1/2 tsp black pepper

Cooking Instructions:

1. In a large stovetop skillet combine the olive oil with the onions.  Saute over low heat, stirring occasionally, for ten to 15 minutes until the onions are caramelized, which essentially means they’ve turned darker in color and become a bit thicker in texture.

2.  Add the dried herbs and garlic and saute for another five minutes over low-medium heat, being careful to stir so the garlic doesn’t burn.

3. Add the zucchini and peppers and saute over medium heat for about 3-4 minutes until the colors become a bit darker and more vibrant.

4.  Add the tomatoes and saute another 3-4 minutes.

5. Add the cooked shrimp with the herbs, salt and pepper, and stir until well coated and shrimp becomes slightly warm, about 1-2 minutes.

6. Serve by itself or over pasta or rice or couscous or quinoa or whatever.

* I prefer to buy or grow and use smaller zucchini because the flavor is better and it’s not as seedy.  If you purchase a larger store zucchini, then you should adjust your amount accordingly and scrape out the seeds from the zucchini before slicing.

** I love frozen deveined cooked shrimp because it’s cheaper and always ready when I want to use it.  You can use fresh shrimp but you then need to add it after the vegetables with the tomatoes so they can cook during that 3-4 minutes.  If yo use the frozen shrimp and forget to take it out ahead of time like I always do, you can just put the shrimp in a bowl of cold water to defrost them.

*** I use a lot of herbs for this recipe because my family likes it that way, but you can use reduce the amount by half.  As for the types of herbs we use, we like to vary it every time, but we usually use some combination of oregano, basil, mint, ginger mint, cilantro, rosemary, thyme, dill, chives, and/or parsley.

Easy Does It: Cooking with a Crockpot

website crockpot

“What’s for dinner?”

The yellow school bus had pulled up less than a minute ago, and my youngest had bounded into the car, dumped his backpack onto the car floor, and buckled his seat belt before asking the question he asked every weekday at the same time.

Before I could answer, he cast a hopeful look at me and threw out another one word question, “Pizza?”  Then, he giggled, because he was already anticipating the answer which I gave most every day to this ritualistic exchange.

“Noooo, no pizza today, little pizza monster.”

If my son had his way, we’d have pizza every single night for dinner.  And in some ways, it would make my life simpler if we did just eat the same meal every day.

“What’s for dinner?” is arguably one of the most frequently asked questions of a mom.  And for many moms at the witching hour, it’s one that can cause considerable stress.  Families today are pulled in so many directions, and getting supper onto the table for a family meal can be a daunting prospect, let alone trying to make it a healthy meal that also takes into account every person’s food allergies.

Crockpots or slow-cookers

If you’re like me, though, you do want to make family dinners a priority, and if you do, I’d like to encourage you to think about using a crockpot.

If you don’t know what a crockpot or slow-cooker is, it’s simply a pot in a warming element that cooks your food slowly over time.  Today, there are many varieties, but the most used are the 4 quart and 6 quart sizes.  They usually have a knob which you can turn to a low, high or keep warm setting.  Some are programmable, though, and others have the settings by hours, usually 4, 6,or 8 which are the most used times on a crockpot.

You can purchase them for reasonable prices these days at any store, but you can also acquire them for very little money at second-hand stores like Savers or the Salvation Army or online at sites like Craig’s list .  Whatever you spend, it will be one of the best investments you’ve ever made.

Advantages of a crockpot

I actually own four in different sizes, because you can cook just about anything in a crockpot – meats, stews, soups, vegetables, beans, cakes, puddings, fruits, quiches, etc….

The advantage of doing so is that you won’t be cooking during the most difficult time of your day.  You simply put everything into your crockpot first thing in the morning, and the food is ready when you and your family are ready to eat at the end of the day.  Also, because the crockpot can keep things warm, for those days when you simply can’t eat as a family, the food can stay warm in the crockpot for as long as you need so each person can eat when it suits their schedule.  (I actually have a meal in one of my slow-cookers right now as I write:  Thin and Trim chicken sausage mixed with zucchini, eggplant, summer squash, peppers, carrots, tomatoes, onions, and herbs.  Doesn’t that sound delicious?  And this evening when we’re rushing in from all the children’s after school activities, it’ll be ready for us to eat!) 

In addition, crockpots are wonderful for those summer months when you want something warm but don’t want to make the house warm by using the oven.  As well, for those times when you need to cook a lot (think Thanksgiving!) and your oven is full, you can use crockpots to cook your side dishes at the same time as whatever is in your oven.

Slow-cooking tips

Some tips for you to know when cooking with a slow-cooker:

1) Don’t stress about it!  You can put together just about anything, and it will come out fine.

2) Whatever you need to cook the longest should be on the bottom.  So foods like potatoes and carrots and other root vegetables which can take longer should be at the bottom if you were to make a meal like pot roast and vegetables.

3) If you like your meat to still moo when it’s done, you don’t want to cook it in a slow-cooker.  Slow-cookers are for when you like your meat to be tender and falling apart when you put your fork to it.

4) Your crockpot should always be at least half full to 3/4 full for it to cook properly.

5) Foods cooked on the low heat setting normally take between 7-9 hours.  If you use the high heat setting, the food usually cooks in half the time as the low heat setting.

6) If you make a single food like meatloaf or a whole chicken, you want to add some liquid like beef or chicken broth to the pot, or these items will be a bit dry.

7) If you’re cooking other foods like a stew or roast and vegetables, you want to limit the amount of liquid you add, because the process of slow-cooking will add liquid to the foods naturally.

8) Never put frozen meat into the crockpot.  They will not cook well.

9) You can, however, put little frozen fruit or veggies into the crockpot like peas or blueberries if you’re making a mixed vegetable or fruit dish.

10) You should always cut off any extra fat from any meat before putting it into the slow-cooker because the fat will just drain into your food.

11) If you want to enhance the flavor of  food you’re cooking, you can brown the meats or sauted your aromatics (garlic, onions, et…) before adding them to your slow-cooker.

12) Boneless chicken breasts only take a few hours, about three to four hours in a crockpot on low, but cuts of meat like  a roast take longer, 8 to 10 hours on low.

13) If you want vegetables to be only lightly cooked, you should check them after two hours.  Most vegetables only dishes will be done in three to four hours.

14) Crockpots are great for beans, because you don’t have to presoak them.  Just wash them and put them into the crockpot with your seasonings, and after 6 to 8 hours, they’ll be done and ready to eat.

15) Don’t be afraid to experiment!  There are so many online blogs and recipe sites, as well as crockpot cookbooks, that you could probably make a different crockpot meal every day of the year and not exhaust the recipes.

Crockpot Enchilada Casserole

Ingredients:

1 to 3 tsp chili powder (depends on how hot you like things)
1 cup low salt, fat free chicken broth
6 oz can of tomato paste
1 tsp dried oregano
1 tbsp ground cumin
One 8 oz can no added salt tomato sauce
2 tsp minced garlic
½ tsp black pepper
1 cup salsa

One 15 oz can of no added salt beans (ranchero, kidney, northern beans, black – whatever you like best or have on hand)
2 cups thawed frozen corn
1/2 cup diced red, yellow or green peppers
1/2 cup finely diced zucchini
1/2 cup sliced broccoli

4 chicken breasts (sliced into thin slices or diced into small squares and sauteed just until no longer pink) 

10 corn tortillas
8 oz shredded reduced fat, low sodium cheddar cheese (can be omitted)

Cooking Instructions:

1.  Mix the chili powder, chicken broth, tomato paste, oregano, cumin, tomato sauce, garlic, pepper and salsa together.  Set aside.

2.  Combine the beans, corn, peppers, zucchini, and broccoli.  Set aside.

3. Layer two tortillas on the bottom of the crockpot.*

4.  Follow with ¼ of the chicken slices.

5.  Top with ¼ of the sauce mixture.

6.  Add ¼ of the bean mixture.

7.  Top with 1/5 of the cheese.

8.  Repeat the layering three more times.

9.  Top with the last two tortillas and remaining cheese.

10. Cover the slow-cooker and cook on low for 6 to 8 hours or on high for 3 to 4 hours.

*NOTE: The two tortillas don’t completely fill the crockpot, so we layer the tortillas perpendicular to the layer beneath (i.e. making a cross shape with every two layers).

Sodium Extract: Thinking about Salt

OLYMPUS DIGITAL CAMERA

The chickens ruined it.

The town meeting was on target for being the shortest I’d attended in twelve years.  Every warrant article had passed unanimously with nary a peep, blink or cough.  Even the 17 million dollar town budget had passed for the first time in my memory with no debate.  I was overjoyed at the prospect of an early meeting end, some time with my children, and a reasonable bedtime for myself.

But then the chicken warrant was read.

45 minutes of discussion followed about the pros and cons of changing the current regulations to allow chickens on less acreage.  Everything from tick control to poop possibilities were presented and argued by the “defense” and the “prosecutors”.

All my dreams and wishes for the evening swished straight down the drain because of one local hotbed issue.

Salt Disagreement

In the same way, salt can be a source of immeasurable disagreement among even the experts.  Some say everyone should refrain from salt usage.  Others state that only folks with family histories of health issues need to worry.  Still more present arguments for why we need to keep salt in our diets.  It can be confusing and frustrating to try to sort out exactly what we should know and do.

Salt Facts

Salt isn’t necessarily bad in and of itself.  It provides flavor in cooking; it helps metabolize yeast in breads; it draws moisture from veggies and fruits when needed; and it tightens protein bonds, giving strength to dough and batter when we bake. In our bodies, salt helps our blood cells, our nerves and our muscles; and unfortunately salt isn’t something our bodies make, so we need to ingest it.

On the other hand, folks prone to high blood pressure, migraines, heart and stroke problems, and kidney stones have found that cutting back on their sodium intake helps their overall health.  In addition, studies do reveal that our bodies only need so much salt to function properly, and we have a tendency to eat way above that amount.

Salt Moderation

Sodium is naturally in a lot of the foods we eat, and simply eating fresh fruits and veggies and low fat meat and chicken and fish will provide our bodies with much of the sodium we need.  So, for myself and my family, when I cook, I don’t usually add salt.  Herbs and spices lend flavor to just about anything cooked or baked without any need for salt.  In most baked goods, you can almost always cut the salt by half and your baked product will not be affected in taste or texture.  Sometimes you can even omit it altogether.  When I do want to use salt, though, I judiciously use small amounts of coarse salt.  The coarse salt tends to give you that slightly salty flavor without overdoing it, and by reducing the amount and using the slightly large salt crystals, you do cut down  on your actual sodium intake, even if only by 25%.

Salt in Processed Products

Of course, most of our salt “problems” stem from the products on the grocery shelves which tend to have large amounts of either salt or sugar to both preserve and provide flavor.  The good news is that many companies are making low salt and reduced sugar versions of their products.  You just have to look for them and choose to use them.

A few years back my children discovered a breakfast muffin they liked, but I was horrified by the amount of salt in one muffin from the bacon, the salt in the batter, and the cheese.  So I revamped the recipe, omitting the salt in the batter and using reduced sodium products.  Of course, I also made other changes to fit my family’s allergies, but you’ll see those all below.

Breakfast in a Muffin

Original Ingredients:

2 cups all purpose white flour

1 tbsp white sugar

1/2 tsp salt

2 1/2 tsp baking powder

3 whole eggs

1 cup cream

1/2 cup melted butter

12 strips cooked bacon

12 medium egg yolks (they tell you to save the whites for another recipe)

1/2 cup cheddar, swiss or jack shredded cheese

Revamped Ingredients:*

2 cups 100% whole wheat flour

2 1/2 tbsp baking powder

1/2 tsp dried thyme (crush the thyme leaves in your hand before adding)

1/2 tsp dried basil

1 tsp dried oregano

1/4 tsp black pepper

1/4 tsp onion powder

3/4 cup liquid egg whites (I use the egg whites from the yolks needed later)**

1 cup soy milk

1/2 cup safflower oil or grapeseed oil or Smart Balance oil

1 tbsp Agave

12 strips cooked low sodium turkey bacon

12 small egg yolks

1/2 cup reduced fat reduced sodium shredded cheddar cheese

Baking Instructions:

1.  Preheat oven to 400 degrees.  Prepare a 12 cup muffin tin.  (I usually use “If You Care” muffin cups, but you can spray the tin or coat it with oil or butter.)

2.  Blend the flour, thyme, oregano, basil, pepper and baking powder together.  Set aside.

3.  Whisk the egg whites until frothy (which just means they’ll be bubbly and a little thicker looking).  Add the milk, oil, and Agave, and mix well.

4.  Add the wet ingredients to the dry, mixing quickly just until the dry ingredients are moistened.

5.  Put 2 tablespoons of the batter into the bottoms of each of the muffin tins.

6.  Insert a bacon strip in a circle into the batter of each tin and carefully put an egg yolk into the center of the bacon.  (If your yolk breaks, don’t sweat it.  It still tastes good, even if it doesn’t look as pretty when you cut the muffin.)

7.  Cover the muffins evenly with the remaining batter.  (I usually put 1 tablespoon of batter on top and then find that I can add about another 1/2 tbsp of batter to each muffin to finish up the batter.)

8.  Divide the cheese evenly on top of each muffin.

9.  Bake the muffins in the preheated oven for 20-25 minutes.  (The muffins will rise, and the cheese will be a golden brown on top.)

10.  Cool the muffins for five minutes in the pan before removing to cool.  To serve, slice the muffins in half vertically to reveal the pretty yolk and bacon strip inside.

*  As always you can substitute ingredients to fit your needs, so for example, you don’t have to use soy milk if you’re allergic.  Use another type.

** I separate the twelve yolks from their white ahead of time into a little bowl and use the whites for the egg whites needed in the batter.  Then I gently spoon the yolks out of the bowl into each of the bacon circles.

The Frozen Chosen: Eating More Fruits and Veggies

website frozen

“New Yorkers really ARE friendly!”

For my oldest daughter’s sixteenth birthday she asked if I could take her to NY city instead of having a sweet sixteen party.  We stayed with a friend in NJ and took the train and subway in and out for five days of visiting.

Since my oldest is on the autism spectrum, I wanted to make sure she knew what to expect on our trip, and the first thing I did was to tell her that despite the stereotype, New Yorkers were actually friendlier than folks in Boston.  She, of course, was doubtful — until she experienced their friendliness on our trip.

She learned that if she smiled at a New Yorker on the street, they smiled back, whereas in Boston if you smile at someone, they look at you funny and cross the street.  She reaped the benefits of helpful pedestrians who pointed out when we were going the wrong way to Broadway as opposed to someone saying, “If you don’t know how to get there, maybe you shouldn’t be here.” (True response to me when I was lost in Boston once!)  When I missed a curb and went sprawling across the pavement, purse and souvenirs flying here and there, she marveled as twelve different people came to our aid, helping me up and returning every item including my purse — all monies and credit cards in place — whereas the one time I tripped in Boston, three people walked over me!   (Again, honest to goodness truth!)  She even chatted with fellow travelers on the subway as folks made conversation with us on every trip in and out of the city.

At the end of our visit, her perceptions about the folks of NY City had changed, and I was glad.

Similarly, I hope to change perceptions about the types of ingredients people can use for their own healthier eating.

Using Frozen Fruits and Vegetables

One of the best things we can do for our health is to eat more fruits and vegetables, but with the price of groceries going up by the minute, especially fresh items like vegetables and fruit, people are actually cutting down on the amount they eat.

But you don’t have to do so.  You can invest instead in frozen fruits and vegetables which are just as good as the fresh.  Because the fruits and vegetables are flash frozen, they retain the nutrients you find in fresh produce, but they are cheaper and also have the benefit of being ready when you need them without going bad.

Frozen Vegetable Ideas

People are always amazed when I tell them that the roasted vegetables they are eating were frozen, but it’s true.  If you roast frozen vegetables like carrots, cauliflower, Brussel sprouts, etc… with a little bit of olive oil, garlic and herbs, you’ll have a dish delicious and pretty enough to serve to company.  The trick is to roast the veggies from their frozen state, not thawed.  Similarly, you can throw frozen vegetables into soups and stews.  You can add thawed, frozen vegetables to dips. You can even puree thawed, frozen vegetables to put into your cake recipes.

Frozen Fruit Ideas

Frozen fruits are wonderful to use, too.  You can replace fresh fruit in cobblers and crisps.  (Simply make sure you coat them with a 1/4 to 1/2 cup more flour than your recipe calls for because the fruit will be juicier.)  You can puree them into smoothies for a hot summer day.  You can even chop them up while frozen to add to that favorite muffin recipe.

However you choose to eat your fruits and veggies, know that you’re not limited to fresh produce only, nor relegated to having to eat it canned.

Gluten Free Peach Cobbler

Ingredients:

4 16 oz bags of no added sugar frozen peaches

2 tbsp lemon juice

1 cup Agave

1 tsp cinnamon

1/2 tsp nutmeg

1/2 tsp ground ginger

1/2 cup  Bob’s Red Mill Gluten Free All Purpose Baking Flour*

2 cups additional Bob’s Red Mill Gluten Free All Purpose Baking Flour**

2 tsp baking powder

1 tsp cinnamon

1/2 tsp nutmeg

1/2 tsp ground ginger

1/2 tsp salt

1/2 cup soy free vegan butter (or another type you’d prefer)

2 beaten eggs***

1/2 cup Agave

1 1/2 tsp xanthan gum

Baking Instructions:

1.  Preheat your oven to 350 degrees.  Lightly coat the bottom of a 11 x 15 pan with an oil such as grapeseed or safflower oil.  (You can use vegan butter or another type of oil or Pam spray if you prefer.)

2.  Put the peaches into a very large mixing bowl and toss with the lemon juice.

3.  Blend together the Agave, cinnamon, nutmeg and ginger.  Coat the peaches with the mixture.

4.  Sprinkle the flour over the peaches and toss to coat.  Carefully put the peaches into your prepared pan.  Set aside.

5.  Mix the flour, baking powder, cinnamon, nutmeg, ginger and salt.

6. Cut in the butter using a pastry blender or with a couple of forks or knives until the flour mixture is crumbly.

7.  Mix the beaten eggs with Agave and add to the flour mixture, mixing just until everything is moistened.

8.  Sprinkle the xanthan gum evenly over the batter and mix in well.

9.  Drop the batter by small spoonfuls on top of your peaches.  It will not completely cover the peaches, but don’t worry, because the batter will spread when it is cooking.

10.  Bake for 50 minutes or so until the the topping has spread, is golden brown, and fully cooked through, which means it’ll be firm to your touch and not soft in the center.

100% whole wheat flour can be substituted if you don’t need it to be gluten free.

** 100% whole wheat flour can be substituted if you don’t need it to be gluten free.

*** If you’re not making it gluten free and need to omit eggs, you can mix 2 tablespoons of ground flaxseed with 6 tablespoons of water.  Let it sit for 5 minutes, and then add it in place of the eggs.

To Grease or Not to Grease: Thinking about the Question

website grease

The forest floor was a mess!

Broken branches littered the ground.  Sapling undergrowth surrounded mossy stumps.  Trees leaned against one another, their branches fighting for the sun’s rays.  Vines encircled tree trunks and ran away onto the ground below.  Tiny wildflowers grew in, under, and around whatever it could, and years of layered dead leaves blanketed everything.

Being a city gal, when my husband told me were going to visit the family forest, I pictured straight trees standing tall in neat rows with large spaces of manicured grass in between.  Imagine my surprise to discover, instead, nature’s version of an unkempt house.

Current Thinking about Trees

Few folks these days think much about forestry.  If we think about trees, we think about wasting trees by using too much paper.  Air dryers in the bathrooms proclaim that we’re protecting trees if we use them.  Schools and businesses send everything electronically so we can save trees.  Children are taught to recycle paper to prevent the killing of trees.

Misperceptions about Using Trees

Protecting trees is a good thing.  Misunderstanding what actually helps trees, though, can pose a problem.  There’s an island in the middle of a lake in a state where the trees are “protected” by a law stating no trees can ever be cut.  As such, it’s so overgrown that all the animals for whom that island used to be a natural habitat have left because there is no longer room for them to live.  In what way does this make sense?  Nature itself knows the dangers of overcrowding.   Natural fires are forests way of clearing themselves of standing dead trees.

In similar thinking, we’re told that using paper products when we cook and bake is bad because it hurts the environment, but we freely and willing use propellant sprays which contain nitrous oxide, an ozone depleting gas, and whose containers add substantially to the problems we have with overflowing landfills.  Again, where is the sense in that?

Advantages of If You Care Products

Personally, I’ve chosen to use many of the If You Care products for my cooking and baking.  I like that the company is committed to creating environmentally friendly products and to using trees, which are both sustainable and renewable, as opposed to fossil fuels which currently are not sustainable and are definitely not quickly renewable.

As well, if you have food allergies as I do, using products like parchment paper and baking cups helps prevent contamination when you are using a cookie pan or muffin tin, because your food doesn’t touch the baking implement.  Additionally, if you are trying to eat healthier and don’t want to grease with butter or oil, parchment paper provides a fat-free alternative which isn’t Pam spray.

Disclaimer

Now, about this point, some folks are wondering what sort of kick-back I’m getting, whether it’s from the forestry industry or the If You Care company.  I can tell you that small family-owned forestry companies rarely make a profit.  The owners are foresters usually because they love trees, and they care about the land.  As for the If You Care company, they have no idea that I use their products or that I recommend their products, but if anyone happens to knows the owners and want to let them know that I’m a big advocate, I’d be quite happy to entertain any thoughts of a kick-back!  (We have 12 straight years of college tuition stretching before us!  We can use all the monetary help we can get!)

Upside Down Pumpkin Pear Cake

Ingredients:

2 tbsp vegan butter, melted (or whatever type you prefer)

1 tbsp Agave

1/2 tsp cinnamon

Two 15 oz cans of pears, drained (best to get the ones in 100% juice, not syrup)*

2 1/2 cups 100% whole wheat flour or 2 cups Authentic Foods Multi-Blend Gluten free flour

2 tsp gluten free baking powder

1 tsp baking soda

1/2 tsp salt

2 tsp cinnamon

1/2 tsp nutmeg

1/2 tsp ground ginger

1/4 tsp cloves

2 cups cooked pureed pumpkin (can use one 15/16 oz can)

1/2 cup grapeseed oil (or another type you prefer)

1/2 cup unsweetened applesauce (you can use another 1/2 cup of oil if you prefer)

1 cup Agave

1 cup liquid egg whites or 4 tbsp ground flaxseed mixed with 12 tbsp water (can use 4 whole eggs if you want)

Baking Instructions:

1.  Preheat oven to 350 degrees.  Prepare a 9 x 13 pan.  (I would use “If You Care” parchment paper, but you can use Pam spray or oil or butter.)

2.  Mix the melted butter with the Agave and cinnamon and spread over the bottom of the cake pan.

3.  Cut the pears into fans and arrange over the bottom of the cake pan.  (To make fans, simply put three to four cuts into the pear which only go about 2/3 down the pear.  Hold the uncut portion and “fan” the cut pieces away from one another.)

4.  Mix the flour, baking powder, baking soda, salt, cinnamon, nutmeg, ginger, and cloves.  Set aside.

5.  Blend the pumpkin, oil, Agave, and eggs.

6.  Quickly mix the dry ingredients into the wet and mix just until the dry ingredients are moistened.  Spread the batter carefully over the pears.

7.  Bake for 30 minutes until a toothpick inserted in the center comes out clean.

8.  Cool the cake in the pan on a wire cooling rack.  Carefully flip the cake over onto a platter and remove the parchment paper.  (You can also simply serve the cake from the pan and invert the slices onto a plate with your spatula.)

*  If you do not want to use canned pears, you can use two ripe fresh pears.  Wash and slice the pears into eight long slices.  Coat a pan with 2 tsp grapeseed (or another type) oil.  Mix 1 tbsp water with 1 tsp Agave or Truvia.  Saute the pears in the Agave mixture until they’re softened.   Arrange the pears on the bottom of the cake pan and proceed as instructed.

Food “Subbing”: How to Revamp Recipes

website subbing

“Do you have a pass to be out of class, young lady?”
     I was 22, and it was my first day as the newly hired in-house tutor and substitute for a 6-12 private Christian school, and apparently my recently acquired pantsuit did nothing  to disguise my youthful appearance.  To my chagrin, as my conversation with the teacher progressed, I realized I was not even being mistaken for a high schooler but as one of the middle school students!
     This would not be the most embarrassing moment of my new job, though.  My crowning mortification would come a few days later in the week, when a seventh grade boy decided he’d like to invite the “new girl” he’d seen around to the first dance of the year!   (For some reason, my husband of several months thought this was hilarious!)
     Over the next couple of weeks, I even had to convince some parents that despite my youth, I was a good replacement for the retired tutor.  In time, though, staff, students, and parents alike learned that I was more than capable of fulfilling my responsibilities for the job.
“Making Over” a recipe
     In many ways, people tend to be skeptical in the beginning about substituting non-traditional ingredients in tried and true recipes.  They fear that the new ingredients will detract from the quality of the food or that they’ll mess up the whole recipe entirely by attempting to make any changes.I can tell you, though, that  most recipes are quite adaptable.  You just need to remember the few tips we’ve discussed in previous posts about exactly how to replace one set of ingredients for another.
     To help you see how to pull those tips together, I’m going to show you below how I adapted a recipe to fit my family’s needs.
An example

     Recently I was invited to brunch with some friends, and I decided to make some muffins.  I found a recipe for pumpkin muffins which looked good.The ingredients were:2 cups of raisins1 cup boiled water

3 1/2 cups white all purpose flour

1 tsp salt

1 1/2 tsp cinnamon

1 1/2 tsp cloves

3 tsp baking powder

1 tsp baking soda

2 1/4 tsp white sugar

4 eggs

2 cups cooked pumpkin

1 cup vegetable oil

Since I don’t ever use white flour or refined white sugar, I substituted 100% whole wheat flour for the white flour and Agave for the sugar.  Because I was using the Agave, it meant I needed to increase the flour amount and reduce the amount of Agave (in the end I actually reduced it more than just half).  I decided to omit the raisins, since my children don’t like “chunks” in their muffins; and because I wanted to add protein to the muffins,  I substituted soy milk for the water.  In addition, I switched the “bad” fat with a “good” fat and decreased the amount of oil being used.  To lower the fat even more, I put in all egg whites in place of whole eggs. Finally, because I personally like more flavor and because I had leftover butternut squash I wanted to use up, I added to the spices and substituted squash for the pumpkin.

So, here’s what my new recipe looked like:

1 cup soy milk*

4 cups 100% whole wheat flour**

1/2 tsp salt (decreased it simply to have less sodium intake)

2 tsp cinnamon

1/2 tsp nutmeg

1/2 tsp ginger

1/4 tsp cloves

3 tsp baking powder

1 tsp baking soda

1 cup Agave

1 cup liquid egg whites

2 cups cooked pureed butternut squash

2/3 cup grapeseed oil

The muffins baked up nicely, and the four of us at brunch and later my family enjoyed them immensely.

Squash Muffins

Ingredients:

1 cup soy milk*

4 cups 100% whole wheat flour or 3 1/2 cups favorite gluten free flour blend

1/2 tsp salt (decreased it simply to have less sodium intake)

2 tsp cinnamon

1/2 tsp nutmeg

1/2 tsp ginger

1/4 tsp cloves

3 tsp baking powder

1 tsp baking soda

1 cup Agave or honey

1 cup liquid egg whites

2 cups cooked pureed butternut squash

2/3 cup plant based oil

Baking Instructions:

1.  Preheat oven to 400 degrees.  Prepare 24 muffin cups.  (I would use “If You Care” muffin cups.  You can also spray with Pam or coat with butter or oil.)

2.  Mix all the dry ingredients:  the flour, salt, cinnamon, nutmeg, ginger, cloves, baking powder and baking soda.  Set aside.

3.  Blend the wet ingredients:  soy milk, Agave, eggs, squash, and oil.

4.  Quickly blend the dry ingredients into the wet just until the dry ingredients are moistened.

5.  Fill the muffin cups evenly about 2/3 full.

6.  Put the muffin tins into the oven and immediately reduce the heat to 375 degrees.  (Preheating the oven to 400 allows the muffins to begin with the heat necessary to facilitate  rapid rising of the muffins, but lowering the heat allows the muffins to cook evenly without the sides becoming more cooked than the middle.)

7.  Bake for 20 minutes or until a toothpick inserted in the center comes out clean.  Cool for at least five minutes in the tins before removing to a wire rack to cool.

* You can always use water or another type of milk.


“Dairy”licious: Substituting Dairy Products

website dairy

“It’s chocolate.  How bad can it be?”

My oldest had been diagnosed as lactose intolerant, and I had purchased a soy yogurt for her to try.  It looked and smelled like chocolate pudding, but apparently it did not taste like chocolate pudding!

Feeling a bit frustrated by the vehemence of her refusal to eat another bite, I grabbed the spoon, dipped it, and stuck some yogurt into my mouth.  Let’s just say that my oldest is turning 17, and she still laughs today about the face that I made at the taste of that chocolate soy yogurt.   To say it was unpleasant is a definite understatement.

For many of us who have grown up with the tastes and textures of dairy products, it can be an adjustment to have to switch from milk to almond, rice, soy, flax, or coconut milk or from milk yogurts to soy or coconut yogurts or from regular cheese to soy cheese.  I myself have simply given up on cheese.  After trying too many types to name, I’ve admitted that I will never like the taste of a non-dairy cheese.

Substituting for Dairy

I have, however, found yogurts, milk, and ice creams which I like, and I’m grateful that I have.  I’m even more thankful that I can still cook and bake all the foods I love even without dairy.  I simply make a one to one switch for all products such as milk, yogurt, cream cheese, or sour cream in any given recipe.

If you’re substituting with a soy product for dairy, you won’t often find much of a difference in your desserts or cooking.  If you use a rice product, you will find that you may have to increase your dry ingredients by a tablespoon or two because rice produces a thinner, runnier milk, and you’ll need to increase your fats by a tablespoon or two because rice milk has no fat in it, unlike the milk you’ll be replacing.  If you’re using an almond or coconut milk or yogurt, make sure you like the taste of either, because the subtle taste will underlie whatever you’re baking or cooking.

Substituting for Heavy Cream

The most difficult recipes to substitute for are if you want to make something which requires heavy cream.   For soups and anything else you would normally thicken with cream, pureed cooked veggies work really well as a substitute.  For cakes, whipped cream, mousses, and other such goodies canned coconut milk does the trick, providing you have no allergies to coconut and also like the taste of coconut.  I know some folks who say that pureeing raw cashews with water is also a good substitute, but I haven’t tried that myself since I’m allergic to tree nuts. Another option is to use aquafaba which is the liquid formed from cooking chickpeas. You can purchase no salt, no sugar added canned chickpeas and use the liquid as you would heavy cream by putting it into your mixer and whipping it.

Replacing Liquid Dairy

If you simply want to replace the dairy produce altogether, though, you can also substitute with other types of liquids and foods.  For baked goods calling for milk, substituting water or 100% fruit juice works excellently.  Simply decrease the amount by 1/4 since milk tends to be a thicker liquid.  As with rice milk, though, you sometimes need to add a tablespoon or two to your fat amount to compensate for the fat that would be in the milk.

Replacing Solid Dairy

If you want to substitute the dairy in something like a pumpkin pie or cheesecake, silken tofu works well.  For pies, you’d replace the 14 oz can of evaporate milk with one package of silken tofu.  For a cheesecake, if a recipe called for four packages of cream cheese and I didn’t want to substitute all four packages with soy cream cheese, I would substitute with two packages of the soy cream cheese and two packages of silken tofu.

Replacing Cheese

And if you really do need to use a vegan cheese, which I do in a lasagna, for pizza, and in a macaroni and cheese dish, there are the Daiya and Chaou brands.  Their cheeses do tend to melt similarly to real cheese, and if you flavor them with your herbs, garlic and onions, the taste is similar to real cheese. My tip for you, though:  After you bake your dish, broil the top for a couple of minutes to fully melt the cheese into that gooey-ness you like from a real cheese. Another tip, if you mix just a tiny amount of olive oil in with the cheese, when you bake it, it will become more crusty like mozzarella.

Dairy Free Dark Chocolate Snack Cake

Ingredients: 

3 1/2 cups 100% whole wheat flour or 3 cups favorite gluten free flour blend

2 tsp baking soda

1 tsp salt

1/2 cup Hershey Special Dark unsweetened cocoa (or regular unsweetened cocoa if you prefer)

10 oz package Enjoy Life mini chocolate chips

1 cup chopped dried cranberries (or another dried fruit like cherries or raspberries or blueberries — if you have a food processor, chop the dried fruit into even smaller pieces to more evenly distribute the flavor through the cake)

1 cup Agave or honey

3/4 cup your favorite plant based oil (I like avocado oil with anything chocolate)

2 tsp vanilla extract

2 cups water (or fruit juice if you’d prefer)

2 tbsp apple cider vinegar (or another type you prefer like white or raspberry)

Baking Instructions:

1.  Preheat the oven to 350 degrees. Prepare a 11 x 15 pan.  (I would use “If You Care” parchment paper, but you can Pam spray it or coat it with oil or butter and flour.)

2.  Mix together the flour, salt, baking soda, and cocoa powder.  Stir in the mini chips and chopped dried fruit.  Set aside.

3.  Blend together the Agave, oil, vanilla, and water.

4.  Add the dry ingredients to the wet with the vinegar, and mix quickly just until the dry ingredients are moistened.

5.  Pour into the prepared pan, and bake for 25 minutes until a toothpick inserted in the center comes out clean.

6.  Cool in the pan on a wire rack, or if you’re like my children, dig into it while it’s still warm!