Handling Holidays: The Main Entrees

website entrees

“But it’s bleeding!”

Imagine that you’re meeting your future spouse’s parents for the first time. They’ve invited you over for Easter at a cousin’s home and the cousin raises sheep. You’re already nervous because you really want his parents to like you. However, you now learn that, you who are a vegetarian, are about to be served lamb for Easter dinner. More so, the family has just had a lengthy conversation about the best way to cook lamb which apparently is to simply torch the outside a bit while leaving the lamb mostly rare.

You’re expecting the worst, but nothing prepares you for actual reality. When the lamb appears, you glance at the platter and see what looks to you like blood running in riverlets down the lamb’s sides. Your stomach, which has already been lurching horribly due to nerves, can’t take this unexpected sight, and you promptly run from the table and spend the next half an hour incredibly sick in the cousin’s bathroom, wondering if you’ve doomed your chances of ever impressing your future in-law’s.

I, unfortunately, don’t have to imagine the above scene, because I lived it. That experience, though, solidified a few things for me. One, I have never entertained without making sure that everyone who is coming will be comfortable with what I serve. Two, no new experiences where folks have made a dish I can’t eat has ever come close to topping that one, so I’ve been able to handle them with much more aplomb. And three, I’ve learned that when it comes to food, everyone’s tastes are different, and we have to be accepting of that.

So what do you do when you need to cook a main course that accommodates your health needs and is delicious for everyone who gathers at your table who may not need to watch what they eat?

1.  Plan ahead:  Don’t decide the day before what you want to try to make. If it’s something you’ve never made before, be sure to have a practice run, so you can learn what might be a potential glitch in the recipe. If it’s something you have made many times, be sure you have all the ingredients you need so you’re not running out at the last minute to purchase something you forgot.

2.  Forget the fat and focus on the cooking:  The mantra is that meat and chicken and turkey need the fat to taste good, but that’s not actually true. Whether your meat or turkey or chicken is dry and tasteless really depends on your cooking technique.

For meats and poultry, the key to seasoning is to do it everywhere.  Make a rub of herbs and spices and onions and garlic with just the tiniest bit of an oil like olive oil to create a paste and rub it everywhere.  For the meat, you can even put little slits into the meat and put seasoning into.  For the birds, use your hands to pull the skin away from the flesh and put the herbs in between the skin and breast as well as on top and inside the bird.  For inside, add an onion or garlic cloves or veggies like carrots and celery for even more flavor.

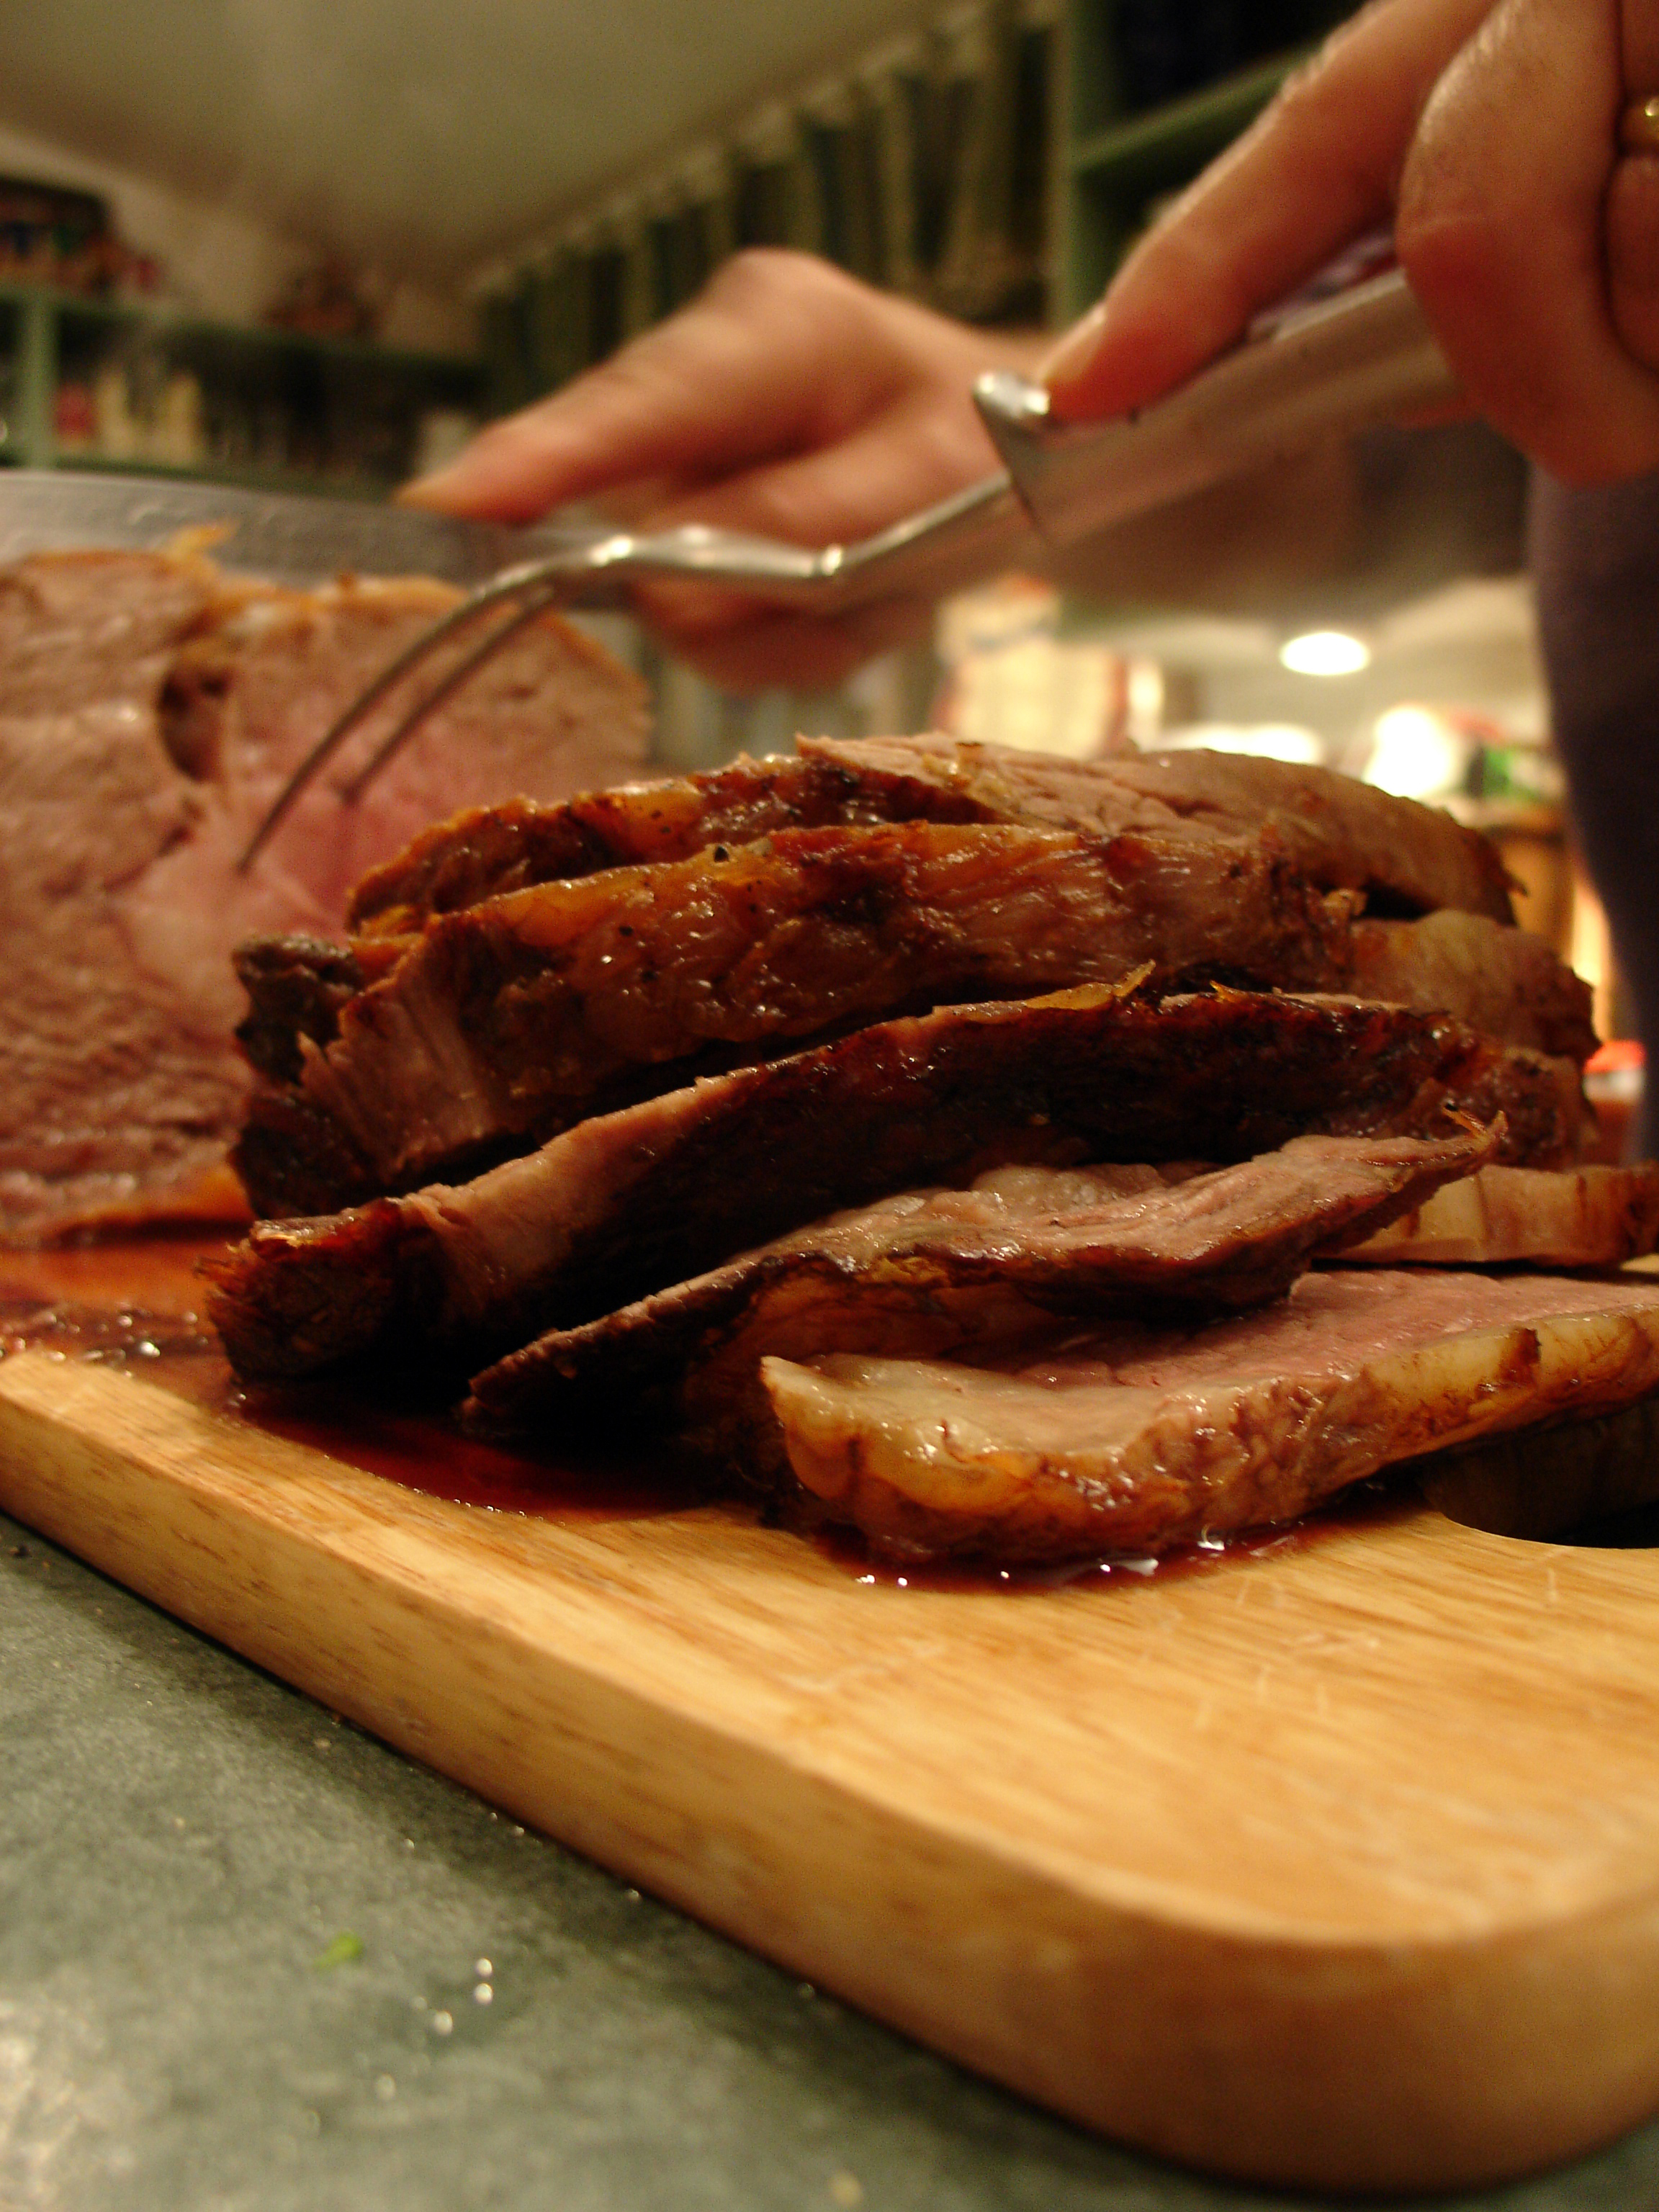
Cook the meats and poultry to maximize moisture.  Cook them on high heat for only 10 minutes to get the outside crisp immediately, then tent them with foil and cook on low heat for more even cooking. At the end you can cook them for another few minutes at high heat to finish them off with a nice brown crust or skin.  For folks who are extra wary, you can also use a reduced sodium, fat free stock to baste meats and birds during the cooking process.

Finally, let your meats and poultry rest after cooking.  If you let them sit for at least 15 to 20 minutes, all the juices which have been released will be reabsorbed into the meat and poultry, to allow for moister slices when you do cut them into pieces.

For tender cuts like a pork tenderloin or turkey tenderloin, just trust the meat. Once you season it with your herbs and spices, you can simply cook them at 350 for an hour, and they’ll taste great.  You choose to make a nice glaze to brush on instead, too.

For ham, you can omit the glazes that come packaged with the meat, and either cook it without or make your own less caloric version and just cook the ham according to instructions.

3. Make it yourself: If you’re making something like chicken cordon bleu, make your own bread crumbs. Whether you use 100% whole wheat bread or a gluten free millet bread, you’ll add more fiber to the crumbs which is good, and you can then season the bread crumbs as you’d like without all the salt. Contrary to thinking, it literally takes about two minutes to make your own crumbs.  A couple of tips:  For gluten free bread, use frozen slices.  For both breads, if the bread is already at room temperature, toast them on the lowest setting and cool before processing. If adding herbs and spices, throw them in with the slices you’re about to zoop in the processor, because that will meld the herbs and spiced into the crumbs.

If you’re supposed to use a certain type of bottled glaze or marinade, find a recipe that you like and modify to omit the salt and sugar and fat, using the tips I’ve put into past posts.

If the recipe calls for a bottled spice that includes salt, create your own mix, using herbs and spices from your cabinet which you combine with onion and/or garlic powder and black pepper.

4. Look for better options: If you’re making something like a stuffed, rolled pork tenderloin and the recipe calls for crumbled sausage, use a turkey variety. If you’re supposed to use cheese, find a lower sodium, reduced fat variety or a vegan substitute instead. If the recipe calls for ham and you really want to use ham, use half the amount and slice it into smaller pieces to distribute the taste throughout something like a cordon bleu. If you’re supposed to use meat to stuff a meat, try using sauteed vegetables instead. If butter is required, use a heart healthy and dairy free oil instead.

5. Think outside the box: Maybe this is the year you don’t make a chicken cordon bleu or ham for Christmas. Maybe you created a stunning whole wheat or gluten free roasted vegetable lasagna. Or maybe you make a spanikopita, only you use olive oil instead of butter and lower fat cheeses. Or maybe you try your hand at a vegan manicotti which used vegan cheeses and pureed cashews and is stuffed with butternut squash.

Chicken Cordon Bleu

(This is for four chicken breasts; we always double the recipe and use a 9 x 13 pan. If you aren’t allergic to dairy, you can use low fat real cheese!)

Ingredients: 

1/4 cup reduced sodium, fat free chicken broth

2 tsp minced garlic

1 tsp herbs of choice (oregano, thyme, basil, rosemary, etc…)

1/2 cup breadcrumbs (make your own!)

1 tbsp grated vegan Parmeson

1 tsp paprika

4 chicken breasts (smaller 4 to 6 ounce portion, not the huge ones!)

herbs of choice (oregano, basil, thyme, rosemary, etc…)

black pepper

4 thinly sliced pieces of fat free ham or turkey ham (the ultra thin deli style works well)

chopped fresh baby spinach

1/4 cup shredded vegan mozzarella

Cooking Instructions:

1. Lightly coat an 8 inch square pan with your choice of “grease”. (I usually brush a very light coat of olive oil.) Preheat the oven to 350 degrees.

2. Combine the broth with the garlic and herbs and microwave for 20 seconds until it’s warm.

3. Combine the bread crumbs with the Parmeson and paprika.

4. Pound the chicken breasts to a uniform thinness.  (We put the breast between parchment paper and pound them with the bottom of a heavy ice cream scoop.  If you have a meat mallet, that works, too. Recipes will often tell you to pound between saran wrap. Do what works for you.)

5. Sprinkle both sides of the chicken breasts with the herbs of your choice and black pepper.

6. Place one slice of the ham, some chopped baby spinach, and 1 tbsp of the mozzarella on top of each chicken breast and roll up the breasts in a jelly roll style.

7. Dip the rolled chicken breasts into the chicken broth and cover with the breadcrumb mixture.

8. Put the breasts into the baking pan, seam side down, and pour the remaining chicken broth over the chicken breasts evenly.

9. Bake for about 30 minutes until the juices from the chicken are clear and the chicken is golden brown.

10. You can serve immediately or cover them with foil to keep warm until it’s time to serve them.

Handling Holidays: Side Dishes

website side dishes

“But it’s mostly Korean food.”

The first time anyone came to my house for Thanksgiving, it never failed that someone would make the above exclamation. Being a half Korean-half white family, our Thanksgiving dinner would consist of the traditional turkey but surrounded by mostly Korean side dishes with a couple of American ones thrown in for good measure. In many ways, the turkey was simply there as a centerpiece to accent the foods we actually wanted to eat: chop chay (Korean noodle and vegetable dish), kimbop (essentially Korean sushi), kimchee (fermented vegetables of all types), mandu (sort of a Korean dumpling), chemi (a Korean melon), gogoma (Korean sweet potatoes), chigay (a hot Korean soup), mashed potatoes, and green bean casserole.

As I’ve had the opportunity to attend other families’ Thanksgiving dinners, I’ve learned that it’s not just my half and half family, though, that thinks Thanksgiving is really about the side dishes and not the hailed turkey. The question being asked all around the U.S. this week is, “What are we going to serve with the turkey?” Families will have long Facebook, email, and phone conversations about who will bring what and in what quantity.

As wonderfully-tasting as the many side dishes are to our palates, they are also usually loaded with fat and calories and wheat and dairy which a lot of folks can’t have for one reason or another.  This doesn’t mean, though, that side dishes needed to be relegated to, well, the side, for us.  There are many ways to revamp traditional dishes.

For Healthier and/or Allergy Friendly Side Dishes:

1.  Roast the vegetables: Roasting intensifies the natural flavors of the vegetables so you don’t need to accent them with heavy cream or butter or cheese. Simply use just enough heart healthy oil to coat the vegetables for cooking. Then drizzle the vegetables with some freshly chopped herbs or a little balsamic vinegar or a light glaze. The other advantage of roasting is that you can roast the vegetables the day before and then just reheat them on Thanksgiving by popping them into the oven at the end of the turkey’s cooking time.

For glazes, work with flavors you like. Start with a liquid, add spices, and heat until it’s thickened down to a glaze. Maybe mix a little soy sauce with ground ginger, garlic, agave, and rice wine vinegar. Or take 100% unsweetened orange juice and add cumin and black pepper. Kids tend to like maple syrup mixed with a little balsamic vinegar and black pepper. Experiment and see what you can create.

Roasting tips: Make sure all your vegetables are the same size and shape, so they’ll cook evenly. Only put the vegetables into a pan just large enough to hold them. Cook similar textures of vegetable together. For example, don’t cook broccoli which roasts very quickly with carrots which take longer. Cook at a very high temperature for a shorter period of time for the best flavor.  I usually cook at 475 to 500 degrees and check them every ten minutes, turning them over as needed to cook all sides well.

2. Revamp your potatoes: Use reduced sodium, fat free chicken or vegetable broth for your mashed potatoes instead of milk.  Or make your potatoes with half potatoes and half cauliflower. If you cook the cauliflower with the potatoes until they’re very soft, they’ll mash up with the potatoes, providing moisture which means you don’t need to add any milk or butter at all. You can also cut back on the fat by reducing the butter and increasing the spices. Cooking the potatoes with garlic, onions, chives, or thyme adds a nice flavor that my kids particularly like. Or you can roast garlic, smash it and add it to the mashed potatoes for a more intense flavor. If you’re making twice baked potatoes, use a fat free regular or Toffuti sour cream or cream cheese and try Cabot’s 50% reduced fat shredded cheese.

3. Try a different style of stuffing: Instead of letting the bread dominate your stuffing, imagine it as the “glue” that holds better things together. Saute a variety of finely chopped vegetables and add it to the stuffing for added flavor as well as healthier eating. Use your food processor to finely chop dried fruit, coconut flakes or roasted chestnuts to add to the stuffing. Crumble cooked turkey or tofu sausage into the stuffing for protein. Swap out the bread for brown or wild rice. Use a heart healthy oil instead of butter. Use chicken or vegetable broth instead of butter.

4. Remake that green bean casserole: Instead of using canned soup, make your own sauce. Saute garlic, onions, mushrooms, and some finely chopped vegetables like carrots, peppers, zucchini and/or yellow squash in a little bit of olive oil, about two to three teaspoons. Add 2 to 4 tbsp of a flour of your choice, depending on how thick you want your sauce, (I like garbanzo bean flour) and stir. Add flavoring of your choice: thyme, oregano, basil, tarragon, chives, marjoram, etc…. Slowly add 2 cups of milk of your choice. Stir constantly and heat until it thickens.  Pour the sauce over partially cooked green beans and put into a casserole dish. Caramelize some onions by slowly cooking onions in a little bit of olive oil for 15 to 20 minutes until they thicken and become brown and sweet. Mix the caramelized onions with about 1/4 to 1/3 cup home made bread crumbs and top the green beans. (I make bread crumbs in my food processor with Udi’s gluten free millet chai bread.) Bake in the a 350 degree oven for until warm and bubbly, about 20 minutes.

5. Rethink that sweet potato/yam casserole: Instead of using heavy cream as the liquid, think about using chicken or vegetable broth or a nondairy fat free “milk”. You can even leave the liquid out entirely if you’ve cooked your sweet potatoes or yams soft enough. Instead of using butter for flavor,  ponder spices like cinnamon and nutmeg and a dollop of maple syrup. Or roast the sweet potatoes before mashing them, which will intensify their flavor. Instead of using a lot of large marshmallows and nuts, consider using a smaller amount of mini marshmallow and finely chopping a smaller quantity of nuts.

6. Get the sugar out of your cranberry sauce: Because cranberries are so tart, most recipes call for an awful lot of sugar. But making cranberry sauce without sugar is relatively easy. You can substitute agave or stevia or coconut sugar which would mean you could use half the amount of granulate white sugar. You can also use 100% fruit juices like pineapple or orange. You can also use unsweetened applesauce.

7. Consider soups: I personally like a nice soup at Thanksgiving. Butternut squash is my favorite. Recently I tried making it in a way a friend suggested, and I was very happy with the results. Roast chunks of peeled, fresh butternut squash with a couple of sliced apples until they’re soft. Take a hand blender and puree the squash and the apples. Add enough chicken or vegetable broth to make it the consistency you like. Add the herbs you like. I used thyme, onion powder and black pepper, but ginger and nutmeg would probably be great, too. Heat until the soup is warm. Simple, fat free, and delicious. And you could do this with anything. Roast some potatoes for a potato soup. Try carrots and parsnips. Let your imagination go wild.

8. Think outside the box: Create your own food tradition with side dishes that fit your dietary needs and which you like. As you’ve seen with my family, just about anything goes with turkey.

Korean Chop Chay

Ingredients:

Bean Thread Noodles

Assorted Thinly Sliced Vegetables (carrots, peppers, zucchini, yellow squash, onions, etc…)

Sesame Oil

Soy Sauce

Baby Spinach

Minced Garlic Ground Ginger

Black pepper

Toasted Sesame Seeds

Cooking Instructions:

1. Cook the bean thread noodles according to instruction. Rinse with cold water and let it drain in a colander. Use scissors to cut the noodles into shorter threads and put them into a large bowl. Mix the noodles with soy sauce to taste.

2. Saute the thinly sliced vegetables over medium heat in a little bit of sesame oil until the vegetables are softer and becoming a brighter color. Remove from the heat and mix in soy sauce to taste. Drain the vegetables of all liquid. Add to the bowl with the noodles.

3. Saute the spinach in sesame oil just until it begins to slightly wilt, just a couple of minutes. Add to the bowl with the noodles and other vegetables.

4. Mix the noodles, vegetables and spinach with ground ginger, minced garlic, black pepper and sesame seeds to taste.

5. If you’re not eating the chop chay immediately, refrigerate it until you need it. Then reheat on the stovetop in a pan until the noodles are nice and brown and everything is warm.

Handling Holidays: Cakes and Tortes

KONICA MINOLTA DIGITAL CAMERA

“Why are the Christmas decorations up when it’s not even Halloween?”

My son and I had popped into BJ’s to pick up a couple of much needed bulk items. As we entered, we were greeted by twinkling lights, decorated trees, and gift wrapping.  Since it was still a week and  a half until Halloween, I could understand the reason for my son’s question.

What I didn’t know, though, was how much I should explain to an eight year old about the “pushing” aspect of the holidays — everyone trying to get us to think we need to purchase something, whether we need to or not.  For the most part, I don’t actually mind all the early decorating.  It’s pretty.

What boggles my mind is the onslaught of catalogs that begin to pile up in my mailbox. It wouldn’t be so bad if you received one for every company, but you don’t.  You receive multiple copies from October through December.

I usually simply recycle them all without looking at them.  One which my children love to pore over, though, is the Swiss Colony catalog with its different types of cakes and tortes and petit fours that they’re hoping we will purchase.

When it comes to the holidays, nothing says, “Celebrate!” like a cake.  And in many parts of the world, a torte is seen as special holiday food.  There are basically two types of tortes:  traditionally thought of torte which is made with little flour where nuts and jams take center stage in a layered extravaganza and the type of torte which is a multi-layered cake alternating cake with cream, frosting, ganache or jam.

Both types can wreak havoc with a healthy diet and/or an allergy sensitive one. Below, I’ll give you some tips for lightening cakes and substituting ingredients when necessary, but I’ll also share some thoughts for that latter type of torte (multi-layered cake alternating with filling), in case you’re thinking your holiday dinner ought to end with one.

For Healthier Cakes:

1.  Cut the amount of “filling” you use:  If your cake or torte calls for chocolate chips or dried fruit  or coconut flakes or nuts, use mini chocolate chips and/or process the dried fruit or coconut or nuts into smaller pieces. By doing so, you can distribute more of the filling throughout the cake or torte and can then cut the amount you’re using by a quarter or half without losing the flavor and texture.

2.  Swap out solid butter or shortening with coconut oil, which is actually a solid, not a liquid as the name implies.  It’s considered a healthier fat than butter and shortening.

3.  Substitute applesauce or pureed banana, pumpkin or prunes for up to half of the fat called for in a cake recipe.

4.  Swap out melted butter or vegetable oil for a heart healthy oil:  safflower oil, grapeseed oil, canola oil, a nut oil, Smart Balance, olive oil, etc….

5.  Substitute egg whites for the whole eggs.  Two egg whites equals one egg. You can also substitute ground flaxseed meal mixed with water for the eggs. 1 tbsp of meal mixed with 3 tbsp of water equals one egg.

6.  Swap out part of the flour in the recipe with a nut flour, coconut flour or soy flour.  You can substitute up to half of the flour with  a nut flour, about 1/4 of the flour with coconut flour, and up to 1/3 of the flour with soy flour.

7.  Swap the white flour for whole wheat.  100% whole wheat has a higher fiber content, but you can also use white whole wheat if you want something closer to white flour.  Since 100% whole wheat flour is denser than white, you should use about 1/4 cup less in your recipe.

8.  Use Agave or Stevia or Coconut sugar in place of the sugar in the recipe. For every cup of sugar use about half of any of these substitutes.  If you use the Agave and it’s simply a couple of tablespoons to 1/4 cup, don’t worry about it being a liquid.  If you’re using a cup or more, though, decrease any other liquid by at least 1/4 cup to 1/2 cup or increase a flour ingredient by 1/4 to 1/2 cup.

9.  Swap out any “whole” milk product (milk, yogurt, cream cheese, etc….) for a lower fat, lower sodium variety.

10.  Use date molasses instead of regular molasses.  You can use the same amount of date molasses as regular molasses.

For Allergy Friendly Cakes:

1.  Use gluten free flour instead of wheat.  Authentic Foods has a multi-flour blend that includes everything including the xanthan gum which works very well as a substitute.  You can also use your favorite flour blend and add 1/2 tsp of xanthan gum for every cup of flour your recipe needs.

2.  Substitute water, 100% fruit juice or your type of “milk” (soy, rice, almond, coconut, etc…) for any milk needed in a recipe.

3.  Swap out the heavy cream: You can substitute using coconut milk; or 3/4 cup of your type of milk with the addition of an extra 1/4 cup of your type of butter per cup of “cream” needed; or a type of yogurt you can eat; or pureed soft or silken tofu.

4.  Substitute vegan butter or coconut oil for any butter or shortening called for in a recipe.

5.  Use a recipe that calls for a liquid oil as opposed to butter so you can use safflower, canola, grapeseed, walnut, pumpkin, etc… oils instead.

6.  Substitute vanilla soy milk for evaporated milk.  1 1/2 cups is equal to those 12 oz cans usually used.

7.  Make your own dairy free sweetened condensed milk.  This recipe only works for a cake that is going to be baked:  Beat 2 eggs until thick.  Add 1 cup brown sugar and mix well.  Add 1 tsp vanilla and mix well.  Add 2 tbsp of a flour and beat for one minute.  Add 1/2 tsp baking powder and 1/4 tsp salt. Beat for another minute.  Set aside until you need to add it to your recipe. This is equivalent to one 14 oz can of sweetened condensed milk.

You can also try making homemade sweetened condensed milk by mixing about 2 1/2 cups of your type of “milk” (rice, nut, coconut, soy) with 8 tbsp sugar or agave.  Stir well and simmer over low heat until the “milk” has reduced and thickened.  This will take a couple of hours.  Keep the heat low and stir frequently.  When it’s thickened, you can add 1/8 tsp of salt and/or 1/2 tsp vanilla, if you’d like.  Put a clear plastic wrap up against the mixture before cooling in the fridge to prevent a “skin” from forming.

8.  Make a dairy free whipped cream.  Chill a can of full fat coconut milk overnight. Turn the can upside down and drained out the liquid.  Put the cold cream into a cold mixing bowl and whip into it’s light and fluffy.

9.  Substitute eggs with 1 tbsp ground flaxseed meal mixed with 3 tbsp water for every egg needed in the recipe.  Simply mix up the meal with the water and let it sit for at least five minutes to thicken to an egglike consistency.  Or if you are allergic to flaxseed, you can substitute 1/4 cup applesauce for every egg needed in the cake recipe and add 1 tsp of baking soda with 1 tbsp of vinegar to the cake recipe.

10.  Use Tofutti sour cream and cream cheese instead of the dairy versions.

11.  Substitute the dairy chocolate in chocolate cakes or fillings with Enjoy Life chocolate bars and/or chocolate chips.  Or use unsweetened cocoa powder instead of the chocolate.  Three tbsp of cocoa powder plus one tbsp of a fat (oil or “butter”) is equivalent to one ounce of unsweetened chocolate. One tbsp of cocoa powder plus two teaspoons of a fat (oil or “butter) plus one tbsp of sugar is equivalent to one ounce of semi-sweet baking chocolate.

12.  Replace nuts in a cake recipe with chopped dried fruit or coconut flakes or chocolate chips.

Allergy Friendly Torte

1.  Decide what type of torte you’d like to make:  chocolate mint (chocolate cake with mint filling); raspberry (white cake with raspberry jam filling); pumpkin spice (pumpkin cake with spiced filling); lemon (yellow cake with lemony curd filling); etc….  The options are actually endless.

2.  Make your cake:  Find a recipe that you really like and make your substitutions as needed.  Most torte recipes will tell you to bake one or two layers and then cut them.  I suggest instead that you bake thinner layers.

Line your cake pans with parchment paper and pour one cup of batter into each pan and bake for 10 minutes in a preheated 350 degree oven.  Let the cakes cool for a couple of minutes, then turn them over onto a wire cooling rack to cool, removing the parchment paper immediately from the cakes.

If you only own two cake pans or your oven will only fit two 8 or 9 inch pans at a time,  after you bake the first two cake layers and turn them over onto a wire cooling rack, put the cake pans into the freezer for a couple of minutes to cool them.  Then reline them with your previously used parchment paper and fill them with one cup of batter each again and repeat.

I usually find that a basic cake batter recipe for a two layer cake will make six of the one cup layers.  Let all the layers completely cool.

3.  Make your filling:  If you’re simply going to use jam, scoop out whichever jam you are going to use (I like to use Polaner All Fruit which has no added sugar) and whip it up in a bowl to a nice spreadable consistency. Similarly do the same if you are using a store bought lemon or fruit curd or fruit butter.

A recipe for your own lemon curd:  Heat 1/3 cup of lemon juice in a pan until it’s warm, but not boiling.  Whisk two whole eggs and one egg yolk with 1/2 cup of sugar.  Then while you’re constantly stirring, very slowly pour the hot lemon juice into the egg mixture.  Pour all of the mixture back into your pan and cook for about two to three minutes, stirring constantly.  Remove the pan from the heat and stir in 2 tbsp of “butter” which has been cut up into small pieces.  Add 1 tbsp of cream or cream substitute, 1/4 tsp vanilla and 1/8 tsp salt.  If you want the curd to be smoother, push it through a mesh strainer.  Wrap the curd with plastic wrap, pressing the wrap directly onto the curd surface.  Let it cool in the fridge until needed.

If you are making an allergy friendly cream filling: A nice versatile recipe I like to use is as follows:  Overnight, put two 14 oz cans of coconut milk into the fridge. When you’re ready to use them the next day, turn the cans upside down and open them.  Pour out the coconut water and scoop the “cream” into a cold mixing bowl (I put the bowl into my freezer for about ten minutes, along with the mixing tool.) Whip the cream until it’s nice and thick.

For a chocolate cream, add 1/3 cup special dark unsweetened cocoa powder, 1/2 cup coconut sugar, and 2 tsp vanilla.  To make it minty, reduce the vanilla to 1 tsp and add 2 tsp mint extract.  For a spice cream, add 1/2 cup coconut sugar and 2 tsp cinnamon or a mixture of cinnamon, ginger, cloves, nutmeg, etc….  For just a plain sweetened cream, just add 1/2 cup of coconut sugar and 1 tsp vanilla.

While the cream is being whipped, put 2 tbsp of cold water into a bowl. Gently sprinkle 2 tsp of unflavored gelatin over the cold water.  Let it sit for two minutes. Carefully pour 1/4 cup of boiling water over the gelatin and whisk until its completely dissolved. Let it cool for a couple of minutes. Then add it to the whipped cream.  You can either cool it in the fridge for two hours and then stir it and spread it over your layers or you can spread it directly onto your layers immediately and let the entire cake cool for two hours in the fridge.

4.  Layer your torte:  I find that the best way to layer the cake is to use a springform pan that fits your cake.  Put down one of the cake layers on the bottom of the pan, layer your filling, and then keep repeating until you reach the top layer of cake.  Cover and let the cake chill.  When you’re ready to top the torte, release the springform pan and clean up the sides with a metal spatula.

5. Top your torte:  After your torte is cooled, you can frost it with your favorite frosting or cover it with a ganache or top it with melted chocolate.

Elana’s Pantry has some nice allergy friendly frosting recipes if you’re trying to also avoid using sugar.  If you have no problems with powdered sugar, then use a recipe you like and just substitute as necessary for ingredients like butter and spread the frosting over your cooled torte.

For a ganache:  If you aren’t allergic to dairy, heat in a pan over low heat 1 cup of cream, 1 cup of sugar, and 1/4 tsp salt, stirring frequently until it begins to simmer.  Pour the hot mixture over 10 ounces of small pieces of chocolate.  Whisk until smooth.  Add 1 tsp vanilla and 1 stick of butter.  Cover and refrigerate for about an hour until it’s cool but spreadable.  Spread carefully over your cooled torte.

If you need to substitute, you can use Enjoy life chocolate, and/or water or your type of “milk” (this will just make it  bit thinner and have less of a “shine”) and/or 1/2 cup of Agave and/or your type of butter.

You can also make another type of ganache where you melt one ounce of your type of butter with two fluid ounces of your type of milk per four ounces of chocolate, cool, and then whip until thick.

For a hard chocolate topping:  Fill a small pan halfway with water.  Put a larger pan on top of the smaller pan and turn the heat to medium low.  Melt 2/3 of a 10 ounce bag of Enjoy Life mini chocolate chips, keeping the other 1/3 nearby.  Be sure to stir constantly.  Once the chips are melted, remove them from the heat and quickly stir in the remaining 1/3 of the chocolate chips until all the chips are melted.  Working quickly, pour the melted chocolate over the cooled torte, and use a cake spatula to spread the chocolate over the top and around the sides.

You can use regular chocolate if you’re not allergic to dairy.

If you use the chocolate as a topping, you’ll need to remove the torte from the fridge about an hour before you’re going to serve it so it can soften a bit. Then run your knife under hot water before slicing the torte.

Handling Holidays: Cookies

website holiday cookies

Food Traditions.

My husband and I were only about a month into our marriage when we realized that growing up with a non-baking mother versus a baking one makes for very different expectations about the holidays.  For my husband, special holiday specific desserts were normal.  Cherry pie for Washington’s birthday and a Lincoln log for Lincoln’s. Coconut cake for Easter and a mint torte and cookies for Christmas.  And a variety of different pies for Thanksgiving! It quickly became clear that I had married over my head when it came to holiday treats!

Fortunately, we were able to reach a compromise:  I bake two of the four handed-down-from-the-Civil War-cookies and a mint torte for Christmas, only two pies for Thanksgiving – apple and pumpkin – and a coconut cake only when my husband’s parents’ are here for Easter.  The rest of the holidays fend for themselves!

Over the years, though, I’ve come to really appreciate the tradition of making holiday cookies with the children.  Never having done it myself as a child, I was surprised by the joy and eagerness with which my children looked forward to baking them every single year.  Our own new family traditions have evolved around the cookie making, and now Christmas wouldn’t seem like Christmas without them.

So you can imagine the pressure when I developed food allergies to flour and butter, the two key ingredients in our cookies, and had to also reduce my use of sugar due to hypoglycemic reactions.  Suddenly, the allergies weren’t just disrupting what I could eat, but they were affecting my family’s tradition and expectations for the holidays.

Fortunately, accommodating food restrictions and/or allergies is quite easily doable within the realm of cookies.  Below, I’ll share some learned experiences for making substitutions in any type of cookie, plus some tips specific to making holiday rolled, cut-out cookies.

Substituting Ingredients in Cookies:

1.  Swapping the white flour in the recipe for whole wheat or gluten free flour:  Match your flour to your cookie type.  100% whole wheat and heavier gluten free flours like garbanzo bean, coconut or almond are fine for heartier cookies like ginger, biscotti, and shortbread.

If, however,  you are making a lighter cookie like a spritz, linzer or snowballs, you should use white whole wheat or for a gluten free flour, rice flour or sorghum.

For both types, though, if you’re making them gluten free, a mixture of flours is better than simply using just one type. Authentic Food, Bob’s Red Mill, and King Arthur sell blended flour mixtures which you can easily substitute for regular flour. Just remember to add 1/4 tsp of xanthan gum per cup of gluten free flour if you’re using a mixture that doesn’t already include it.

2.  Swapping out the butter or shortening:  When it comes to the fat in a cookie, you need to consider the taste.  For cookies like sugar cookies, where keeping the buttery taste is important, you may want to use a vegan “butter”.

For a cookie that calls for melted butter, you can often substitute a heart healthy oil like safflower or grapeseed or Smart Balance without changing the taste.

Where the taste won’t conflict, like with an oatmeal cookie, coconut oil, which is actually a solid, not a liquid as the name implies, is a good substitute.

With all cookies, if you’re simply trying to cut down on the fat, you can also simply reduce the amount of butter up to half without usually affecting the cookie’s taste and quality.

3.  Swapping out refined sugars:  You can always use Agave, Stevia, or Coconut sugar in place of sugar in any cookie recipe.  For every cup of sugar use about half of any of these substitutes.  If you use the Agave and it’s simply a couple of tablespoons to 1/4 cup, don’t worry about it being a liquid.  If you’re using a cup or more, though, decrease any other liquid by at least 1/4 cup to 1/2 cup or increase a flour ingredient by 1/4 to 1/2 cup.

For molasses, you can use date molasses in the equivalent amount.

4.  Swapping out milk products (milk, yogurt, cream cheese, etc….):  If you simply want to have a lower fat cookie,  use low fat, reduced sodium varieties of any milk product.

For food allergies, use soy, coconut, almond, and rice varieties of “milk” in equivalent amounts.

You can also simply use water or a 100% fruit juice in place of milk.

If a bar cookie recipe calls for sweetened condensed milk, make your own dairy free sweetened condensed milk.  This recipe only works for bar cookies that are going to be baked:  Beat 2 eggs until thick.  Add 1 cup brown sugar and mix well.  Add 1 tsp vanilla and mix well.  Add 2 tbsp of a flour and beat for one minute.  Add 1/2 tsp baking powder and 1/4 tsp salt. Beat for another minute.  Set aside until you need to add it to your recipe. This is equivalent to one 14 oz can of sweetened condensed milk.

Vanilla soy milk is a good substitute for evaporated milk.

5.  Substituting for eggs:  If you simply want to cut your cholesterol, using egg whites in place of whole eggs works well in cookie recipes.  Just use two egg whites for every whole egg or 1/4 cup liquid egg whites.

To substitute for the eggs completely, mix 1 tbsp ground flaxseed meal with 3 tbsp water for every egg needed in the recipe.  Simply mix up the meal with the water and let it sit for at least five minutes to thicken to an egglike consistency.

You can also use pureed fruit or vegetables as a binder in place of eggs. Use 1/4 cup for every egg needed in the cookie recipe.  Cooked and pureed apples, figs, pumpkin, squash, prunes all work really well in cookie recipes.

6.  Replacing nuts and peanuts:  If you’re making a cookie which usually uses peanut butter and you’re not allergic to tree nuts, there are a variety of nut butters you can use instead.

If you are allergic to tree nuts as well, there are soy butters and sunflower butters.

If you’re making a recipe that usually calls for nuts in the batter as a filler, just replace the nuts with chocolate chips or chopped dried apricots or cranberries or dates.

If you’re making a cookie that uses peanuts or nuts to give the cookie a certain “nutty” texture, using rolled whole oats will give the cookie a similar texture.  You can also use a gluten free flour mix that uses garbanzo bean flour, because the “beany” taste is similar to a “peanutty” taste.

Tips for Making Rolled, Cut-out Cookies

1.  Use wax paper to roll out the dough.  Simply cut a sheet that overlaps around a large cutting board or piece of cardboard and tape it down.  Then when you sprinkle your flour over the wax paper, your dough won’t stick to the board.

2.  Use sifter to put flour onto your cutting board and rolling pin.  If you sprinkle it on with your fingers, you’re more likely to clump the flour in places which then get stuck to your cookie dough.

3.  Use a long, thin metal spatula to periodically release your dough from the board while you’re rolling it, and before you use your cookie cutters, be sure to go completely under the entire rolled out piece of dough so that your cookies won’t stick to the board when you’re cutting the shapes.

4.  Invest in some smaller cookie shapes which you can use to cut little cookies from the dough left after you cut out the big cookie shapes.  This cuts down on the amount of dough you need to re-roll.  Put one cookie sheet aside specifically for the little cookies, which you fill up as you go along and then bake at the end.

5.  Make sure your dough for rolling is very cold and firm.  Most recipes will tell you to chill for an hour, but in reality you’re better off planning ahead and chilling your dough for several hours or overnight.  When you’re making the cookies, be sure to put the dough back into the fridge in between scooping out new dough to roll.

6.  Put all your re-roll dough into a small bowl which you then put into the freezer while you’re finishing up the regular dough.  This will make the dough firm enough for you to re-roll immediately as opposed to having to wait for it to firm back up again.

7.  Make your own colored sugars.  Put 1/4 cup of sugar into a bowl and add two to four drops of food coloring.  Carefully work the color into the sugar, using the back of a spoon to continualy “spread” the color completely into the sugar.  You can store extra, leftover sugar in a sandwich baggie for a very long time!

8.  Use parchment paper to line your cookie sheets.  Your cookies will never stick. You won’t have to clean the cookie sheets.  And you won’t have to worry about cross-contamination of your cookies.  I usually use the If You Care brand.  The parchment sheets can also be re-used over and over again on one cookie sheet.

9.  Be sure to completely cool your cookie sheets before putting new cookie dough shapes onto them.  I usually pop my cookie sheets into the freezer for a minute or two after removing the cookies.  Works like a charm.

10.  Invest in metal cookie cutters which you can use year after year. When you’re cutting out the shapes, put a pan of flour in the center which you can dip the cutters into so the cutters won’t stick to your dough.

11.  When you’re done with your cookie cutters, fill the sink with hot, soapy water and just let them sit for a while.  You’ll be able to simply rinse them off without having to try to “clean” the crevices.  Then pop them (as long as they’re metal) onto one of your cookie sheets and place the cookie sheet in the oven which is turned off and cooling down.  The residual heat will evaporate all the water, and your cutters will be sterilized and ready for next year’s use.

Gluten and Dairy Free Holiday Cut-out Ginger Cookies

These make a lot of cookies, so you may want to cut it in thirds.

Ingredients:

2 cups melted coconut oil (You can use regular butter, vegan butter, or a heart healthy oil if you prefer)

2 cups date molasses (You can use regular molasses if you prefer)

1 cup coconut sugar (You can use regular white or brown sugar or Stevia or Agave instead)

2 tsp ground ginger

1 tsp ground cloves

1 tsp ground cinnamon

1/2 tsp ground black pepper

1 tsp baking soda

4 tsp vanilla soy milk (You can use another type of milk like rice or coconut or use sweetened condensed milk instead)

6 to 8 cups Gluten Free Flour Blend or sorghum flour (You can use any gluten free blend you prefer, or the straight sorghum, or 100% whole wheat flour — you’ll need just enough flour to make a soft dough)

Baking Instructions:  (The dough needs to chill overnight so make the dough up  the night before you want to bake the cookies.)

1.  Mix the coconut oil with the date molasses, coconut sugar, ginger, cloves, cinnamon, black pepper, baking soda, and milk.

2.  Add in the gluten free flour, a cup at a time, only as much as you need to make a soft dough.  Blend well.

3.  Cover the dough tightly with plastic wrap and chill overnight, or at least for several hours.

4.  Preheat the oven to 350 degrees.  Line cookie sheets with parchment paper.

5.  Line a board with wax paper.  Sprinkle the board and a rolling pin with flour of your choice, and roll out small amounts of dough to a very thin thickness – thin enough to make a crispy cookie but not so thin that you can’t actually move the cut out dough to the cookie sheet.

6.  Cut out shapes with cookie cutters and place on the prepared cookie sheets.  The cookies will not spread a lot so you can put them fairly close together.

7.  Decorate the cookies with colored sugar and/or currants. (You can also just bake the cookies and then decorate them with icing when they’re cooled.)

8.  Bake in the preheated oven for 8 to 10 minutes.  Start with 8 minutes and then go up by 1 minute increments.  The cookies should be browned but not burnt and slightly puffed.

9.  Move the cookies to a wire cooling rack and cool them completely. Once cooled, they’ll be nice and crispy ginger cookies.  If you eat them while they’re warm, they’ll be chewier.

10.  When the cookie are completely cooled, store them in a tightly covered container.  They’ll last for a few weeks, though after a couple of weeks, they’ll get a bit softer.

Handling Holidays: Pies

website pies

“As American as apple pie.”

As the story goes, the Pennsylvania Dutch invented the two crusted fruit pie as we know it today, and apparently being able to have pies regularly with your meals was seen as a status symbol.  Whether this is all true or not, I don’t know, but I do know that my husband would rather have a pie than a birthday cake; that my members of my extended family would think Thanksgiving had gone horribly wrong if no pies were present; that figures say 700 million dollars in pies are sold every year in the U.S.; and that students everywhere are thrilled to celebrate Pi Day with pies of every type every year.

Ironically, though, pies, which are made with “good for you” ingredients like fruit and vegetables, are full of fat, sodium, and allergy triggers like wheat, nuts, and dairy.

Fortunately, when it comes to desserts, however, pies are probably the easiest to adapt for healthier eating or for an allergy restricted diet.  They usually don’t require very exact ratios of ingredients, and because you don’t need to make anything “rise”, you can pretty much substitute any ingredient with another without worry of disastrous results.

Healthier Pies

If you simply need to eat healthier, here are a few easy fixes to try:

For Crusts:

1.  Swap the white flour in the crust for whole wheat.  100% whole wheat has a higher fiber content, but you can also use white whole wheat if you want something closer to white flour.  Since 100% whole wheat flour is denser than white, you should use about 1/4 cup less in your recipe.

2.  Swap out the butter or shortening with coconut oil, which is actually a solid, not a liquid as the name implies.  It’s considered a healthier fat than butter and shortening.

3.  Make a crust using a liquid healthy oil as opposed to a solid fat.  A general recipe:  1 1/3 cup flour, 1/2 tsp salt, 1/3 cup oil, 3 tbsp “milk”.  I have used safflower oil, grapeseed oil, canola oil, etc… and almond milk, soy milk, and rice milk — all to success.

4. Substitute part of the flour in the recipe with a nut flour, coconut flour or soy flour.  You can substitute up to half of the flour with  a nut flour, about 1/4 of the flour with coconut flour, and up to 1/3 of the flour with soy flour.

For Fillings:

1.  Use Agave or Stevia or Coconut sugar in place of the sugar in the recipe.  For every cup of sugar use about half of any of these substitutes.  If you use the Agave and it’s simply a couple of tablespoons to 1/4 cup, don’t worry about it being a liquid.  If you’re using a cup or more, though, decrease any other liquid by at least 1/4 cup to 1/2 cup or increase a flour ingredient by 1/4 to 1/2 cup.

2.  Swap out any “whole” milk product (milk, yogurt, cream cheese, etc….) for a lower fat, lower sodium variety.

3.  Substitute egg whites for any whole eggs.  If you’re worried about the texture of a certain type of pie like pecan pie, use half whole eggs and half egg whites.

4.  Use date molasses instead of regular molasses.  You can use the same amount of date molasses as regular molasses.

Allergen Friendly Pies

If you need to substitute traditional ingredients, here are a few things you can try:

For Pie Crusts:

1.  Make a gluten free crust instead of a wheat flour type.  There are tons of recipes online you can follow.  Companies like Bob’s Red Mill also have their own pie crust mixes which you just add water to and roll out.  HINT:  These always need slightly more water than the instructions indicate, though, and you’re best rolling them out between wax paper.

2.  Substitute water or your type of “milk” (soy, rice, almond, coconut, etc…) for any milk in a crust recipe.

3.  Substitute vegan butter or coconut oil for any butter called for in a recipe.

4.  Use a recipe that calls for a liquid oil as opposed to butter so you can use safflower, canola, grapeseed, walnut, pumpkin, etc… oils instead.   A general recipe:  1 1/3 cup flour, 1/2 tsp salt, 1/3 cup oil, 3 tbsp “milk”.

For Fillings:

1.  Substitute vanilla soy milk for evaporated milk.  1 1/2 cups is equal to those 12 oz cans usually called for in a pumpkin pie recipe.

2.  Substitute vegan butter or a liquid oil or coconut oil for any butter called for in a recipe.  If you’re making a fruit pie that calls for “dotting with butter”, you can just omit the butter altogether and still have a tasty pie.

3.  Use a gluten free flour like garbanzo bean instead of a wheat flour.

4.  Make your own dairy free sweetened condensed milk.  This recipe only works for a pie that is going to be baked:  Beat 2 eggs until thick.  Add 1 cup brown sugar and mix well.  Add 1 tsp vanilla and mix well.  Add 2 tbsp of a flour and beat for one minute.  Add 1/2 tsp baking powder and 1/4 tsp salt.  Beat for another minute.  Set aside until you need to add it to your recipe.  This is equivalent to one 14 oz can of sweetened condensed milk.

You can also try making homemade sweetened condensed milk by mixing about 2 1/2 cups of your type of “milk” (rice, nut, coconut, soy) with 8 tbsp sugar or agave.  Stir well and simmer over low heat until the “milk” has reduced and thickened.  This will take a couple of hours.  Keep the heat low and stir frequently.  When it’s thickened, you can add 1/8 tsp of salt and/or 1/2 tsp vanilla, if you’d like.  Put a clear plastic wrap up against the mixture before cooling in the fridge to prevent a “skin” from forming.

5.  Use a frozen non-dairy dessert to replace the vanilla ice cream as a topping.

6.  Make a dairy free whipped cream.  Chill a can of full fat coconut milk overnight.  Turn the can upside down and drained out the liquid.  Put the cold cream into a cold mixing bowl and whip into it’s light and fluffy.

7.  Make a soy cream:  Mix one pint soy creamer, 1/2 cup soy sour cream, 1/4 cup Agave, 2 tablespoons cornstarch, and 1/4 teaspoon salt.  Cook over low heat until it thickens, stirring constantly.  Remove from the heat and add 2 teaspoons vanilla.  Scrape into a heat safe bowl and press plastic wrap directly against the cream to prevent a “skin” from forming.  Cool in the fridge.  Before serving, whisk the cream to make it lighter and fluffier.

8.  Substitute eggs with 1 tbsp ground flaxseed meal mixed with 3 tbsp water for every egg needed in the recipe.  Simply mix up the meal with the water and let it sit for at least five minutes to thicken to an egglike consistency.

Crustless Dairy Free Gluten Free Pumpkin Pie

Ingredients:

2 cups cooked, pureed pumpkin or 1 15 oz can of pumpkin

1 1/2 cup vanilla soy milk (or milk of your choice: evaporated milk, rice, almond, coconut)

1/2 cup liquid egg whites (or two whole eggs or 2 tbsp flaxseed meal mixed with 6 tbsp water)*

1/2 cup Agave

1/2 cup garbanzo bean flour (or other gluten free or wheat flour of choice)

1 tsp ground cinnamon

1 tsp dried orange  peel

1 tsp gluten free baking powder

1/2 tsp ground ginger

1/2 tsp ground nutmeg

1/4 tsp ground cloves

1/8 tsp salt

1/2 cup gluten free whole grain rolled oats

1/2 tsp ground cinnamon

1 tbsp Agave

1 tbsp melted vegan butter or oil such as grapeseed

Baking Instructions:

1.  Preheat an oven to 350 degrees.  Lightly grease a 9.5 or 10 inch pie pan with your preferred method.

2.  Mix the pumpkin with the soy milk, egg whites, and Agave.

3.  Mix the garbanzo bean flour with the cinnamon, orange peel, baking powder, ginger, nutmeg, cloves, orange peel, and salt.

4.  Mix the dry ingredients into the pumpkin mixture and pour into the prepare pie pan.

5.  Mix the rolled oats with the cinnamon.  Add the Agave and melted “butter” or oil, and combine well to make an oat topping.

6.  Use clean hands to evenly top the pumpkin mixture with clumps of the oat topping.

7.  Bake in the preheated oven for about 50 minutes.  The pie will be puffed and golden.

8.  Cool for 15 minutes on a wire cooling rack.  Then put into the fridge to cool completely.

* If you like your pumpkin pie denser, simply whisk in the egg whites with the rest of the liquid ingredients.

If you prefer a lighter, creamier version, though, whip the egg whites with 1/8 tsp of cream of tartar until they’re stiff. Mix the wet and dry ingredients together, and then gently fold the egg whites into the batter until they’re fully incorporated.

To fold egg whites:  Used a large curved spatula and be sure to put your batter into a large bowl.  Gently scoop your egg whites on top of the batter.  Then go along the curve of the bowl along the bottom of the batter with your spatula to gradually get some of the batter.  Scoop the batter gently into the center of the egg whites.  Then scoop your spatula back up toward the top of the batter and start all over again.  Essentially you’re just really, really gently incorporating the batter into the egg whites.