Cooking Techniques: Leftover Makeovers

website leftovers

There are risks, and then there are risks.

I recently read an article about people who like to ski on mountains with risks of avalanches. The article detailed the number of deaths from such risky skiing but then went on to talk about the numerous devices now available to skiers in the event of an avalanche. I couldn’t help but wonder about the type of people who would willingly ski on a mountain that requires you to carry a tracker in your pack in case someone needs to locate you underneath a mound of snow; to carry special poles which allow you to dig in case a friend is trapped underneath snow; and to strap an inflatable device to your backside with the hopes that in the event of an avalanche, you might be able to “ride” the avalanche out instead of being killed by it.

It occurred to me, though, that several friends have made similar comments about me with respect to my cooking. They have wondered aloud to me about what type of person willingly makes recipes up on the spur of the moment for company, using whatever leftovers she has in her fridge and not knowing whether the food will actually be edible or not. For some of them, that is risky behavior they are not inclined to follow.  When a friend asked such a question of me the other day, I knew it would have to be a topic for our series on cooking techniques.

The fact is that turning leftovers into a scrumptious meal for company or the family is not risky behavior. It’s being creative, and being creative is easy if you know where and how to begin.

Techniques for utilizing leftovers:

1. Make soup: Meat, beans, vegetables, fish, pasta, rice, potatoes, anything actually, can be turned into a good soup. If you have leftover vegetables, puree them with garlic, onions, black pepper, and herbs of your choosing, and add a fat free, no salt broth of your choosing to the consistency you like. Warm, and serve with assorted garnishes of choice like shredded low fat cheese or crushed croutons or chopped chives or sliced turkey bacon. Your guests will never know you were using leftovers.

If you have a little of this and a little of that leftover from a variety of meals, chop everything into bite size pieces and throw it all into a slow cooker. Don’t worry that you’re mixing a Mexican dish with an Italian one. Add a can of no salt, no sugar diced tomatoes and broth of your choosing with dried herbs and black pepper, and let it cook all day. You’ll be surprised at how tasty the soup is. If you don’t have quite enough leftovers, you can always add some thawed, frozen vegetables or a can of no salt, no sugar beans. Your soup will be a minestrone of sorts which your guests will thoroughly enjoy.

2. Make egg dishes: If you have a small amount of leftovers, you can chop your leftovers, place them into a greased pan, mix eggs with some “milk”, herbs, onions, and black pepper, pour over the chopped leftovers, and bake for a straightforward egg bake. For an egg bake, your eggs to leftover ratio is such that you have more eggs than leftovers.

If you have a large amount of leftovers, you can make a timbale or souffle. A timbale is similar to an egg bake because you use beaten eggs and milk, but your ratio of eggs to leftovers is such that you have more leftovers than egg mixture. Instead of pouring the mixture over your leftovers, you want to puree the leftovers and mix your egg mixture into your leftovers before spreading the mixture into a greased pan.

For a souffle, you separate the eggs, mixing the egg yolks into the pureed leftovers.  You then whip the egg whites until they are stiff and gently fold them into the leftovers before putting them in a pan to cook. I’ll be doing a post on souffles soon since people seem to think they’re difficult when they’re really not, and they’re wonderful to serve for company.

3.  Make enchiladas: Just about any type of meat, bean, fish, quinoa, or vegetable can become a filling for enchiladas. Simply finely chop your leftovers, add cumin and cilantro and salsa, add your type of “cheese” and scoop the mixture into your favorite wrap, whether it’s a corn, whole wheat, gluten free spinach or other type of tortilla. I make an enchilada sauce by combining tomato soup, salsa, garlic and cumin which I pour over the top of the enchiladas and then cover with “cheese”. One of my kids favorites is when I use leftover quinoa mixed with leftover black beans and vegetables.

4.  Make pasta salad: Any leftover meats, beans and vegetables go well with pasta. Just decide whether you want a cold salad or a warm one. If going with cold, make a marinade of olive oil, lemon juice, garlic, onions, black pepper, and ground mustard where the lemon juice is half your amount of olive oil and the rest is to your taste preference. Mix your leftover with your pasta of choice and blend well with the marinade. The salad should be in the fridge for at least an hour or two for the flavors to meld, but then let it sit for 30 minutes to come to room temperature for serving.

If making a hot pasta salad, decide on the type of sauce you’d like. A white sauce? A tomato sauce? A pesto sauce? A cheesy sauce? It depends on the type of leftovers you have. If it’s just vegetables leftover, any type will go well. Anything with ground meat or beef or pasta tends to go well with a tomato sauce. Chicken and turkey or ham goes well with a white or cheese sauce. Make your chosen sauce, mix your leftovers with your pasta and the sauce and pop the entree into the oven to warm, usually about thirty minutes.

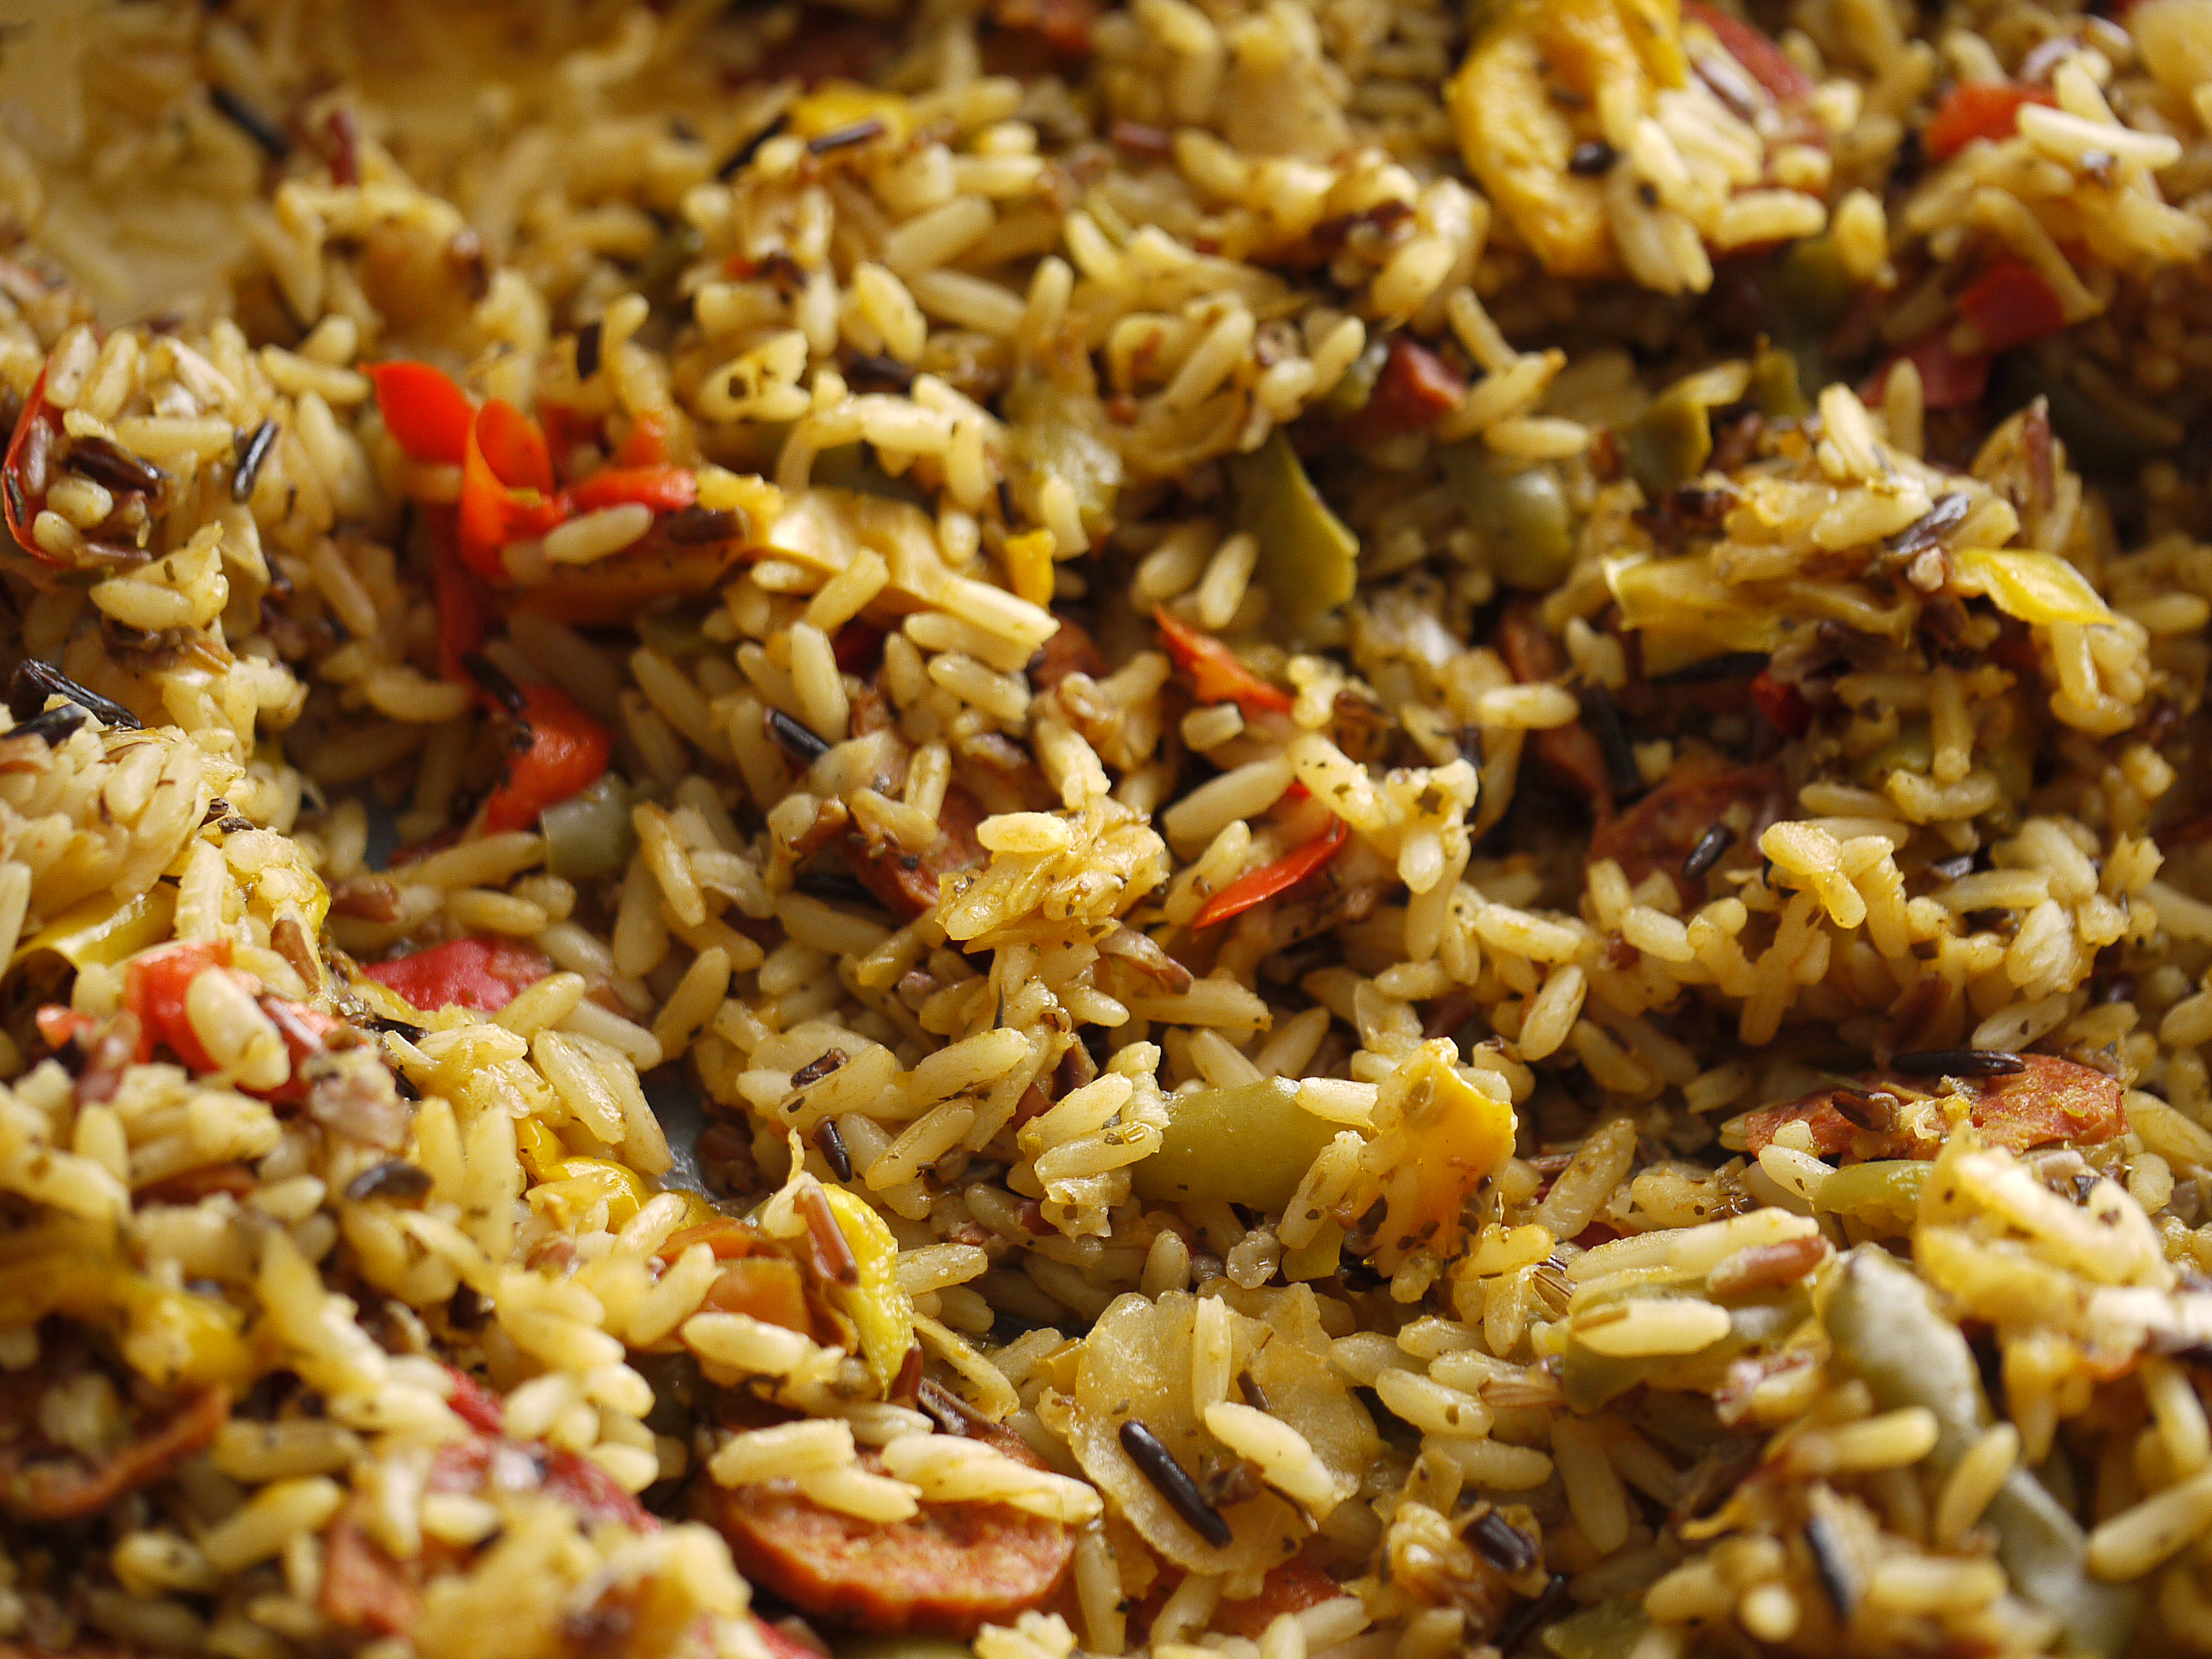
5.  Make rice dishes: Leftover meat, vegetables, fish and beans are great with rice. If you have meat like sausage, chicken, seafood and vegetables leftover, make a jambalaya or paella.  Both are simply rice, broth, tomatoes and spices mixed with meats, seafood and vegetables, so they’re a great way to utilize leftovers.

You can also make a stir fried rice. Take whatever leftovers you have, chop them into bite size pieces, and stir fry them in a little sesame oil just until warm. Add them to cooked rice and stir fry a little more with garlic, soy sauce to taste and onions.

Or you can make a rice casserole. Two types I like to make are a rice parmagiana where I mix the leftover meats and vegetables with rice and beaten eggs and layer the rice mixture alternately with slices of tomatoes and mozzarella “cheese” and bake in a greased pan until golden brown and crispy around the edges, about thirty minutes.

The other way is to make a nice “cheesy” white sauce or a curried white sauce which I mix into rice and the leftover meat or seafood and vegetables and bake in the oven until warm. The curried rice dish is always especially well-liked.

The final way to utilize leftover rice and meat or seafood and vegetables is to make rice muffins. Mix everything up with herbs and black pepper. Beat some eggs and mix them into the rice and leftover mixture, and evenly distribute them among greased muffin tins.  Bake until warm and browned.

6. Make pies: Pot pies and shepherd’s pies are great ways to revamp leftovers. Chop leftover meats and vegetables into bite size pieces. For a pot pie, heat two tbsp of olive oil and stir in 1/4 cup of chosen flour.  Slowly add 2 cups of a chosen broth, and stir until the broth thickens. Add herbs and black pepper and pour over the leftover meat and vegetables. Spread into a pan and top with a biscuit or crust recipe of your choosing. and bake until the biscuits or crust are golden and the pot pie is bubbly.

For a shepherd’s pie, chop the leftovers into bite size pieces and mix them with your favorite tomato soup. Spread into a greased pan and top with mashed potatoes (shepherd’s pie is great to make when you already have leftover mashed potatoes) and a layer of cheddar “cheese”.  Bake until warm and bubbly.

7. Make chili: Throw all the leftover meat and vegetables and beans into a slow cooker. Add tomatoes and chili peppers or spices and garlic and onions and more beans if needed, and just let it simmer all day.

8. Stuff something: If you puree leftover meats and vegetables and beans and add “cheese” and sauteed bread crumbs of your choosing, along with herbs, garlic, and onions, you have a wonderful filling for stuffing mushrooms or eggplants or zucchinis or peppers or squash or anything else you can stuff.

9. Make “cakes”: Finely chopped leftovers mixed with bread crumbs, spices, and beat eggs can be made into seafood or meat and vegetable cakes. Let the mixture meld in the fridge for half an hour, and then form into little patties which you can bake in the oven or fry on the stove top.

10. Make mac and cheese: When all else fails, make your favorite baked macaroni and cheese but add chopped up leftover meat and vegetables before baking. It adds a little something to your mac and cheese as well as extending the amount to accommodate a lot of guests.

Luncheon Rice Dish (made with leftovers)

Ingredients:

2 tbsp olive oil

1/4 cup flour of choice

1 1/4 cup milk of choice

1/2 cup fat free reduced salt chicken broth

1/4 cup white cooking wine

1/2 to 2 tsp curry powder, depending on how much you like curry

1/2 tsp black pepper

2 1/2 cups finely chopped leftover ham, chicken and vegetables

2 to 3 cups cooked brown rice, depending on the ratio of rice to leftovers you want

Optional: cheddar “cheese” of choice

Cooking Instructions:

1. Preheat the oven to 350 degrees. Lightly grease a casserole dish.

2. Heat the olive oil in a saucepan over medium-low heat. Whisk in the flour and brown for a minute.

3. Slowly add the milk and broth. Whisk until the flour is completely mixed in, and cook, stirring constantly, until the mixture has thickened.

4. Add the wine, curry powder and black pepper.

5. Mix the chopped leftovers with the rice and the sauce.

6. Pour into the prepared pan and if using, top with the cheddar “cheese”. Bake for thirty minutes until the entree is warm and bubbly.

Advertisement

Cooking Techniques: Omelets

OLYMPUS DIGITAL CAMERA

“Do I look like a ma’am to you?”

I was 15 and working at a military base Burger King.  I asked a woman, “Ma’am, would you like cream and sugar in your coffee?”

“Ma’am?” she asked. “Ma’am? Do I look like a ma’am to you?”

At 15 I didn’t understand what I had said to make her so upset, but fast forward fifteen years later….

I had been out shopping, using the gift cards I had received for my 30th birthday.  Arriving home, I dropped my bags on the floor and slumped into the nearest kitchen chair.

“What’s wrong?” asked my husband.

“What’s wrong? I’ll tell you what’s wrong.  Pimply-faced teenage clerks kept calling me ma’am.  Do I look like a ma’am to you?”

As the words slipped from my mouth, that woman’s face from fifteen years earlier swam before my face. I had one of those “ah-ha” moments where everything is so clear that you wonder how you hadn’t realized it before.

Those ah-ha moments come in all sorts of situations. I still remember my first cooking “ah-ha” moment. I had taught myself at a young age to make omelettes. I had the basic principles down – mixed eggs; setting the eggs to form a base for the meat and/or cheese and/or vegetables; and folding. My omelets, however, lacked a certain something. They were flat, and quite often they broke when I folded them over. I wanted thick, fluffy omelettes which would hold the filling and provide a good  egg to filling ratio.

One weekend, as a teenager, my parents took me to a conference where the breakfast buffet included the chef making fresh omelettes for the guests right at the table. As I watched him, everything I had been doing wrong became clear.

I was reminded of this particular ah-ha moment this past week when my middle child wanted me to teach her how to make omelettes, so for this post, we’ll look at omelette technique.

Figuring Out Omelettes:

1. Eggs alone verses eggs and liquid: My grandmother always told me that she put water into her eggs because they made them fluffier than putting milk, and if you google omelettes and scrambled eggs, you’ll find “advice” on all sides of the issue. After experimenting, I have not found that adding milk or water affects the fluffy factor at all. Adding any type of liquid simply makes your eggs more “liquidy” and less “eggy”. Whether you add liquid or not is really a taste preference: Eggs blended on their own will be a little dryer. Water added will make for thinner but slightly moister eggs. Milk adds some flavor as well as moisture. Cream makes for a richer omelette. If you do add water or milk or cream, though, don’t add more than 1 tbsp per egg, because too much liquid will only cause liquid to separate out from your eggs.

2. Low heat heat verse higher heat: I always cooked my omelettes over low heat because I feared burning them while I was waiting for them to set, but the chef I watched made his omelettes over a medium-high heat. If you google the subject, you’ll once again find many differing opinions. The one consensus among the opinions and my own experience is that you shouldn’t ever cook eggs over high heat. It doesn’t give the eggs time to set properly, and if you’re not watching like a hawk, they will burn. After experimenting, I’ve found that starting the omelettes on a medium-low heat and turning down the heat to low actually works best for cooking an omelette more quickly while also setting it without burning it.

3. Setting the eggs: I had always set my omelettes by cooking the blended eggs over low heat with a lid on top. This worked well, but it made for a very flat omelette which wasn’t very solid nor was it fluffy. Watching the chef that day, however I realized that he knew the secret. You have to create layers to your egg. To do so, you bring the liquid egg sitting on the top to the more solid bottom part of your egg.

How do you do this? When you pour your egg mixture into your pan, within a minute, it will start to set around the edges. Just it begins to set, you gently lift a sold edge of the omelette and tilt your pan so that the egg that hasn’t solidified can run underneath your omelette. You keep doing this around different parts of your edge until no more eggs will run down underneath. What this does is to create depth to your omelette which makes the omelette thicker and fluffier and more stable for your filling.

4. Pan size and type: Once again, people have a lot of opinions about what you should use for cooking omelettes. The only two things you really need to know are: 1) No matter what type of pan you use, it should be one that your eggs won’t stick to. That doesn’t necessarily mean a nonstick pan. It just means that you need to grease your pan well. I normally put a tsp of olive oil into my pan and make sure I spread it all around the pan, including up the sides. 2) Your pan should be properly sized. A omelette made with two eggs or equivalent should not be cooked in a pan larger than 6 to 8 inches wide. The larger the pan, the more your eggs will spread, and the thinner the omelette will be. Similarly, if you’re making an omelette to share and are using four eggs, you want your pan to be 9 to 10 inches wide so you’ll have proper heat distribution and enough egg space for your filling.

5. Fillings: Few people make omelettes plain with nothing in them. If they want their eggs plain, they simply scramble them. Omelettes are specifically designed for filling, even if it’s simply with cheese. A couple of tips for really good omelettes: 1) Since an omelette usually cooks in about 3 to 5 minutes, if you want your filling to be warm, you should saute them first. I like to saute chopped mushrooms, broccoli, peppers and spinach. My husband likes to saute chopped ham. Whatever you prefer, if you saute the meat or veggies for a minute or two, they’ll be warm and you can season them with the spices and herbs you like for added flavor. 2) If using cheese, shredded is always best. You want something that will melt quickly just from the heat of the folded over egg. About a tablespoon of shredded cheese or cheese substitute for a two egg or equivalent omelette is good.

6. Flavoring: Most recipes for omelettes simply use salt and pepper, but for really good omelettes you should always consider adding herbs or spices, and for health reasons, omit the salt. I make my omelettes with black pepper, chopped chives and paprika. My oldest likes to make hers with cumin. One friend of mine swears by thyme. Another believes only oregano and basil should allowed in an omelette. Experiment and see what flavors you prefer.

Okay, for a recipe. Here’s how I make my omelettes these days:

Omelette

Ingredients:

olive oil (2 tsp, divided)

fillings (meats and/or veggies), about 1/4 to 1/2 cup worth, chopped

seasonings for the filling (pepper, herbs, spices)

two egg whites or 1/4 cup liquid egg whites

one whole egg

1 tbsp flax milk (or whatever you prefer)

ground black pepper (a pinch, about 1/8 tsp)

chopped chives (a good sprinkle, about 1 tsp)

paprika (a dash, about 1/4 tsp)

1 tbsp of shredded Daiya cheddar “cheese”

Cooking Instructions:

1. Spread 1 tsp olive oil in a pan and heat on medium-low.

2. Chop vegetables and meat into small pieces and saute in the pan with seasonings like pepper, oregano, basil, onion powder, whatever, just until the vegetables begin to soften and meats are warm.  Remove from the pan and set aside.

3. Re-coat the pan with another 1 tsp olive oil and warm over medium-low heat.

4. Whisk with a fork: the egg whites, whole egg, flax milk, pepper, chives, and paprika until well blended.

5. Pour the eggs onto the hot pan and let the edges begin to set. Should do so pretty quickly. Once setting begins, lower the heat to low.

6. Using your spatula, gently lift a solidified edge and tilt your pan so some of the liquid egg runs down underneath. Do the same with an edge side opposite the one you just did and continue until your liquid eggs are gone. This will only take a minute.

7. Add your filling to one side of the omelette, and add the shredded cheese on top.  Using a spatula fold the empty side of the egg on top of the filling. Turn the heat off and cover the omelette with a lid for about 30 to 60 seconds.

8. Remove the lid and slide the omelette onto a plate to enjoy.

*NOTE:  If I’m serving omelettes for company, I make three to four, but instead of putting all the cheese and meats into the omelettes, I keep some back for the top. I make the omelettes and then lay them side by side in an ovenproof dish. Then, I sprinkle the remaining cheese and meat on top of the omelettes, sometimes adding thinly sliced tomatoes and spinach leaves on top as well. After I put the dish into the oven at 170 degrees which not only melts the cheese but keeps the omelettes warm until we’re ready to eat.

Cooking Techniques: Puddings

website pudding

Diaper boxes.

When my oldest was a toddler, she loved to play with other people’s toy kitchen sets. I wanted her to have one of her own, but all our money was going toward our first home and diapers.

One day I looked at the number of Costco diaper boxes piling up in the basement and realized just how sturdy those boxes actually were. I had a brainstorm. Maybe I could make a kitchen set using those boxes.

If you had asked me before that day whether I was capable of even thinking up such an idea, let alone following through with it, I would have said, “No way!” Growing up, my best friend was the artsy, creative one. I was the math and science nerd. I didn’t “do” crafts.

As life often proves, though, necessity can breed skill. My daughter loved to play “cook”, and I was going to make it happen for her. Using the diaper boxes, duct tape, and contact paper, I created a complete kitchen for her which included a stove, a fridge, and cabinets. I even added a diner style counter with a cash register to go with it.

That kitchen set lasted us for years, and my daughter loved it. And other people loved it, too. I got so many compliments on that set that, to this day, I am still amazed by what I accomplished.

I share this because recently folks have been telling me that they’re not capable of revamping their recipes like I do; but if I can create a kitchen set out of diaper boxes, folks can most definitely learn how to accommodate their food needs. And I’m going to help folks do it!

For the next several posts, I’m going to focus on technique, specifically the “how-to’s” of certain dishes with special reference to making them healthier and allergy friendly. For today’s post, we’ll look at puddings, because someone recently wanted to know how to make it.

Puddings are ridiculously simple, but people rarely make it homemade. They think it’ll take too much time or that they’ll mess it up. Neither is true. There are, however, some tips to keep in mind.

1. Make sure your recipe is a good one. Don’t just presume that because it is online or in a recipe book that it actually is correct. For some reason there are a lot online and in books that tell you to do things incorrectly like add the cornstarch by itself to the mixture, which leads me to point two.

2. Cornstarch (or another thickener like arrowroot or tapioca starch):  The key to pudding is how you thicken it. Cornstarch is the traditional thickener used, but it should never, ever be added to pudding by itself. Doing so will simply “gummy up” your pudding. Cornstarch is always to be mixed with your sugar (if you’re using it) and salt before adding it to your liquid or it needs to be mixed with liquid before adding it to the rest of your pudding mixture. The same should be kept in mind if you use arrowroot or tapioca starch.

Cornstarch also thickens best when your cooking temperature is even, so a stainless steel pan or enamel covered is best which leads us to point three.

3. Cooking Method: The best way to make pudding is to use a double boiler. I don’t own one so I simply put one pan on top of another. There are two ways of doing so: put a smaller pot filled halfway with water on the bottom and a slightly larger one on top or put water halfway in a pot that another pot will fit snugly into without touching the water below.

Whichever method you use, you want to bring your water to a boil before you begin making your pudding, because the heat from the boiled water is necessary for thickening your pudding.

When you do begin making your pudding, it’s important to stir the mixture well in the beginning so all ingredients are evenly mixed and there are no lumps.  Then, after your mixture has come to a boil, when you’ve added your thickener, it’s important to continually stir the mixture so it doesn’t burn on the bottom, which brings us to point four.

4. Patience: Pudding doesn’t actually take all that long, maybe fifteen minutes or so to completely cook, but when you’re standing over it, stirring constantly, fifteen minutes begins to feel like a long time. When it does, do not be tempted to try to speed things up or to stop stirring. Use the time to relax. Allow yourself the luxury of not being rushed and being able to reflect. Before you know it, the pudding will have thickened, and you’ll have a nice treat.

Okay, for a recipe: I have a chocolate recipe that is simple to make. If you are simply trying to lower your fat intake, use skim milk. The pudding won’t be as rich and thick, but it’ll still be delicious. If you have food allergies, I’ve successfully made this with flax milk, soy milk, almond milk, coconut milk, and rice milk. If you actually use sugar, then use 1/2 cup of sugar instead of the 1/4 Agave. You can also use 1/4 cup Stevia instead or 1/2 cup coconut sugar instead. If you want a really rich pudding, use soy or coconut creamer (or heavy cream if you don’t need to worry about milk allergies or fat intake.)

Chocolate Pudding

Ingredients:

1/4 cup Agave

1 3/4 cup “milk” (whichever type you want to use)

1/8 tsp salt

3 tbsp cornstarch

1/4 cup “milk”

1 oz unsweetened chocolate*

1 tsp vanilla

Cooking Instructions:

1. Bring water to a boil in a double boiler or makeshift boiler.

2. Mix together the agave, 1 3/4 cup milk, and salt. Set aside.

3.  Mix together the cornstarch and the remaining 1/4 cup milk. Set aside.

4. Stirring continually, melt the unsweetened chocolate.

5. Slowly, while continuing to stir, add the agave-milk mixture.

6. Bring the mixture to a boiling point. (Little bubbles will begin to appear at the top. You don’t need to continually stir here, but you’ll want to occasionally stir it until it begins to boil. Usually it’s less than five minutes to bring the chocolate liquid to a boil.)

7. When the mixture begins to boil, re-stir the cornstarch mixture and slowly pour it into the hot chocolate liquid, stirring continually.

8. Continue to stir the pudding until it begins to thicken.  (It’s okay to stop stirring for a few seconds at a time, but not for minutes, because once the pudding begins to thicken, it’ll thicken quickly. Usually it takes less than ten minutes for the cornstarch to thicken the pudding. You’ll know when it’s thickening because it’ll go from its liquid state to more of a solid.)

9. When the pudding thickens, remove it from the heat and stir in the vanilla until well blended.

10. Scrape the pudding into a shallow bowl and press a piece of plastic wrap directly against the top of the pudding. (This keeps that “skin” from “growing” on top of your pudding as it cools.)

11. Cool the pudding completely in the fridge before eating. If you put it into a shallow dish, you can usually eat the pudding within half an hour.

*Chocolate Note: If you don’t have unsweetened chocolate on hand, you can make your own.  Three tablespoons of unsweetened cocoa powder mixed with one tablespoon of shortening or oil is equivalent to one ounce of unsweetened chocolate.

You can also substitute an ounce of chocolate chips which is one tablespoon of chips. This will make for a sweeter pudding so if you don’t want it that sweet, simply reduce the agave by half.

If you like to use carob powder instead, 3 tablespoons of carob powder mixed with 2 tablespoons of water is equivalent to one ounce of unsweetened chocolate.

Also, if you don’t have allergies to it, you can use one of those pre-melted chocolate packages they make these days.

Finally, if you want, you can also just use chocolate flavored soy or rice or almond or coconut milk and skip the chocolate step and leave out the Agave.  I often use unsweetened chocolate soy milk with the Agave so I can control the amount of sweetener.