Holiday Happenin’s: Stick Cookies and Cranberry Drops

holiday-cookies

“You’re done already?”

The summer between my sophomore and junior year of high school, a couple of my girlfriends and I decided to host a special dinner for friends of our who had graduated and would be leaving in August for college or boot camp. We spent hours scouring our parents’ cookbooks and one we took out from the library (no google back then!). On the day of the dinner, we worked for just as many hours in the kitchen, prepping, cooking, baking, and cleaning up.

When the guys arrived for dinner, we proudly served all the dishes we had literally slaved over all day long. Imagine our shock when in the time it took us to finish bringing out the entire meal, they had already scarfed down the food! It couldn’t have been more than 10 to 15 minutes from the time they began eating and the time they finished. (Did I mention these were football and baseball players?)

The guys didn’t understand why we were upset. We tried to explain that they hadn’t taken the time to enjoy the food we had spent so much time preparing, but in hindsight, I realize we 16 year old girls were expecting an awful lot from 18 year old boys!

I was reminded of that dinner when I received an email this week asking if there were any holiday cookie recipes which didn’t require all the rolling and cutting and fancy decorating. The mother explained that her children ate the cookies so quickly that the time put into them seemed far and above what one should invest. Remembering that fateful dinner, I understood exactly where this mom was coming from!

For our family, making the rolled sugar and ginger cookies I have on this site is a family tradition, and spending the day as a family, listening to Christmas music and decorating them together is something we enjoy. But for folks who are looking for an easier and shorter way to have family time, I have a couple of cookies which are just perfect.

The first are stick cookies. They are a peppermint candy cookie which you simply roll into a rectangle, cut into sticks and then bake. If you want to decorate them as my children did in the picture, you simply drop a few sprinkles on top and press. Easy, peasy as my son likes to say!

The other is a cranberry cookie which you just roll into a ball and flatten. On its own, it’s a nice, not too sweet cookie. If your children do want to have fun, though, they can roll them in colored sugar as my kids did in the picture before flattening them.

Cranberry Drops

Ingredients:

2 cups favorite gluten free flour blend

1/2 cup millet flour

1/2 cup sorghum flour

1/2 tsp salt

1 cup Enjoy Life mini chocolate chips

1 cup julienne dried cranberries (If your store doesn’t sell them that way, just chop up regular dried cranberries in a food processor or simply use them whole instead in smaller pieces)

1 cup vegan butter

8 oz Toffuti cream cheese

1/2 cup Agave

2 tsp vanilla

Baking Instructions:

  1. Preheat oven to 350 degrees and line cookie sheets with parchment paper.
  2. Blend together the gluten free flour, millet flour, sorghum flour and salt.
  3. Stir in the chocolate chips and cranberries
  4. Cream the vegan butter until smooth, scraping down the sides.
  5. Add the tofu cream cheese and cream together, scraping down the sides.
  6. Slowly add the agave while the mixer is on low until the mixture is completely blended together, scraping down the sides.
  7. Add the vanilla and mix just until blended.
  8. Add the dry ingredients and mix well.
  9. Form balls made of 1 1/2 tablespoons of dough. If decorating, roll the balls into colored sugar before putting onto the prepared pan. If baking plain, just put onto the prepared pan. For both, flatten the balls a little bit with the bottom of a cup or your clean hands.
  10. Bake for 14 to 16 minutes, rotating halfway through the cookie time until the cookies are puffed and firm to the touch.

Stick Cookies

Ingredients:

1 cup vegan soy free butter

1 cup coconut sugar

1 egg

1 tsp vanilla

1 tsp peppermint extract

2 cup favorite gluten free flour blend

1/2 cup sorghum flour

1/2 cup millet flour

1 1/4 tsp baking powder

1 cup Enjoy Life mini chocolate chips

1/2 cup crushed peppermint candies

Baking Instructions:

  1. Preheat oven to 350 degrees and line cookie sheets with parchment paper.
  2. Cream the vegan butter until smooth. Add the coconut sugar and mix well, scraping down the sides.
  3. Add the egg, vanilla and peppermint extract. Blend well, scraping down the sides.
  4. Blend together the gluten free flour blend, sorghum flour, millet flour, and baking powder.
  5. Mix the dry ingredients into the wet.
  6. Add the chocolate chips and crushed candies.
  7. Chill the dough for one hour.
  8. On parchment paper sprinkled with flour and using a floured rolling pin, roll the dough into a large rectangle that is 1/4 inch think.
  9. If decorating, put sprinkles on top and gently press them into the dough. Cut the dough into sticks. We usually do one inch by 4 or 5 inches.
  10. Put the cookies onto the prepared cookie sheets and bake for 8 to 10 minutes until puffed and becoming stiff to the touch.
  11. NOTE:  If you want, after pressing in the sprinkles, this dough can be cut into shapes and not just sticks.

Advertisement

Spice Suggestion: Ginger

“You’re a gook.”

A recent event brought back some memories of my youth….

Growing up in the 70’s was not the best time to be Asian. It would be many years before I’d be old enough to understand the politics of Vietnam and the generalizing that strengthened the animosity aimed at me; so I remember being confused as to why people kept calling me a vulgar name for being Vietnamese when I was Korean.

As I grew up, I rebelled not only against the prejudice in general but the idea that there weren’t any differences among the various Asian ethnicities.

In some ways, I feel the same today about the spice, ginger. Too often when I mention using ginger, people will say something like, “Oh, it makes sense that you’d like ginger, being Asian and all.”

And when they do, that rebellious feeling sweeps over me again, and I find myself wanting to argue against the notion that ginger is somehow the spice of Asians and should only be relegated to Asian foods….

From medicinal to cooking uses, ginger has been a staple of Greek, Middle Eastern, and European countries for as many centuries as Asian countries. Even in the United States people have used ginger without considering it an “Asian” spice. Colonial recipes for gingersnaps and gingerbread and ginger teas and ginger ales abound as well as records of its use as medicine for upset stomachs.

Admittedly, ginger can be strong, so sometimes folks who are used to bland foods might find it a bit much, but a little can add an abundance of flavor.

In this day and age, ginger comes in a variety of types: fresh, dried, candied, crystallized, freeze dried, pickled, as a paste, and grated in a tube or container for the refrigerator. Fresh ginger obviously is the strongest in terms of flavor, but the convenience of the options with a longer shelf life is not to be underestimated.

If you’re using fresh ginger, you want look for ginger root with a nice, tan color which is firm to the touch and has smooth ends. If it looks dried out or moldy or is soft to the touch, don’t buy it. To use, simply peel and chop as desired. Ginger keeps for a good few weeks in the fridge, and you can even freeze it for several months.

Obviously the more you use, the stronger the ginger flavor, and fresh ginger will have a stronger taste than the other varieties. Ginger is like garlic and onions, and the more ginger cooks, the mellower its flavor becomes, so if you prefer the spicy, pungent taste, add the ginger near the end.

Some ways to use ginger:

1. Homemade ginger tea: The way my mom makes it is to put some fresh ginger root and cinnamon sticks into a pot of water and just let it simmer and steep for a while. Add a little bit of honey, and it’s quite delicious plus has added health benefits.

2. Vegetables: Grated fresh ginger root or ground ginger adds a bit of zest to sauteed vegetables.

3. Omelettes and Egg dishes: Make a paste of ginger and garlic to add a little zing which is quite tasty.

4. Baked goods: Add dried ginger or chopped crystallized ginger to muffins, pancakes, scones, waffles, cakes, cookies, pies, for a new taste.

5. Meats, chicken and fish: Add grated or chopped fresh or freeze dried ginger or ground ginger to any entree to add another flavor dimension to the dish.

6. Soups and dressings: Ginger adds a nice tang to soups and homemade dressings, whether for salad or entrees.

On this site there are already recipes for ginger snaps and a ginger cake and gingerbread, but I’ll add another couple below for a ginger cheesecake which is creamy and spicy and yummy and pumpkin custard squares which my kids love and which are great when you don’t want to take the time to make a pumpkin pie. Both recipes are dairy, gluten, nut and mostly refined sugar free.

Pumpkin Custard Squares

1. Preheat the oven to 350 degrees. Grease an 8.5 x 11 pan with your preferred method.

2.  In a large bowl, mix 1 can of pumpkin with 2 eggs, 1/2 cup agave, 2 tbsp melted butter, 1 cup soy or flax milk, 1 cup water, 2 tsp cinnamon, 1 to 2 tsp ground ginger (if you love ginger, use the higher amount; if not use the smaller amount), 1/2 tsp nutmeg, 1/2 tsp salt, and 1/4 tsp ground cloves.

3. Mix in 3/4 cup Gluten Free Bisquick until the batter is smooth and creamy with no lumps.

4. Pour into prepared pan and bake for 50-55 minutes. The custard will be stiff and dry on top and the custard will be slightly puffed.

5. Cool completely on a wire cooling rack. Cut into squares and serve.

Ginger Spice Cheesecake

(Be sure ALL ingredients are at room temperature for best results!)

1. Preheat the oven to 350 degrees.  Grease a 10 inch springform pan with your preferred method.

2. In a food processor pulse one 8 ounce box of gluten, nut and dairy free gingersnaps until you have crumbs. Mix well with 1/4 cup melted vegan butter. Spread evenly onto the bottom of the prepared springform pan and bake for 10 minutes. Remove from the oven and cool on a wire cooling rack. Decrease the oven temperature to 325 degrees.

3. When cool, carefully cover the outside of the springform pan with aluminum foil and put the pan into a larger pan. Begin to boil some water, enough to fill the pan at least halfway up the springform pan but no more than 3/4 way up (this you’ll do after you put the cheesecake batter into the springform pan).

4. In a mixer, cream four 8 ounce room temperature Tofutti cream cheese packages until smooth and creamy. Use a rubber spatula to scrape the cream cheese down from the sides.

5. Slowly drizzle in 1/2 cup Agave while mixing the cream cheese on low.  Once incorporated slowly mix in one 12 ounce package Tofutti sour cream.

6. Blend in 1/2 cup liquid egg whites. Then 2 whole eggs, being careful to mix them in one at a time.

7. Mix in 1/4 tsp salt, 1/2 tsp nutmeg, 1 tsp cinnamon, and 1 to 2 tsp ground ginger (choose the amount based up on your preference for mild or strong ginger taste).

8. In a food processor chop up crystallized or candied ginger so you have at least 2 tbsp (you can use more if you want). Add to the cheesecake mixture and blend only until the ginger is incorporated.

9. Carefully pour the cheesecake batter into the springform pan. Place the larger pan with the springform pan into the oven. Very carefully pour the boiling water in the larger pan until it’s at lease halfway up the springform pan. You can go as high as 3/4 way up.

10. Bake for one hour and 30 minutes. When done, the cheesecake will be firmer around the edges, the batter won’t be jiggly, and the cheesecake will be slightly puffed.

11. Remove the cheesecake from the oven and from the larger pan. Remove the aluminum foil, and cool for 15 to 30 minutes on a wire cooling rack. Run a knife around the edge of the springform pan and remove the outer side of the pan.

12. Cool the cheesecake completely in the fridge for several hours.


Menu Suggestion: Mini Cheesecakes

website mini cheesecakes

“You’re going to host a brunch? With everything you have going on?”

Even after 20 years together my very introverted husband doesn’t fully understand his more extroverted wife. The more he has happening, the more likely my husband is to retreat to a corner of the house for time alone because being with people drains him. For me, the crazier my life is, the more I need time with people with whom I can “refuel”. Extroverts are invigorated by the energy they get from spending time with people.

So, when I had an article due, a baking workshop to prepare for, several recitals, baseball games, and volunteer meetings to attend, my daughter’s graduation to prepare for, relatives coming in from town, and literally a dozen doctors’ appointments for myself and my children, it seemed a good time to host a brunch of some of my closest friends.

We had a great time, and I received the laughter and love I needed to sustain me through the hectic weeks to follow.

So, when I received a question this past week at a baking workshop about what I’d recommend as the perfect dessert to take to a potluck brunch if you had to make something gluten, dairy and tree nut free, I was ready with an answer: mini cheese cakes.

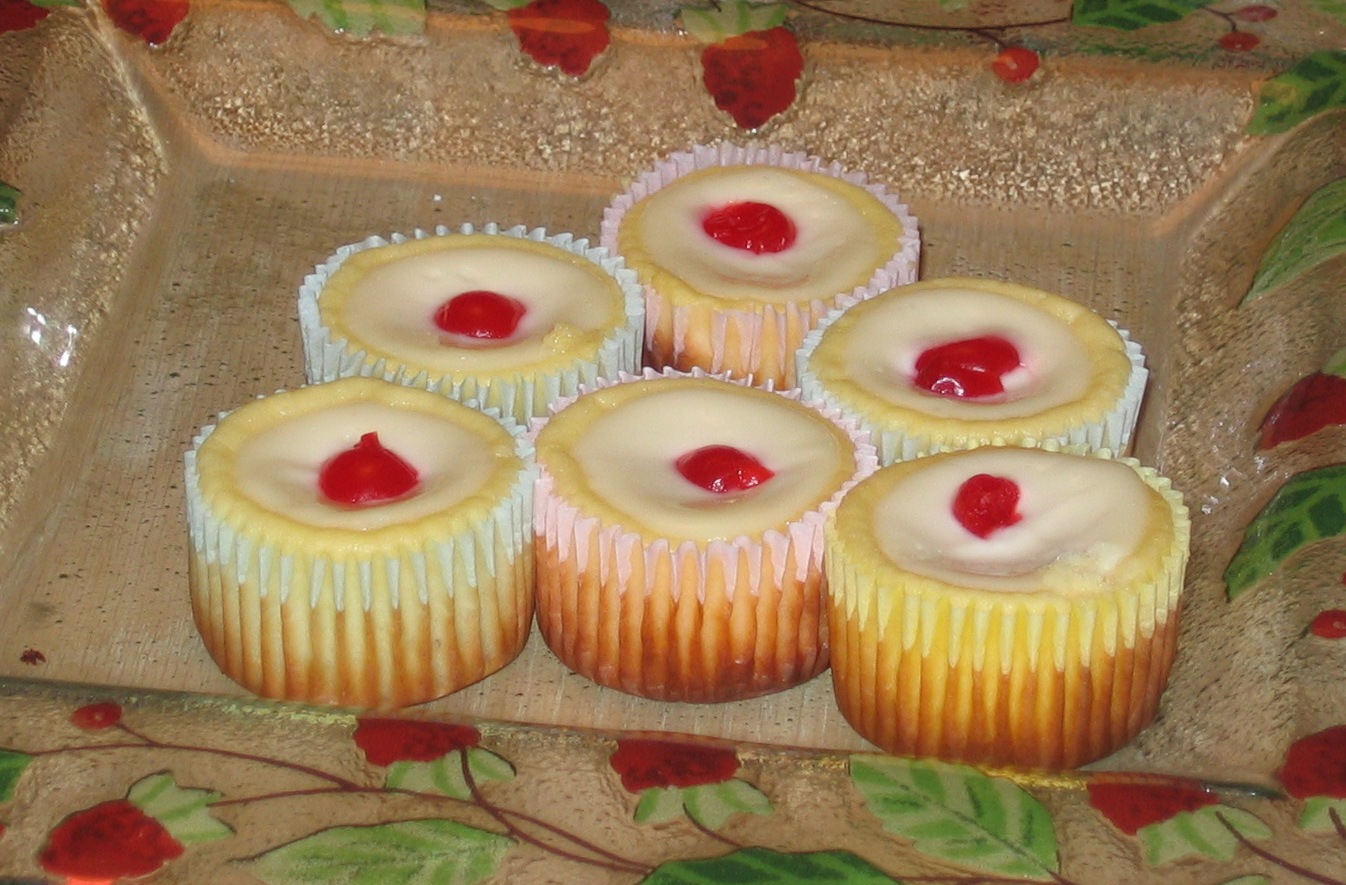
Mini cheesecakes are elegant, easy to make, versatile, and very adaptable for dairy, gluten and tree nut allergies.

Cheesecake Tips:

1. The crust: Crusts for cheesecake can be made from just about anything you want – honey graham crackers, animal crackers, shortbread cookies, oreo cookies coconut cookies, chocolate grahams, ginger cookies  – your imagination is your only limitation. And today we live in a time where all the above can be found in gluten, dairy, and nut free versions at the grocery store. Depending on the type of cheesecake you want to make, you can vary which type of crust you want to make.

Making crusts are ridiculously easy, too. Simply zoop up your cookie or graham crackers in a food processor to make crumbs, or if you don’t have a food processor, put the cookies or crackers into a ziploc bag, seal, and whack away with a rolling pin or the end of an ice cream scoop or a clean meat mallet. then you mix the crumbs with a little bit of a sweetener like Agave or coconut sugar and a little bit of a fat like melted vegan butter or safflower oil. A good ratio is one tablespoon each of the sweetener and fat for every 1/3 cup of crumbs.

And if you’re trying to watch your overall caloric, carb and fat content, you can always omit a crust altogether.

2. The cheesecake filling: Cream cheese is the main ingredient in cheesecake. Today, folks with dairy allergies can find vegan versions of cream cheese at their local grocery store which makes for a nice substitute. Sometimes, though, folks prefer to use straight tofu, which works well, too.

The key tip for making good cheesecake is to be sure all your ingredients come to room temperature. If your cream cheese or tofu are cold, you’ll get lumps in your cheesecake, which doesn’t affect the taste but definitely detracts from the texture. To make sure your cream cheese isn’t affected by other ingredients, all other ingredients like your eggs should be at room temperature, too.

You should always cream the cream cheese alone before adding any of the other ingredients. Sometimes an online recipe will tell you to just mix all the ingredients together. Don’t. It will affect the texture of your cheesecake. Also, if you start to cream your cream cheese and find it’s still too cold, you can then just wait a little bit and resume creaming. If all the ingredients are together, you’ll never get the lumps out, no matter how long you wait.

If you are using cream cheese instead of tofu, you should decide on the type of texture you want for your cheesecake. Using only cream cheese makes for a nice, thick, “cheesy” cheesecake. If you want your cheesecake to be a bit silkier, adding sour cream (a vegan version) or silken tofu or a dairy free yogurt will lighten the cheesecake. If lightening the cheesecake, use a 3 to 1 ratio (e.g. 3 containers of cream cheese with 1 container of sour cream).

If you’re making cheesecake with tofu, I like to use the silken tofu because it’s so much smoother. One 15/16 ounce container is about equivalent to two containers of cream cheese.

3. The flavoring: You can make just about any type of cheesecake you desire. For a regular cheesecake, you only add vanilla and some sweetener. If you want a flavor, you can add lemon or orange zest, unsweetened cocoa powder, raspberry liquor, pureed cooked pumpkin or squash, or even herbs like rosemary and basil for a more savory type of cheesecake.

If you’re in a fun mood, you can make a layered cheesecake where you layer two different flavors of cheesecake or you layer cheese cake on top of a brownie crust or layer a mousse on top of cheesecake. The ideas are endless.

4. The sweetener: Regular cheesecake will often call for about 1/4 cup of sugar per one 8 ounce container of cream cheese. If you’re watching sugar, you can always use Agave (half the amount of sugar called for) or coconut sugar (same ratio as sugar) or Truvia (half the amount you’d use for sugar).

If you’re using Agave, the best way to incorporate it into the cream cheese is to slowly pour the Agave into the creamed cream cheese mixture while the mixer is constantly stirring and incorporating the Agave into the mixture. For coconut sugar and truvia, simply follow the instructions for sugar.

5. The eggs: Most cheesecake recipes call for eggs to help give the cheesecake structure. If you’re trying to watch your cholesterol, you can use egg whites only. The cheesecake will be slighly drier and a little less creamy but some people actually prefer their cheesecake that way.

If you want to avoid eggs altogether you can simply omit the eggs, but you’ll need to add a little flour or cornstarch to give the cheesecake some structure, about a 1/4 cup of either. I make an eggless chocolate cheesecake where I mix  a 6 oz container of yogurt with cornstarch as a substitute for the eggs.

6. Making the cheesecake mini: The advantages of mini cheesecakes are several. For one, they bake up more quickly. Secondly, they are easier to serve. Thirdly, if you’re taking them to a party, they’re easy to transport. Fourthly, when you decorate them, you can vary the toppings and have a variety of cheesecakes to offer to the guests.

To make mini cheesecakes, you just use muffin tins. I like to line my muffin tins with paper liners to prevent any cross-contamination and for easy removal of the cheesecake, but you can also simply spray or grease the tins, too.

7. Baking the cheesecake: Cheesecakes are usually baked at low heat to prevent cracking and drying out the cheesecake. So, the best temperature is about 325 degrees. If you want to have extra smooth cheesecakes and really prevent cracking,it’s best to add some moisture to your oven. You can fill a pan with some hot water and put it at the bottom of your oven while the cheesecakes cook or you can put the muffin tins into another larger pan which is filled halfway with hot water. If you don’t do either of these steps, it is not a big deal. The cheesecakes just may crack a bit on top or be a little less smooth and moist. They’ll still taste good.

When your cheesecake is done, the edges are more done than the center. A knife inserted into the edges should come out clean while the middle should still be less stiff. It shouldn’t be liquidly and runny still, but it shouldn’t be as stiff as the edges. If you overcook the cheesecakes and the middles are stiff and cracked, don’t sweat it. the cheesecakes won’t be as creamy, but they’ll still be good and you can cover the cracks with your lovely toppings.

8. Cooling the cheesecakes: Cheesecake needs to cool before you eat it because it’s the coolin process that finishes cooking the cheesecake center and which solidifies the cheesecake. It’s best to let the cheesecakes cool at room temperature first and then to put them into the fridge.

9. The toppings: You can top your cheesecakes with just about anything. Slices of fruit like strawberries, kiwi or blueberries or a chocolate drizzle or crushed cookies or a whole cookie or a raspberry drizzle or shredded coconut. Your imagination is the only limit.

You can wait to add fruit garnishes until right before you’re taking them to a party or before you serve them so the fruit will stay fresh. Drizzles can be added while the cheesecakes are still warm or when they are cold. Cookies should be put on while the cheesecakes are still soft enough for you to push them down into the cheesecake.

10. Transporting mini cheesecakes: Always keep your cheesecakes in the fridge until it’s time to take them to the party. If you’re going a short distance, you don’t need to worry about keeping them cold, but if you’re going far away, pop them into a cooler with an ice pack or into a bag with a ziplock baggie full of ice.

Since the mini-cheesecakes are muffin size, you can usually fit them into a rectangular tupperware container or cupcake holder and transport them easily.

Mini Cheesecakes

Ingredients:

2 cups Smorables Gluten Free Graham crackers (about one box)
6 tbsp melted vegan butter
3 tbsp Agave
4 8 oz containers Tofutti vegan cream cheese, at room temperature
1/2 cup Agave
2 tsp gluten free vanilla
4 eggs, at room temperature

Baking Instructions:

1. Preheat oven to 325 degrees and line 24 muffin cups with cupcake liners.

2. Crush the graham crackers into crumbs by either processing them in a food processor or by whacking them with a rolling pin or mallet in a sealed bag.

3. Mix the melted butter with the Agave and blend well into the graham cracker crumbs until the crumbs are moist.

4. Evenly divide the crumbs among the muffin cups, about one tablespoon per muffin cup. Press the crumbs down to form an even crust.

5. Bake in the oven for 5 minutes and remove onto a cooling rack.

6. Cream the cream cheese in a mixer until smooth and creamy.

7. Slowly pour in the Agave while continually stirring until all the Agave is incorported into the cream cheese

8. Add in the vanilla.

9. Add the eggs, incorporating them one at a time.

10. Divide the cheesecake filling evenly among the muffin cups. They will be almost to the top of the muffin cups.

11. Bake until the cheesecakes are dry on the edges and mostly firm but still slightly soft in the center. This will take between 15 and 25 minutes depending on the thickness of your muffin tins and how evenly your oven is heating food.

12. Remove the cheesecakes to a wire cooling rack and cool to room temp. Put into the fridge so they can cool completely and solidify.

13. Garnish with fruit or chocolate drizzle or raspberry drizzle or cookie crumbs and serve.