Happy New Year: Dark Chocolate Cheesecake

“It has to be special….”

The ending of a year can generate different emotions. Sadness if the year was especially good. Relief if the year was especially difficult. Anticipation for the possibilities of a new year. Frustration about unfinished items. Guilt about lost opportunities. Joy for upcoming planned opportunities.

When the ending is also the ending of a decade (depending on how you count, that is), those emotions can sometimes be compounded because now we may be looking back at ten years instead of one and experiencing all the same emotions. For me, my husband and I celebrated a milestone this month – 25 years of marriage – so, for me, I find today holding all the joy, sadness, frustration, guilt and anticipation of and for two and a half decades.

As such, when the family talked about what food to have to celebrate tonight’s festivities, the word “special” kept coming up. A special dinner, a special dessert, special treats and snacks. The family wanted something we do not usually have and which would make tonight feel different and festive.

So, to celebrate, I made a dark chocolate cheesecake which is dairy and gluten free, and in case anyone decides they want something “special” in 2020, I am sharing it below. Happy New Year!

Dark Chocolate Cheesecake

Ingredients:

2 cups Enjoy Life dark chocolate chips

3 pkgs dairy free 8 oz cream cheese, at room temperature

3/4 cup coconut sugar or monk fruit sweetener blend

1/2 cup dairy free sour cream, at room temperature

2 tbsp unsweetened Hershey special dark cocoa powder

1 tsp vanilla

4 eggs, at room temperature

1/2 cup coconut milk

1 cup Enjoy Life dark chocolate chips

chopped Enjoy Life chocolate

Baking Instructions:

  1. Preheat oven to 350 degrees. Grease a 9 inch spring form pan with your preferred method and cover the bottom of the pan with two layers of aluminum foil. Boil water, and get out a pan large enough to fit the spring form pan inside.
  2. In a microwave safe container, melt the chocolate chips for a minute and stir until the chips are completely melted and smooth. If you need more time, microwave 15 seconds at a time until you can stir the chocolate to smoothness. Then set aside to cool.
  3. In a mixer, blend together the cream cheese until smooth.
  4. Add the coconut sugar and blend well, scraping the bowl as needed.
  5. Temper the chocolate mixture by stirring in a spoonful of the cream cheese mixture. Then add all of the chocolate into the cream cheese mixture and blend well.
  6. Mix the sour cream with the cocoa powder until completely blended. Then add the chocolate sour cream to the cream cheese batter and mix well.
  7. Add the vanilla and blend.
  8. Add the eggs, one at a time, mixing well after each addition, scraping the bowl as needed.
  9. Pour the chocolate cream cheese batter into the prepared pan and spread evenly.
  10. Place the pan into the larger pan and place into the oven, pouring the boiling water into the larger pan to cover up to at least the halfway point of the spring form pan.
  11. Reduce the heat to 325 degrees and bake the cheesecake for 50 to 65 minutes until the cheesecake is mostly firm with the center being still a bit jiggly.
  12. Turn off the heat and allow the cheesecake to finish cooking and cooling in the oven with the heat off and the door open for about an hour.
  13. Remove the spring form pan from the oven and remove the aluminum foil and put the cheesecake into the fridge to completely cool, at least four hours, preferably overnight.
  14. Put the dark chocolate chips into a microwave safe bowl with the coconut milk and microwave for a minute. Stir until the chips are completely melted and chocolate begins to glisten and become smooth.
  15. Remove the cheesecake from the spring form pan and carefully pour the chocolate ganache over the cheesecake to your liking.
  16. Sprinkle the top of the ganache with chopped chocolate and enjoy!


Advertisement

Thanksgiving Thoughts: Vegan, Gluten Free Butternut Squash Swirl Cheesecake

“Why not?”

A few years back, a cousin of Tim’s brought chocolate cupcakes to a Thanksgiving dinner, and when asked, “Why?”, she responded, “Why not?” Since we knew her fondness for chocolate it made sense, but of course the traditionalists of the family thought it was odd to not bring pie. As someone who is not fond of making pies, I was silently in her camp about a different type of Thanksgiving dessert being okay.

Where I did differ, though, is that I felt if you’re going to upset the apple cart, so to speak, then you might want to keep the “new” dessert in line with Thanksgiving flavors. With that in mind, I looked around for different types of desserts folks tended to make for Thanksgiving and noticed that cheesecake was actually the number one “non-pie” dessert eaten. I found many recipes for swirled cheesecakes using pumpkin which seemed interesting.

I picked one to use as a base and immediately realized that it needed work. The original recipe called for 2 1/2 cups of graham cracker crumbs for the crust, mixed with 1/2 cup of butter, 1/3 cup sugar, and 2 tsp molasses. The filling was 3 packages of cream cheese, 3/4 cup sugar, 1/2 cup maple syrup, 3 tbsp molasses, 1 tsp vanilla, 4 eggs, 2 cups sour cream, 1 tsp spices (cinnamon, nutmeg and ginger), and 1 cup of pumpkin. If you’ve followed my blog for any length of time, you know how I reacted to all that “sugar” in the recipe and that I was figuring out how I could cut the fat to at least some degree.

To revamp the crust, I cut the sugar and molasses completely from it. All graham crackers, whether they are wheat based, gluten free and/or sugar free, have sweeteners of some sort in them. There is no need to add any more. I also reduced the butter to 5 tbsp and swapped a vegan butter because you just need enough to moisten the crumbs so they’ll stick when baking. For the flavoring, which is what I presumed the extra molasses was for, I added 1 tsp of pumpkin pie spice.

For the cheesecake filling, I swapped Tofutti dairy free cream cheese for the regular, and for the sweetener, I mixed 1/4 cup agave with 1/4 cup maple syrup. This kept the maple taste but with much less calories and sugars. I cut the white sugar out completely and reduced the molasses to 1 tbsp which would keep the molasses flavor but also reduce the sugars. To do something about the fat, I reduced the sour cream to 1 1/2 cups (a 12 oz container) and eliminated the eggs entirely so vegan folks could eat it, using instead 1/4 cup of arrowroot starch. Instead of the vanilla I opted to use 1 tsp of pumpkin pie spice plus 1/4 tsp cloves which tend to be the flavors of Thanksgiving pies.

My final swap was to use roasted, pureed butternut squash but that simply was because I didn’t want to make a pumpkin cheesecake when there was going to be pumpkin pie, but folks can always choose to make it a pumpkin cheesecake, should you desire to do so.

Vegan, Gluten Free Butternut Squash Swirled Cheesecake

Ingredients:

For Crust:

2 1/2 cups gluten free crushed graham cracker crumbs

1 tsp pumpkin pie spice

5 tbsp melted vegan butter

For the Filling:

Three 8 oz dairy free cream cheese, at room temperature

1/4 cup maple syrup

1/4 cup agave

1 tsp pumpkin pie spice

1/4 tsp ground cloves

12 oz (1 1/2 cup) dairy sour cream

1 tbsp molasses

1/4 cup arrowroot starch

1 cup pureed roasted butternut squash (or canned squash or pumpkin)

Baking Instructions:

Preheat the oven to 325 degrees. Wrap aluminum foil around the base of a 10 inch spring form pan. Line the bottom of the pan with parchment paper.

  1. Mix together the graham crumbs and pumpkin pie spice. Mix in the melted vegan butter. Spread the mixture evenly on the bottom of the spring form pan and bake for 15 to 20 minutes until the crust is puffed and golden. Set aside to cool.
  2. In a mixer, blend the dairy free cream cheese until smooth.
  3. Mix the maple syrup with the agave and slowly pour it into the cream cheese mixture while the mixer is on low, until all is incorporated into the cream cheese.
  4. Add the pumpkin pie spice and ground cloves and mix.
  5. Add the dairy free sour cream and molasses and mix.
  6. Add the arrowroot starch and mix until it is fully incorporated and the filling is smooth.
  7. Remove 1 1/2 cups of the cheesecake filling and mix that with the pureed butternut squash.
  8. Dot the top of the crust with half of the cheesecake filling, using a spoon to drop spoonfuls onto the crust. Then using another spoon, drop spoonfuls of the squash filling to fill in the holes of the cheesecake filling.
  9. Using the second half of each of the fillings, drop spoonfuls of the squash filling on top of the first layer of cheesecake filling, and drop spoonfuls of the cheesecake filling on top of the layer of squash filling.
  10. Once both batters are completely in the pan, use a knife to swirl through the layers and then smooth down the top of the cheesecake to make sure the batter is even.
  11. Put the spring form pan into a larger pan, pour hot water in the pan until it’s about 1/3 to 1/2 way up the sides of the spring form pan.
  12. Bake for 50 to 60 minutes until the cheesecake is mostly firm and just jiggles a bit in the center.
  13. Turn off the heat, open the oven door and allow the cheesecake to cool for an hour and a half, before removing to the fridge to cool overnight.
  14. Before you are going to serve it, run a knife around the edges to loosen it. If you want to garnish it, to make it prettier, you can sprinkle ground cinnamon or decorate with dairy free whipped cream or do both as I did in the picture.


Holiday Happenings: Cranberry Cheesecake

“If you have a good allergy…”

My oldest went to a restaurant where the menu said, “If you have a good allergy, let your server know.” She texted the picture of this typo to me, and when I responded, she said that it got worse. The rest of the blurb: “We have a glue tin free menu.”

Now, I am willing to believe the owners/managers of the restaurant didn’t catch the mistakes when they were ready to print the menus and afterwards decided that the costs of reprinting were prohibitive, but this serves as a good illustration of why folks with food allergies sometimes feel like people don’t care about their feelings.

After all, what is a good allergy? If we have the bad ones, we can’t let our server know? And it’s great that their food is free of glue and tin but what about those of us who can’t eat gluten? It’s easy for the restaurant owners/managers to wave off the typos, but for folks who live with the reality of life-threatening allergies, their dismissal can feel marginalizing.

Having had four too many anaphylactic episodes in the past several years (for most, it was how I learned I had these new food allergies!), I tend to be rather careful about food other people prepare. It meant a lot to me when my brother called to ask what he’d need to do to make the mashed potatoes dairy free for me to eat. It showed that he was taking my allergy seriously and that he wanted me to be able to partake of all the offerings and not be limited.

For most of us with food allergies, we’re not asking that people always accommodate us. We know it’s not easy and convenient to do at all times. We do ask, though, that folks at least be sensitive to the fact that we have allergies and that it’s not always easy for us either.

I always make sure to make and bring food which I can eat so that it’s not a hardship on the folks hosting, and this Thanksgiving was no exception. I ended up making those mashed potatoes for my brother, simply because I had all the ingredients and he didn’t, but I was glad he asked. And I contributed a green bean dish and homemade cranberry sauce, made without sugar, since I don’t encourage anyone to eat sugar.

There was enough of the cranberry sauce left for me to ponder a use for it, and this past week I made a gluten, dairy free cranberry cheesecake for a brunch I hosted. It came out so creamy, and the tang of the cranberries was a wonderful complement to the cheesecake. I used only one half a cup of agave to sweeten the entire cake. It was so good! I’m going to include the recipe below. For folks who need tips on making cheesecake, see Cheesecake Tips

Cranberry Cheesecake

Ingredients:

3 8 oz containers of tofu cream cheese, at room temperature

1/2 cup agave

1 tsp vanilla

3 eggs, at room temperature

1 cup tofu sour cream, at room temperature

1 cup leftover cranberry sauce (I made a homemade version which was just fresh cranberries with water and two tablespoons of agave)

1/4 cup unsweetened orange juice

Baking Instructions:

  1. Preheat the oven to 325 degrees. Cover the bottom of a cheesecake springform pan with aluminum foil so it’s completely covered. You may need two or three layers to make it waterproof. I used an 8 inch pan for this cake to make it thicker but you can use a 9 inch pan for a thinner cheesecake. You’ll just need to adjust the cooking time. Grease the pan with your favorite method.  I just used vegan butter.
  2. In a mixer, blend the tofu cream cheese until smooth.
  3. Slowly pour in the agave, mixing the entire time on low. Scrape down as needed.
  4. Add the vanilla.
  5. Add the eggs, one at a time, blending well after each addition.
  6. Pour the cream cheese mixture into your prepare pan.
  7. If you want the chunkiness of the cranberries, then just dollop the leftover cranberries on top of the cheesecake and swirl through. If you want it smooth like I made it (because my autistic children have a thing about chunks!), put the leftover cranberry sauce in a blender or food processor with the orange juice and puree. Then dollop onto the cheesecake and swirl.
  8. Put the cheesecake pan into a larger pan and fill the larger pan with hot water, halfway up the cheesecake pan.
  9. Bake in the preheated over until the cheesecake is firm around the edges (a knife inserted will come out clean) but still a bit jiggly in the center. If you used the 8 inch pan, it may take 75 to 80 minutes or so. If you used the 9 inch pan, it may be slightly less. Don’t stress if you “overcook” by a little bit of time. It’ll just give you a firmer cheesecake, which some people actually prefer.
  10. When the cheesecake is done, turn off the oven and leave the door open and let the cheesecake cool in the oven before putting it into the fridge to chill.
  11. When you’re ready to serve it, you can drip some melted allergy-friendly chocolate as I did to make it festive or just serve as is or serve with an allergy friendly whipped cream.
  12. Enjoy!


Changing Tradition: Dairy Free Pumpkin Cheesecake

“What exactly is traditional?”

This year, for the first time in eight years, I did not coordinate the parades and barbecue for the high school band which signifies the end of a “tradition” for our family. Every Memorial Day for these past few years, we’ve woken up early as a family and headed to the high school to drop off a high school child and to receive all the food parents were donating to the barbecue. Then, my remaining children, husband and I would head over to the local camp to set up for the barbecue. After cooking and serving hamburgers, hot dogs and veggie burgers to 70 people, we’d clean everything up, unload at home, and head back to the high school to pick up our child from the second of the two parades marched in on Memorial Day.

What’s varied over the years is the number of my children who helped at the barbecue. First there were two while my eldest marched with the high school band; then there was one as my middle child marched. What didn’t change was the fun we had serving as a family, and the expectations of my youngest who from his youngest years loved going to the camp on Memorial Day. Last year, however, I resigned from 15 years of school volunteer work to focus more on other opportunities.

For my youngest, who is on the autism spectrum, he was torn between wanting to support his mother and what he saw as a loss from participating in our “traditions” for Memorial Day. As it is, this year would have marked a change whether I had continued or not because my husband’s father passed away a couple of weeks ago, and though we spent a week with my mother-in-law for the funeral, my husband and youngest went back this weekend to help her sort through my father-in-law’s office materials.

Before my father-in-law passed away, though, I reminded my son that traditions are what we make, not what make us and that this could be a year to do something slightly different. For some of us, our foods are very traditional… foods we’ve always had and therefore must continue to have. This can make it difficult if we’re trying to eat healthier or suddenly have food allergies altering our food needs.

This week I received an email from someone who has always loved pumpkin cheesecake. It’s apparently been a “tradition” to make it for Memorial Day, a tradition that dates back to his childhood when he wanted pumpkin pie for Memorial Day and his mom wanted to make a cheesecake, and they compromised. This year, however, his mother can no longer eat dairy and has to be careful of her total carb intake due to diabetes, and he feared their tradition would have to end. Instead, he learned that the tradition simply need to be modified.

I used tofu versions of the dairy for the cheesecake, reduced the “sugars” by using a smaller amount of agave instead of a larger amount of sugar, and reduced overall carbs by opting to not have a crust for the cheesecake. The gentleman said his mother enjoyed the cheesecake immensely, so for those of us wondering if change can be good, this cheesecake says, “Yes.”

Pumpkin Cheesecake

Ingredients:

3 (8-ounce) packages tofu cream cheese, at room temperature
¾ cup Agave (If you like your cheesecake sweet, you may want to increase this to one cup)
1 (15-ounce) can pureed pumpkin or two cups cooked, pureed pumpkin
1/4 cup tofu sour cream, at room temperature
2 teaspoons ground cinnamon
1 teaspoon fresh ground ginger
¼ teaspoon ground cloves
4 eggs, at room temperature

Topping: 12 ounce tofu sour cream, 2 tsp agave, 1 tsp vanilla

Cinnamon

Cooking Instructions:
Preheat oven to 350 degrees F. and wrap a 10 inch springform pan with aluminum foil around the bottom. Line the bottom of the pan with parchment paper.

In a mixer, beat tofu cream cheese until smooth. Slowly add the agave with the mixer on low, scraping down the sides as needed. Add the pumpkin puree, sour cream, and the spices. Beat together until well combined. Add the eggs, one at a time, mixing well in between each addition.

Pour into the prepared pan. Spread out evenly and place in a large pan that will hold the springform pan and water. Pour boiling water into the larger pan until it’s about halfway up the springform pan. Bake the cheesecake in the oven for about an 1 hour or so. The cheesecake will be slightly jiggly in the center but a knife inserted near the edge should come out mostly clean.  Mine took an hour and ten minutes. This made a creamy, less dense cheesecake. If you like your cheesecake to be more solid, bake longer until the center is more firm.

Mix the sour cream with the agave and vanilla and spread over the top of the cheesecake. Bake for about another ten minutes. You just want the topping to solidify a bit.

Remove from the oven and let sit for 15 to 30 minutes. Cover with plastic wrap and refrigerate for at least 4 hours until the cheesecake is set. Remove from the springform pan and sprinkle with cinnamon on top before serving.

Recipe Revamping: Banana Cheesecake

“I wouldn’t have thought of that!”

At a baking workshop I had last week where 32 people were present, the comment I kept hearing in response to my answers to their questions was “I wouldn’t have thought of that!”

I found this intriguing, because I don’t really think it’s that folks wouldn’t have thought of it. I think it’s more that sometimes we tend to accept things as they are as opposed to giving any thought to whether something can done be different.

This week I received an email asking if I could revamp a recipe, which always thrills me. I enjoy thinking about a recipe and seeing if I can make it healthier, allergy friendly, and yummy all at the same time.

It was a gentleman writing in this time about a cheesecake recipe. I was interested immediately simply because it was a banana cheesecake which I had never actually heard of before. He needed it to be dairy, nut and gluten free, but he also wanted to cut back on the refined sugar and fat.

The bananas:

Original Recipe: 2 large bananas, diced, cooked with 1 tbsp lemon and 2 tbsp brown sugar

I thought about the folks who said they “wouldn’t have thought of that” because one of the first changes I made to the recipe was to roast the bananas. The recipe called for cooking the bananas on the stove top with sugar. The easiest way to sweeten bananas without the use of sugar is to bake them so their own sweetness becomes concentrated.

The idea of roasting a banana, though, isn’t something people usually consider for home cooking. It’s quite easy to do, though. There are several different ways to go about it, but the way I prefer is to simply bake the banana in its peel. You preheat the oven to 400 degrees, put your bananas in a line on a cookie sheet and bake for about 20 minutes. Allow the bananas to cool until you can safely peel them, and then use the bananas as you’d like.

The crust:

Original Recipe: 1 1/2 cup finely crushed vanilla wafers, 1/2 cup chopped pecans, and 1/4 cup butter (plus 17 vanilla wafers for the sides and 1/2 cup coarsely topped wafers for the top) 

This recipe called for the use of a lot of vanilla wafers.  It needed crushed wafers for the crust, then more wafers for the sides, and finally coarsely chopped wafers for the topping. This is a lot of sugar, fat, and just plain empty carbs. It’s also not great for folks with food allergies.

For folks who want to use vanilla wafers, Kinnikinnick actually makes a gluten, dairy, nut free vanilla wafer. I’d recommend just using it for the crust, though, and forgetting about the sides and top. That alone will cut back on the calories, sugar and fat. Since I’m always in favor of adding something better if possible, I opted to use Jo-Sef’s gluten, dairy, nut free dark chocolate cookie squares, because these cookies are made with soy flour, which adds protein, and not just the usual rice flour. In addition, because it’s a dark chocolate cookie, the sugars in it are much less. I zooped an 8 oz box of cookies in my food processor for the crust.

To make it dairy free, I used a vegan butter instead. Since 1/4 cup is actually a reasonably small amount compared to most crust recipes, I kept the amount as is. To make it nut free, I simply omitted the pecans altogether, which also cuts back on the total fat, though nuts are considered good fats in general.

(FYI: If you want to make your own vanilla wafers, Gluten Free on a ShoeString actually has a gluten free recipe which can easily be adapted to also be dairy, nut, soy, etc… free.http://glutenfreeonashoestring.com/nilla-wafers/)

The filling:

Original Recipe: 3 8 oz pkgs cream cheese, 1 cup white sugar, 3 large eggs, 2 tsp vanilla

Since the crust was made with a store bought cookie which had some sugar, even if less than other cookies, I omitted sugar from the cheesecake filling, choosing to use Agave instead because I could then use half the amount of what would have been required of sugar.

To cut back on the fat, I replaced the whole eggs with egg whites, and to make it dairy free, I simply used tofu cream cheese instead. The vanilla, I kept as is.

The topping:

Original Recipe: 1/2 cup coarsely crushed vanilla wafers

As mentioned earlier, omitting the use of more vanilla wafers cuts back on the sugar and fat. It does, though, leave the cheesecake a little naked. So, I opted to make a sour cream topping with some amendments.

Usually a sour cream topping for a cheesecake calls for 2 cups of sour cream. I opted to use only one cup, though, to cut back on overall calories, and I used tofu sour cream to make it dairy free.

Sour cream topping usually also calls for anywhere from 1/4 cup to 1/2 cup of sugar. I used 2 tbsp of coconut sugar, and I added 1/2 tsp of cinnamon for some additional flavoring.

The size:

Original Recipe: Bake in a 9 inch spring form pan.

A simple trick for cutting back on overall calories, fat and sugar, is to change the size of the cheesecake. Instead of using a 9 inch pan, I used a 10 inch, which slightly spreads the cheesecake to thin the overall layer out. So when you go to cut the cheesecake, you can cut it into more slices which have a little less height to them, thus making for a little less of everything you’re eating.

Banana Cheesecake

Ingredients:

one 8 oz package chocolate cookie wafers (I used Jo-Sef’s gluten, dairy, nut free ones)

1/4 cup vegan butter, melted

three 6 inch bananas

three 8 oz packages Tofu cream cheese, at room temperature

1/2 cup agave

3/4 cup liquid egg whites, at room temperature

2 tsp vanilla extract

1 cup tofu sour cream

2 tbsp coconut sugar

1/2 tsp cinnamon

Baking Instructions:

1. Preheat the oven to 350 degrees.

2. In a food processor process the chocolate cookie wafers into crumbs. Empty the crumbs into a bowl and mix them with the melted butter.

3. Put the chocolate cookie mixture into a 10 inch springform pan, and evenly press the mixture into a bottom crust for the cheesecake.

4. Bake the crust in the preheated oven for 10 minutes. Remove and allow it to cool.

5. Increase the oven heat to 400 degrees.

6. Line the three bananas on a cookie sheet, and bake them for 20 minutes. They will be black and soft with some moisture oozing out of them when they’re done. Allow the bananas to cool.

7. Decrease the oven to 325 degrees.

8. In a mixer, gently blend the cream cheese until it’s smooth.

9. With the mixer on low, slowly pour in the agave until it’s all incorporated into the cream cheese. Be sure to use a rubber spatula to scrape the sides and bottom occasionally.

10. With the mixer on low, slowly add the egg whites until they’re fully incorporated into the cream cheese batter.

11. Add the vanilla.

12. Remove the roasted bananas from their peels, and mash them. Then add them to the cream cheese batter until they’re fully mixed in. Be sure to scraped down the sides and bottom with a rubber spatula once or twice.

13. Completely cover the bottom of the springform pan with aluminum foil and put the pan into a larger pan which will hold it.

14. Gently pour in the cream cheese batter into the prepared pan, and level off the filling so it’s even.

15. Pour boiling water into the larger pan until the water is halfway up the sides of the springform pan.

16. Bake in the oven for one hour.

17. Mix the sour cream with the coconut sugar and cinnamon. When the cheesecake is done at the hour mark, carefully spread the sour cream mixture evenly over the top of the cheesecake, and bake for 10 minutes.

18. Remove the cheesecake from the larger pan when it’s done, and allow it to cool for about half an hour to an hour on a cooling rack.

19. Remove the outside of the springform pan, and put the cheesecake into the fridge to completely cool. Usually it needs at least three to four hours.

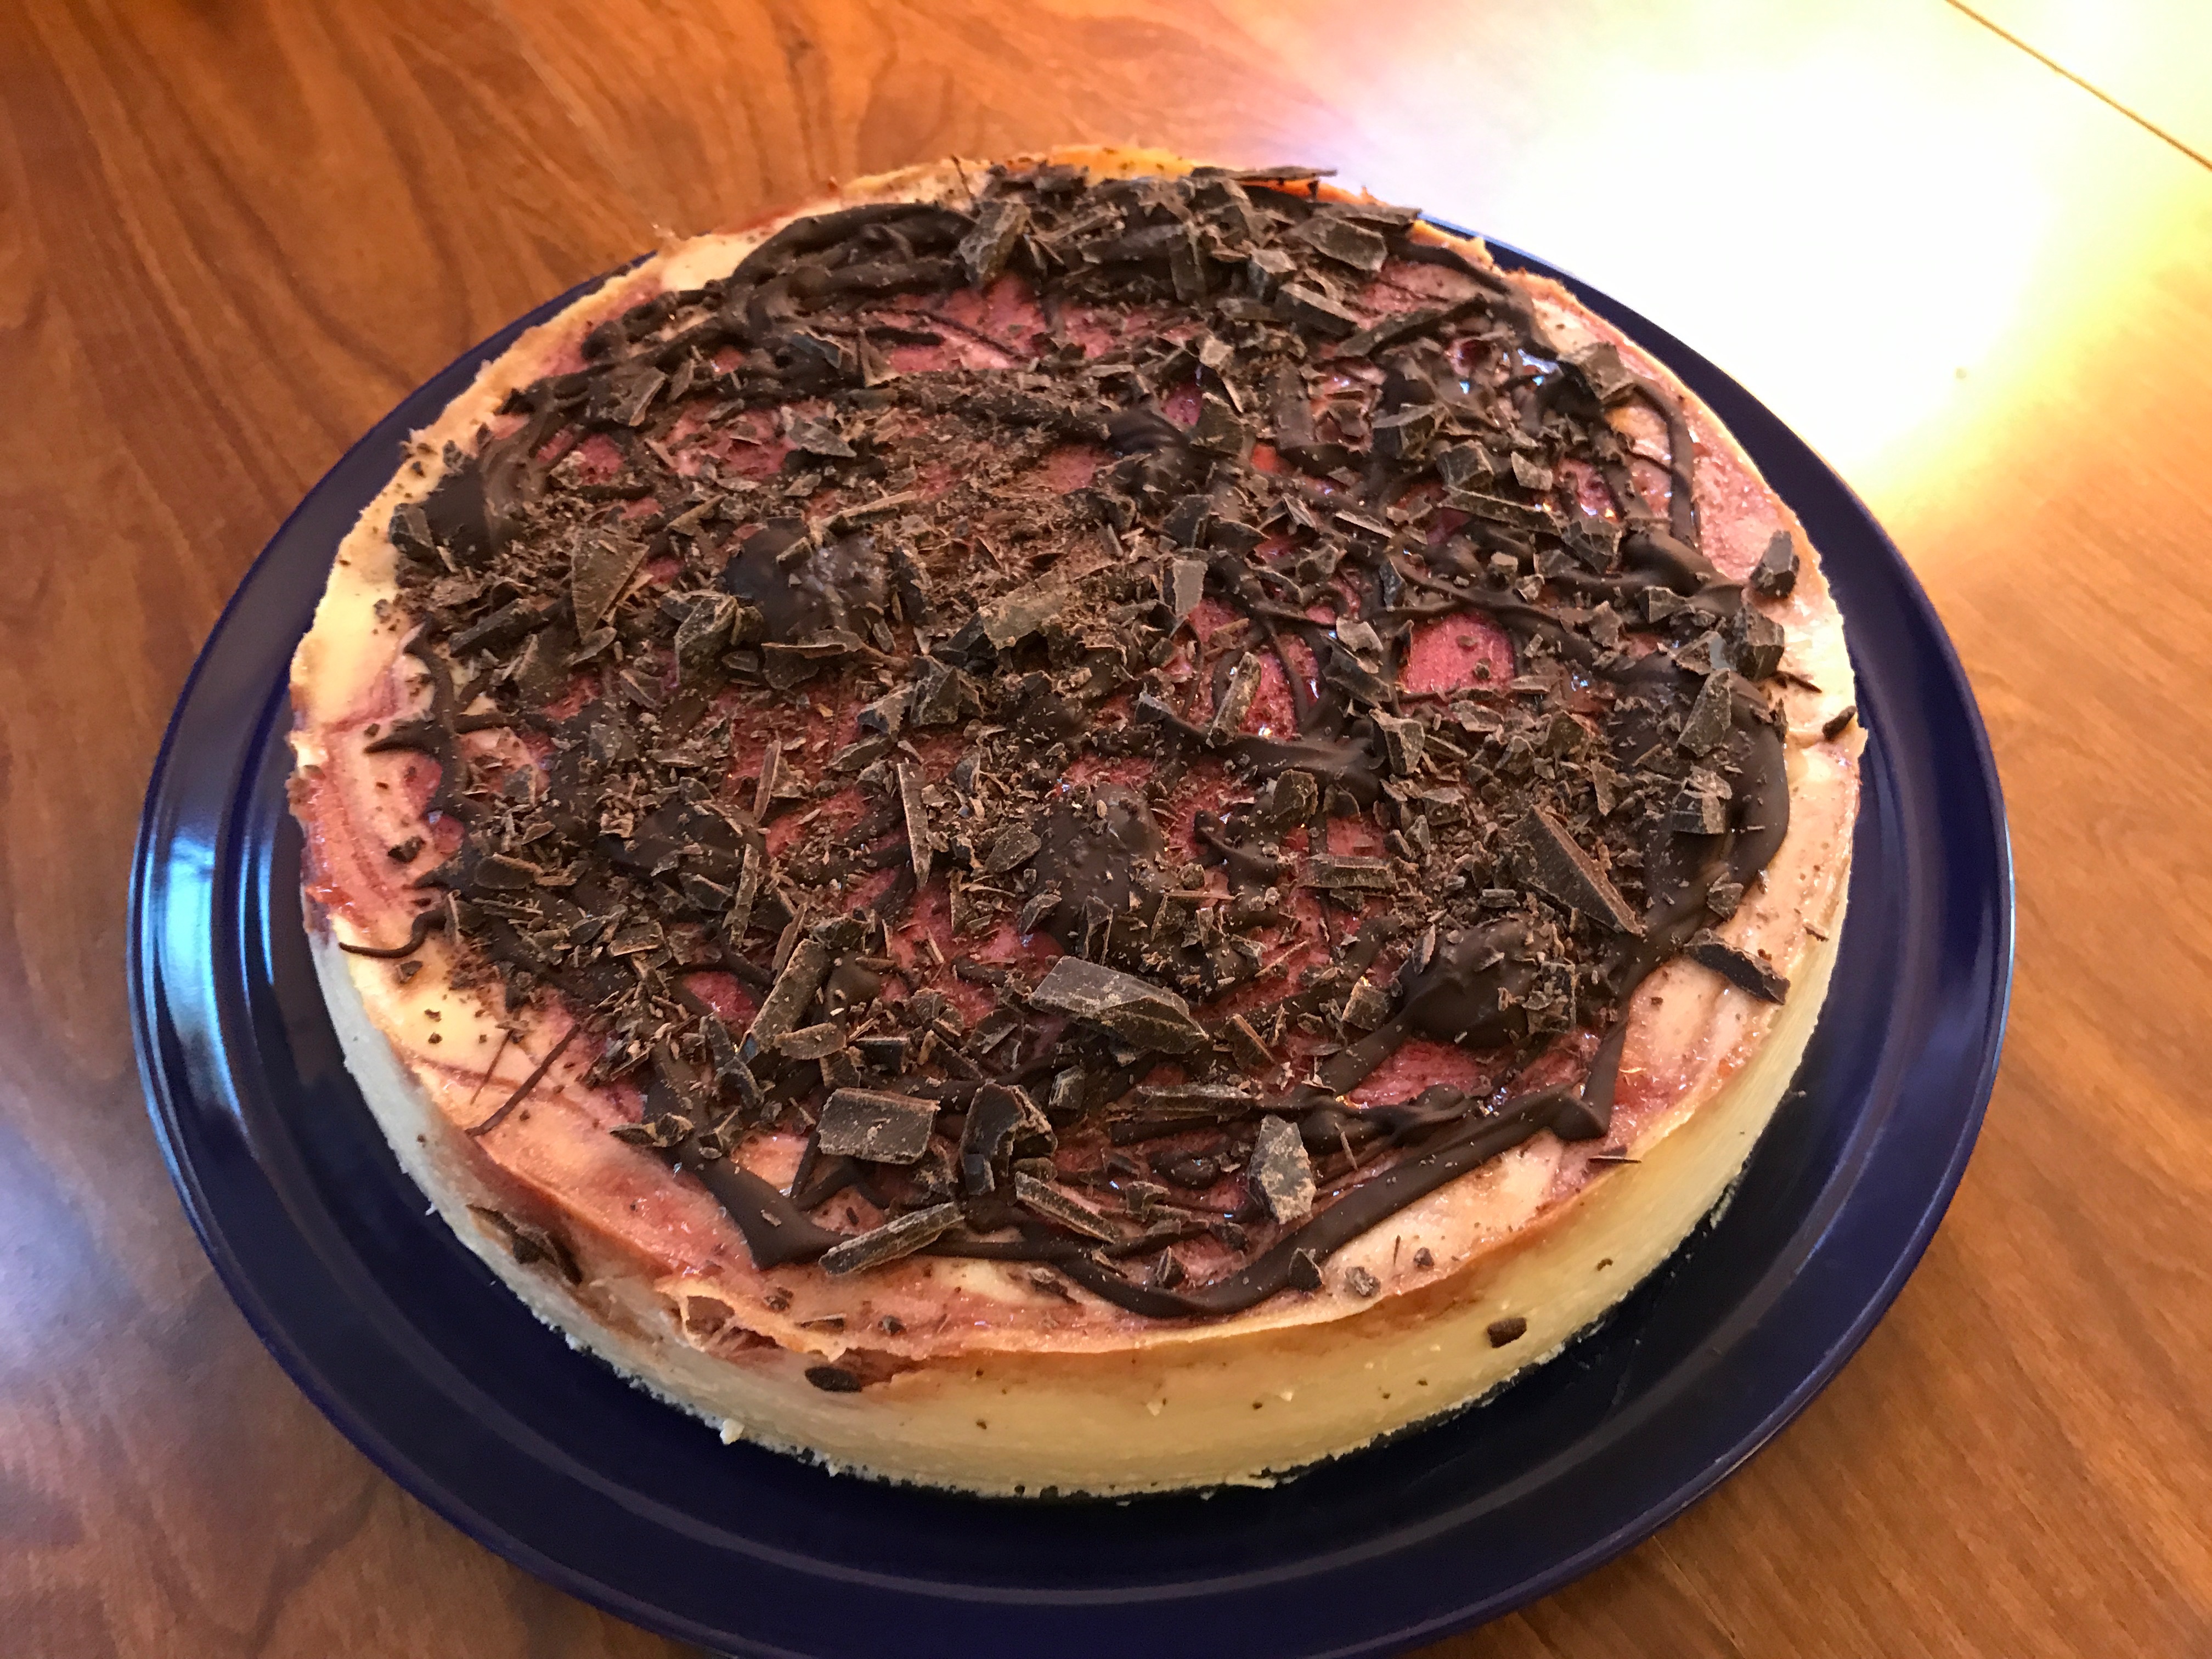
20. Slice, serve, and enjoy!


Spice Suggestion: Ginger

“You’re a gook.”

A recent event brought back some memories of my youth….

Growing up in the 70’s was not the best time to be Asian. It would be many years before I’d be old enough to understand the politics of Vietnam and the generalizing that strengthened the animosity aimed at me; so I remember being confused as to why people kept calling me a vulgar name for being Vietnamese when I was Korean.

As I grew up, I rebelled not only against the prejudice in general but the idea that there weren’t any differences among the various Asian ethnicities.

In some ways, I feel the same today about the spice, ginger. Too often when I mention using ginger, people will say something like, “Oh, it makes sense that you’d like ginger, being Asian and all.”

And when they do, that rebellious feeling sweeps over me again, and I find myself wanting to argue against the notion that ginger is somehow the spice of Asians and should only be relegated to Asian foods….

From medicinal to cooking uses, ginger has been a staple of Greek, Middle Eastern, and European countries for as many centuries as Asian countries. Even in the United States people have used ginger without considering it an “Asian” spice. Colonial recipes for gingersnaps and gingerbread and ginger teas and ginger ales abound as well as records of its use as medicine for upset stomachs.

Admittedly, ginger can be strong, so sometimes folks who are used to bland foods might find it a bit much, but a little can add an abundance of flavor.

In this day and age, ginger comes in a variety of types: fresh, dried, candied, crystallized, freeze dried, pickled, as a paste, and grated in a tube or container for the refrigerator. Fresh ginger obviously is the strongest in terms of flavor, but the convenience of the options with a longer shelf life is not to be underestimated.

If you’re using fresh ginger, you want look for ginger root with a nice, tan color which is firm to the touch and has smooth ends. If it looks dried out or moldy or is soft to the touch, don’t buy it. To use, simply peel and chop as desired. Ginger keeps for a good few weeks in the fridge, and you can even freeze it for several months.

Obviously the more you use, the stronger the ginger flavor, and fresh ginger will have a stronger taste than the other varieties. Ginger is like garlic and onions, and the more ginger cooks, the mellower its flavor becomes, so if you prefer the spicy, pungent taste, add the ginger near the end.

Some ways to use ginger:

1. Homemade ginger tea: The way my mom makes it is to put some fresh ginger root and cinnamon sticks into a pot of water and just let it simmer and steep for a while. Add a little bit of honey, and it’s quite delicious plus has added health benefits.

2. Vegetables: Grated fresh ginger root or ground ginger adds a bit of zest to sauteed vegetables.

3. Omelettes and Egg dishes: Make a paste of ginger and garlic to add a little zing which is quite tasty.

4. Baked goods: Add dried ginger or chopped crystallized ginger to muffins, pancakes, scones, waffles, cakes, cookies, pies, for a new taste.

5. Meats, chicken and fish: Add grated or chopped fresh or freeze dried ginger or ground ginger to any entree to add another flavor dimension to the dish.

6. Soups and dressings: Ginger adds a nice tang to soups and homemade dressings, whether for salad or entrees.

On this site there are already recipes for ginger snaps and a ginger cake and gingerbread, but I’ll add another couple below for a ginger cheesecake which is creamy and spicy and yummy and pumpkin custard squares which my kids love and which are great when you don’t want to take the time to make a pumpkin pie. Both recipes are dairy, gluten, nut and mostly refined sugar free.

Pumpkin Custard Squares

1. Preheat the oven to 350 degrees. Grease an 8.5 x 11 pan with your preferred method.

2.  In a large bowl, mix 1 can of pumpkin with 2 eggs, 1/2 cup agave, 2 tbsp melted butter, 1 cup soy or flax milk, 1 cup water, 2 tsp cinnamon, 1 to 2 tsp ground ginger (if you love ginger, use the higher amount; if not use the smaller amount), 1/2 tsp nutmeg, 1/2 tsp salt, and 1/4 tsp ground cloves.

3. Mix in 3/4 cup Gluten Free Bisquick until the batter is smooth and creamy with no lumps.

4. Pour into prepared pan and bake for 50-55 minutes. The custard will be stiff and dry on top and the custard will be slightly puffed.

5. Cool completely on a wire cooling rack. Cut into squares and serve.

Ginger Spice Cheesecake

(Be sure ALL ingredients are at room temperature for best results!)

1. Preheat the oven to 350 degrees.  Grease a 10 inch springform pan with your preferred method.

2. In a food processor pulse one 8 ounce box of gluten, nut and dairy free gingersnaps until you have crumbs. Mix well with 1/4 cup melted vegan butter. Spread evenly onto the bottom of the prepared springform pan and bake for 10 minutes. Remove from the oven and cool on a wire cooling rack. Decrease the oven temperature to 325 degrees.

3. When cool, carefully cover the outside of the springform pan with aluminum foil and put the pan into a larger pan. Begin to boil some water, enough to fill the pan at least halfway up the springform pan but no more than 3/4 way up (this you’ll do after you put the cheesecake batter into the springform pan).

4. In a mixer, cream four 8 ounce room temperature Tofutti cream cheese packages until smooth and creamy. Use a rubber spatula to scrape the cream cheese down from the sides.

5. Slowly drizzle in 1/2 cup Agave while mixing the cream cheese on low.  Once incorporated slowly mix in one 12 ounce package Tofutti sour cream.

6. Blend in 1/2 cup liquid egg whites. Then 2 whole eggs, being careful to mix them in one at a time.

7. Mix in 1/4 tsp salt, 1/2 tsp nutmeg, 1 tsp cinnamon, and 1 to 2 tsp ground ginger (choose the amount based up on your preference for mild or strong ginger taste).

8. In a food processor chop up crystallized or candied ginger so you have at least 2 tbsp (you can use more if you want). Add to the cheesecake mixture and blend only until the ginger is incorporated.

9. Carefully pour the cheesecake batter into the springform pan. Place the larger pan with the springform pan into the oven. Very carefully pour the boiling water in the larger pan until it’s at lease halfway up the springform pan. You can go as high as 3/4 way up.

10. Bake for one hour and 30 minutes. When done, the cheesecake will be firmer around the edges, the batter won’t be jiggly, and the cheesecake will be slightly puffed.

11. Remove the cheesecake from the oven and from the larger pan. Remove the aluminum foil, and cool for 15 to 30 minutes on a wire cooling rack. Run a knife around the edge of the springform pan and remove the outer side of the pan.

12. Cool the cheesecake completely in the fridge for several hours.


Recipe Makeover: Lemon Cheesecake

“Why a Meyer?”

As my mother tells the story, sucking on lemons was the only thing which helped with the morning sickness she had while pregnant with me. Interestingly enough — for those who believe the studies which say that children get their tastes from what their mothers eat during pregnancy — I am rather fond of the taste of lemon, and though I didn’t eat a lot of lemons while my son was in utero, he, like my mother, loves to suck on a fresh lemon.

When we had company last weekend, I wanted a dessert which would complement the tastes in the Moroccan chicken with figs I was making as the main entree. As I considered and discarded several options, I came across a recipe for a Meyer lemon raspberry cheesecake. My son, of course, was all for the idea, though he did inquire what a Meyer lemon was.

For folks who might not be familiar with them, Meyer lemons are lemons which have crossed with mandarin oranges. As such, while still lemony, they’re not as sour as a true lemon. The resulting taste is really quite nice if you like lemons but aren’t fond of the pucker.

The original recipe, though, needed some tweaking if our family was going to be able to it, and the result was a delicious cheesecake which even my daughter who doesn’t like cheesecake found herself enjoying.

Original Recipe for the Crust:

1 box quadruple chocolate chunk cookies, 1 box pure butter shortbread lemon thins, 2 tablespoons sugar, 4 tablespoons butter

Revamping the Crust:

1. The cookies: Here’s my thinking on crusts for cheesecake: The crust it there as a contrast to the cheesecake. The cheesecake is the glory. So, I decided there was no reason to use such decadent cookies and opted for simply graham crackers instead. Also, because I needed the crust to be gluten free, I used Smoreables gluten free version.

2. The sugar: If you’re using cookies or graham crackers which already have a sweetener in them, why would you add more sugar? I simply omitted it altogether.

3. The butter: Since I needed the crust to be dairy free, I opted to use the Earth Balance vegan, soy free version.

Original Cheesecake Recipe:

4 8 oz blocks of cream cheese, 1 cup sour cream, 4 large eggs, 1 cup sugar, 2 tbsp Meyer lemon zest, 1/2 cup Meyer lemon juice, 1/4 tsp salt

Revamping the Cheesecake:

1. The cream cheese: Since I don’t have a soy allergy, I chose to simply substitute the cream cheese with the Tofutti soy cream cheese which works rather well in cheesecake.

2. The sour cream: Again, not having a soy allergy, I was able to use the Tofutti brand sour cream.

3. The eggs: Since whenever possible, I like to cut back on fat and cholesterol, I opted to use 2 eggs and 4 egg whites instead of four whole eggs.

4.  The sugar: Since I don’t use sugar when I bake, I decided to use Agave instead which meant I could cut back on the sweetener by half the amount.

5. The lemon zest and juice: I’m not actually all that fond of zest in my cheesecake, because I don’t like how it looks, so I omitted the zest and only used freshly squeezed Meyer lemon juice. The recipe said 3 to 4 lemons would be needed for 1/2 cup, but my husband got a whole cup’s worth out of four lemons, which worked out since I then used the other half in my Moroccan chicken recipe.

Original Topping:

10 oz fresh or frozen raspberries, 1/4 cup sugar, 1/4 cup water.

Revamping the Topping:

Okay, I’ve already confessed that I don’t like to make more work for myself than necessary. When I looked at the recipe, telling me to cook the raspberries for 15 minutes and then push the sauce through a sieve, only to have to bring the sauce to a boil again, I decided then and there that I wasn’t doing any of that.

Instead, I decided that good ol’ Polaner All Fruit was going to do the trick, and as I looked at my selection, I actually decided that I’d rather have the combination of blueberry and lemon over raspberry and lemon, so I simply microwaved some blueberry Polaner All Fruit and drizzled it over the top of the cheesecake.

The end result, as I already mentioned, was a huge hit with our guests and with our family. My son is already asking that I make it again!

Gluten, Dairy Free Lemon Blueberry Cheesecake

Ingredients:

one 8 oz box of gluten free graham crackers

1/4 cup vegan butter

four 8 oz containers vegan cream cheese, at room temperature

1/2 cup agave

1 cup vegan sour cream, at room temperature

2 eggs plus 4 egg whites, at room temperature

1/2 cup Meyer lemon juice, squeezed fresh from 2-4 lemons

1/4 tsp salt

blueberry Polaner All Fruit

Cooking Instructions:

1. Preheat the oven to 350 degrees, and grease the bottom of a 10 inch springform pan with favorite method of greasing. Cover the outside of the pan well with aluminum foil.

2. Pulse the graham crackers in a food processor until you have graham crumbs. Mix the crumbs with the butter and pat into the bottom of the springform pan.

3. Bake the graham crust for 10 minutes and remove to a cooling rack to cool.  Lower the oven temperature to 325 degrees.

4. Boil water and get out a pan which is large enough to hold your springform pan, which you’ll immerse in water halfway for the cooking.

5. In a mixer, whip the cream cheese just until smooth.

6. With the mixer on low, slowly drizzle in the agave until it’s all incorporated into the cream cheese.

7. Add the sour cream and mix only until blended.

8. Add the eggs and egg whites, one at a time, blending after each addition just until incorporated.

9.  Scrape down the sides of the cheesecake batter, and add the lemon juice and the salt.  Combine well.

10. Scrape the cheesecake batter into the prepared springform pan and smooth the top.

11. Put the springform pan into the larger pan and put the pan into the oven. Carefully pour the boiling water into the larger pan until the water is halfway up the springform pan.

12. Bake the cheesecake for an hour and a half.

13. Remove the cheesecake from the larger pan and put onto a cooling rack to cool for 15 minutes. Remove the foil.

14. Gently run a butter knife around the end of the springform pan to loosen the cheesecake from the pan and remove the outer edge of the springform pan.

15. Cool the cheesecake in the fridge for at least six to eight hours or overnight.

16. Remove the cheesecake from the fridge and put onto a larger platter. Microwave 1/4 cup to 1/2 cup of the blueberry Polaner All Fruit and drizzle it prettily over the cheesecake so the all fruit runs down the sides.


“Eggs”cellent News: Substituting for Eggs

website eggs three

Eggs.

How in the world could my nine month old son be allergic to eggs, when he’d never eaten one before?  I would never receive an answer to that question, but I would learn how devastating it can be to watch your child stop breathing.

My son developed eczema as a baby, and given our family history of food allergies and intolerances, our pediatrician suggested I have him tested for food allergies.  She said many babies with eczema are allergic to milk, and I’d be better off knowing if he was sooner as opposed to later.

So, we had a blood test done, and the good news was that he was NOT allergic to milk.  The bad news was that he was somehow allergic to eggs and peanuts.  The pediatrician wanted me to bring him into the office so she could test exactly how allergic he was to eggs and peanuts.

On our appointment day, she carefully injected my son with eggs first, and to my horror, my sweet baby boy’s face and throat began to swell as he started to gasp for air.  Being a good doctor, our pediatrician immediately administered an antidote, and both my son and I began to breathe again.  She turned to me and announced, “Anaphylaxis.  He’ll need an epi-pen.  Ready to try the peanuts?”

What I thought:  “Are you insane?”  What I replied:  “Well, since we already know he needs the epi-pen for the eggs, can’t I just work on the assumption that he does for the peanuts as well?”

To my relief, she agreed.

What do eggs do?

So, what are cakes like without eggs?  Dry, dense, and without structure!  Doesn’t sound very appetizing, does it?  Eggs act as both leaveners and emulsifiers, which essentially means they help our baked goods to be light and fluffy.  They increase the amount of air we can incorporate into our batters which increases the volume, tenderness and appearance of the final baked product.  Eggs are also, if you remember our “chemistry” of baking, part of the liquid equation in cakes, which means they keep our cakes moist.

As a general rule, eggs are considered a good food. They’re an excellent source of protein and contain a lot of nutrients the body needs.  Unfortunately, whole eggs also have fat and cholesterol in the yolks which many folks need to avoid for a variety of health reasons.  Other people like my son are allergic to and cannot eat the whites of the egg.

Given what eggs do for baking, many are hesitant to substitute other ingredients for them, but it is quite possible to bake without them and to also bake with just the whites of eggs.

How to substitute egg whites

If you simply want to eat healthier (i.e. without the yolks), the simplest approach is to use egg whites only.  One large whole egg is about ¼ cup of egg whites, so I usually use liquid egg whites and substitute accordingly for the whole eggs.  If you want to separate egg whites from the yolks, usually two egg whites is equivalent to one whole egg.

How to substitute for eggs altogether

If you need to avoid eggs altogether, I recommend four best approaches.  Substituting 1 tablespoon of ground flaxseed mixed with 3 tablespoons of water for every egg in a recipe; adding 1 tsp of baking soda with 1 tablespoon of vinegar (or other acid like lemon juice) to the recipe after you’ve substituted 1/4 cup of pureed fruit or vegetable or yogurt or sour cream per egg as the binder; using 1/4 cup of aquafaba which is the liquid generated when cooking chickpeas; or making or buying an egg replacer.

If you utilize the flaxseed substitution, you should mix the flaxseed and water in a mixing bowl, and let it sit to thicken.  Once it thickens, it looks a bit like beaten eggs and acts like eggs in a baked good.

If you’re making cookies or brownies instead of a cake, where the eggs act mostly as a binder, simply substituting pureed fruit or cooked vegetables in place of the eggs works very well.  My favorites to use are applesauce, bananas, pumpkin, and squash.  About 1/4 cup of pureed fruit or cooked vegetable equals one whole egg. As well, if you don’t have any dairy allergies, yogurt works nicely, especially if it’s a thick yogurt like Greek yogurt.

If, however, you need the baked good to rise, then after substituting a binder for the egg, you need to use the baking soda plus vinegar option to leaven the baked good. If you try the baking soda and vinegar approach, you mix the baking soda with the dry ingredients and add the vinegar (or other acid like lemon juice) at the very end, just as you’re mixing the dry ingredients with the moist.

A third option for replacing eggs is to use aquafaba. You can make your own by cooking dried chickpeas or you can purchase canned chickpeas and use the liquid. You’ll want no salt, no sugar added versions of store-bought chickpeas. 1/4 cup of the liquid equals to one egg. Simply whisk the liquid with a fork until frothy. You can also whip aquafaba like regular eggs into a meringue by adding cream of tartar and whisking in a mixer until white and fluffy.

A fourth way to substitute for eggs is to use the egg replacers you can purchase at the store or to make your own. Egg replacers are simply a version of the baking soda plus vinegar trick. It basically just adds a starch and a gum to a powder leavener and acid (i.e. baking powder, which is baking soda plus cream of tartar). To make your own, you can mix 1/2 tsp of baking powder (which already has the baking soda and acid mixed together in powder form) with 1 tsp of a starch like tapioca or arrowroot or cornstarch and 1/8 tsp of a gum like xanthan or guar. Add 2 tbsp of warm water and whisk. Let it sit and then rewhisk right before adding to your wet ingredients as an egg.  Simply multiply the amounts per number of eggs needed for the recipe.

Eggless Chocolate Cheesecake

Ingredients:

3 pkgs Tofutti Better Than Cream Cheese, at room temperature (or real cream cheese, if you prefer)

1/2 cup unsweetened baking cocoa

6 oz Greek plain dairy free yogurt mixed with 1/2 cup Agave , at room temperature

1/2 cup Agave 

1/4 tsp baking soda

2 tsp gluten free baking powder

1/2 cup cornstarch

1 tbsp raspberry liquor*

2 tsp gluten free vanilla

12 oz Tofutti Better Than Sour Cream, at room temperature (or real sour cream, if you prefer)

Baking Instructions:

1.  Preheat oven to 300 degrees, and prepare a 9 to 10 inch springform pan by securely wrapping aluminum foil around the outside of the pan.  Grease the bottom of the pan, but do not grease the sides of the pan to ensure proper rising of the cheesecake.  (I would use “If You Care” parchment paper, but you can Pam spray the bottom or use butter or oil to grease it.)

2.  In a large mixer, beat cream cheese just until it’s smooth, using a rubber spatula to scrape the sides down when done.

3.  Mix in cocoa and yogurt mixed with Agave, just until it’s blended.

4.  On low speed, very slowly drizzle in Agave.  You want to take your time so the cream cheese mixture can slowly absorb the Agave and retain its creaminess.

5.  Mix the baking soda, baking powder, and cornstarch together and mix into the cream cheese with the raspberry liquor and vanilla just until they’re mixed in.

6.  Add the sour cream and mix just until it’s incorporated.

7.  Pour the cheesecake batter into the prepared pan and bake for 1 1/2 hours.  A knife inserted into the outer edge should come out clean.  The center will still be creamy.  Another test is:  If you gently shake the cheesecake, only the center should slightly jiggle.

8. Turn off the oven and open the door.  Leave the cake in the center of the oven for 2 hours so it can slowly begin to cool.

9.  Remove the cheesecake from the oven, and loosen and remove the sides of the pan.  Put the cheesecake into the refrigerator to cool completely, at least four hours, but overnight is best.

* The raspberry liquor can be left out entirely.  You can also substitute other flavored liquor or 1 tsp of another extract like mint.