Handling Holidays: Strategies for Surviving Food Stress

website holidays

The Holidays.

In our home, the holidays can sometimes have a lot in common with schizophrenia. With two of our three children on the autism spectrum, there’s a disconnect between the fantasy of holiday love and cheer and the reality of life with it’s unexpected and unanticipated twists and turns.

When life’s reality prevents us from doing the “tradition” which must always be done every single year, our autistic children, like the schizophrenic, will declare that everyone and everything is against them.  Then, like the schizophrenic, they’re incapable of managing their emotions and relating to the real world, so they withdraw,

As a result, holidays aren’t always fun in our home.  The stress and pressure for everything to be “perfect” is that much more, and the effort it takes to help our children learn how to live in reality and be more flexible can drain all my husband’s and my energy and reserves.

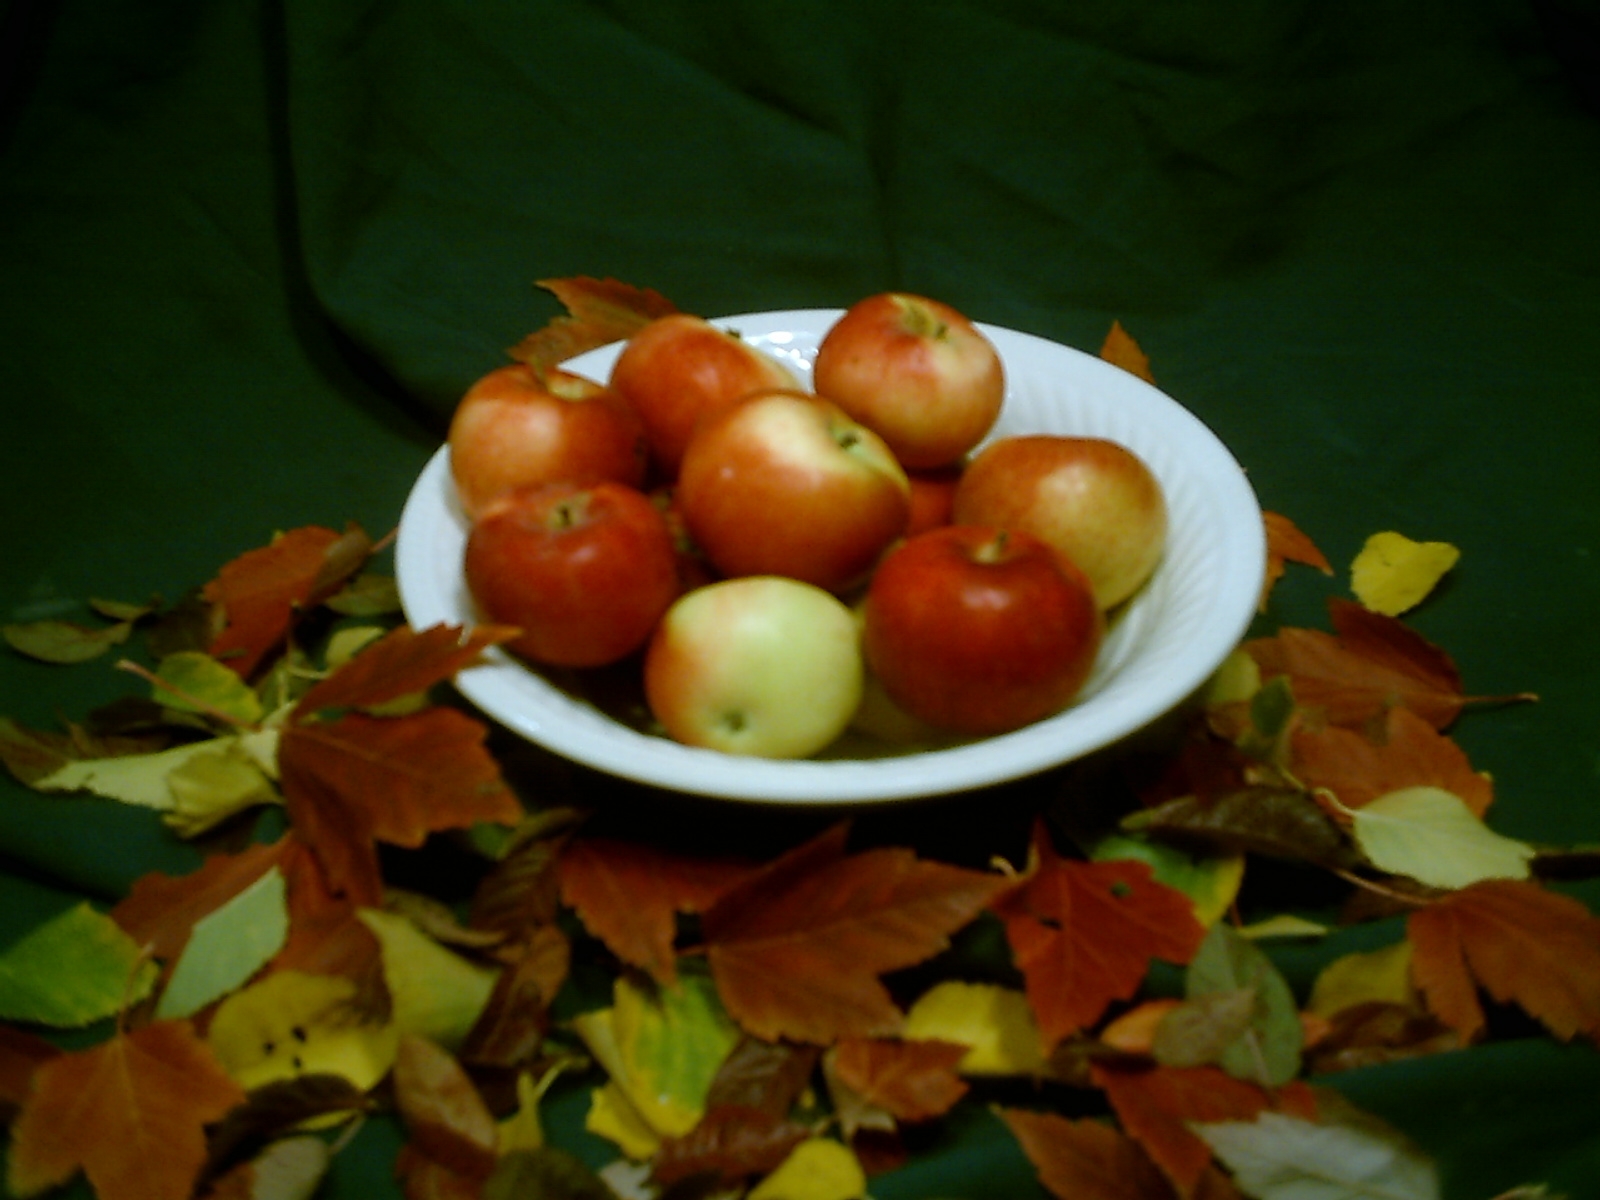
So, imagine adding to this the fact that you also can’t eat any of the lovely traditional dishes that the majority of your family and friends will be serving for holiday dinner.  Suddenly you’re not only concerned with keeping your family life constant, but you’re depressed because you know you’ll only be eating turkey at Thanksgiving because you’re going to be served green bean casserole, mashed potatoes, and pecan pie at Thanksgiving when you can’t have wheat, dairy, nuts or sugar. (True experience one year!)

For those of us who need to watch what we eat, whether for dietary or allergy reasons, there are ways to still enjoy the holidays, but it takes some initiative on our parts.

1.  You can host:  If you invite folks to your place, you can simply incorporate what other family members want to bring into a menu of your own choosing. Then you’ll have a combination of the foods you make which you can eat and the traditional dishes the rest of the family still like to enjoy.

2.  You can contribute:  If you know there are certain dishes which everyone wants like a green bean casserole, you can offer to bring a revamped version so you can enjoy it as well as the others.  If folks are nervous about you messing up their favorite dish, you can offer to bring a similar dish so folks can have a little bit of both.

3.   You can  inquire:  If a family member or friend is hosting, ask them how they are going to cook a particular dish and whether they might be able to do it a tad bit differently this year.  Can they roast the butternut squash with olive oil instead of butter?  Would they be willing to purchase a dairy free “ice cream” for that apple pie?

4.  You can teach:  What I’ve encountered most is that folks are very willing to help me be able to eat at a holiday dinner, but they simply don’t know how to go about doing it.  So, I’ve learned to answer their questions with particular tips. If they want to replace ricotta cheese in a recipe, I tell them how to use silken tofu.  If they think that making a gluten free apple pie might be too difficult for them, I suggest a gluten free apple crisp.  If they don’t know where to purchase a certain type of flour, I tell them.  If you’re prepared to provide the necessary information, people are usually happy to accommodate your needs.

5.  You can learn:  The other situation I’ve experienced is that many folks with newly acquired dietary restrictions or food allergies don’t know for themselves how to revamp traditional holidays dishes which accommodates their needs and which the non-food issue people will actually like.  In these cases, you can learn how to cook to meet the needs.  In the posts following this, I will focus on certain traditional holiday foods to show folks how to create healthier, allergen friendly versions.

With the colder weather setting in, we’ve been enjoying hearty soups more, so below is one of my daughters’ favorite crockpot soup.

Crockpot Split Pea Soup

Ingredients:

2 lbs of dried split peas (I buy two 16 oz bags)

1 red pepper

1 zucchini

1 squash

12 oz bag of broccoli slaw*

1/2 cup chopped onions (I just use frozen chopped onions)

16 oz diced ham pieces**

1 tbsp minced garlic

1 tsp black pepper

1 tsp dried thyme leaves

12 cups fat free reduced sodium chicken or vegetable broth

2 bay leaves

Cooking Instructions:

1.  Put the split peas into a large bowl and fill the bowl with water, enough to cover the split peas.  Running your fingers over and around the split peas to loosen any white coverings still on the split peas.  (They’ll float to the top of the water, making it easy for you to pick them out.)  Drain the peas and sort through to pick out any stones that might be residing within the group of split peas.  Put the picked over split peas into a 6 quart slow cooker/crockpot.

2.  Using a food processor, chop up the red pepper, zucchini, squash, and broccoli slaw into tiny pieces and add them to the split peas.

3.  Add the onions, ham pieces, garlic, black pepper and thyme.  Mix well.

4.  Pour in the broth and stir carefully.  Your Crockpot will be filled almost to the top.

5.  Stick the two bay leaves into the center of the soup, and cook on high for 8 hours.  (Note:  During the cooking, the spices will rise to the top.  Some time during the 8 hours, after the halfway mark, stir the soup and recover to resume cooking.)

6.  When you’re ready to serve, remove the bay leaves and stir the soup well, smashing the peas a bit with your spoon.  (Note:  My children love to put some reduced fat shredded cheddar cheese into this soup.) 

*  If you can’t find the broccoli slaw, simply chop up a carrot or two and half a cup of broccoli.

** My grocery store sells packaged really finely diced ham pieces.  If you can’t find something similar, simply use some leftover turkey ham from a previous meal, just make sure to dice it into small pieces so the flavor will incorporate into the soup.  If you’re vegan, you can simply omit the meat altogether.  To get a similar flavor, though, when you serve the split pea soup, put a spoonful of diced, cooked, smoked tofu or veggie burger into the bowl of soup.

The American Love: The Chocolate Chip Cookie

website cookie

“But I want chocolate chip cookies!”

Growing up, my life was a collision of two worlds, even when it came to food.  On the one side was the traditional daily Korean fare of rice, fish and vegetables for all three meals.  On the other side was the American eating of the 1970’s – cheese in a can on Ritz crackers, Chef Boyardee, and Nestle Toll House cookies.

Even my non-baking, non-sweet eating Korean mother baked Nestle Toll House cookies on occasion.  It was what everyone did and still does.  Biting into a fresh from the oven chocolate chip cookie is high on the list as one of many people’s little joy’s in life. Chocolate chip cookies even became the state cookie of Massachusetts in 1997.

Go out to eat at a restaurant, and you’ll find chocolate chip cookies in some form worked into a dessert.  Go grocery shopping, and you’ll see 101 variations of the chocolate chip cookie with a handful of sugar cookies, macaroons, and oatmeal raisin cookies on the periphery.  Buy ice cream, and you’ll find the chocolate chip cookie ice cream sandwich, the chocolate chip cookie dough ice cream, and broken up chocolate chip cookies to use as a topping.  You can even purchase chocolate chip cookie scented candles, soaps, air fresheners, and hand sanitizers.

Americans have a love affair with chocolate chip cookies.  And when dietary restrictions or allergies limit your ability to have dairy, wheat, sugar, nuts, soy, and/or sugar and fats, you can suddenly find yourself living a life without one of your food loves.

The good news for most folks these days is that you can get just about any type of chocolate chip cookie you need:  fat free, sugar free, gluten free, dairy free, you name it, it’s out there.  Unfortunately, they don’t always quite “hit the spot” for whatever reason.  Many that I’ve tried just simply have a strange aftertaste that I can’t quite get over.  Others are too pasty or way too hard.  Sometimes it’s just not “right”, meaning it’s not what you expected out of your chocolate chip cookie.  And even when you do find a type that you like, sometimes you just want a homemade, fresh from the oven chocolate chip cookie.

Until very recently, I never tried making a chocolate chip cookie at home, though. Why be disappointed?  But the other day, my middle daughter said that she wanted to make cookies, and she wanted them to be chocolate chip.  What was a mother to do?  I bit the bullet and worked out a recipe for my daughter.  Because that’s what a good mommy does, right?

So, below is a recipe that my daughter and I concocted for chocolate chip cookies which are dairy free, soy free, nut/peanut free, gluten free, and made with a heart healthy fat and little refined sugar.  We decided we wanted them to be like the bigger, chunkier cookies you buy fresh from the bakery, and I have to tell you that the group we served them to the evening we baked couldn’t believe they had none of the above ingredients.  I hope you enjoy them, too.

Oatmeal Chocolate Chip Cookies

Ingredients:

3 1/2 cups gluten free whole grain oats (quick cooking or regular, either is fine)

2 cups gluten free flour blend (we used Bob Red Mill’s which was garbanzo bean flour and brown rice flour mixed)

1 cup coconut sugar (we used the Madhava brand found at the grocery store)

1/2 cup gluten free ground flaxseed meal

1/2 cup tapioca starch

1 tbsp xanthan gum

2 tsp baking soda

2 tsp cinnamon

1 tsp sea salt

2 to 3 cups Enjoy Life allergen free mini chocolate chips*

1 1/2 cup safflower oil

3/4 cup unsweetened applesauce

1/2 cup Agave

1 tbsp gluten free vanilla

Baking Instructions:

1.  Preheat the oven to 325 degrees and prepare your cookie sheets with parchment paper.

2.  Grind the oats in a food processor to make 3 cups of oatmeal flour.   Measure the 3 cups into a large bowl.

3.  Add the gluten free flour blend, coconut sugar, flaxseed meal, tapioca starch, xanthan gum, baking soda, cinnamon, and salt.

4.  Stir in the mini chocolate chips.  Set aside.

5.  Blend together the oil, applesauce, agave and vanilla.

6.  Make a hole in the center of the dry ingredients and pour in the wet ingredients.  Mix the batter until all ingredients are well mixed together.  (Note:  With gluten free batter, the chips will seem like they aren’t incorporating well.  When you form the cookies, you can just use your fingers to make sure the chips are in the dough.)

7.  To form the cookies, take two level tablespoons of cookie batter and roll them with clean hands into balls.  Place them on a cookie sheet with enough space to flatten the cookie with a fork in a crisscross pattern.

8.  When your cookie sheet is full, bake the cookies in the preheated oven for 8 minutes.  Turn the cookie sheet around and bake for another 8 minutes.  The cookies will be nicely browned.

9.  Cool on the cookie sheet for at least two minutes before moving the cookies to a wire cooling rack.  Cool completely.

10.  Enjoy!  Makes 36 large cookies.  You can always choose to make one tablespoon sized cookies, but you should then reduce the cooking time by a couple of minutes or so.  (Note:  We discovered that these were absolutely great for making a homemade nondairy frozen dessert “ice cream” and chocolate chip cookie sandwich!)

*My son likes a “more cookie to chips” ratio, so 2 cups of chocolate chips is good for his batter, but my daughters prefer a “more chips to cookie” ratio, so they put 3 cups in their batter.

When You’re Out of What You Need

DIGITAL CAMERA

“What do you mean we’re out of baking powder?”

My younger two children and I were busy, baking a variety of quick breads for a luncheon we were hosting the next day.  Their favorites were on tap:  chocolate chip date bread, pumpkin, a gluten free banana bread, and a lemon poppy seed.

The kitchen held the evidence of our hard work:  flour scattered on the counter top and kitchen stools – courtesy of my son; millimeter tabs of butter sticking to the kitchen aid and measuring spoons – my daughter’s workmanship; and measuring cups and ingredients cloistered in the center – my attempt at providing some measure of organization and neatness to the mess.

All had been going well with two of the four breads in the oven and our attentions turned toward the last two breads when my daughter said, “We’re out of baking powder.”

“What you do mean we’re out of baking powder?  When did we run out of baking powder?”

“I used the last bit in the pumpkin bread.”

“So, why didn’t you tell me BEFORE we started making the banana bread?”

“I dunno.”

That last statement, of course, was presented with the traditional shrug and vacant expression we moms have come to associate with such an explanation from our children.

Fortunately for my daughter, I know a trick or two, and we were able to finish preparing the last two breads despite running out of baking powder.

The same experience

Chances are that you’ve had a similar experience sometime in your life of cooking. You’re halfway into a recipe and suddenly realize you’re all out of a key ingredient. Sometimes you haven’t begun cooking but would really like to make something which requires an ingredient you don’t currently have in the house.

What can you do?

Do you have to stop cooking or forget making that particular recipe?  The answer is usually, “No,” because chances are good that you actually have what is necessary to substitute for most key recipe ingredients. If you google the ingredient you’re missing, you’ll find a whole host of online recommendations for substitutes, but a few of the more common culprits are listed below.

Common Culprits

1.  You’ve run out of baking powder:  People tend to always have baking soda in the house because we use it for more than just cooking.  If you run out of baking powder you can make your own.  For each teaspoon of baking powder you need, simply add to your recipe 1/4 tsp of baking soda plus any ONE of the following: 1/2 tsp cream of tartar OR 1/2 cup buttermilk or yogurt OR 1/4 cup molasses.  I usually determine which ingredient I’ll use by what I have in the house and which might taste better in the recipe.

2.  The recipe calls for buttermilk which you don’t buy:  Whenever a recipe calls for buttermilk, you can make your own.  Simply add 1 tablespoon of vinegar or lemon juice to 1 cup of your type of milk (cow, soy, rice, etc…) and let it sit for five minutes.  It’ll thicken up, and you can simply stir and use whatever amount you need for your recipe.  You can also mix 3/4 cup of yogurt with 1/4 cup of milk or 3/4 cup sour cream with 1/4 cup milk.  Again you can choose simply by what you have in stock or by which you’d think would taste best in your recipe.

3.  You’re baking, and you’re completely out of eggs:  No worries.  1 tablespoon of ground flaxseed mixed with 3 tablespoons of water is equivalent to one egg.  If you don’t have ground flaxseed on hand, 1/4 cup of a pureed fruit or vegetable like applesauce or pumpkin will substitute as an egg binder.  If the egg is acting as a leavener in your recipe (like for a cake), you can replace the egg by adding an extra 1 tsp of baking soda to your dry ingredients and mixing in 1 tablespoon of vinegar as the last ingredient to the batter.

4.  The recipe wants you to use milk but you’re out:  If it’s a baking recipe like a cake or cookies, you can always use another liquid like fruit juice or even water.  If you’re making something like a soup that uses milk simply as a liquid, you can substitute a vegetable or chicken broth or water seasoned with herbs.  If you’re making a dish that uses milk to make it creamy and thick, you can substitute cooked pureed vegetables in an equal amount.  If you’re baking something that needs the milk to give it density and thickness, substitute yogurt or sour cream, but reduce your fat (butter, oil, etc…) by about 1/4 cup.

5.  You need sour cream but you never buy it:  You can substitute yogurt which you’re more likely to have but for every cup of sour cream you’ll use 1 cup of yogurt mixed with 1 tablespoon of flour.  You can also substitute using 3/4 cup of a homemade buttermilk and adding about 1/3 cup of a solid fat (butter) to your recipe.

6.  You’re completely out of yogurt:  Substitute one cup of sour cream or homemade buttermilk or pureed cottage cheese for every cup of yogurt needed.

7.  You don’t buy cottage cheese or ricotta cheese for dietary/allergy reasons: Simply substitute pureed tofu in equal amounts.

8.  The recipe wants you to use molasses or honey instead of sugar which is all you have or vice versa:  1 cup of molasses is equal to 3/4 cup of sugar and 1 cup of honey is equal to 1 1/4 cup of sugar.  What’s important to remember is that molasses and honey are wet ingredients verses the dry ingredient sugar.  So, if you’re adding molasses or honey instead of sugar, reduce another liquid ingredient by at least a 1/4 cup. If you’re substituting sugar, make sure to increase the liquid by at least a 1/4 cup.  For all three you can always substitute half the amount of Agave remembering to reduce the liquid by 1/2 a cup if you’re using the Agave for the dry sugar.  You can also use 1/2 the amount of Truvia for sugar.  If you substitute Truvia for the molasses or honey, be sure to increase your liquids to adapt for the loss in wet ingredients.

9.  Your recipe calls for tomato sauce and you only have tomato paste:  3/4 cup of tomato paste mixed with 1 cup of water will give you about 2 cups of a tomato “sauce”.  FYI:  If you only have tomato sauce and need tomato “juice” in your recipe, 1/2 cup of tomato sauce mixed with 1/2 cup of water is equivalent to 1 cup of tomato juice.

10.  Your recipe wants you to use a certain type of meat, vegetable, bean or whatever and you only have another type:  Go head!  Substitute!  Use what you have.  Just be sure that what you’re using is comparable. For example, salmon, halibut and tuna are all fish with similar texture, thickness and cooking time, while cod and haddock cook similarly, as does flounder, tilapia and catfish. For vegetables, substitute one root vegetable for another (carrots, turnips, potatos, etc…), a flower vegetable for another (broccoli, cauliflower, brussel sprouts, etc…) and make sure everything is cut to the same shape and size and thickness so your cooking times will stay the same.

A recipe

Since I’ve had a couple of requests now for how I make apple pie and apple crips, I’m going to share those below.

Apple Pie or Apple Crisp

Apple Filling:

Ingredients:

10 cups peeled, cored, sliced apples*

1/4 cup Agave

1 tablespoon lemon juice

2 tsp favorite spices**

Cooking Instructions:

1.  Put apples into a pan which allows them to be evenly distributed and cooked.

2.  Mix agave with lemon juice and spices and pour over the apples.

3.  Cook the apples over medium-low heat, stirring occasionally until the apples begin to soften and release some of their juices.  Usually about 15 to 20 minutes. They’ll lose that “raw” look and take on a slightly darker hue.

4.  Drain the apples, keeping the liquid and returning the liquid to the original cooking pan.  Cook the liquid down over medium-low heat until it’s reduced by about half.

5.  Mix the reduced liquid back in with the apples and set aside.

* Use apples which are good, crisp, sweet eating apples like honey crisp, juno gold, gala, braeburn, etc… which don’t need a lot of sweetening.  Regular pies and crisp tend to call for baking apples which are blander and that’s why the recipes call for two cups of sugar!  FYI:  A regular fist size apple will yield about one cup of apple slices.  The newer gigantic sized apples are usually about two cups.

(NOTE:  If you only have Macs or Empires or green apples, you can still use them, but since they are dry apples, you’ll notice that the liquid actually gets absorbed as they soften.  No worries.  Just skip steps 4 and 5.  Mac/Empire apples will soften more quickly than the crisp, eating apples.  Green apples will take longer.)

** I vary the spices.  Sometimes I just use cinnamon and nutmeg.  Other times I use ginger and cardamom.  Occasionally I use all four mixed together. Experiment to see what flavors you like.

For Apple Pie:

1.  I use Bob’s Red Mill gluten free baking and biscuit mix recipe for pie crust, only I add 1 1/2 tsp cinnamon and 1/2 nutmeg to the dry mix before adding the water. My two tips if you’re going to use that pie mix, though:  The dough usually needs a bit more water than they say, and to roll out the dough, put your dough between two pieces of wax paper.  It’ll roll out nicely and you can easily pull it off when you put the dough into the pan or as the top crust.

2.  After you’ve put your bottom crust into your pie pan, give the apples a good mix before layering them carefully one on top of each other in circle in the pie crust. Be sure to pour off any leftover liquid over the top of the apples when you’re done layering them.

3.  Cover the apples with your top crust and fold your edges in whatever manner you prefer (pinching, forking, free-style).

4. Melt a tablespoon of vegan butter and mix it with 1 tsp agave and 1/2 tsp cinnamon.  Brush the crust with the mixture, put in steam slits, and cover the pie edges with an edge cover or with aluminum foil.

5.  Bake for 35 to 40 minutes in a preheated 375 degree oven until the crust is browned and the apples are bubbling.

For Apple Crisp:

1.  Mix the apples and liquid one last time before placing into a 9 x 13 pan.

2.  Combine 2 cups gluten free whole grain rolled oats with 1/2 cup gluten free flour like garbanzo bean flour, 1 tsp cinnamon, 1/2 tsp nutmeg, and 1/2 tsp ginger.

3.  Cut in with a pastry blender 1/2 cup vegan butter to form a crumbly mixture.

4.  Add 1/4 cup agave and mix well until the dry crumbs are damp.

5.  Using your clean hands, crumble the oat mixture evenly over the apples.

6.  Bake for 15-20 minutes in a preheated 350 degree oven until the topping is browned and the apples are bubbling.

Going Uphill: The Possible Obstacles

website obstacles

“I’m sorry but I can’t make it up the hill.”

One cold, crisp December morning a professional hairdresser and make-up artist turned my everyday cute self into a beautiful cover bride.  Snow had swept in the evening before, leaving the countryside picture perfect white.  Unfortunately, the snowplows, dirt and salt had left the parking lots and roads grimy and filthy.

Residual light snow fell onto the umbrella my maid of honor carried over my head while faithful bridesmaids valiantly tried to hold up my dress above the filth and grime as we slowly and carefully stepped to the limousine.   The driver assured me that the roads were clear, and we were on our way to the moment I had been planning for the past six months.

My husband-to-be was waiting at the church with the family and friends who represented the first twenty-two years and twenty-three years of both our lives. In less than an hour our new lives together would begin.  Or so I thought.

“Ma’am, I’m sorry but the main road up to the church is closed because of ice.  I’ll have to go around.”  The road “around” unfortunately was closed as well.  As was the third route option.  We could see the church sitting at the top of the hill, its steeple standing tall in the middle of the swirling snow, but we could not get to it.

Would my wedding be thwarted by the mercilessness of nature?  Would I break my leg if I got out and walked up the icy road?  Maybe getting married in December wasn’t such a great idea after all.

In the end, we made it to the church half an hour later as the sun broke through the clouds and melted away some of the offending ice, but for a moment, it had seemed as if the obstacle might be too great to overcome.

We can have the same overwhelming feeling when it comes to changing our eating habits to fit a food allergy or a healthier diet as obstacles we hadn’t anticipated loom before us.

The Obstacles

For most folks the biggest obstacle is price.  Allergen free foods are more expensive than regularly processed items.  Fruits, vegetables, whole grains, and other fresh produce cost more than white flour goods and boxed and canned foods.  As well, some people find it difficult to find resources which might help them with their new lifestyle while others discover that it’s not easy to create or revamp their own recipes for healthier or allergen free cooking.  Add on that suddenly folks have to “educate” their friends and family about their allergies or dietary restrictions with not always the best responses, and it can seem like one might not be able to make the changes after all.

The Helps

Cost:  When everything you make has to be gluten, dairy, nut, sugar and occasionally egg free at the same time, cooking can become a bit expensive. There are ways to cut back on costs, though.

1.  Many “regular” foods ARE gluten, dairy, nut, egg, etc… free.  Sometimes we get caught in the mindset that everything we buy has to be “special”, but that’s not the case.  You just need to read the labels, but you’ll be surprised by the number of items you find you can still eat.

2.  Whole is better than parts.  If you’re eating healthier and purchasing more fruits and vegetables, don’t buy the separately packaged, pre-washed, cut up varieties.  They always cost more.  Purchase the whole lettuce head.  Buy the loose vegetables and not the ones already on the foam trays.  Get a whole melon and not the halves.

3.  Buy when there are sales.  Most of the grocery stores in my area will have a sale on different allergen free items at least weekly, so I stock up when the prices are good.  You can also find sales online.  Comparison shop between the brand companies and Amazon.

4.  Frozen is good.  Fruits and vegetables which are frozen are cheaper than fresh.  While you definitely want to get fresh when it’s in season, you don’t want to when it’s not.  It’s too expensive.  Go with the frozen and read my post on the “frozen chosen” to learn all you can do with them.

5.  Buy in bulk.  Places like BJ’s and Costco’s now have many allergen free items in stock for purchase at better prices.  At the supermarket, an 11.5 oz of Agave costs me between $4 and $5.  At BJ’s I can buy a 48 oz container for $6.99.  Also, online, if you purchase more, often the price is less per unit and you ultimately save on shipping and handling, too.  For veggies and fruit:  If there’s a good price on something you regularly eat, you can purchase it and freeze them for later use.

6.  Shop at discount places.  In my area Ocean State Job Lot is a wonderful place for picking up gluten free items with good expiration dates for a cheaper price than I’d find it at the store or online.  I don’t make a special trip to the Job Lot but if I’m passing by, I stop in and stock up.  Look around for stores in your area that provide the same option.

7.  Shop with friends.  If you have friends who have similar allergy or health issues, purchase even larger quantities of needed items, together and split the costs.  I’ve found this helpful, because sometimes a friend wants a little of something while I want a lot or vice versa, and we can take the proportional amounts that we each want while saving some money.

Resources:  The biggest question I always get is “Where do I start?”  The nice thing about today’s age is that resources abound online so you don’t even have to spend money purchasing books.  You can get help for free.  Google any food allergy and numerous sites will pop up.  Type in “healthy” before whatever recipe you want, and you’ll get a “bazillion” hits.  Because it is “numerous”, though, ask around.  Friends can tell you what sites have been helpful to them.  Once you are at a site, see what other sites are linked to that one.  People are very open about sharing site they “like”.  If you do want a book, Google your particular allergy and see what pops up.  Read the reviews, and you’ll find that people are very vocal about whether a book works or not.

Recipes:  If you find that you’re simply are not cut out for revamping or creating your own recipes, don’t worry.  There are plenty of people out there who have recipes you can simply follow.  Those sites and books you found will always have recipes you can use, and you’ll find allergen free recipes for just about anything under the sun you want to create.  And if following recipes isn’t your thing, either, you still don’t need to stress, because there are many, many products on the market, both online and in stores.  I personally don’t make my own pie crusts from complete scratch.  Bob’s Red Mill has a wonderful gluten free baking and biscuit mix which makes a great pie crust, so I use it.  I add my own little touches, a little cinnamon and spice added, a bit of vegan butter brushed on the top, etc…, but I’m using a store bought product.  No one says you have to do it all yourself, especially when there are plenty of options out there for you to use.

Education:  This is usually the most difficult obstacle, more than even the cost. Too often the obstacle are well-meaning friends and family who simply don’t understand.

1.  “But I only used a little.”  Sometimes folks don’t seem to understand that “a little bit” can be deadly for someone with a food allergy.  In these cases, it’s important to be patient and to take the time to gently explain that a little bit can trigger a reaction which could lead to death.  Don’t be dramatic, but matter of fact.  In time, people usually begin to get it.  If you’re eating healthier for a health issue, simply explain that you really can’t eat certain foods because of your health.

2.  “But I can cook for you.”  Sometimes folks turn down your offer to bring something you know you can eat.  They’ve invited you and don’t want you to have to go through any effort.  Occasionally, they’re actually hurt that you want to bring something, as if there won’t be anything they’ve made you can eat.  In these cases, you need to be honest and simply explain that it’s no reflection upon them, but you’ve learned to be careful because you’ve had bad experiences in the past.  Usually people understand when you explain it that way.

3. “But I’ve read that you can be misdiagnosed with an allergy.”  Sometimes people don’t believe you have an allergy.  With all the information out there about “sensitivities” verses “intolerances” verse “allergies”, it’s easy to be confused.  People aren’t trying to call you a liar.  They’re genuinely concerned that your whole life may be changing when it doesn’t need to be.  Simply tell folks that you’re aware of the differences and can assure them that you do indeed have a confirmed allergy.  If you’re firm, in time people accept the truth.

4.  “But don’t you want to eat it.”  Sometimes people just can’t understand how you can resist eating foods which are so tempting.  They’re not intentionally trying to make you feel badly.  They just think they’d have less self-control if they were in your place.  This is another time when you can simply be honest.  Yes, you’re tempted, but you know it could have terrible consequences – anaphylactic shock, another heart attack, whatever….  People usually do get it eventually.

5.  “But what’s left for you to eat.”  This one may only apply to folks like myself who are allergic to multiple foods, but sometimes people just can’t take it in.  They think you’re somehow going to be deprived.  If this is the case, you simply need to tell them all the wonderful foods you’re still able to eat, or better yet show them.  Below is a recipe for a chicken piccata that I serve to guests which is not only delicious but easy to make.

Chicken Piccata

Ingredients:

1/2 cup Gluten Free Flour*

1 tsp dried oregano

1/2 tsp black pepper

1/2 tsp dried thyme leaves

1/2 tsp dried basil

1/4 tsp ground onion powder

1/4 tsp ground garlic powder

10 chicken cutlets**

2 tsp olive oil

1/2 cup vegan friendly white wine***

1 cup low sodium, fat free gluten free chicken broth

1/4 cup lemon juice

2 tsp minced garlic

2 tbsp vegan soy free “butter”

Cooking Instructions:

1.  Mix the flour with the oregano, pepper, thyme, basil, onion powder and garlic powder.

2.  Coat both sides of the chicken cutlets with the flour, making sure to shake off any excess and stack them on a plate.

3.  Heat 2 tsp of olive oil in a large skillet over medium heat and add the chicken cutlets.

4.  Brown the cutlets one minute on each side and place back onto your plate.

5.  Deglaze your pan with the white wine and cook until the wine is almost gone.

6.  Mix the chicken broth with the lemon juice and garlic.  Add to the wine in the pan.

7.  Add the cutlets back into the pan and cook for one to two minutes on each side until the chicken is cooked through.

8.  Remove the cutlets to a warming dish, and add the “butter” to the sauce left in the pan.

9.  Cook the sauce until it’s reduced a bit and thicker.  Pour over the chicken.

* I like to use a garbanzo bean flour, but you can use whatever type you prefer.  If you have no wheat or gluten issues, use 100% whole wheat flour.

** I rarely actually buy cutlets because they’re more expensive.  I keep frozen chicken breast in the freezer which I defrost only partially, then cut into half both lengthwise and widthwise so I have cutlet sized chicken.  (Because the chicken breasts they sell these days are so large, you can do this.  If you buy normal sized chicken breasts, you should only cut them widthwise so you don’t have tiny portions.)

*** If you go to vegnews.com or barnivore.com, you can find lists of wines not contaminated with casein.