Cooking Techniques: Popovers

“But that’s not appropriate.”

A friend from the city was visiting and heard my son hysterically laughing while reading our local newspaper. She commented that he must really enjoy the comics.

“Oh, he’s not laughing over the funnies,” I said. “He’s reading the police log.”

The look on my friend’s face was priceless! She clearly was wondering whether she had misjudged me as being a sound parent and how best to tell me that my son was going to grow up to be a psychopath if he found the police log funny!

So, I showed her the paper. Examples of true police log reports from papers in my local area:

“Goat running loose ate a pair of pants. Owner of pants declined pressing charges against goat.”

“Man waiting in line for Cabela’s to open cut in line. He was spoken to. All was well.”

“Report of annoying phone call. Mother-in-law was calling. Police explained they could do nothing about it.”

“Road blocked by 14 chickens. Traffic was backed up for 20 minutes until chickens finished sunbathing.”

“Unsecured trash barrel taken. Discovered in back yard of a neighbor. Child using it as a horse.”

“Back porch light went out. Al Qaeda suspected.”

Once my friend read that week’s police log, she understood why my son was laughing, and we had an interesting discussion afterwards about the difference between “crime” in the city and where I live.

I was reminded of this conversation recently as my son and I made popovers this weekend. Popovers are a wonderful addition to meals which people don’t often think about, because their perceptions of them aren’t always in line with reality.

There’s a myth out there that popovers are difficult to make, and if you google popovers, many sites talk about the “secrets” to making perfect popovers. This, I believe, feeds into the perceptions that people hold, so then folks opt to make muffins instead or to purchase bread from the store.

The truth is that popovers are ridiculously simple to make, and you can adapt them to make a variety of popovers for any occasion. Plus they’re fun. Children love them because they literally pop-over from the pan.

What’s important to know about popovers:

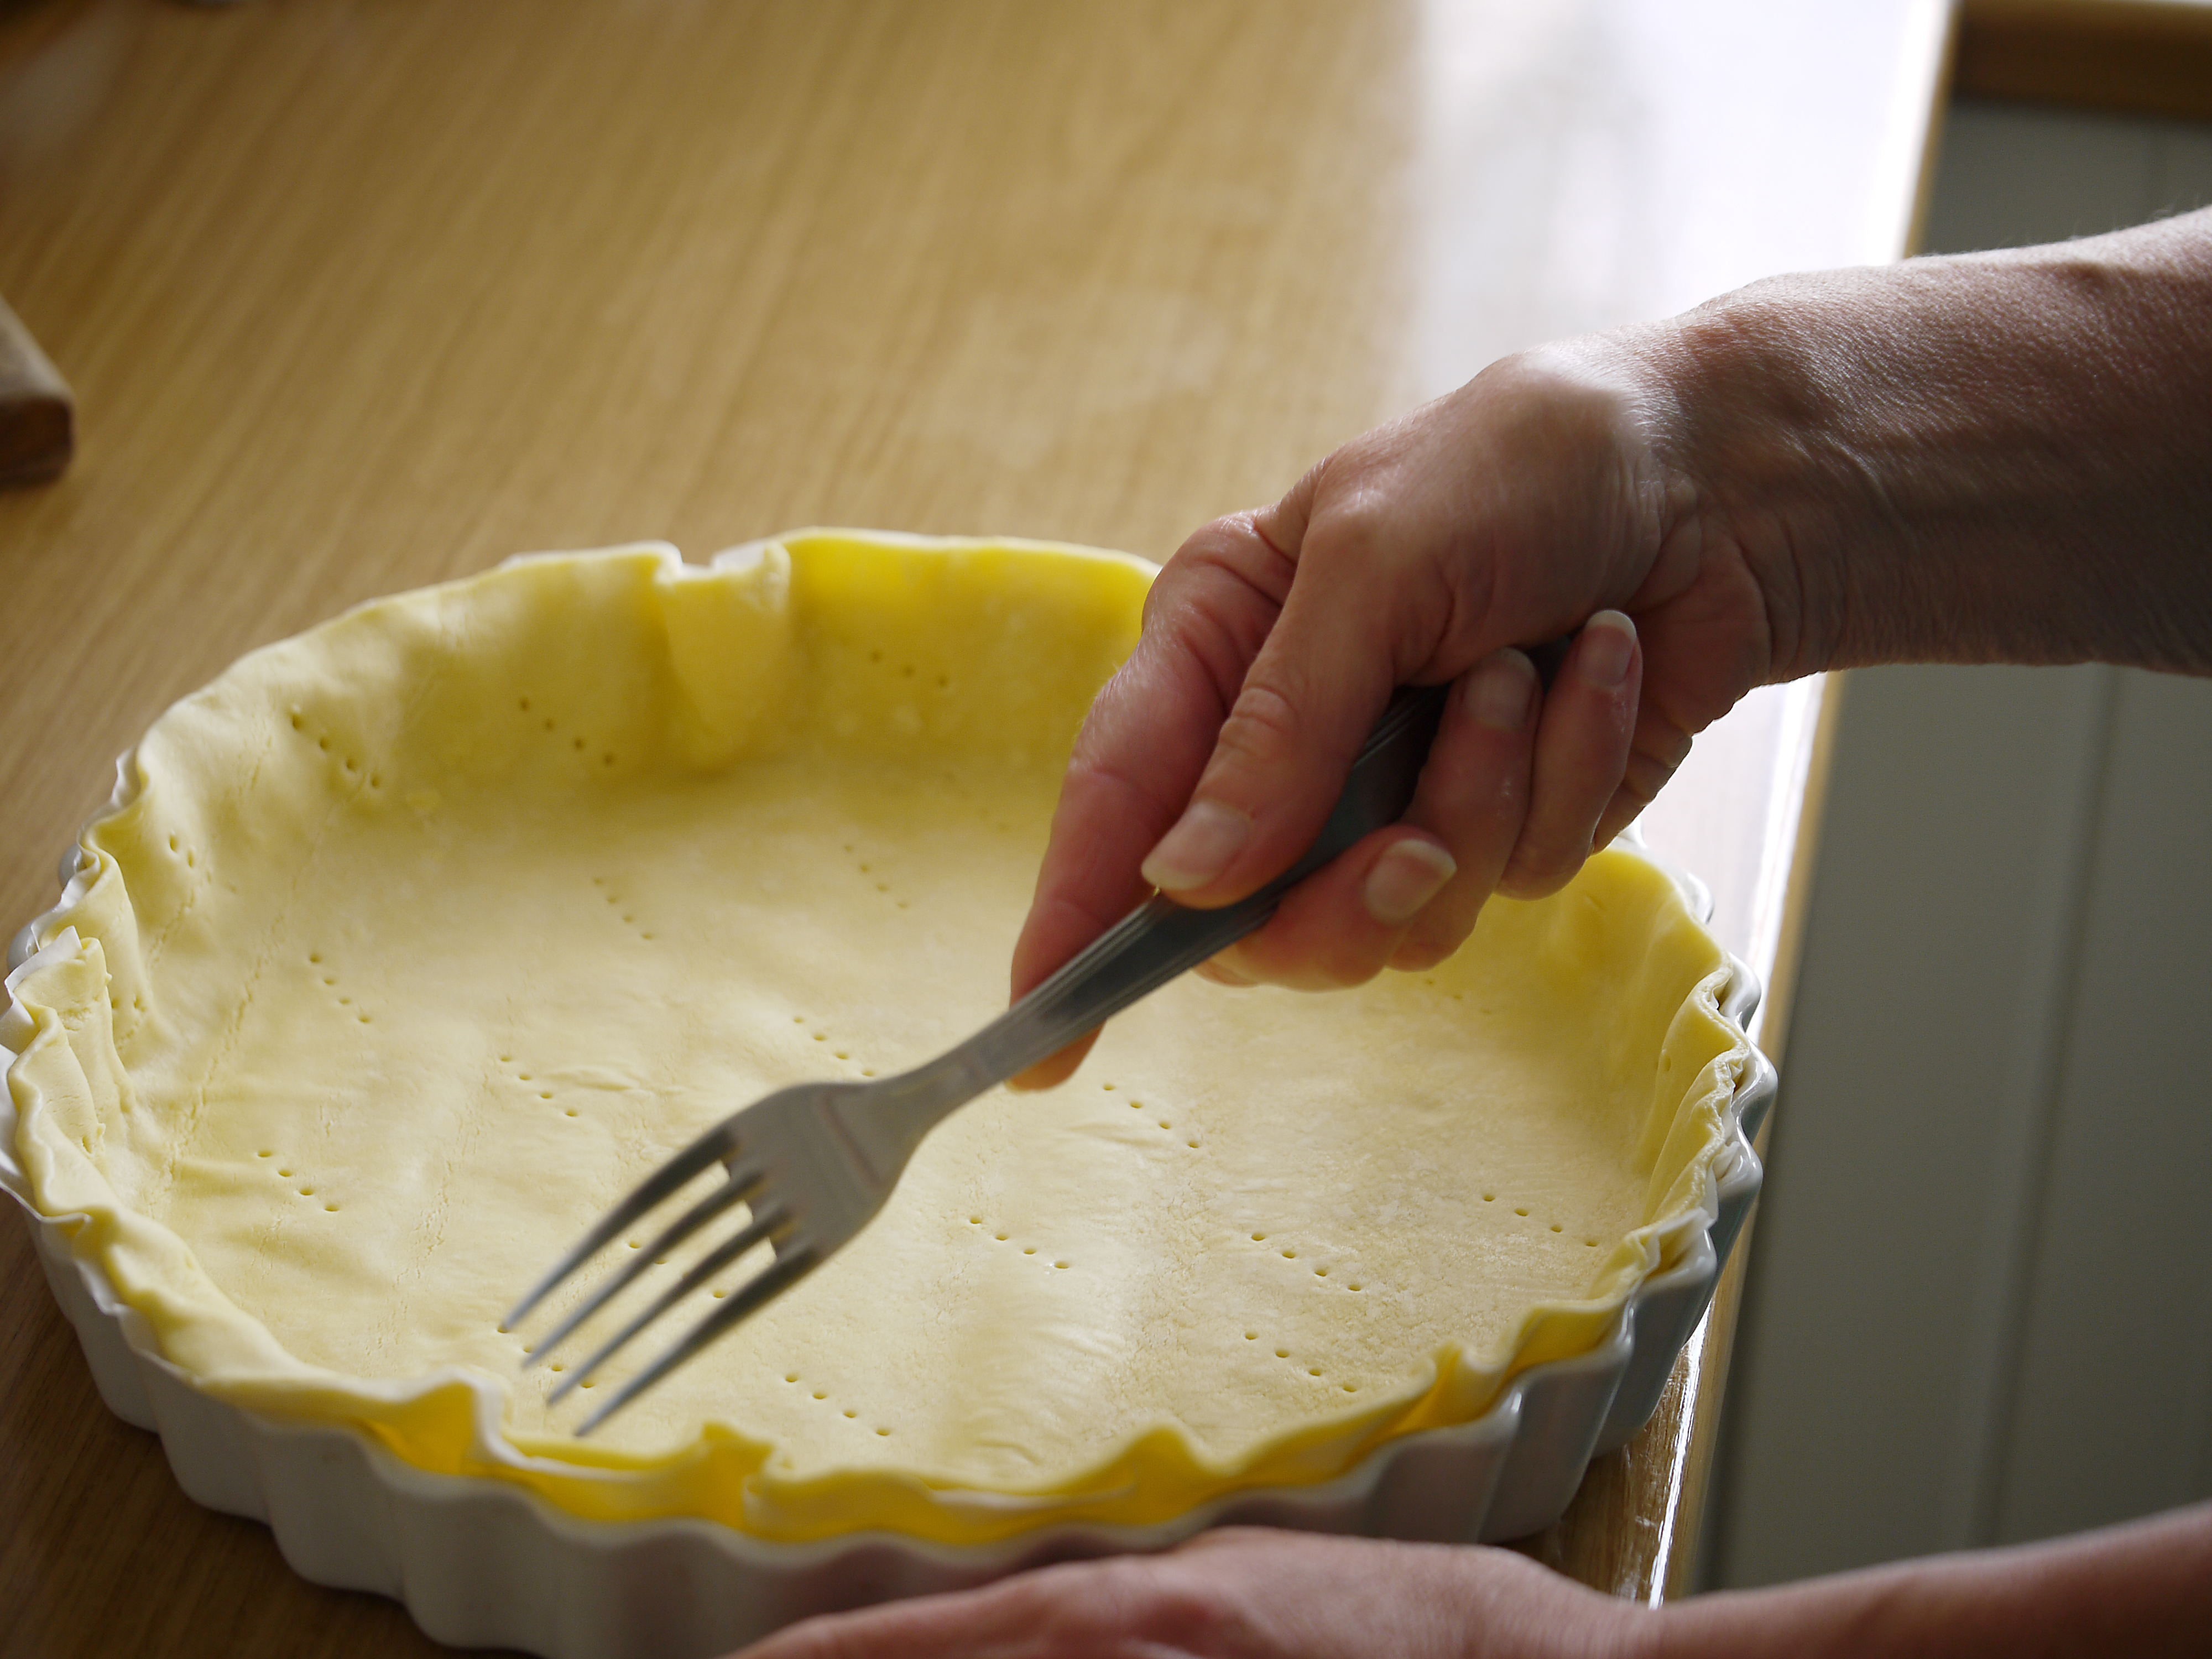
1. Cooking: You want a hot oven temperature so I always preheat the oven to 450 degrees. Once you put the popovers into the oven, you don’t want to open the oven until they are done which is always 30 minutes in a regular sized muffin tin. When they’re done, just remove the popovers from the tin and if not eating immediately put them onto a cooling rack so moisture won’t condense on them. If eating immediately, you can put them into a nice bowl lined with a pretty towel.

2. Mixing: You want to mix the eggs together before adding the other ingredients, but you simply blend them with a fork for a minute or less until the eggs are mixed. No need to make them fluffy or frothy or airy. Just a nice uniform color to the eggs, and then you add the rest of the ingredients.

3. Measuring: I find the best way  to make popovers is to transfer the batter into a large spouted measuring cup so I can easily pour the batter equally among the muffin tins.

4.  Ingredients: A popover is just eggs, milk and flour. For a muffin tin that makes 12 popovers, you’ll always use an equivalent to one cup of eggs, 2 cups of milk, and 2 cups of flour. Since I like to be a bit healthier, instead of 4 large eggs (which should yield a cup) I opt to use half whole eggs and then add enough liquid egg whites to make a full cup. For the milk I’ve used soy, flax, and rice milk without any issues. For the flour, to be gluten free, I either use sorghum flour, arrowroot flour, or a mixture of both. For seasoning, I use 1/2 tsp of salt and then depending on the type of popover, an additional herb or spice.

5. Pan: A simple muffin tin is all you need whether it’s a 12 muffin one or two six muffin ones. It’s important to grease the muffin tins. You can use butter, oil, spray, shortening – it doesn’t matter what, but you must grease the pan so the popovers can rise and pop without sticking to the pan.

6. Variety: Popovers can be adapted. You can add any herb or spice. You can add cheese. You can add finely grated vegetables. My kids really like it when I make the popovers with pureed vegetables or fruit. I used puree squash or pumpkin or applesauce or bananas in place of some of the milk, and they come out quite delicious.

For eating, you can top the popovers with butter or jam or fruit butters. You can also cut them open and fill them with food like chicken salad which is incredibly tasty in a popover!

Below I’ll include two recipes I make often for the family. Enjoy!

Squash Popovers

Instructions:

1. Preheat the oven to 450 degrees and grease either a 12 muffin tin or two six muffin tins.

2. Whisk 2 cups of flour of choice (I like 1 cup of sorghum flour with 1 cup of arrowroot flour) with 1/2 tsp salt and 1/2 tsp cardamom. Set aside.

3. Using a fork mix the equivalent of 1 cup of eggs (4 large whole eggs, 1, 2, or 3 whole eggs plus enough liquid egg whites to make 1 cup) just until the eggs are light and uniform in color.

4. Add 1 1/4 cup milk (I prefer flax or soy milk) and 3/4 cup cooked, pureed squash to the eggs. Whisk just until blended. There will be lumps, and that is how you want it.

5. Transfer the batter (which will be thin and runny) to a spouted measuring cup large enough to hold all the batter. Evenly divide the batter among 12 muffin tins.

6. Put the muffin tin into the oven and bake for 30 minutes. Do not open the oven door at any time during the 30 minutes. After 30 minutes, you can pierce the popovers to release the steam and then remove the popovers to a wire cooling rack or towel-lined bowl or directly to the plates.

Tarragon Popovers

Instructions:

1. Preheat the oven to 450 degrees and grease either a 12 muffin tin or two six muffin tins.

2. Whisk 2 cups of flour of choice (I like to use 2 cups of sorghum flour for this recipe, but mixing half sorghum and half arrowroot or using all arrowroot is fine, too) with 1/2 tsp salt and 1 tsp dried tarragon. Set aside.

3. Using a fork mix the equivalent of 1 cup of eggs (4 large whole eggs, 1, 2, or 3 whole eggs plus enough liquid egg whites to make 1 cup) just until the eggs are light and uniform in color.

4. Add 2 cups milk (I prefer flax or soy milk) to the eggs. Whisk just until blended. There will be lumps, and that is how you want it.

5. Transfer the batter (which will be thin and runny) to a spouted measuring cup large enough to hold all the batter. Evenly divide the batter among 12 muffin tins.

6. Put the muffin tin into the oven and bake for 30 minutes. Do not open the oven door at any time during the 30 minutes. After 30 minutes, you can pierce the popovers to release steam and then remove the popovers to a wire cooling rack or towel-lined bowl or directly to the plates.


Advertisement

Menu Suggestion: Reusable Rice

website rice

“Do you want to learn?”

I was 22 when my husband decided to teach me how to ski. He bought me the perfect ski bunny suit in my favorite color – purple – and made sure I had lessons before attempting any hill of substance. Unfortunately, the lessons I learned didn’t transfer well once I took to the bunny slope and started going faster than I was able to control.

Within a few minutes I was careening past children and their parents, unable to recall any of the lessons about how to slow myself down. I tried to turn my skis, which caused me to tumbled head over heels and landed in a heap off to the side. Fortunately, no bones were broken in my fall, and all might not have been lost if it weren’t for that one young man….

As I laid there on the snow, wondering whether I would even be able to get myself up without any help, a young gentleman, I think about my age, came to a stop next to me, pushed up his ski goggles and laughed. Truly. He laughed at my plight, and then he sped off down the hill.

By the time my husband caught up to me, I had worked myself into a rather fine tizzy, and I’m sorry to say that I refused to go back on the slope and try again. My pride had been bruised, and at the young age of 22, I hadn’t learned yet that I might regret making decisions in haste for the wrong reasons.

When I received an email today from a woman who was tired of making mistakes in her cooking, I thought about my skiing experience. I was quick to give up, and as a result I lost out on the opportunity to join my husband in an activity he really enjoyed. More than that, my husband eventually lost out on something he really liked doing, too, because as the years went on, he would want to do something with me as opposed to without, which resulted in him skiing less and less.

This particular woman wanted to give up cooking because she felt she was wasting food every time it came out wrong. In this case, she’d made mushy and overcooked rice which her children refused to eat as it was. As I thought about how to respond, it occurred to me that she needed more than me simply giving her instructions on how to cook the rice correctly. She needed ideas which could “redeem” the “failure”. So I told her that she hadn’t failed but that she now had perfect rice for dishes she could make later in the week for the family to eat.

For example:

1. Rice Parmigiana: If you have rice which is overcooked or even simply leftover from another meal, it’s perfect for making a parmigiana. Simply whisk a couple of eggs or egg whites with a little bit of milk and herbs like oregano and basil and mix in your leftover rice with real or vegan parmesan cheese. In a greased deep dish layer the rice alternately with thinly slice tomatoes and real or vegan mozzarella, ending with the tomatoes and mozzarella. Put the dish into a larger dish and pour hot water halfway up the casserole dish. Bake at 350 degrees for half an hour or so until the cheese is melted and browned and the casserole is hot and bubbly.

2. Rice Pudding: If you’re looking for something warm and creamy on a cold night, chocolate rice pudding is just the dish. If you’ve overcooked your rice, so much the better. For six cups of cooked rice, I mix in a shallow pan 2 cups of “milk” (cow, soy, flax, rice, etc… all work) with 2 tsp cinnamon, 1 tsp nutmeg, 1 tsp vanilla, and 2 tbsp cornstarch. Cook the mixture over low heat, stirring constantly until the mixture thickens. Usually only about five minutes. Stir in 1 cup mini chocolate chips (I use Enjoy Life allergen free ones.) Stir in the rice and mix until the milk mixture is fully soaked into the rice.

3. Rice cakes: If you want a side dish which is slightly different, take your overcooked rice, mix it with green onions or leeks, garlic powder, black pepper, and ground ginger. Finely chop veggies like peppers, zucchini, carrots, squash, etc… and add them to the rice. Whisk together a couple of eggs or egg whites and add them to the rice mixture, and make little rice patties. Cook them in a shallow pan in some olive oil until they’re browned on both sides.

If you want to make the cakes with protein, mix in canned crabmeat or tuna or salmon or chopped up pieces of ham, chicken or beef.

4. Chicken Rice Soup: When making soup with rice, the problem you normally run into is that your rice is too hard because it didn’t cook long enough in the soup or it becomes more and more overcooked as the soup is reheated. If you have overcooked rice, freeze it in batches of 1/2 to 1 cup, and then when you make your famous chicken soup, before you’re about to serve it, drop in the frozen rice and let it warm up in the soup. The rice will be just right.

5. Rice crusts: Overcooked rice is perfect for making a rice crust. I often make a rice crust for quiche. Simply mix your rice with a beaten egg or egg whites and herbs and, if you like, real or vegan cheese. Pat the rice mixture into the grease bottom of your pan and pour your quiche mixture over the top and bake as you normally would.

Rice crusts are also good for meat dishes. I will make a rice crust and fill it with the filling I normally use for chicken pot pie or shepherd’s pie and bake it in the oven until bubbly.

In addition, rice crusts are great for tomato tarts. Mix real or vegan ricotta with eggs or egg whites and herbs to the consistency you like. Spread the cheese mixture over your rice crust, top with fresh tomatoes and fresh basil and bake for about 30 minutes in a 350 or 375 degree oven.

6. Stuffing: Overcooked rice is wonderful as a stuffing for your favorite veggies. Mix the rice with chopped up veggies and/or meat and/or cheese with herbs of your choice and stuff into zucchini or squash or peppers or pumpkin or eggplant or artichokes or tomatoes or cabbage or mushrooms or kale or etc….


Menu Suggestion: Tenderloin Dinner

“When I grow up, I’m only going to do the things I like to do.”

My son has lived a charmed life so far. In addition to two older sisters doting upon him and a mother and a father who find it difficult to resist the impish grin he inherited from his dad, he has a fun-loving nature which usually protects him from any drudgery that comes his way. This Autumn, though, he’s been a bit disgruntled by a change in his comfortable life.

With his oldest sister going off to college, he no longer can stay at home while my husband and I are attending meetings and carpooling our other daughter to various activities. The other day, while he was being taken against his will, to a meeting of mine, he declared that he was only going to do things which he liked when he grew up.

Being the terrible parent that I am, I laughed, and my confused son wanted to know what was so funny. I told him that unfortunately for him, life is very much made up of activities which people don’t often like to do but simply must. He didn’t understand, so I asked him how he’d feel if I gave up doing things I didn’t like as much as other activities such as playing 20 questions with him on car rides or reading the same book to him over and over again or doing his laundry or washing his dishes three meals a day every single day.

It’s been a couple of days now, and my son still hasn’t answered my question. *laugh* I’m thinking he didn’t quite like the picture I had painted for him!

I was reminded of this conversation last night when I received an email: “Dear Paula,” it said. “I hate to cook, and I have to host Christmas dinner. Do you have any suggestions for something easy which will still impress my family?”

The fact is that many people don’t like to cook, and holidays can be stressful if suddenly you’re the one selected to host. Fortunately there are many easy menu suggestions, and I’ll share what I shared in my email:

If you’re hosting a large gathering, don’t want to do a lot of work, and want something which will taste good no matter how poor a cook you may be, you can’t go wrong with a tenderloin. It’s a very tender meat, needing very hands-off cooking, and can withstand any overcooking you might do. Plus you have choices: beef, pork, or turkey, and if you make a special sauce to spoon over it, people will think you’ve slaved away when in reality you’ve done very little.

Easy Holiday Dinner Menu:

1. The tenderloin: Choose which type you prefer, mix together some dried herbs of your choosing with a tiny bit of olive oil and rub all over the tenderloin. Put the tenderloin into a pan which just fits the meat, cover with aluminum foil, and cook in the oven for 15 to 20 minutes per pound. Most packages will suggest you use a preheated 400 or 425 degree oven, but you can also cook the meats at 350 or 375 degrees for a slower roasting time. When it’s done, you can simply turn off your oven, and let the meat sit in the oven until you’re ready to serve it.

2. The sauce: You can find all sorts of sauce recipes for tenderloin online, but one I always get rave reviews for is an artichoke cream sauce which I make: Drain a 14 ounce container of artichoke bottoms (can be found at the grocery store next to artichoke hearts), keeping the liquid. Mix the liquid with enough “milk” to make 2 cups. (I usually use soy or flax, but any will do.) Puree the artichoke bottoms in a food processor with 1/4 cup dry or cooking white wine (if you don’t want to use the alcohol, just use 1/4 cup of water or “milk”). In a large shallow pan, heat 2 tbsp of olive oil for about 30 seconds. Add 1/4 cup flour (I usually use a gluten free oat flour, but any will do), whisking well. Slowly pour the artichoke liquid/milk mixture into the rue, whisking well to combine the liquid with the flour mixture. Keep stirring, and let the mixture thicken, usually just a few minutes will do it. Add 1/8 tsp of black pepper and 1/4 tsp of dried thyme. Mix in the pureed artichoke bottoms until the sauce is smooth and creamy. Serve in a pretty dish with a ladle or in a gravy boat. Note: This can be made ahead of time and then just reheated before use. 

3. The veggie side dish: Choose any frozen vegetable you like, but one my children love is green beans. Put the frozen veggies into a large shallow pan with 1/2 cup or more of frozen diced onions. Add dried herbs of your choosing and black pepper to taste. Sprinkle a bit of olive oil, maybe a tsp or two, and simply saute the frozen veggies over low heat until they are cooked through. Starting with frozen veggies and cooking them over low heat means you don’t have to do more than occasionally stir the veggies, and if you forget about them, and overcook them a little, they still taste good, because the slow cooking allows the flavors to meld more.

4. The starchy side dish: You can’t go wrong with rice, ever. It doesn’t require a lot from you, and you can jazz it up very easily. I have a rice cooker which makes things even easier, but even if you have to make the rice in a pot on a stop, it’s still very hands-off: Purchase an uncooked rice medley. I like a Trader Joe’s mix which is long grain brown rice, black barley, and daikon seeds, but any will do. Cook the rice according to instructions (which is usually to just let it simmer over low heat, stirring occasionally) but instead of water use a low sodium, fat free vegetable or chicken broth, and add finely chopped veggies like carrots, zucchini, broccoli, peppers, or squash. When the rice cooks, the flavors of the broth and veggies, as well as the pretty colors, will make for a special side dish which required very little work.

5. The dessert: If you want something which seems fancy and is very pretty, but also quite easy, an upside down pineapple cake is the way to go. You can prepare this ahead of time.

At your grocery store, pick-up a fresh, peeled, cored pineapple. My store usually has it in a clear 18 oz container in the fruit section. Remove the core, and slice the pineapple into eight slices (they’ll be about 1/2 inch thick). Decide what you want for your cake: circles, half circles, or 1/4 fans. (I usually cut the circles into the 1/4 fans, because I think it’s prettier that way.)

In a shallow, large pan, melt 1/4 cup “butter” (I use Earth Balance soy-free, vegan butter) with 1/4 cup Agave. Add the pineapples and cook for 5 minutes, flipping them after about 2 1/2 minutes. Remove the pineapple slices, putting onto the bottom of a greased 9 x 13 pan. Cook the butter mixture another minute until it’s thickened, and then evenly pour it over the pineapple slices.

Mix 2 cups of a brown rice gluten free flour blend like Authentic Foods or King Arthur with 1/2 cup sorghum flour, 1 tsp baking powder, 1 tsp baking soda, 1/2 tsp salt, and 1/tsp cardamom. Set aside.

Mix 1 cup Toffuti sour cream with 1/2 cup safflower oil, 2 eggs, and 2/3 cup Agave.

Add the dry ingredients to the wet and quickly mix them together just until the dry ingredients are moistened. Carefully spread the batter over the pineapples. If the batter doesn’t go completely to the edges, don’t worry, it’ll spread when cooking.

Bake in a preheated 350 degree oven for about 30 minutes. The cake will be golden brown and a toothpick inserted in the center will come out clean. When you take the cake out of the oven, you can cool it on a wire cooling rack and then flip it or you can flip it immediately and then let it cool on a wire rack. Either way, though, be sure to flip it onto a pretty platter which has a rim for catching any of the syrup. If a pineapple is stuck on the bottom of the pan, just pull it off and insert it back into its missing space.

When you serve the cake, you can serve it with whipped cream or ice cream or just plain, by itself.


The Secret Is In The Small Things

“I don’t know how you do it all. What’s your secret?”

After the Autumn I just had with my daughter’s accident, too many friends and family members wrestling with cancer, loved ones being in the hospital, and a friend’s daughter dying at too young an age, I was more than ready for the holiday brunch I hosted this past week where 30 of the loveliest ladies I know gathered together to simply enjoy one another’s company.

The day after the brunch, a friend sent me an email, thanking me for a delightful time, and ending with, “I don’t know how you do it all. What’s your secret?”

My first thought was that there’s no secret, but as I pondered a bit more, it occurred to me that maybe it was a secret — a secret because sometimes folks don’t actually realize that it’s the little things I do which make all the difference.

The fact is that I don’t actually like to work very hard when it comes to cooking, or really anything else for that matter. *grin* I like to be efficient at all that I do, and I like to have the time to focus on what matters most — like my family and my friends. So, when it comes to hosting a delightful brunch or Thanksgiving or a birthday party or a Christmas celebration, I rely on a few simple, not so time-consuming “secrets”.

I’ll share them with you now so you can think about them for the wonderful holiday gatherings you’ll be hosting.

Secret #1: When you have a choice about where to invest your time, it’s okay to choose the easier option:  For example, for Thanksgiving, I used frozen vegetables, potatoes, and sweet potatoes for the side dishes which saved me all the time I would have put into washing, peeling, chopping, and prepping the fresh versions.

Frozen vegetables are just as nutritious as the fresh versions; they’re usually cheaper; they’re ready when you need them without worry of spoiling; and they literally can save you hours of work in the end. Within minutes I was mashing sweet potatoes and potatoes for a layered two potato casserole, and it only took a couple of seconds to coat frozen vegetables with some olive oil and pop them into the oven to roast to perfection.

The same holds true for frozen fruit. A few weeks ago I needed to make a couple of peach cobblers, and the frozen peach slices in my freezer saved me the time it would have took for me to wash, core, and slice the peaches.

Secret #2:  Focus on the garnishes instead of the main ingredient: Within minutes, you can make any dish exceptional.

For my two potato casserole, I didn’t do anything special to the potatoes themselves, simply mashing them with traditional (well, allergy friendly versions) ingredients. What I did do, though, was to take five minutes to caramelize leeks which I arranged on top of the potatoes, which gave the casserole a pleasing appearance, added a slightly different flavor, and provided a textural contrast to the smooth potatoes. In the end, it seemed like I’d put a lot of effort into the dish when I hadn’t, and I received enthusiastic approvals of the potatoes.

For vegetables, in just a couple of minutes I often make a topping in my food processor, mixing gluten free bread slices with fresh herbs and a tiny drizzle of olive oil, which I arranged prettily over the roasted veggies. When the veggies are warmed in the oven, the crispy, browned topping adds a delightful flavor combination and provides a nice crunch to the vegetables. People will think you went through a lot of effort because you homemade bread crumbs, when in reality you used very little effort to make a tastier topping than if you had used store-bought bread crumbs.

A garnish doesn’t even have to take as much time as caramelizing leeks or making homemade bread crumbs. Sometimes for company, I’ll pull out frozen fruit, thaw them for a few minutes, and chop fresh mint leaves to throw on top. Suddenly, something ordinary becomes something exotic and tasty.

Other times, I’ll make a soup where I’ll puree frozen squash or carrots or broccoli or potatoes with broth to make a cream soup, but I’ll serve it with some crushed croutons, shredded cheese, chopped turkey bacon and/or sliced chives. Suddenly, ordinary soup becomes something special.

Secret #3: You can make anything special by keeping spices, herbs, oils, vinegars, and flavoring handy in the pantry: For special occasions I always make special drinks out of ordinary products. For example, if you purchase apple cider or apple juice at the store, but put it into your crock pot with sticks of cinnamon, cloves, and allspice, you’ll have a festive drink for any occasion.

Similarly, if you have guests over, transform your ordinary instant hot chocolate mix into something extraordinary by adding a 1/4 tsp of vanilla or peppermint or orange or maple or coconut extract. For extra-special occasions, I also keep peppermint and chocolate sticks in the pantry which I give to the children to stir their hot chocolate with. This adds some fun as well as extra flavor.

Also, adding herbs and spices to your cooking enhances the flavors for your guests even when you’re making something quite ordinary. I often serve guests what my children call “leftover” soup. I take whatever leftovers I have in the fridge, throw them into a crock pot with some vegetable or chicken broth, and let it cook for hours until everything is creamy and homey-tasting. This alone is delicious, but for company, I make up a little compote of flavors like dried thyme, black pepper and onion powder or cumin, paprika, and garlic which I mix into the soup. This elevates the taste of the soup to a different level.

You can do the same for vegetables and fruits. Sauteed or roasted or microwaved veggies become special when you drizzle them with a little bit of avocado or truffle or pumpkin seed oil as opposed to your regular olive oil. Strawberries become a delicious dessert when you drizzle them with a little bit of chocolate balsamic vinegar, not to mention that folks feel like they’re having something different and unique, even though it’s still strawberries.

Chicken or turkey or meats or fish are transformed when you brush them with a quick freshly made marinade. Choose an oil whether it’s olive oil or avocado or safflower or any other good fat oil and whisk in a couple of tbsp of a vinegar like balsamic or sherry or white wine, a tsp of a fancy mustard like garlic or honey dijon, some fresh herbs, minced garlic, and black pepper. Marinate your chicken or fish or meat for at least half an hour in the fridge. Cook as you desire whether it’s grilled or sauteed or oven-baked.

Or make a special rub: Make a dry rub of herbs and seasonings of your choice or a wet rub of herbs and seasonings with olive oil and rub it over your meat or fish or chicken before cooking.

Whether you use a marinade or a rub, the few minutes it takes will enhance the flavor of your entree with very little work.

Secret #4: You can enhance store-bought items with less time consuming homemade items: For example, I often will just purchase store-made bread or rolls, but to make them special, I’ll make a roasted-herb butter to go with it. Simply purchase some already peeled garlic, roast it in the oven at 500 degrees for about ten to fifteen minutes, stirring every five minutes, and puree in your food processor with your choice of fresh herbs. Keep the mixture in your fridge until you need it, and mix it with your choice of butter. (I use the soy and dairy free Earth Balance butter, and it always comes out delicious.)

For veggies, I’ll throw rinsed and drained canned white cannelloni beans into the food processor with some spinach, herbs, garlic, and little bit of olive oil to create a delicious dip. Or I’ll mix a drained can of artichoke hearts with some tofu cream cheese, herbs, onions, garlic, and vegan parmesan cheese in the food processor and warm it in the oven.

For chips, I’ll buy an assortment of sweet potato, brown rice, and corn tortilla chips but I’ll make a quick homemade salsa in the food processor. Maybe mix some tomatoes, onions, garlic, frozen peach slices and herbs. Or mix tomatoes, onions, garlic, avocado, and hot sauce.

By investing only a few minutes into a dip or a spread or a salsa, folks will think you’ve gone to some effort when in fact you’ve purchased most of the items from the store and your food processor did the rest of the work.

Secret #5: Sometimes it’s the presentation, not the food: Often I’ll use store-bought products but put them out on a special platter. So, for example, store-bought pudding which is scooped into little crystal dishes with a dollop of whipped cream is special.

Store-bought cookies arranged by shape on a holiday platter is more appealing to the eye and therefore to the stomach than simply keeping them in their box or putting them on a regular kitchen plate.

Often I’ll purchase hummus from the store, but to serve it for company, I’ll scoop it into a pretty bowl and throw a few chopped green onions on top. Or for a store-bought fruit dip, I’ll arrange a few curls of orange peel around a pretty bowl.

When things look pretty and are eye-appealing, people feel differently about the food, even if you didn’t actually prepare it yourself.


Turkey Talk

“The measure of success is not how high you fly but how high you bounce.”

Apparently I owe folks an apology. I blithely wrote a post about chocolate cupcakes for Thanksgiving, absolutely unaware that people were expecting some advice about turkey! Many thanks to the people who kindly made me aware! *grin*

First, my most important piece of advice: Let the worry go! I have never understood why people stress so much about cooking a turkey for Thanksgiving dinner. The truth is that, yes, something may go wrong. Just accept that fact now, plan for it, and move forward. It’s really rather freeing to know that things are not going to be perfect, so you can just enjoy being with family and friends. If the turkey is too dry, so be it; that’s what gravy and cranberry sauce is for anyway!

Now, for the turkey: (Will try to address the questions asked):

1. Frozen versus fresh: This is really just about time and money. Frozen turkeys tend to be cheaper, but you have to thaw them a couple of days ahead of time. Fresh is a little bit more money, but you can pick it up the day before.

A tip: If you don’t have a lot of space in your fridge for the turkey, put a cooler on your porch filled with ice and keep your turkey in there. As long as you’re replacing any ice that melts, your turkey will stay cold.

2. To brine or not: Funny how folks worry about this. This, too, is about time. Yes, brining does make for a moist turkey. Why? Because the turkey absorbs the liquid which then means less is lost during the cooking process. Brining, however, means doing some work ahead of time, and if you have any sodium issues, you don’t really want to add salt to your turkey.

If you choose to brine, it’s really just a matter of mixing some kosher salt with water, and if you want, herbs and/or aromatics like celery, garlic or onions. People will vary as to how much salt versus water they say to use. I usually use 2 tbsp of kosher salt for 4 quarts of water, and brine my turkey for two days. Others use more salt per water and brine the turkey for just 8 hours. What’s important to note is that the stronger the salt-water, the shorter amount of time you’ll want to use, because you don’t want your turkey to become too salty, even if you don’t have salt issues.

If you don’t want to brine, then the tip is to cook your turkey at a lower temperature. A long, slow roast makes for a moister turkey than cooking at a high heat which dries the meat out. This, of course, means starting your turkey a lot earlier in the day or having your meal much later in the day.

Tips: If you do brine, you can put the turkey into a large stockpot or tupperware with the brine and put it into your cooler on the porch. Also, if you purchased a frozen turkey, you can put the turkey into the brine frozen and allow it to slowly defrost in the brine.

3. Flavoring: If you really want a flavorful turkey, make a rub of herbs and rub it over the turkey flesh. This means gently pulling the skin away from the turkey and rubbing the dry rub underneath the skin. For the skin, if you actually like to heat the skin, you can make a moist rub by adding a bit of olive oil to the herbs and rubbing it over the skin. There’s no need to use salt or butter which helps folks who have issues with either.

A tip: Instead of stuffing your bird with stuffing, put herb sprigs and garlic and onions and carrots inside the bird. Makes for a lovely taste. Also, stuffing the bird is not the best, because you get all the bacteria from the inside of the bird onto your stuffing, and to get your stuffing to the right temperature usually means overcooking your turkey.

4. Cooking: If you are someone who really is worried about cooking a whole turkey just right, go ahead and purchase one of those turkey bags. They really do work. If you are like me and would rather not spend the whole day cooking a whole turkey, you can chop your turkey into pieces-parts and cook the white and dark meat in separate containers at the same time.

As I mentioned above, you can cook your turkey at a high heat for quicker cooking but as this will make for a drier turkey, you really should put water or chicken broth at the bottom of the pan and baste during the cooking process. Otherwise, cook the turkey at a low heat, and then just before it’s finished turn up the heat to crisp up the outer skin.

A turkey between 12 and 16 lbs usually  takes around 3 to 3 1/2 hours at 350 degrees if it’s not stuffed. Add an hour if it’s stuffed. Always use a meat thermometer to check the internal temperature. You want the bird to be at 165 degrees Fahrenheit before you remove it from the oven.

Tips: It’s always good to use a rack when cooking your turkey. To make your life easy, though, go ahead and purchase a disposable pan with a built in rack (basically a patterned raised bottom). I found these at our local dollar store for a buck. Best deal ever!

Also, let your turkey rest before carving. If you give the turkey time to sit, some of the liquids will be reabsorbed into the turkey as it cools. Use the resting time to finish off any side dishes in the oven.

Finally, you know what: You can always make the turkey the day before, slice it up, arrange it prettily on an oven proof platter, and then reheat it the next day just until it’s warm. No Thanksgiving day stress!

5. The gravy: If you’re looking to be healthy, just go ahead and use low sodium, fat free chicken broth in your favorite gravy recipe. If you make your own using the bones and neck and such of the turkey, you can also be healthier by straining your homemade broth over ice cubes which will skim the fat away for you.

A tip: Use your crock pot: Put anything you are not using from the turkey (bones, neck wings) into the crock pot with water and herbs (fresh is best like sage, oregano, thyme) and aromatics (I throw in carrots, onions, garlic cloves) and just let it cook on high for the whole day (12 hours). You’ll have some wonderful broth for your gravy and for soup without any work your part! When you go to make gravy, use 2 tablespoons of olive oil to 1/4 cup flour of your choice for every 2 cups of broth. For extra flavor, puree the herbs and aromatics from the crockpot and add it to the gravy. If using the pureed aromatics, you can reduce the flour by half because the pureed aromatics will also thicken the gravy.

6. Turkey sides: Make life easy on yourself. Use your crock pot to make veggies so you don’t have to stress about no oven space. Or make dishes which can stand at room temperature. Also, do as much as you can the day before so you can actually enjoy time with your family and friends. Finally, cut yourself some slack. Cheese and crackers are a wonderful appetizer! If you can’t have dairy, veggies and hummus work just as well. Don’t feel pressured to create something fancy. Remember, it’s all about time together, not how fancy the food is!

Happy Thanksgiving!

Creative Cooking: Chocolate Raspberry Cupcakes

“Can we make something chocolate?”

My few weeks have been beyond crazy.  On top of our usual busyness of school, work, and activities, we’ve continued to deal with my oldest’s recovery from being hit by a car, we’ve grieved the death of a friend’s daughter, we’ve agonized over a loved one being in the hospital in an induced coma, and we added rehearsals for my son to be in “It’s A Wonderful Life” and auditions for a play I’m directing.

So, it’s now just a few days before Thanksgiving, and I’m finally turning my attention to the menu for that day and returning to this blog which I have ignored for these past three weeks. When I asked my children what we should have my middle child responded with the question:  “Can we make something chocolate?”

Now, two of my three children are well-rounded dessert lovers. When presented with choices, they may choose a slice of apple pie or a piece of zucchini cake or a ginger cookie or a slice of pumpkin cheesecake. My middle child, however, when given options to choose from, will opt for the chocolate cream pie or the chocolate fudge cake or the double chocolate cookie or the chocolate cheesecake.

So, I wasn’t surprised when she asked if we could make something chocolatey. She always does, and I always suggest that we stick to the traditional pies for Thanksgiving and make something chocolate for another time. I surprised myself yesterday, though, by actually contemplating the idea of making chocolate cupcakes.

Why? Three reasons: One, I just had a really, really long week and the thought of something comforting like chocolate cupcakes was enticing; two, with the death of my friend’s daughter at such a young age (20’s) and my own daughter being alive after being hit by a car, I’m realizing that life’s too short to NOT have chocolate, no matter the season; and three, we just watched my son’s performance in “It’s A Wonderful Life” where I was reminded that it’s all really about family and friends and time together and not the menu.

So, if you need assistance in revamping your holiday menu to fit allergy or health needs, please read my posts from last year (Nov and Dec 2013) where you’ll learn all sorts of lessons for how to do so; but for this Thanksgiving, I’m offering a creative addition to the Thanksgiving menu:  Chocolate Raspberry Cupcakes which are gluten, dairy, nut, soy, peanut, and egg free. Enjoy and have a most Happy Thanksgiving!

Chocolate Raspberry Cupcakes

Ingredients:

3 1/2 cups gluten free flour (I used Authentic Foods Multi-Blend)

1/2 tsp salt

2 tsp baking soda

1 cup Enjoy Life allergen free mini chocolate chips

1/2 cup Hershey’s dark unsweetened cocoa powder

3/4 cup oil (I used safflower)

1 cup Agave

2 tsp vanilla

2 cups water

2 tbsp vinegar (I used raspberry but apple cider or white will do)

Polaner’s Raspberry All-Fruit

Baking Instructions:

1. Preheat the oven to 350 degrees and line 24 muffin cups with cupcake liners.

2. Whisk together the flour, salt, baking soda and cocoa powder. Add the chocolate chips and set aside.

3. Whisk together the oil, agave, vanilla, and water.

4. Mix the dry ingredients into the wet, adding the vinegar.

5. Divide half of the batter evenly among the muffin cups. I usually put about 1 1/2 tbsp of batter into each.

6. Carefully put one teaspoon of raspberry all fruit into the center of the batter.

7. Evenly distribute the remaining batter among the muffin tins, carefully putting the batter over the raspberry all fruit.  Again, this is usually about another 1 1/2 tbsp.

8. Bake the cupcakes until a toothpick inserted in the center comes out clean, about 15 to 20 minutes.

9. Cool in the muffin tins on a wire rack for about five minutes before removing them from the tins and completely cooling them on a wire rack.

10. For a festive touch, put the cupcake into a bowl with a scoop of vanilla ice cream or nondairy frozen dessert next to it with a raspberry and mint leaf on top.


Menu Suggestion: Bread Pudding

“Um… you don’t know me but your daughter has been run over by a car.”

Last week, one of my worst fears as a mother came true. My husband and I received THAT phone call. You know, the one where you’re told that something horrible has happened to your child while you were not with them to prevent it.

We were very fortunate that our daughter survived being hit by a car while she was crossing the street at a crosswalk, but there’s nothing which can erase the agony of those first few hours as the doctors ran tests and our daughter was in and out of consciousness.

Even when we knew she was going to be okay, though, and the world was once again filled with the light of what would eventually be, there was still this need for comfort, and while most of my comfort came through prayers and the support of friends and family, I came to a place one day where I knew I simply had to cook something, because, for me, cooking is soothing to my soul, and being able to cook something special for my daughter brought a different type of  solace.

As I thought about what to make, the first thing which came to my mind was bread pudding. Now, bread pudding isn’t something which folks in my part of the United States make much these days, and that’s such a shame, because folks don’t realize what they’re missing. Bread pudding is a delicious, homey sort of dish which is also extremely versatile and easily adaptable for a lot of food allergies. It’s also a great way to use up leftovers of any type of bread product like loaf bread, muffins, bagels, croissants, or quick breads. Plus it can be anything from a sweet dessert to a savory side dish to a breakfast entree.

I happened to have some allergy friendly pumpkin muffins leftover (free of gluten, dairy, nuts, eggs, and sugar) so I decided to chop those up and mix it up with eggs, chocolate soy milk and chopped pears. It was so delicious! And I confess, I ate it for breakfast, too, since you know — eggs, pumpkin, fruit, milk — all good things to start your day, right? *grin*

There’s some general information, though, which you should know for making bread pudding, and I’ll share them below:

1. The egg to milk ratio: Search for bread pudding recipes in cookbooks and online, and you’ll find that people differ on the ratio of milk to eggs. For myself using at least 1/2 cup of milk per egg is the lowest ratio I use; using 1 cup of milk per egg is the most I’d suggest you’d use. You’re essentially making a custard for the bread to soak up. The milk contributes to the creaminess; the eggs bind it together. The more eggs, the firmer the custard; the more milk, the softer the custard.

2. The milk: The thicker your milk, the more rich your bread pudding, so heavy cream obviously makes for a richer bread pudding than skim milk. You can, however, use any type of milk you want, from skim to heavy cream, from cow milk to coconut, soy, almond, rice or flax milk. Since we have dairy and nut allergies, I use either soy milk or flax milk. Flax milk is thicker so it mimics more the consistency of whipping cream, and it has the added bonus of those omega 3s. Soy milk is nice because it adds some more protein. In addition you are not limited to plain milk. Flavored milks, of any type, are a great way to change up the bread pudding you’re making.

3. The eggs: Using whole eggs with both the whites and yolks makes for a creamier pudding, but you can also make bread pudding with only egg whites, with Eggbeaters, and even without eggs. While eggs do bind, simply using milk alone will work, too. You just need to remember that your liquid to bread ratio has to account for the loss in eggs, which requires using more milk.

4. The liquid to bread ratio: How much liquid you need really depends on your bread. Denser whole grain breads or leftover bagels or muffins will require more liquid than an airy French or Challah bread. As a general rule, though, a one to one ratio works well — one cup of liquid for every one cup of bread. So, for example, 4 cups of bread could be mixed with 4 eggs (which would equal one cup) and 3 cups of milk which would give you a four cup liquid yield to the 4 cups of bread. If you’re uncertain, start with half the amount you think you might need and then add more if necessary.

If you’re making a bread pudding in a 9 x 13 pan, usually you’ll be using at least 3 cups of bread for a shallower bread pudding and up to 6 cups for a thicker bread pudding.

5. Mixing the custard: If you are using both eggs and milk, it’s really important to mix them together before pouring the liquids onto the bread. You’ll sometimes find a recipe that soaks the bread with milk and then mixes in the eggs. You really don’t want to follow that recipe. The key to a good bread pudding is the bread evenly soaking up the liquid, so be sure to whisk your eggs and milk together before pouring them over the bread. Obviously if you’re only using milk, you have no issues.

It’s important that any flavorings or sweeteners or aromatics you use for your bread pudding, whether sweet or savory, are mixed into your custard so that the flavors will soak into the bread along with the custard liquid.

6. The bread: What’s lovely about bread pudding is that most anything will work. Any type of sliced bread, whether wheat based or gluten free, and any type of leftover muffins, bagels, cake pieces, scones, croissants, donuts, etc…. The advantages to using leftover baked products is that you’re using up something you might otherwise throw out and usually those products are already flavored so you don’t need to add any to the custard.

If you are using bread, though, you’ll note that people will say that it should be stale bread or they’ll have you toast the bread in the oven or lightly cook it on the stovetop. This is because the drier your bread, the more obviously it’ll soak up liquid. You don’t, however, need to wait until you have stale bread to make bread pudding. If using fresh bread, simply let the bread soak longer before you put it into the oven. The effect will be the same.

7. The bread shape: Here again you will find that people’s preferences vary. Some will say use cubed bread; others say to keep it sliced; a few will argue for large hunks; many suggest small pieces. Really, it’s all about what you’re looking for as the end product. When I made the chocolate pumpkin pear bread pudding, I actually crumbled the muffins because I wanted a smoother, creamier texture. If you keep the bread in slices, it’ll make for a denser, crispier texture. Bread chunks give you something to bite into. Small cubes make for a chewier texture. So, you decide.

8. The flavorings: Bread pudding can be both sweet or savory. If you want the bread pudding for a dessert, use cinnamon, nutmeg, cardamom, cloves, ginger or vanilla or fruit peels. If you want a savory side dish or something for breakfast use herbs like thyme, rosemary, oregano, marjoram or basil and/or aromatics like onions, garlic or celery.

9. The sweetener (for dessert puddings): If you’re making a sweet bread pudding, you can sweeten it with sugar, honey, maple syrup, molasses, agave, stevia, or coconut sugar. How much you add to your custard mixture really depends on your sweet tooth. Recipes vary from 1/4 cup to 2 cups for a 4 to 6 cups of cubed bread. I personally add chopped or pureed fruit or some mini chocolate chips if I’m making a sweet bread pudding and omit any other added sweetener.

10. The additions: Okay, the best part of bread pudding is that you can create whatever you want. As I mentioned, this time around I took leftover pumpkin muffins and added chopped up pears and used chocolate soy milk to make a chocolate-pumpkin-pear bread pudding.

You can add anything you like to a bread pudding. For sweet puddings add chopped or pureed fruits or chocolate chips or coconut flakes or dried chopped fruits. For savory puddings add chopped vegetables or pureed pumpkin or squash or sauteed vegetable aromatics like mushrooms and celery or add cheeses like romano or parmesan or even chopped up chicken or sausage.

What’s important is that you either mix the additions with the bread or sprinkle them onto the bread before you add the custard mixture. The custard mixture is always last.

11. Assembling a bread pudding: We’ve basically gone over this in pieces-parts: Prepare your bread, whatever it is, the way you want, whether crumbling, cubes, chunks or slices. If you’re going to mix in any additions, do so. Grease a pan with your preferred method of greasing. Spread the bread mixture evenly in the pan. Mix together your custard, whether it’s eggs and milk or just milk, with your flavorings. Pour the mixture over the bread. Let the bread soak up some of the custard before baking (This can be anything from 15 minutes to overnight.)

12. Cooking the bread pudding: Okay, this is where you decide what type of pudding you want. I like my bread puddings to be soft and creamy in texture. So, for my bread puddings I use a pan with a large overhanging edge and place that pan into a larger pan. Then I put the larger pan, holding the smaller pan, into the oven. Slowly I pour hot water from my tea kettle into the larger pan until the water comes up just under the overhanging edge of the smaller pan. As the pudding cooks and solidifies, the hot water bath more evenly cooks the pudding and the moisture keeps the pudding soft and creamy. If you prefer a heartier texture to your pudding, you can simply bake the bread pudding in the oven in its pan without any hot water bath.

Most bread puddings in a 9 x 13 pan will cook in about an hour at 350 degrees. You’ll know it’s done because the bread pudding won’t be liquidy but puffed and solid.

And bread puddings last for days and days in the fridge without going bad so you can go ahead and make that big 9 x 13 batch instead of the 8 x 8 which many recipes these days make!


Cooking Techniques: Allergy Friendly Pie Crusts

website crusts

“Yay! Thanksgiving in October!”

My ninth grade daughter is taking French this year for the first time, and the high school she is at hosts an exchange program with another high school in France. We were asked to host a French student for two weeks, and one of the suggestions for entertainment was to have a Thanksgiving meal with them, since that would be a different experience for them.

We were happy to oblige, as you can tell by my son’s response above.

As we prepared, we explained to our French student that no matter what people say about the Turkey and the side dishes and the rolls, that Thanksgiving really is all about the pies: apple pie, pumpkin pie, mincemeat pie, cranberry pie, pecan pie, sweet potato pie, pear pie, buttermilk pie, and every possible variation of these pies which exist.

For folks with food allergies, though, pies can be tricky. May people struggle with pie-making in general, even when you’re able to use white flour, butter, and salt. The thought of trying to make a pie crust with substitutions is something a lot of folks simply just don’t want to consider.

The good news, though, is that making a gluten, dairy, soy, salt free pie crust is actually easier than making a traditional pie crust. You just need to know a few things, and you’ll be on your way to a great Thanksgiving dessert buffet!

Tips for Allergy Friendly Pie Crusts:

1. It’s just a simple swap: Because pie crusts don’t need to rise the way breads and cakes do, you can simply substitute your favorite gluten free flour for the all purpose flour. No need to make up any special flour blends at all. If you want a flakier, crispier, closer to traditional pie crust, opt for flours like brown rice or sorghum. If you want a more substantive crust with flavor, protein and fiber, try garbanzo bean or gluten free oat flour. If you have a gluten free flour blend sitting around in your closet, you can by all means use, too.

2. Cold is best all the way around: All pie crust recipes call for cold butter or shortening, cold ice water, and to put the made crust in the fridge for a little while. Why? Because warm pie crust dough sticks and won’t roll very well. Warm pie crust dough makes for a denser, less flaky crust.

What I find works wonderfully is to stick your measured butter and/or shortening into the freezer for five 10 minutes or so before using, to put ice cubes into your water, and to put your prepared pie crust dough into the fridge for a minimum of thirty minutes, an hour at the most.

3. “Fat” substitutions work: I use soy free vegan butter and shortening in my pie crusts all the time without any difference. So you can simply use what works for you without worry. It’s a straight one to one substitution ratio. What you should know, though, is that the allergy friendly versions tend to be softer than regular butter and shortening so sometimes I freeze them a little longer more like 10 to 15 minutes.

4. Work around and with the rolling: When it comes to pie crusts, the rolling out of the dough is what usually causes issues for people. I’ve learned a couple of things:

One, you don’t have to roll the bottom crust. I shape my dough into a slightly flattened disk (about an inch high) which I cool in the fridge for my 30-60 minutes, and then I simply use my fingers to push the dough outward from the center to the edges. It takes less than five minutes and actually makes for a more even crust.

Two, when I do have to roll the crust for the top part of a pie, I’ve found that putting the dough between two pieces of wax paper which I’ve also lightly greased is the best approach. The dough rolls easily, doesn’t stick, and comes off when I go to put it on top of the pie.

5. Be creative with the flavoring: Salt is the go-to for pie crusts, but it doesn’t have to be. If you’re making an apple pie, add some cardamom to complement the cinnamon in the pie. If you’re making a pumpkin pie, add grated orange peel as a contrast to the pumpkin. If you’re making a sweet potato pie, add grated nutmeg to intensify the sweet potato taste. You simply add the spices to the dry ingredients of the pie dough before cutting in the fat.

6. Know the effects of the process: Another issue people often have problems with is making their dough too dry or too wet. It’s important to understand the dynamics of the different ways you process the dough:

If you use a food processor which is what many recipes say to do nowadays, the dynamics of the food processing blade means the water is incorporated quickly and efficiently. If you have cut the fat in yourself with a hand pastry blender of two knives and are adding the water by stirring the dough with a fork, the water will drain into different parts of your dough more quickly than you can stir it. As a result you will often need more water for hand processing than when using a food processor.

Also, a food processor will draw the dough naturally into a ball which makes it easy for you to see that you have enough water. When you stir the dough by hand, the dough will usually not form a ball unless you’ve added too much water.

So, a tip: If a recipe calls for a certain tbsp amount of ice water for use in a food processor, it will normally mean you’ll need about two tablespoons more for hand stirring, so if my dough looks dry after the amount specified, I will go ahead and add two more tablespoons, and then even if it looks dry still, I will push the dough together with my hands to form two disks. If the dough will stick together, it’s fine, if there are dry pieces falling off, I simply wet my hands with the ice water and incorporate those dry pieces into the disks.

Struesel Pear Cranberry Pie

(This recipe makes two pies)

Ingredients:

Pie crust, prepare enough for two bottoms only

1 cup agave

1/4 cup water

one 12 oz package of fresh cranberries (be sure to check for stems)

8 pears, washed, cored and sliced into 12-16 slices each

3 tbsp cornstarch

3 tbsp water

2 cups gluten free whole oats

1/2 cup sorghum flour

1 tsp cinnamon

1/2 tsp nutmeg

1/4 tsp ground cloves

1/2 cup vegan soy free butter*

Baking Instructions:

1. Prepare your favorite pie crust recipe. If you don’t have one, Bob’s Red Mill pie crust mix works very well. Would recommend adding some spices to jazz it up a bit, though.  Line the bottoms of two 9.5 inch pie pans with the crusts.

2. Mix agave with water and put into a stove top pan large enough to hold all the pears.

3. Add the cranberries and bring to a boil. Cook for a minute or two until the cranberries begin to pop.

4. When the majority of cranberries have popped, add the pears, stirring to coat with the cranberries. Cook for 3-5 minutes until pears have softened.

5. Mix the cornstarch with the water, and making a well in the center of the pear mixtures, slowly add the cornstarch, stirring continually. Mix the cornstarch syrup thoroughly with the pear-cranberry mixture, cooking for a minute or two to make sure the syrup has thickened.

6. Evenly divide the pear-cranberry mixture between the two pie crusts.

7. In a food processor, add the oats, sorghum flour, cinnamon, nutmeg, cloves and butter.  Process until the mixture is a nice crumbly topping.

8. Evenly distribute the topping over both pies to completely cover them.

9. Bake in a preheated 375 degree oven for about 40-45 minutes until the pie is bubbling and the streusel is golden brown.

10.  Cool completely before serving.

* This makes for a savory topping which contrasts with the sweetness of the pear-cranberry mixture. If you happen to like your toppings sweet, you should add a tbsp or two of Agave with the butter.


Autumn Appetites: Apples

website apples

“An apple a day keeps the doctor away.”

For many folks autumn in New England is all about the beautiful colors and the opportunities for leaf-peeping. For me, I adore that it’s apple season. Orchards abound with every type of apple you can imagine, and you can pick them right of the trees by your very self.

My favorite is a variety called, Honey Crisp, which is just as it sounds – crisp and sweet. For someone like myself who doesn’t use refined sugar, these apples are wonderful for making pies and cakes and cookies and for sauteing slices to put on top of pancakes, waffles and ice cream (or rather nondairy frozen dessert, in my case!).

The thing about apples, though, is that most of the fiber and nutrients which are healthy for you are in the skin which people peel and throw out. So, I like to make recipes which require using washed, unpeeled apples which will mean that me and my family will receive the many benefits one can receive from eating apples.

Some suggestions for whole apple eating:

1. Make baked apples:  Wash and core your apples and put them whole into a baking pan. Melt a little bit of vegan butter and mix it with a little bit of natural sweetener like agave or coconut sugar and spices like cinnamon or cardamom or ginger or nutmeg or allspice or orange peel or a combination and sprinkle the mixture over the apples. Pour some hot water into the bottom of the pan and cover with foil. Bake at 350 degrees for half an hour, remove the foil, and bake the apples until they are fork-soft.

I usually can bake about 15 to 18 apples in a 9 x 13 pan, depending on the size of the apples, and I mix 2 tbsp of vegan butter with 2 tbsp of agave and 3 tsp of mixed spices.  To top the apples after they’ve cooked, I saute gluten free whole grain oats on the stove top with spices and butter and agave. (2 cups oats mixed with 4 tbsp melted vegan butter, 1/4 cup agave, and 1 1/2 tsp cinnamon, 1 tsp nutmeg, and 1/2 tsp ground coriander.)

2. Make apple cake:  A lovely cake I recently developed using all that extra sorghum flour I have is:  Mix 2 c sorghum flour with 1/2 c garbanzo bean flour, 1 c gluten free flour blend, 2 tsp baking soda, 2 tsp baking powder, 2 tsp cinnamon, 1 tsp sea salt, 1 tsp nutmeg, and 1/4 c coconut sugar.

In a separate bowl, mix 2 1/2 cup grated apples (keeping the peels on but draining the shredded apples in a colander for 5 minutes before adding the other wet ingredients) with 2/3 cup safflower oil, 2/3 cup milk mixed with 2 tsp lemon juice, 3/4 cup agave, and 3/4 cup liquid egg whites.

Mix the dry ingredients into the wet, quickly and thoroughly. Bake in a parchment paper lined 9 x 13 or 11 x 14 pan (depending on how high you want the cake) for 30 to 40 minutes until a toothpick in the center comes out clean. Baking time may vary depending on the type and size of pan.

3. Make apple crisp or apple pie with the peels on the apple:  I have recipes for both on the site already. Both say to peel the apples because that is how we make them for company, but for home we keep the peels on and the crisp and pies are just as tasty and actually more filling.

4. Saute the apples: Wash, core and slice apples with the peels on. Put into a pan and saute over medium low heat with a couple of teaspoons of agave mixed with an equal amount of water and cinnamon and nutmeg. Usually within five minutes or so, the apples are fork tender and delicious for topping pancakes or waffles or cake or ice cream.

5. Make quick and easy homemade applesauce:  Cut up an apple with the peels on and put into a microwave safe bowl. Add spices of your choice and microwave until the apples are soft enough to chop up and mash (usually just a couple of minutes in my microwave). Mash up with a fork or in your food processor. Cool and enjoy.

6.  Make an apple sweetened squash or carrot soup: Roast chopped butternut squash and/or carrots with cut up apples with the peels on. Be sure that everything is cut to the same size so they roast equally. When the vegetables and apples are soft, cool them for a few minutes and then puree with a hand blender or processor, adding fat free, low sodium broth of your choice and seasonings like thyme or rosemary or onions or black pepper to add extra flavor. Warm the soup to the temperature you’d like, and enjoy.

7. Add unpeeled chopped apples to salads:  Put apple slices into your green leaf salad for added flavor. Add finely chopped apples to your tuna fish or chicken salad for some crunch and texture.

8. Eat the apples as are:  I like to slice the apples and eat them with little dabs of peanut butter on them. When my children need a snack after school, they will eat apples whole, enjoying the sensation of biting into a sweet, crisp apple. Sometimes on a cold day, I core an apple and microwave it to soften it a bit and eat the apple warm which is soothing and tasty.


Recipe Experiment: Sorghum Quick Bread

“Well, can’t you make some healthy junk food for me to have as a snack?”

If my son was growing up in what the surveys say is a typical American home, he’d be a junk food junkie. Given the choice, cookies, ice cream, cake, chocolate, candy, would always win. As it is, though, he was born into our family so he is more of a junkie wannabe, constantly nagging me for all those things and resigning himself to a banana when the answer is, “No.”

The other day, though, he had a particularly rough day, and he really wanted something sweet but a banana wasn’t cutting it. (Yes, he must be my son, since he’s already learned that food can sometimes provide solace in the face of difficult days! No, I do not approve of folks “feeding” their problems, but face it, sometimes you just need some comfort food!)

One look at his little sad face, and I caved. Since I still have all that sorghum flour I mentioned in the sorghum pancake post, I decided I’d try experimenting. Maybe I could make a quick bread which would be a good healthy snack but provide that little sweet solace my son craved.

Since sorghum flour is so high in fiber, it seemed it would make a great base for a banana bread where ripe bananas would help to cut down on the need for sugar and the fiber in the sorghum flour would counter any spike in blood sugar levels from all the fructose. I didn’t want the bread to be too heavy, though, so I mixed a bit of brown rice flour, and then, because you know how much I like that protein-full garbanzo bean flour, I added that, too.

Because I wanted to steer clear of egg, dairy, and soy allergies, I used ground flaxseed and flax milk, using lemon to make a “buttermilk” and adding vinegar at the end to help the eggless, gluten free breads to rise.

I had wanted to use a little bit of safflower oil, but since the cupboards were bare of that, I opted for a coconut oil and used some coconut sugar, figuring any residual coconut taste would complement the bananas. To add other flavor, I decided this would be a spice bread and incorporated some cinnamon, nutmeg, ginger, allspice and cardamom. Then because this was supposed to be “medicinal” bread, I added mini Enjoy Life chocolate chips, and the results were two loaves of delicious, healthy snacking bread.

My son was happy that he got to eat a “healthy junky snack”, and I was happy that I was able to bring a smile to his face without compromising my principles surrounding junk food.

Sorghum Banana Quick Bread

Ingredients:

2 tbsp golden ground flaxseed mixed with 6 tbsp of water

1/2 cup flax milk* mixed with 1/2 tbsp lemon juice

2 cups mashed very ripe bananas

1/2 cup melted coconut oil**

1/4 cup Agave

2 cups sorghum flour

1/2 cup brown rice flour

1/2 cup garbanzo bean flour***

1/2 cup coconut sugar

1 1/2 tsp baking soda

1/2 tsp sea salt

2 tsp ground cinnamon

1 tsp ground cardamom

1/2 tsp ground ginger

1/2 tsp ground nutmeg

1/2 tsp allspice

1 1/2 cups Enjoy Life allergen free mini chocolate chips****

2 tbsp apple cider vinegar*****

Baking Instructions:

1. Line two 9 x 5 loaf pans with parchment paper so there are wings hanging over the sides of the pan for lifting the bread out, and preheat the oven to 350 degrees.

2. Mix together the flaxseed and water and let it sit for five minutes to thicken.

3. Mix together the milk and lemon juice and let that sit for five minutes to thicken.

4. Mix together the flaxseed mixture, the milk mixture, the mashed bananas, coconut oil and agave. Set aside.

5. Whisk together the sorghum, brown rice and garbanzo bean flours with the coconut sugar, cinnamon, cardamom, ginger, nutmeg, and allspice.

6. Add the chocolate chips to the dry mixture, and then add the dry mixture to the wet ingredients with the apple cider vinegar.  Mix quickly and well.

7. Evenly divide the batter between the two loaf pans.

8. Bake for 40 minutes until the bread is golden brown and a toothpick in the center comes out mostly clean.

9. Cool the bread for 10 minutes in the pan. Then remove the bread, using the parchment paper wings to a wire cooling rack. Cool another ten minutes, and then carefully slide the loaves off the parchment paper onto the wire rack.

10. Cool completely, slice and enjoy.  Or eat it while it’s still warm, if you can’t wait!

* You can use any other type of milk, too.

** Try it with safflower oil or vegan melted butter instead of coconut oil if you have a tree nut allergy.

*** If you have a legume allergy, just double the brown rice flour or opt for another type altogether.

**** If you want to mix it up, omit the chocolate chips and try using chopped dried plums or apricots or dates instead.

*****If you don’t have apple cider vinegar, white distilled is fine.

Final Note: If you don’t want to use all those spices, don’t. Feel free to omit any of them or experiment with your own flavors.


Recipe Makeover: Waffles

website waffles

“But I was good all week; I went to school!”

My two daughters love school — my oldest because she’s academically inclined; my middle child because she’s socially inclined. My son, however, believes school was designed by adults who want to torture little boys. His current goal is to grow up to become President of the United States for the sole purpose of changing the laws which mandate that children need to attend school.

Still, I laughed this morning when he asked if I would make waffles for special breakfast, and his reason for why I should was because he had been good by going to school all week. What he thought he might have been able to do otherwise, I do not know….

To be honest, though, I hadn’t been inclined to make waffles because we had always used a lovely recipe from my mother-in-law which now I can’t use due to my new wheat sensitivity and dairy allergy. So, I had been making a lot of French toast and pancakes and frittatas instead for our special Saturday breakfasts. However, I bit the bullet this morning and decided to attempt a recipe makeover and see what happened.

What happened was that the waffles came out delightfully delicious and perfect with no inkling that they weren’t the same waffles from my mother-in-law’s recipe, so I’m going to share the makeover this morning in case anyone else has a son wanting waffles to eat.

Original Waffle Recipe:

1 1/4 cup whole wheat flour, 1 cup wheat germ, 2 tbsp sugar, 1 tbsp baking powder, 1 tsp salt, 2 cup milk, 1/2 cup vegetable oil, and 2 eggs.

The Makeover:

1. Flour: I had loved this recipe because it called for 100% whole wheat flour which is more nutritionally dense than white flour. To make it gluten free, though, required making some choices. I could use a more nutritionally dense flour like garbanzo bean and gluten free oat flours which are usually my flours of choice, but waffles really require a lighter, finer flour if you want them to come out light and airy, so I chose instead to use a brown and sweet rice flour blend from Authentic Foods instead.

2. Wheat germ: Because wheat germ has added nutritional benefits I didn’t really want to simply replace this part of the recipe with more flour. So, instead, I opted to replace it with golden ground flax seed which is a great addition for those omega-3’s and has a similar texture and consistency to wheat germ.

3. Sugar: Since I rarely use refined white sugar, I decided to use 1 tbsp of Agave in place of the sugar.

4. Baking powder and salt: Since baking powder has sodium in it, I reduced the amount of salt to 1/4 tsp and added 1 tsp of cinnamon for some flavoring.

5. Milk: Because of my dairy allergy, I decided to experiment with both soy milk and flax milk, since we usually make a double batch so the kids can toast up waffles during the week before school. The soy milk has the advantage of adding protein to the waffles. The flax milk would provide another alternative since I’m always watching how much soy I use in case my body decides to add yet a fourth allergy or sensitivity onto my plate. Both versions came out perfectly, so I would imagine that folks could experiment with almond or coconut milk, too. Rice milk is always an option, as well, but remember that it’s much thinner than all the other milks so sometimes it needs the addition of a tbsp of flour or arrowroot to thicken it.

Because I was concerned about getting the right thickness for the waffle batter and about how well the gluten free version would rise, I also decided to borrow a technique I use for pancakes and make a “buttermilk”. So, I added 2 tbsp of lemon juice to the 2 cups of “milk” and let it sit for a couple of minutes after stirring. This added acid to the batter which created a “just right” batter texture and perfectly risen waffles.

6. Vegetable Oil: So, nowadays you can google oils and find all sorts of reports saying that even the ones which were touted as good like safflower are bad. It’s difficult to know what to believe anymore. The truth is moderation in all things is always the key. Since the one thing which hasn’t changed — ever — is that people continue to tout the benefits of olive oil, I decided I’d use a blend for the waffles. Using olive oil alone would considerably alter the taste of the waffles s I used a blend of olive, canola and grapeseed which I purchase at BJs and keep in the house.

7. Eggs: Since no one has an egg allergy (currently!), and neither my husband nor I have cholesterol issues, I opted to just keep the eggs as is, and this recipe is marvelous because you just whisk the eggs in with the batter without having to separate the yolks from the whites and whip the whites, which takes so much more time to do. If someone does have to watch cholesterol and opts for using four egg whites instead of the two eggs, I would encourage you to then whip the egg whites and fold them into the rest of the mixed up batter.

8. Additions: Since I was creating a new waffle recipe, I decided it would be nice to try to jazz them up a little bit, so after whisking the batter, I gently folded in one cup of frozen mini wild blueberries. Not only did this make the cooked waffles pretty but it added a very nice taste to them.

Gluten and Dairy Free Waffles

Ingredients:

1 1/4 cup gluten free flour blend

1 cup golden ground flax seed

1 tbsp baking powder

1/4 tsp salt

1 tsp cinnamon

2 cups “milk” (soy and flax work well)

2 tbsp lemon juice

1/2 cup plant-based oil blend

1 tbsp Agave

2 eggs

1 cup frozen mini wild blueberries

Cooking Instructions:

1. Preheat waffle maker.

2. Whisk together the flour, ground flax seed, baking powder, salt and cinnamon. Set aside.

3. Whisk the lemon juice into the milk and let it sit for a couple of minutes.

4. Add the oil, agave and eggs to the milk, and whisk well.

5. Gently fold in the blueberries.

6. Put one cup of the batter into the waffle maker and cook according to the waffle maker’s design. (We have two; and for one, the light goes on when it’s done, but the other the light goes off. It always makes for an interesting morning!)

7. When the waffles are done, if you aren’t going to eat them immediately, put them onto a wire cooling rack so they can cool, and then put them into the fridge in a container. To reheat, simply toast them in the toaster on low.

Note: One recipe made 20 waffles for us with a waffle maker that makes four at a time.


Summer Veggin’: Eggplant

website eggplant

“It’s a miracle.  The eggplant turned into a tomato plant!”

Several years ago my mother-in-law generously gave my husband some plants she had grown from seed to put into our garden. Most of the plants were tomato plants but she offered us one eggplant, because she knows that I like eggplant. My husband, however, does not care for it as much as I do, and he had actually at one point said that he would never grow eggplant in his garden. So, it was really a testament of his love for me that he accepted that plant from his mother and dutifully planted it in his precious garden.

Well… one day he came running into the house.  “Honey, even God doesn’t want me to grow eggplant.” He grinned and dragged me outside. “See, it’s a miracle. The eggplant turned into a tomato plant.”

Sure enough, what my mother-in-law had given us as an eggplant was actually another tomato plant. Obviously, there had simply been a mistake, but my husband still refers to that incident as divine providence affirming his dislike for eggplant.

And I’ve found that many people are like my husband and don’t care for eggplant very much, which I just don’t understand. Eggplant provides so many nutrients our bodies need and is an extremely versatile vegetable — one that can be roasted, stuffed, stewed, grilled, baked and stir-fried. They’re a great substitute for meat because they’re very filling without all the calories and fat and have a meaty texture. And they’re one of the few other vegetables which  provide those purples that round out rainbow eating.

Over the years, eggplant continues to be my husband’s least favorite vegetable, but he’s come to a place of recognizing their benefit — mostly that they’re much cheaper than meat — and acknowledging that the dishes I prepare can actually be tasty, even with eggplant.

Some Eggplant Suggestions which most people will like:

1. Make an eggplant parmesan instead of chicken parm. The eggplant has less calories and fat, but is just as filling, and with tomato sauce and cheese, I’ve served it to company with rave reviews. For a healthier version, I simply brush a little bit of olive oil on the eggplant and broil the eggplant on both sides for a few minutes until just beginning to become tender. I layer the eggplant with tomato sauce and a mixture of mozzarella and parmesan and fresh herbs until my pan is filled and then bake it in the oven at 375 for about thirty to forty minutes until the dish is bubbly and the eggplant is soft to cut. (When I make this allergy friendly so I can eat it, I use the vegan parmesan and mozzarella but I mix the cheeses with garlic, herb and onions and put it in the fridge overnight so the flavors can meld so the “cheeses” will taste more to everyone’s liking.)

2. Make an eggplant dip or spread. Roast a whole eggplant on a cookie sheet in a 400 degree oven for about an hour until it’s soft and the skin is splitting. Scrape out the eggplant from the skin and mash with some garlic, onions, herbs, and a little bit of olive oil. This is delicious as a dip for pita chips or spread onto little toasts and topped with a small crumbling of cheese.

3. Stir fry the eggplant. Some friends just gave me three nice sized eggplants which I peeled and sliced into one inch cubes. Then I stir fried the eggplant with some thinly sliced carrots and mushrooms in a little bit of sesame oil. Once the vegetables were beginning to soften, I added a sauce which thickened nicely and coated the vegetables: 1/2 cup fat free low sodium chicken broth, 1 tsp sesame oil, 1 tsp avocado oil, 1 tsp mince garlic, 1 tsp minced ginger, 1/4 tsp soy sauce, and 1 tablespoon cornstarch – all mixed well.

4. Grill the eggplant. Slice eggplant lengthwise into long, fat pieces, keeping the peel on. Lightly brush the eggplant with olive oil and drizzle herbs, black pepper, and a small amount of salt on both sides. Grill a couple of minutes on both sides until the eggplant is tender. You can then drizzle a bit of balsamic vinegar over the eggplant, and it’s a lovely side dish.

5. Stuff the eggplant. Stuffing vegetables is a wonderful way to use up leftovers in the house, and I think I’ll actually do a post on stuffed vegetables. For now, though, focusing on eggplant, you can use most anything you want — rice, meat, vegetables, bread crumbs, seafood, stuffing, cheese. To prepare the eggplant, cut it in half and brush the cut sides with a little bit of olive oil. Bake in a 375 degree oven on a cookie sheet cut side down for 15 minutes and then turn it over and bake for another 15 minutes until the eggplant is tender. Scoop out the insides and mix it in with whatever you’re using as stuffing. Stuff the eggplant and return it to the oven for another 30 minutes to fully heat the stuffing and eggplant together.

6. Add eggplant to your usual dishes. If you’re making a vegetable pizza at home, add some sauteed, chopped eggplant. If you’re throwing leftovers into a stew or soup, add chopped eggplant. If you like to make a fresh tomato sauce for pasta, add chopped eggplant to the recipe. In each of these the eggplant will lend a meatier texture and add flavor. The ideas are endless, and I encourage you to experiment.