Easy Does It: Cooking with a Crockpot

website crockpot

“What’s for dinner?”

The yellow school bus had pulled up less than a minute ago, and my youngest had bounded into the car, dumped his backpack onto the car floor, and buckled his seat belt before asking the question he asked every weekday at the same time.

Before I could answer, he cast a hopeful look at me and threw out another one word question, “Pizza?”  Then, he giggled, because he was already anticipating the answer which I gave most every day to this ritualistic exchange.

“Noooo, no pizza today, little pizza monster.”

If my son had his way, we’d have pizza every single night for dinner.  And in some ways, it would make my life simpler if we did just eat the same meal every day.

“What’s for dinner?” is arguably one of the most frequently asked questions of a mom.  And for many moms at the witching hour, it’s one that can cause considerable stress.  Families today are pulled in so many directions, and getting supper onto the table for a family meal can be a daunting prospect, let alone trying to make it a healthy meal that also takes into account every person’s food allergies.

Crockpots or slow-cookers

If you’re like me, though, you do want to make family dinners a priority, and if you do, I’d like to encourage you to think about using a crockpot.

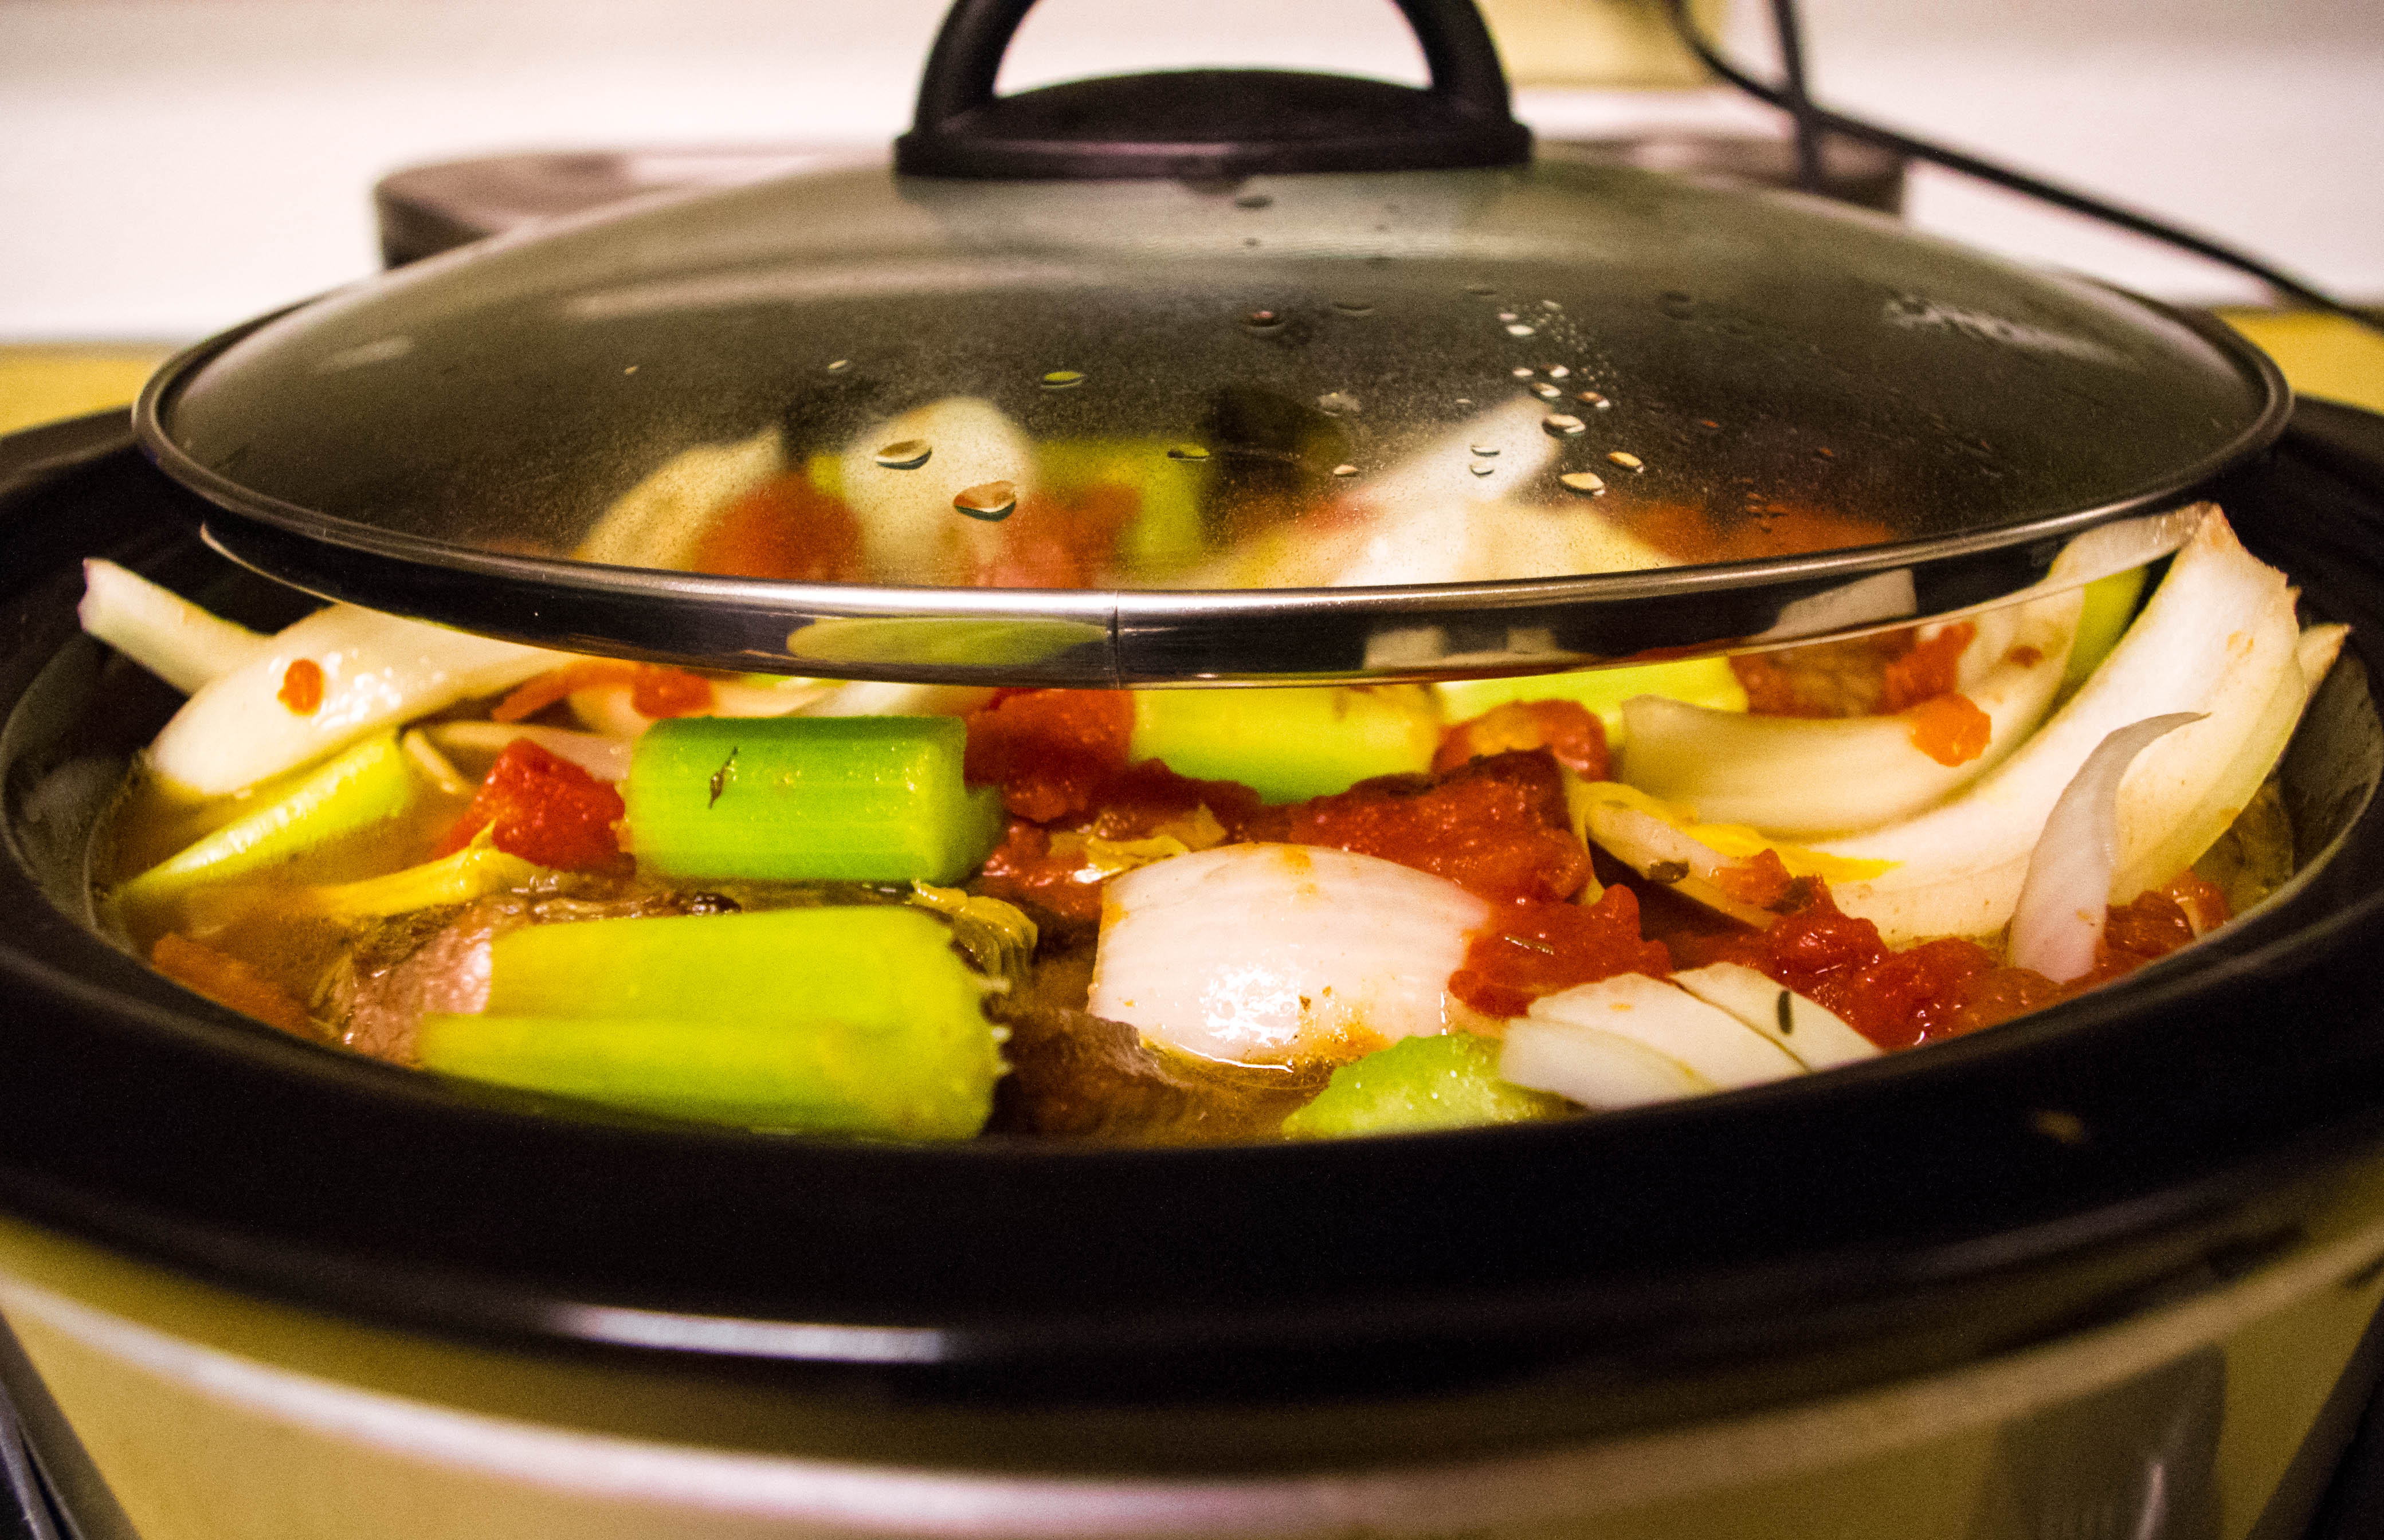
If you don’t know what a crockpot or slow-cooker is, it’s simply a pot in a warming element that cooks your food slowly over time.  Today, there are many varieties, but the most used are the 4 quart and 6 quart sizes.  They usually have a knob which you can turn to a low, high or keep warm setting.  Some are programmable, though, and others have the settings by hours, usually 4, 6,or 8 which are the most used times on a crockpot.

You can purchase them for reasonable prices these days at any store, but you can also acquire them for very little money at second-hand stores like Savers or the Salvation Army or online at sites like Craig’s list .  Whatever you spend, it will be one of the best investments you’ve ever made.

Advantages of a crockpot

I actually own four in different sizes, because you can cook just about anything in a crockpot – meats, stews, soups, vegetables, beans, cakes, puddings, fruits, quiches, etc….

The advantage of doing so is that you won’t be cooking during the most difficult time of your day.  You simply put everything into your crockpot first thing in the morning, and the food is ready when you and your family are ready to eat at the end of the day.  Also, because the crockpot can keep things warm, for those days when you simply can’t eat as a family, the food can stay warm in the crockpot for as long as you need so each person can eat when it suits their schedule.  (I actually have a meal in one of my slow-cookers right now as I write:  Thin and Trim chicken sausage mixed with zucchini, eggplant, summer squash, peppers, carrots, tomatoes, onions, and herbs.  Doesn’t that sound delicious?  And this evening when we’re rushing in from all the children’s after school activities, it’ll be ready for us to eat!) 

In addition, crockpots are wonderful for those summer months when you want something warm but don’t want to make the house warm by using the oven.  As well, for those times when you need to cook a lot (think Thanksgiving!) and your oven is full, you can use crockpots to cook your side dishes at the same time as whatever is in your oven.

Slow-cooking tips

Some tips for you to know when cooking with a slow-cooker:

1) Don’t stress about it!  You can put together just about anything, and it will come out fine.

2) Whatever you need to cook the longest should be on the bottom.  So foods like potatoes and carrots and other root vegetables which can take longer should be at the bottom if you were to make a meal like pot roast and vegetables.

3) If you like your meat to still moo when it’s done, you don’t want to cook it in a slow-cooker.  Slow-cookers are for when you like your meat to be tender and falling apart when you put your fork to it.

4) Your crockpot should always be at least half full to 3/4 full for it to cook properly.

5) Foods cooked on the low heat setting normally take between 7-9 hours.  If you use the high heat setting, the food usually cooks in half the time as the low heat setting.

6) If you make a single food like meatloaf or a whole chicken, you want to add some liquid like beef or chicken broth to the pot, or these items will be a bit dry.

7) If you’re cooking other foods like a stew or roast and vegetables, you want to limit the amount of liquid you add, because the process of slow-cooking will add liquid to the foods naturally.

8) Never put frozen meat into the crockpot.  They will not cook well.

9) You can, however, put little frozen fruit or veggies into the crockpot like peas or blueberries if you’re making a mixed vegetable or fruit dish.

10) You should always cut off any extra fat from any meat before putting it into the slow-cooker because the fat will just drain into your food.

11) If you want to enhance the flavor of  food you’re cooking, you can brown the meats or sauted your aromatics (garlic, onions, et…) before adding them to your slow-cooker.

12) Boneless chicken breasts only take a few hours, about three to four hours in a crockpot on low, but cuts of meat like  a roast take longer, 8 to 10 hours on low.

13) If you want vegetables to be only lightly cooked, you should check them after two hours.  Most vegetables only dishes will be done in three to four hours.

14) Crockpots are great for beans, because you don’t have to presoak them.  Just wash them and put them into the crockpot with your seasonings, and after 6 to 8 hours, they’ll be done and ready to eat.

15) Don’t be afraid to experiment!  There are so many online blogs and recipe sites, as well as crockpot cookbooks, that you could probably make a different crockpot meal every day of the year and not exhaust the recipes.

Crockpot Enchilada Casserole

Ingredients:

1 to 3 tsp chili powder (depends on how hot you like things)
1 cup low salt, fat free chicken broth
6 oz can of tomato paste
1 tsp dried oregano
1 tbsp ground cumin
One 8 oz can no added salt tomato sauce
2 tsp minced garlic
½ tsp black pepper
1 cup salsa

One 15 oz can of no added salt beans (ranchero, kidney, northern beans, black – whatever you like best or have on hand)
2 cups thawed frozen corn
1/2 cup diced red, yellow or green peppers
1/2 cup finely diced zucchini
1/2 cup sliced broccoli

4 chicken breasts (sliced into thin slices or diced into small squares and sauteed just until no longer pink) 

10 corn tortillas
8 oz shredded reduced fat, low sodium cheddar cheese (can be omitted)

Cooking Instructions:

1.  Mix the chili powder, chicken broth, tomato paste, oregano, cumin, tomato sauce, garlic, pepper and salsa together.  Set aside.

2.  Combine the beans, corn, peppers, zucchini, and broccoli.  Set aside.

3. Layer two tortillas on the bottom of the crockpot.*

4.  Follow with ¼ of the chicken slices.

5.  Top with ¼ of the sauce mixture.

6.  Add ¼ of the bean mixture.

7.  Top with 1/5 of the cheese.

8.  Repeat the layering three more times.

9.  Top with the last two tortillas and remaining cheese.

10. Cover the slow-cooker and cook on low for 6 to 8 hours or on high for 3 to 4 hours.

*NOTE: The two tortillas don’t completely fill the crockpot, so we layer the tortillas perpendicular to the layer beneath (i.e. making a cross shape with every two layers).

The Frozen Chosen: Eating More Fruits and Veggies

website frozen

“New Yorkers really ARE friendly!”

For my oldest daughter’s sixteenth birthday she asked if I could take her to NY city instead of having a sweet sixteen party.  We stayed with a friend in NJ and took the train and subway in and out for five days of visiting.

Since my oldest is on the autism spectrum, I wanted to make sure she knew what to expect on our trip, and the first thing I did was to tell her that despite the stereotype, New Yorkers were actually friendlier than folks in Boston.  She, of course, was doubtful — until she experienced their friendliness on our trip.

She learned that if she smiled at a New Yorker on the street, they smiled back, whereas in Boston if you smile at someone, they look at you funny and cross the street.  She reaped the benefits of helpful pedestrians who pointed out when we were going the wrong way to Broadway as opposed to someone saying, “If you don’t know how to get there, maybe you shouldn’t be here.” (True response to me when I was lost in Boston once!)  When I missed a curb and went sprawling across the pavement, purse and souvenirs flying here and there, she marveled as twelve different people came to our aid, helping me up and returning every item including my purse — all monies and credit cards in place — whereas the one time I tripped in Boston, three people walked over me!   (Again, honest to goodness truth!)  She even chatted with fellow travelers on the subway as folks made conversation with us on every trip in and out of the city.

At the end of our visit, her perceptions about the folks of NY City had changed, and I was glad.

Similarly, I hope to change perceptions about the types of ingredients people can use for their own healthier eating.

Using Frozen Fruits and Vegetables

One of the best things we can do for our health is to eat more fruits and vegetables, but with the price of groceries going up by the minute, especially fresh items like vegetables and fruit, people are actually cutting down on the amount they eat.

But you don’t have to do so.  You can invest instead in frozen fruits and vegetables which are just as good as the fresh.  Because the fruits and vegetables are flash frozen, they retain the nutrients you find in fresh produce, but they are cheaper and also have the benefit of being ready when you need them without going bad.

Frozen Vegetable Ideas

People are always amazed when I tell them that the roasted vegetables they are eating were frozen, but it’s true.  If you roast frozen vegetables like carrots, cauliflower, Brussel sprouts, etc… with a little bit of olive oil, garlic and herbs, you’ll have a dish delicious and pretty enough to serve to company.  The trick is to roast the veggies from their frozen state, not thawed.  Similarly, you can throw frozen vegetables into soups and stews.  You can add thawed, frozen vegetables to dips. You can even puree thawed, frozen vegetables to put into your cake recipes.

Frozen Fruit Ideas

Frozen fruits are wonderful to use, too.  You can replace fresh fruit in cobblers and crisps.  (Simply make sure you coat them with a 1/4 to 1/2 cup more flour than your recipe calls for because the fruit will be juicier.)  You can puree them into smoothies for a hot summer day.  You can even chop them up while frozen to add to that favorite muffin recipe.

However you choose to eat your fruits and veggies, know that you’re not limited to fresh produce only, nor relegated to having to eat it canned.

Gluten Free Peach Cobbler

Ingredients:

4 16 oz bags of no added sugar frozen peaches

2 tbsp lemon juice

1 cup Agave

1 tsp cinnamon

1/2 tsp nutmeg

1/2 tsp ground ginger

1/2 cup  Bob’s Red Mill Gluten Free All Purpose Baking Flour*

2 cups additional Bob’s Red Mill Gluten Free All Purpose Baking Flour**

2 tsp baking powder

1 tsp cinnamon

1/2 tsp nutmeg

1/2 tsp ground ginger

1/2 tsp salt

1/2 cup soy free vegan butter (or another type you’d prefer)

2 beaten eggs***

1/2 cup Agave

1 1/2 tsp xanthan gum

Baking Instructions:

1.  Preheat your oven to 350 degrees.  Lightly coat the bottom of a 11 x 15 pan with an oil such as grapeseed or safflower oil.  (You can use vegan butter or another type of oil or Pam spray if you prefer.)

2.  Put the peaches into a very large mixing bowl and toss with the lemon juice.

3.  Blend together the Agave, cinnamon, nutmeg and ginger.  Coat the peaches with the mixture.

4.  Sprinkle the flour over the peaches and toss to coat.  Carefully put the peaches into your prepared pan.  Set aside.

5.  Mix the flour, baking powder, cinnamon, nutmeg, ginger and salt.

6. Cut in the butter using a pastry blender or with a couple of forks or knives until the flour mixture is crumbly.

7.  Mix the beaten eggs with Agave and add to the flour mixture, mixing just until everything is moistened.

8.  Sprinkle the xanthan gum evenly over the batter and mix in well.

9.  Drop the batter by small spoonfuls on top of your peaches.  It will not completely cover the peaches, but don’t worry, because the batter will spread when it is cooking.

10.  Bake for 50 minutes or so until the the topping has spread, is golden brown, and fully cooked through, which means it’ll be firm to your touch and not soft in the center.

100% whole wheat flour can be substituted if you don’t need it to be gluten free.

** 100% whole wheat flour can be substituted if you don’t need it to be gluten free.

*** If you’re not making it gluten free and need to omit eggs, you can mix 2 tablespoons of ground flaxseed with 6 tablespoons of water.  Let it sit for 5 minutes, and then add it in place of the eggs.

Food “Subbing”: How to Revamp Recipes

website subbing

“Do you have a pass to be out of class, young lady?”
     I was 22, and it was my first day as the newly hired in-house tutor and substitute for a 6-12 private Christian school, and apparently my recently acquired pantsuit did nothing  to disguise my youthful appearance.  To my chagrin, as my conversation with the teacher progressed, I realized I was not even being mistaken for a high schooler but as one of the middle school students!
     This would not be the most embarrassing moment of my new job, though.  My crowning mortification would come a few days later in the week, when a seventh grade boy decided he’d like to invite the “new girl” he’d seen around to the first dance of the year!   (For some reason, my husband of several months thought this was hilarious!)
     Over the next couple of weeks, I even had to convince some parents that despite my youth, I was a good replacement for the retired tutor.  In time, though, staff, students, and parents alike learned that I was more than capable of fulfilling my responsibilities for the job.
“Making Over” a recipe
     In many ways, people tend to be skeptical in the beginning about substituting non-traditional ingredients in tried and true recipes.  They fear that the new ingredients will detract from the quality of the food or that they’ll mess up the whole recipe entirely by attempting to make any changes.I can tell you, though, that  most recipes are quite adaptable.  You just need to remember the few tips we’ve discussed in previous posts about exactly how to replace one set of ingredients for another.
     To help you see how to pull those tips together, I’m going to show you below how I adapted a recipe to fit my family’s needs.
An example

     Recently I was invited to brunch with some friends, and I decided to make some muffins.  I found a recipe for pumpkin muffins which looked good.The ingredients were:2 cups of raisins1 cup boiled water

3 1/2 cups white all purpose flour

1 tsp salt

1 1/2 tsp cinnamon

1 1/2 tsp cloves

3 tsp baking powder

1 tsp baking soda

2 1/4 tsp white sugar

4 eggs

2 cups cooked pumpkin

1 cup vegetable oil

Since I don’t ever use white flour or refined white sugar, I substituted 100% whole wheat flour for the white flour and Agave for the sugar.  Because I was using the Agave, it meant I needed to increase the flour amount and reduce the amount of Agave (in the end I actually reduced it more than just half).  I decided to omit the raisins, since my children don’t like “chunks” in their muffins; and because I wanted to add protein to the muffins,  I substituted soy milk for the water.  In addition, I switched the “bad” fat with a “good” fat and decreased the amount of oil being used.  To lower the fat even more, I put in all egg whites in place of whole eggs. Finally, because I personally like more flavor and because I had leftover butternut squash I wanted to use up, I added to the spices and substituted squash for the pumpkin.

So, here’s what my new recipe looked like:

1 cup soy milk*

4 cups 100% whole wheat flour**

1/2 tsp salt (decreased it simply to have less sodium intake)

2 tsp cinnamon

1/2 tsp nutmeg

1/2 tsp ginger

1/4 tsp cloves

3 tsp baking powder

1 tsp baking soda

1 cup Agave

1 cup liquid egg whites

2 cups cooked pureed butternut squash

2/3 cup grapeseed oil

The muffins baked up nicely, and the four of us at brunch and later my family enjoyed them immensely.

Squash Muffins

Ingredients:

1 cup soy milk*

4 cups 100% whole wheat flour or 3 1/2 cups favorite gluten free flour blend

1/2 tsp salt (decreased it simply to have less sodium intake)

2 tsp cinnamon

1/2 tsp nutmeg

1/2 tsp ginger

1/4 tsp cloves

3 tsp baking powder

1 tsp baking soda

1 cup Agave or honey

1 cup liquid egg whites

2 cups cooked pureed butternut squash

2/3 cup plant based oil

Baking Instructions:

1.  Preheat oven to 400 degrees.  Prepare 24 muffin cups.  (I would use “If You Care” muffin cups.  You can also spray with Pam or coat with butter or oil.)

2.  Mix all the dry ingredients:  the flour, salt, cinnamon, nutmeg, ginger, cloves, baking powder and baking soda.  Set aside.

3.  Blend the wet ingredients:  soy milk, Agave, eggs, squash, and oil.

4.  Quickly blend the dry ingredients into the wet just until the dry ingredients are moistened.

5.  Fill the muffin cups evenly about 2/3 full.

6.  Put the muffin tins into the oven and immediately reduce the heat to 375 degrees.  (Preheating the oven to 400 allows the muffins to begin with the heat necessary to facilitate  rapid rising of the muffins, but lowering the heat allows the muffins to cook evenly without the sides becoming more cooked than the middle.)

7.  Bake for 20 minutes or until a toothpick inserted in the center comes out clean.  Cool for at least five minutes in the tins before removing to a wire rack to cool.

* You can always use water or another type of milk.


Sugar-Coated: Substituting for Sugar

website sugarcoated

“Zer,zer, zer, erk, I’m out of gas.”

My son stopped directly in front of me, his arms extended, a big smile on his face. This was my cue to give him a big hug – the “gas” he needed to continue with his playing.  At eight, though, he actually requires very little “gas” to make him go.  His energy is unbounded, and I very often wish I could bottle it and put it aside for those days when my own energy levels are low.

Unfortunately for many of us, long days and too much on our plates lend themselves too easily to being sapped of our “get up and go” just when we need it the most.  And it’s in those moments when we’re most likely to reach for that five letter word – sugar.  Most of us know enough these days to avoid the Snickers bar for our “quick pick me up”, but the abundance of “healthy” power bars on the market belies just how bad even those are for you.

The dangers of sugar

My husband is a history teacher, and he tells me that the new colonists were quick to realize the benefits of growing the four most addictive crops at the time:  tobacco, sugar, coffee, and chocolate.   When we think about refined sugar, we think about its taste and the quick burst of energy it provides us.  We don’t often think about the fact that sugar,  in many ways, is a poison that our bodies react to unfavorably.  It provides nothing our bodies need, and in fact, it depletes our bodies of necessary nutrients as our bodies work to eliminate the refined sugar from our systems.  Studies link refined sugar to the rise in diabetes, the increase in heart attacks, and even to thyroid problems.

What sugar does

In baked goods, though, sugar is priceless.  It controls the temperature of our ingredients for timely baking; it causes fermentation so our desserts can rise properly; it helps with the “browning” necessary for tasty baked goods; it absorbs liquid to keep our cakes moist; and it even breaks up gluten to yield those tender, flaky desserts we crave.  To think of replacing sugar with something else can seem almost like a sin to many people, and I know folks who won’t even try a dessert made without sugar, because they’re convinced  the dessert simply can’t be as good.

I can tell you, though, that cooking without sugar is not as difficult as it seems, and the desserts are definitely worth trying.

Replacing sugar with fruit

There are many, many different substitutes on the market which people can try, but I confess that I prefer to use one of three options:  Ripe, sweet fruit or vegetables; Agave; and Truvia (Stevia).  Whenever possible, it really is best to simply use fruit.  With fruit, you can get all of the nutrients and fiber that your body needs, along with the sweetness derived naturally.  When baking, simply replace half of the sugar called for with a fruit puree of your choice.  Milder purees like applesauce work well in just about anything.  Pureed bananas, peaches, mangos, prunes, pumpkin, figs, etc… work well in recipes which require stronger or similar flavors.

Replacing sugar with Agave or Honey or Truvia

If you want to eliminate the sugar altogether from a recipe, though, I like to use Agave or Honey or Truvia.  Don’t be fooled, though – simply because they’re less refined than sugar does not make them absolutely better.  What they do have going for them, though, is that you can use substantially less of them than sugar, reducing how much “sugar” you’re putting into your body.  For most recipes replacing the total amount of sugar with half the quantity of Agave or Honey or Truvia is a good place to begin.  For many recipes, you may even find that you can reduce by even more, depending on how sweet your sweet tooth is.

Tips for Agave or Honey

Here are the tips you need:  Because Agave or Honey is liquid, you need to make sure you’ve balanced your wet to dry ratio.  For baked goods like cakes and breads which use a lot of sugar, two options work best:  Either increase your flour amount by ½ cup or decrease your liquids by ½ cup.  If you’re making something like muffins or pancakes, though, where the sugar amounts are actually quite small, you don’t need to make any adjustments at all.

Tips for Truvia

Working with Truvia is a little bit trickier.  Most folks like to simply use the stevia/sugar blends because you can just substitute a one to one ratio for the full sugar, which reduces how much sugar you’re putting into your baked product.  If you want to completely eliminate the sugar, though, you can use half the amount of Truvia as the sugar called for, but you’ll need to increase your dry ingredients (usually the flour amount) to compensate for the missing sugar.  This isn’t necessarily a straight ratio, though.  Usually, you’ll only need to replace about half of the missing sugar to compensate.

A trick I like to use:  Use identical bowls of the same shape and size, one for your dry ingredients, and one for your wet.  If you’re making cakes or cupcakes, you’ll find that the two amounts will normally match in depth and amount.  If you’re making muffins, cookies, or breads, the dry ingredients will usually be slightly more than the wet.  After you’ve experimented a few times, you’ll become quite adept at “eyeballing” and knowing whether you need to add or subtract from one bowl or the other before mixing them together.

If you’re cooking with Agave or Truvia or Honey, it’s always best to start with a small amount and add as necessary.  For example, my children like their Brussels sprouts to have a little sweetness to them.  Simply adding half a teaspoon of Agave to an herbed olive oil marinade is more than enough to satisfy them.  The mantra to remember is:  Less is best.

Replacing sugar with Coconut Sugar

On the market these days is coconut sugar which has a low glycemic index because it’s from coconuts. What’s nice about coconut sugar, if you’re not allergic to it, is that it works the same as brown sugar in a recipe so you can simply substitute one for one. I often will decrease the amount because I don’t like things overly sweet but you can experiment and see what taste preferences you have.

Chocolate Cranberry Cookies

Ingredients:

10 oz Enjoy Life mini chocolate chips (or another type if you prefer)

1/2 cup Agave

2 cups 100% whole wheat flour or favorite gluten free flour blend

6 tbsp unsweetened cocoa powder

2 tsp baking powder

1/2 tsp coarse salt

1 cup soy free vegan butter, at room temperature (or another type if you want)

1/3 cup Truvia 

4 eggs, at room temperature or egg white equivalent or fruit puree equivalent 

1 tsp vanilla

1 cup chopped Craisins (if you have a food processor, use it to chop the craisins; you can also just add them as is but the cookie will be “chunkier”)

1 cup Enjoy Life mini chocolate chips (or another type if you prefer)

Baking Instructions:

1.  Preheat the oven to 350 degrees.  Prepare your cookie pans.  (I would use “If You Care” parchment paper, but you can Pam spray or coat the pans with oil or butter.)

2.  Melt the mini chips with the Agave over a pan of simmering water.  (I put a small pan of water on the burner and place a large pan with a handle on top with the chocolate in it.  Works well.)  Set aside.

3.  Combine the flour, cocoa, baking powder, and salt.  Set aside.

4.  Beat the “butter’ until light and fluffy (if you have a mixer, use it).  Slowly add in the Truvia, mixing well an using a rubber spatula to scrape the sides as necessary.  Add the eggs, one at a time (or whites or puree) and blend well.

5.  Slowly add the melted chocolate and vanilla, scraping the sides with a rubber spatula as necessary.

6.  Add the flour mixture, and mix just until the dry ingredients are moist.  Fold in the chocolate chips and craisins.

7.  Drop the cookie dough by 1/4 cupfuls, leaving about 2 inches of space in between.  Bake for about 15 minutes, rotating your cookie sheet halfway through.  The edges will be slightly dry and the tops cracked a little.

8.  Cool for a couple of minutes on the sheet before transferring them to a wire rack to cool completely.

“Whole” hearted: Substituting for White Flour

website whole hearted

No one volunteers to have a chest x-ray, an EKG, a stress test AND an echocardiogram, all at the same time!

I certainly hadn’t.  As a young woman in her thirties (at the time), chest pains were the last thing I expected to be experiencing.  Yet, I was – intermittent pain over a period of a few months.  They weren’t regular or consistent enough for me to give much heed to them at first.  After a while, however, I realized that, though they were few and far between, the pains occurred whenever I became stressed or angry.  Still, however, I rationalized the pains away.

Then came that fateful day when I became angry during a spat with my oldest teen-aged daughter.  (Can anyone relate?)  Not only was my blood boiling figuratively, but it was literally wildly pumping through my veins and into my heart chamber, so much so that the pains in my chest became unbearable, and hence the x-ray, EKG, stress test, and echocardiogram.

I’m happy to report that, no, I didn’t have a heart attack, but I did learn that I have a minor congenital heart defect which over time can cause some issues.  The prognosis was that I would be fine, but the advice I was given was to slow down, stress less, and think more about my heart.

So, I did what I usually do in these situations:  First I prayed.  Then I read.  As I read, I learned that I was already doing what I needed in the way of food – mostly eating whole grains, fruits, vegetables, beans and fish with everything else in moderation.   What I was surprised to discover was all the new research about gluten and the many people who have issues with wheat and other such products.

What flour and gluten does

Folks don’t normally give flour and gluten much thought, but in reality flour and gluten are an important, dynamic part of our baking and cooking.  In baked goods, flour – and essentially the gluten in flour – is what actually provides the “framework” for the cake, cookie, or bread.  It absorbs the moisture and provides the protein strands necessary to give our baked goods a proper structure and a proper consistency.  So, when you replace gluten flours with gluten free ones, your baked good loses its ability to properly regulate its moisture content and its rising capacity, which is why many gluten free breads are denser and heavier than wheat breads.

You can substitute whole grains for white

For most people, flour and gluten is not actually an issue.  What is at stake is eating the right type of flour, which essentially means ditching the white, all-purpose flour and switching to a100% whole grain flour which has the fiber, protein, vitamins and minerals lacking in its white, all purpose counterpart.  Many people are hesitant to make the switch, though, because they think their food won’t taste as good.

The trick to remember is this:  For baked goods, always lightly spoon your flour into your dry measuring cup and level it off without packing the flour down.  If you do this, you can substitute your whole grain flour in a one to one ratio without fearing for the density of your favorite dessert.  For your cooking, simply use less of the whole grain flour for that roux you’re making or those potato pancakes you’re forming.  A rule of thumb is to measure out one cup of whole wheat flour and then take out one tablespoon. This will be closer to what you’d use with white flour. Because the whole grain flour is slightly denser, you can use less to get the same consistency.  And for those of you who still are reluctant to attempt a change, you can compromise with the white whole wheat flours which have begun to flood the market.  It’s a white wheat instead of the red wheat and is closer in consistency to the white , all purpose flour, while still retaining many of the same benefits of the red, hard wheat.

If you need to omit gluten altogether

For folks who do need to refrain from eating gluten, though, you can still have your just desserts, as well.  It used to be that you needed to buy an umpteen number of different flours and starches, as well as xanthan gum, to make up your own flour mix in a specific ratio.  Today, however, we are blessed with an abundance of companies just dying to take our money in exchange for saving us time and reducing our stress.  You can get some of these gluten free flour blends at the grocery store… Hannafords, Shaws, Market Basket, Stop and Shop, Price Chopper, Wegmans…. At the grocery stores, Bob’s Red Mill, King Arthur, and Pillsbury blends are the ones you’re more likely to find. You can also go online. Some brands you’ll find online are Authentic Foods, Cup4Cup, Better Batter, Jules, Namastes…. For folks looking for a one to one substitute, there aren’t too many options when it comes to baking. For other types of cooking, you can substitute any high protein/high fiber flour because the flour is usually just for coating or thickening. For baking, sorghum flour can be used in a one to one ration in some baked goods but sorghum flour absorbs more liquid so be sure to increase your liquids by 1/4 cup or so. Some folks like to use spelt flour, but spelt is only a substitute for folks who can’t eat wheat. For folks who have gluten issues, spelt has gluten. If you do use spelt, it tends to usually need just a bit less liquid than regular wheat.

How to use the gluten free mixes

The benefits of the flour blends are that everything is mixed in the proper ratio for you already, and you can easily substitute them into your favorite recipes.  Read the information on the packaging carefully because some are one to one replacements and others are not. Always remember to whisk the flour in a bowl after measuring, though, before you add the other ingredients.  This helps to lessen the density of the flour by breaking it up and incorporating some air into the flour.

If you want to make your own gluten free mix

Every day, however, there are new flour mixes coming on the market, so folks should experiment and see what you prefer.  If you decide you do want to make your own mix, however, there are sites such as http://www.allergicliving.com/gfblend where you can find some great “recipes” for flour blends. As a general rule to make a gluten free flour blend requires mixing a couple of types of gluten free flours with a couple of types of starches to get the same consistency of wheat flours. Some combinations I make are below.

All Purpose Recipe (Makes 4 1/2 cups):

1 1/4 cup brown rice flour or sorghum flour

1 1/4 cup millet flour or gluten free oat flour

1 cup sweet rice flour or potato flour

1 cup tapioca starch or potato starch

2 tsp xanthan gum

Pie Crust Recipe (Makes 3 cups):

1 cup brown rice flour or sorghum flour

3/4 cup garbanzo bean or fava bean or chickpea flour

3/4 cup potato starch or cornstarch or arrowroot starch

1/2 cup 1/2 cup tapioca starch

High Fiber and Protein Recipe (Makes 3 cups):

1 cup brown rice or sorghum flour

1/2 cup gluten free oat flour

1/2 cup millet flour

2/3 cup tapioca or arrowroot starch

1/3 cup potato starch or cornstarch


Paula’s Gluten Free Pumpkin Pancakes

Ingredients:

2 cups “milk” (use what you prefer; I like to use flax milk or oat or soy milk)

2 tbsp lemon juice

3 tbsp melted Earth Balance “butter” (or whatever type you prefer)

2 tsp oil (use a plant-based oil you prefer; I like safflower or avocado oil)

2 cups your favorite whole grain Gluten Free Flour Blend*

1 cup ground flaxseed

2 tsp gluten free baking powder

1 tsp baking soda

1 1/2 tsp cinnamon

1/2 tsp nutmeg

1/2 tsp cardamom

1/2 tsp ginger

1/4 tsp allspice

1/4 tsp cloves

1/2 tsp salt

1 cup pureed cooked pumpkin

2 tbsp Agave

1 egg or 1/4 cup egg whites or 1 tbsp ground flaxseed mixed with 3 tbsp water

Cooking Instructions:

1.  Preheat your griddle or pancake pan on the stove,  preparing either as necessary.

2.  Mix the lemon juice into the soy milk and let it sit for at least five minutes.

3.  Mix the melted “butter” with the oil, and set aside.

4. Combine the flour, baking powder, baking soda, cinnamon, nutmeg, cardamom, ginger, allspice, cloves, and salt.  Set aside.

5.  Mix the pumpkin with the Agave and egg or egg whites or flaxseed mixture.  Add the milk and lemon mixture, along with the cooled “butter” mixture.

6.  Quickly mix the dry ingredients into the wet, blending just until the dry ingredients are moist.  Let the batter sit for a few minutes.  (I like a thick batter for pancakes, but if it is too thick for you, add some more milk, one tbsp at a time until it’s the consistency you’d rather it was.)

7.  When your griddle or pan is ready, drop 1/4 cup-fulls of batter onto the griddle and cook until the edges are getting a bit dry and little bubbles pop in the center of the pancake batter.  Flip and let the pancakes finish cooking for a minute or two on the second side.

* If you don’t need to be gluten free, you can always make these with 100% whole wheat flour instead.  They’re good either way!  If you use whole wheat flour, though, omit the flaxseed unless you like really, really thick pancakes.


The Skinny on Fat: Substituting for Oils and Butter

website skinny fat

I was twelve years old and as round as a basketball. 

Then, to my surprise, adolescence kicked in, lengthening my body’s height, which thinned my waistline.  Suddenly boys thought I was interesting, and I began to think they weren’t so bad, either.

So, when Keith asked me if he could walk me home from school, I said, “Yes.”  I don’t recall what we talked about, if we talked at all.  I do, however, clearly remember that pivotal moment when we stopped at the center of the bridge to watch the trucks rumble past underneath.

We had been standing side by side, when he suddenly stepped in front of my view, facing me.  Since I only came to his chest, I had to look up to see his face.  He smiled down at me and slowly lowered his head.  I was about to receive my first kiss, and the only thing I could think was “But I have gum in my mouth!  You can’t kiss someone with gum in your mouth!”

I learned, though, that yes, you can actually be kissed while you have gum in your mouth!  But more than that, my first kiss subtly reinforced to me the notion that no fat was good.

The reality, though, is that not all fat is bad.  My husband just told me about a recent study that was published which actually revealed that people with a little bit of fat on their bodies live longer and healthier than skinny folks.  Go figure!

The purpose of fat in baking

And when it comes to baking and cooking, fat plays a pivotal role.  In cooking, fats such as butter, oil, and shortening add flavor, help transfer heat, are needed to deliver certain vitamins into our bodies, and bind foods which normally would not mix well.  In baked goods, fat makes the difference between a crispy or chewy cookie, between a light or dense cake, and between a hard or flaky scone.

What’s important to remember is that you don’t need to use as much fat as any recipe calls for, nor do you have to use the fats which aren’t as good for you or which you’re allergic to and can’t eat

You can cut down the fat

I’ve learned that most recipes call for twice as much fat as you really need, so if you simply want to cut down on the fat, just reduce the amount in any recipe by ¼ to ½ and check if you can taste or see the difference.

You can substitute “good” fat

If you’re trying to decrease your use of the “bad” fats such as butter, feel free to substitute a “good” fat.  The “good” fats such as olive oil or avocado oil or safflower oil, essentially plant based fats, are easily substitutable in recipes.  As well, if you have a dairy allergy, the vegan “butters” work very well in traditional recipes.  What you need to remember, though, is that liquid fat should be replaced by another liquid and a solid fat by another solid.  If your recipe calls for you to cream butter and you try to replace it with canola oil, you should expect to have some problems with the substitution.

You can eliminate the fat

For anyone who does need to avoid fat altogether, though, you, too, can still bake those goodies you long to eat.  Fruit and cooked vegetable purees work wonders in many recipes, as does yogurt or buttermilk, presuming you have no dairy allergy.  The tip to keep in mind when using such substitutions is to use ½ as much of these products for the amount of fat called for in a recipe.

Paula’s Low Fat Date Bread Recipe

Ingredients:

1 cup finely chopped dates

1 cup boiling water

1/2 cup Agave or honey

1/4 cup egg whites or 1 tbsp ground flaxseed mixed with 3 tbsp water 

2 tbsp plant based oil

2 1/2 cups 100% whole wheat flour or 2 cups whole grain gluten free flour blend

1/2 tsp baking soda

1/2 tsp salt

1/2 tsp gluten free baking powder

1 cup your choice of finely chopped nuts, mini chocolate chips, or dried fruit*

Baking Instructions:

1.  Preheat the oven to 350 degrees.  Prepare a 9 x 5 loaf pan to your liking. (I would use “If You Care” parchment paper, but you can spray it with Pam spray or coat it with butter or oil.)

2.  Cover the chopped dates with the boiling water and let sit for at least five minutes.

3. Mix the flour with the baking soda, salt, and baking powder.  Stir in the nuts, chips, or fruit.  Set aside.

4.  Add the Agave, egg whites, and oil to the date-water mixture.

5. Quickly mix the dry ingredients into the wet and pour into prepared loaf pan.

6.  Bake for 40-45 minutes until a toothpick inserted into the center of the bread comes out clean.  Bread will be golden brown.

* Since I have a nut allergy, I like to use the Enjoy Life allergen free mini chocolate chips, but I have occasionally added other chopped dried fruit like apricots and dried plums.

“Eggs”cellent News: Substituting for Eggs

website eggs three

Eggs.

How in the world could my nine month old son be allergic to eggs, when he’d never eaten one before?  I would never receive an answer to that question, but I would learn how devastating it can be to watch your child stop breathing.

My son developed eczema as a baby, and given our family history of food allergies and intolerances, our pediatrician suggested I have him tested for food allergies.  She said many babies with eczema are allergic to milk, and I’d be better off knowing if he was sooner as opposed to later.

So, we had a blood test done, and the good news was that he was NOT allergic to milk.  The bad news was that he was somehow allergic to eggs and peanuts.  The pediatrician wanted me to bring him into the office so she could test exactly how allergic he was to eggs and peanuts.

On our appointment day, she carefully injected my son with eggs first, and to my horror, my sweet baby boy’s face and throat began to swell as he started to gasp for air.  Being a good doctor, our pediatrician immediately administered an antidote, and both my son and I began to breathe again.  She turned to me and announced, “Anaphylaxis.  He’ll need an epi-pen.  Ready to try the peanuts?”

What I thought:  “Are you insane?”  What I replied:  “Well, since we already know he needs the epi-pen for the eggs, can’t I just work on the assumption that he does for the peanuts as well?”

To my relief, she agreed.

What do eggs do?

So, what are cakes like without eggs?  Dry, dense, and without structure!  Doesn’t sound very appetizing, does it?  Eggs act as both leaveners and emulsifiers, which essentially means they help our baked goods to be light and fluffy.  They increase the amount of air we can incorporate into our batters which increases the volume, tenderness and appearance of the final baked product.  Eggs are also, if you remember our “chemistry” of baking, part of the liquid equation in cakes, which means they keep our cakes moist.

As a general rule, eggs are considered a good food. They’re an excellent source of protein and contain a lot of nutrients the body needs.  Unfortunately, whole eggs also have fat and cholesterol in the yolks which many folks need to avoid for a variety of health reasons.  Other people like my son are allergic to and cannot eat the whites of the egg.

Given what eggs do for baking, many are hesitant to substitute other ingredients for them, but it is quite possible to bake without them and to also bake with just the whites of eggs.

How to substitute egg whites

If you simply want to eat healthier (i.e. without the yolks), the simplest approach is to use egg whites only.  One large whole egg is about ¼ cup of egg whites, so I usually use liquid egg whites and substitute accordingly for the whole eggs.  If you want to separate egg whites from the yolks, usually two egg whites is equivalent to one whole egg.

How to substitute for eggs altogether

If you need to avoid eggs altogether, I recommend four best approaches.  Substituting 1 tablespoon of ground flaxseed mixed with 3 tablespoons of water for every egg in a recipe; adding 1 tsp of baking soda with 1 tablespoon of vinegar (or other acid like lemon juice) to the recipe after you’ve substituted 1/4 cup of pureed fruit or vegetable or yogurt or sour cream per egg as the binder; using 1/4 cup of aquafaba which is the liquid generated when cooking chickpeas; or making or buying an egg replacer.

If you utilize the flaxseed substitution, you should mix the flaxseed and water in a mixing bowl, and let it sit to thicken.  Once it thickens, it looks a bit like beaten eggs and acts like eggs in a baked good.

If you’re making cookies or brownies instead of a cake, where the eggs act mostly as a binder, simply substituting pureed fruit or cooked vegetables in place of the eggs works very well.  My favorites to use are applesauce, bananas, pumpkin, and squash.  About 1/4 cup of pureed fruit or cooked vegetable equals one whole egg. As well, if you don’t have any dairy allergies, yogurt works nicely, especially if it’s a thick yogurt like Greek yogurt.

If, however, you need the baked good to rise, then after substituting a binder for the egg, you need to use the baking soda plus vinegar option to leaven the baked good. If you try the baking soda and vinegar approach, you mix the baking soda with the dry ingredients and add the vinegar (or other acid like lemon juice) at the very end, just as you’re mixing the dry ingredients with the moist.

A third option for replacing eggs is to use aquafaba. You can make your own by cooking dried chickpeas or you can purchase canned chickpeas and use the liquid. You’ll want no salt, no sugar added versions of store-bought chickpeas. 1/4 cup of the liquid equals to one egg. Simply whisk the liquid with a fork until frothy. You can also whip aquafaba like regular eggs into a meringue by adding cream of tartar and whisking in a mixer until white and fluffy.

A fourth way to substitute for eggs is to use the egg replacers you can purchase at the store or to make your own. Egg replacers are simply a version of the baking soda plus vinegar trick. It basically just adds a starch and a gum to a powder leavener and acid (i.e. baking powder, which is baking soda plus cream of tartar). To make your own, you can mix 1/2 tsp of baking powder (which already has the baking soda and acid mixed together in powder form) with 1 tsp of a starch like tapioca or arrowroot or cornstarch and 1/8 tsp of a gum like xanthan or guar. Add 2 tbsp of warm water and whisk. Let it sit and then rewhisk right before adding to your wet ingredients as an egg.  Simply multiply the amounts per number of eggs needed for the recipe.

Eggless Chocolate Cheesecake

Ingredients:

3 pkgs Tofutti Better Than Cream Cheese, at room temperature (or real cream cheese, if you prefer)

1/2 cup unsweetened baking cocoa

6 oz Greek plain dairy free yogurt mixed with 1/2 cup Agave , at room temperature

1/2 cup Agave 

1/4 tsp baking soda

2 tsp gluten free baking powder

1/2 cup cornstarch

1 tbsp raspberry liquor*

2 tsp gluten free vanilla

12 oz Tofutti Better Than Sour Cream, at room temperature (or real sour cream, if you prefer)

Baking Instructions:

1.  Preheat oven to 300 degrees, and prepare a 9 to 10 inch springform pan by securely wrapping aluminum foil around the outside of the pan.  Grease the bottom of the pan, but do not grease the sides of the pan to ensure proper rising of the cheesecake.  (I would use “If You Care” parchment paper, but you can Pam spray the bottom or use butter or oil to grease it.)

2.  In a large mixer, beat cream cheese just until it’s smooth, using a rubber spatula to scrape the sides down when done.

3.  Mix in cocoa and yogurt mixed with Agave, just until it’s blended.

4.  On low speed, very slowly drizzle in Agave.  You want to take your time so the cream cheese mixture can slowly absorb the Agave and retain its creaminess.

5.  Mix the baking soda, baking powder, and cornstarch together and mix into the cream cheese with the raspberry liquor and vanilla just until they’re mixed in.

6.  Add the sour cream and mix just until it’s incorporated.

7.  Pour the cheesecake batter into the prepared pan and bake for 1 1/2 hours.  A knife inserted into the outer edge should come out clean.  The center will still be creamy.  Another test is:  If you gently shake the cheesecake, only the center should slightly jiggle.

8. Turn off the oven and open the door.  Leave the cake in the center of the oven for 2 hours so it can slowly begin to cool.

9.  Remove the cheesecake from the oven, and loosen and remove the sides of the pan.  Put the cheesecake into the refrigerator to cool completely, at least four hours, but overnight is best.

* The raspberry liquor can be left out entirely.  You can also substitute other flavored liquor or 1 tsp of another extract like mint.

Understanding Ingredients As a Whole: The Art of Chemistry

website chemistry

My kitchen table was a mess.

As a treat, I made root beer floats for the children.  Unfortunately, I forgot my chemistry.  I put in the ice cream first, and then I added the soda.  If you know your chemistry, you’re already nodding your head, laughing at me, because you know why my table was a mess.

The cold temperature of the ice cream released the carbon dioxide – that wonderful gas which makes our sodas fizzy – from the root beer, and the gas bubbles reacted with the proteins in the ice cream, creating froth and foam – much too much froth and foam – which erupted like a volcano out of the glass and onto my table.

The children, especially my young son, were absolutely delighted by this impromptu science experiment, but it was a reminder to me that the art of cooking is always tempered by certain laws which we must keep in mind.

Recipes Have Ratios

For example, if we were to carefully analyze many different cake recipes right now, we would notice an average ratio to the ingredients in the recipes – something like this:

•2 cups flour ingredients

•2 cups liquid ingredients (which includes the eggs, where 2 whole large eggs equal to about ½ cup of liquid)

•1/2 cup fat ingredients (like butter or oil)

•1 cup dry sweetening ingredients (like sugar or brown sugar)

•2 tsp dry leavening ingredients (like baking powder or baking soda or a mix of the two)

•½ tsp to 1 tsp salt

•1 tsp to 2 tsp flavoring (like vanilla or cinnamon)

Recipes Have Patterns

We’d also discover a pattern to the ingredients where usually:  1. The weight of the liquid ingredients is the same as or more than the weight of the sugar.  (One cup of sugar is said to be about 7 ounces in weight.); 2. The sugar weight is equal to or more than the flour.  (One cup of white flour is said to weigh about 4 ½ ounces.); 3. The eggs weigh the same as or more than the fat.  (Two whole large eggs are said to weigh just under 4 ounces.); and 4. For every cup of flour, the recipe will call for 1 tsp of baking powder or ¼ tsp of baking soda.

Both the ratio and the patterns are important for us to know if we want to create foolproof cakes.  If, however, we know these basic conventions for cake baking, then we can artfully experiment within that framework to successfully create delicious cakes which are tailored to our dietary restrictions and needs – as well as other baked goods such as cookies and muffins which have their own ratios and ingredient patterns.

Paula’s Son’s Favorite Snack Muffin:  Peanut Butter Muffins

Ingredients:

2 tbsp favorite plant based oil (olive, safflower, avocado, etc….)

2 tsp honey

3 tbsp Agave

1/2 cup rolled whole grain regular or gluten free oats

3 cups 100% whole wheat flour or 2 1/4 cups favorite GF whole grain flour blend 

2 cups rolled whole grain regular or gluten free oats, pulsed in a food processor until to make a crumbly oat flour

4 tsp gluten free baking powder

2 tsp ground cinnamon

1/2 tsp salt* 

1/2 cup Agave 

2 mashed or pureed ripe bananas

1 cup applesauce

2/3 cup peanut butter** (you can substitute another “butter” if you are allergic)

1/2 cup egg whites or 2 tbsp ground flaxseed mixed with 6 tbsp of water 

1 1/2 cup soy milk (you may use another type of milk, if necessary)

1 tsp gluten free vanilla extract

Baking Instructions:

1.  Preheat the oven to 400 degrees.  Prepare muffin tins for 18-24 muffins, depending on the size muffins you want. (I would use “If You Care” muffin cups, but you can use Pam spray or grease them with butter or oil.)

2. Stir the canola oil, honey, and Agave together.  Mix in the rolled oats until they are completely coated.  Set aside.

3. Whisk together the flour, processed oats, baking powder, cinnamon and salt.  Set aside.

4. Mix together the Agave, mashed bananas, applesauce, peanut butter, and egg whites or flaxseed mixture.  Add the milk and vanilla.

5.  Quickly combine the dry ingredients into the wet, stirring just until the dry ingredients are moist.  Spoon batter into prepared muffin cups.

6. Carefully sprinkle oat topping onto each muffin. (Will be sticky work!)

7. Bake for 15-20 minutes until a wooden toothpick inserted into the center comes out clean.

8. Cool for at least five minutes in the muffin tins before removing.

* You can omit the salt, if you want.

** I use Teddy’s no salt, no sugar added peanut butter.