Healthy Habits: Blueberry Oatmeal Cake

“How do I….?”

My oldest has been in Germany since the beginning of August, and if I had known then what I know now, I wouldn’t have cried so much when she left! Though she is across an ocean, I have heard from her every single day. The reason? To pepper me with questions about how to cook this or prepare that. Now that she is on her own for the first time in an apartment, she has to cook for herself, and every evening, as she prepares her dinner, she texts or calls with several questions.

So, not only am I not missing her because we speak more than we did while she was in college, but I have been happy to note that she is doing all she can on a limited budget with little cooking supplies to still try to eat as healthy as she can. In fact, she has an app she uses to help her make sure she gets all the nutrients and vitamins she needs from the food she eats. I am pleased that some of the lessons I imparted actually took root!

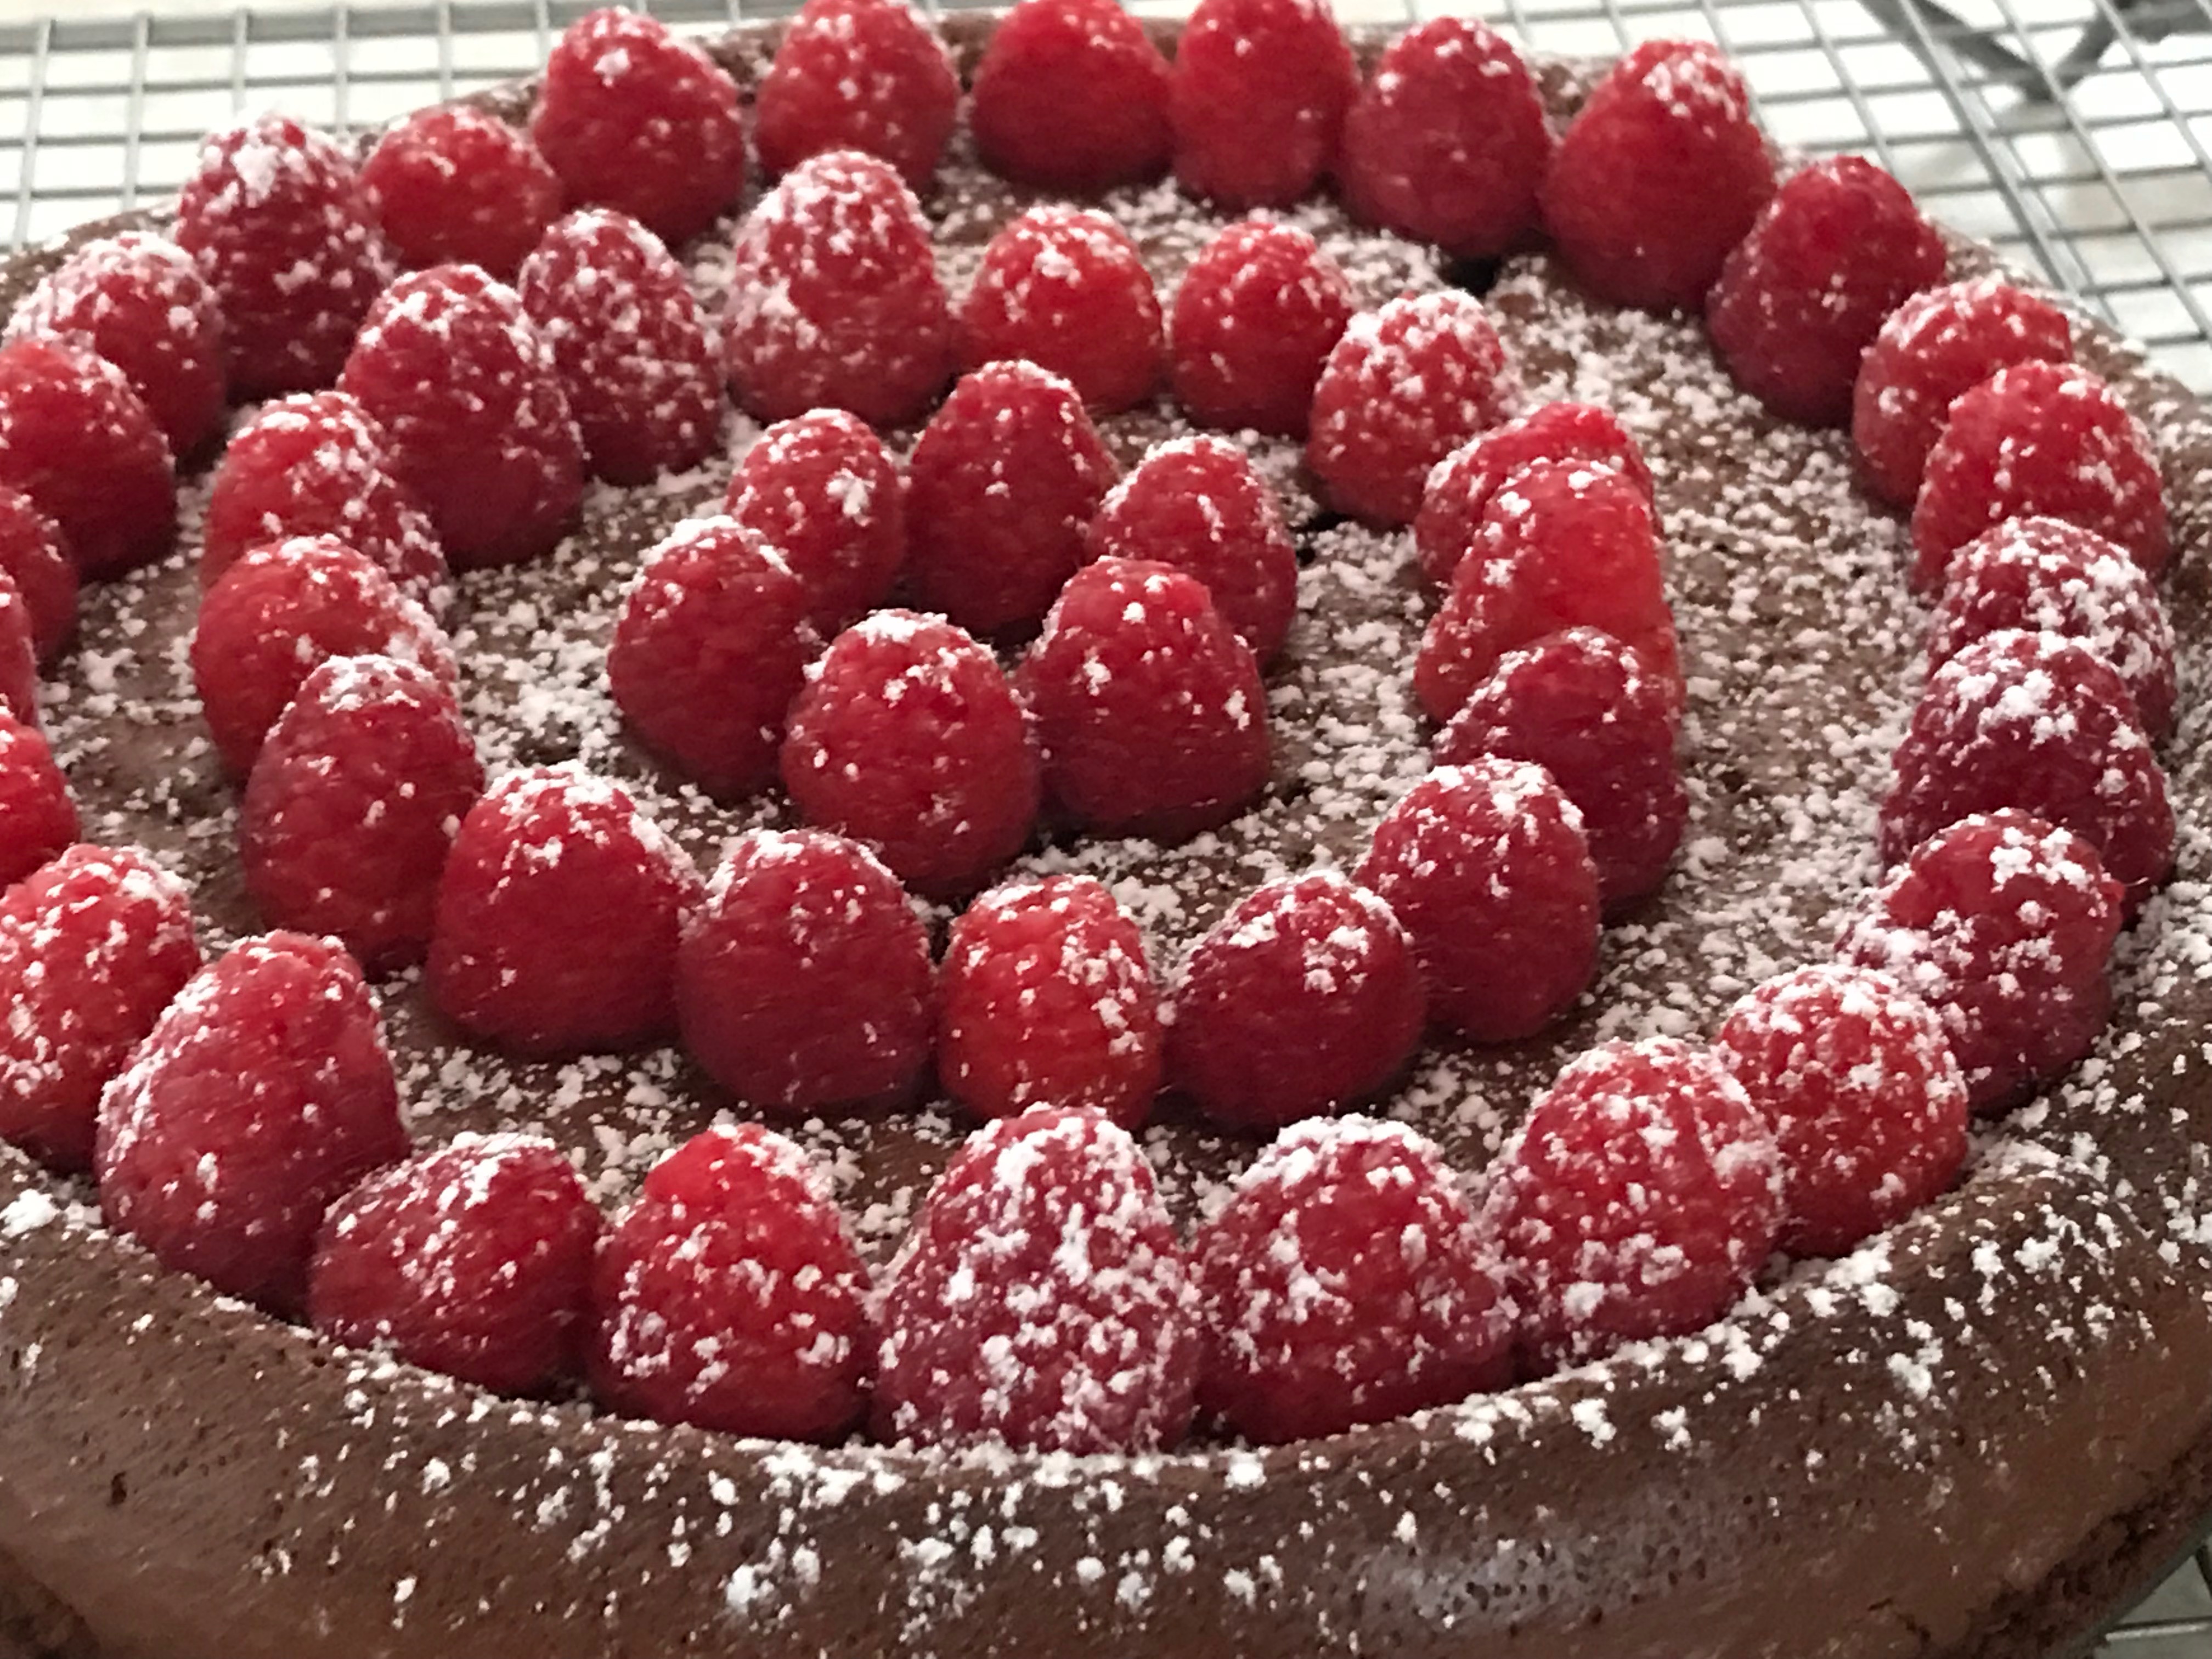
In the past couple of weeks, I have been working on those same lessons for healthy eating and revamped a couple of cake recipes for an uncle who is diabetic. He likes his sweets but white flour and sugar products don’t like him! Since dessert is something he often looks for, though, I put my hand to creating a couple of cakes which might be slightly better for him to consume.

To make a healthier cake, I chose to begin with whole grain, whole rolled oats because they contain a lot of fiber and protein. Then, I removed the sugar, opting instead to use smaller amounts of coconut sugar and/or agave and fruit like blueberries and chunky applesauce which contain fiber as well. My last change was to reduce the fat by swapping a reduced amount of oil for the usual butter and to use egg whites instead of whole eggs.  And of course, I made them gluten, dairy and tree nut free so I could eat them as well!

Below is the blueberry oatmeal cake recipe.

Blueberry Oatmeal Cake

Ingredients:

2 cups gluten free, whole grain, whole rolled oats

2 cups boiling water

1 cup gluten free flour blend

1 tsp baking soda

2 tsp baking powder

2 tsp ground cinnamon

1 tsp ground nutmeg

1/2 tsp salt

1 cup agave

1/2 cup extra light olive oil

1/2 cup liquid egg whites (or two whole eggs if you’d prefer or 2 tbsp ground flaxseed mixed with 6 tbsp water if you want it vegan)

1 cup to 2 cups fresh blueberries (depends on the ratio of cake to berries you want and the size of your berries)

Optional Topping:

In a pan, melt 2 tbsp of vegan butter, add 1 cup of whole rolled oats with 1/2 tsp cinnamon and 1/4 tsp nutmeg. Cook for 5 minutes, stirring frequently. Add 1 tbsp agave or coconut sugar. Mix well and cook for another minute. Sprinkle on top of the cake before putting it into the oven to bake.

Baking Instructions:

  1. Preheat the oven to 350 degrees and line a 9 x 13 pan with parchment paper or grease as you prefer.
  2. In a bowl mix the oats with the boiling water and let them sit until the oats have absorbed all the water. Usually only takes about five minutes.
  3. In another bowl mix together the flour, baking soda, baking powder, cinnamon, nutmeg and salt. Set aside.
  4. In the bowl with the oats, add the agave, olive oil and egg whites and mix well.
  5. Add the dry ingredients to the wet, and mix well.
  6. Fold in the blueberries.
  7. Spread the batter into the prepared pan (adding the optional topping if you’d like now), and bake for 20 to 25 minutes or until the cake is puffed, golden, and a toothpick inserted in the center comes out clean.
  8. Enjoy!


Recipe Revamping: Chocolate Chip Cake

“You need a reset….”

I always anticipate summer to be an opportunity for rest and relaxation, and every year, summer whizzes by with a full schedule of appointments and family visits and school readiness with little rest and even less relaxation. Though we do take time here and there as a family to capture little pockets, the concept of taking time to sit back and revive one’s energy remains just that, an idea.

Some of the reason is simply the season of life we are in at the moment. The years raising children tend to be rather hectic and chaotic. Another reason is that working in the public school system during the year means having to work during the summer to supplement the income which precludes “vacation time”. Yet a third is that we live in a world that is busy, and we get caught up in that busyness.

As I was pondering busyness this week, I realized that as a family we are beginning a time where a “reset” is quite possible. Two of our three children will be away at graduate and undergraduate schools. I have stepped down from most of the obligations I have spent 17 years pursuing. My husband and I are looking at new life ventures. If ever we could make choices about health and lifestyle and time spent, it is now.

Deciding to make the choices, though, tends to be easier than following through with action. A recent email illustrated this. Someone’s health issues meant she had to really begin to watch what she ate. Her grandmother, however, had passed down a chocolate chip cake recipe which she loved and made frequently for the family. Lately, though, as her health has had more complications, she finally realized she couldn’t continue to eat her grandmother’s cake as it was originally made. She needed to remove the gluten and dairy which were making her sick and to make it healthier, fat-wise.

She reached out to me to see I might be able to revamp the recipe. The original recipe called for 1 1/2 cups of butter, 2 1/2 cups of sugar, 4 whole extra large eggs, 1 tsp vanilla, 4 cups all purpose white flour, 4 tsp baking powder, 1 tsp baking soda, 2 cups full fat sour cream, and 2 1/2 cups chocolate chips.

You can see why she shouldn’t be eating it on a regular basis!

Making the cake gluten free was simply a matter of swapping a gluten free flour blend. I chose to use King Arthur’s wholegrain blend, but since I wanted to give the cake more protein and fiber, I opted to substitute one cup of the flour with gluten free oat flour which I made by finely processing gluten free whole rolled oats into a flour. This added the overall protein and fiber count of the cake.

Since making things healthier for me always includes removing the white refined sugar, I reduced the sweetener down to 1 cup and used agave instead of sugar.

The butter, sour cream and eggs, however, required some thinking. I needed to reduce all three if we wanted a healthier cake but how to do that without sacrificing the moisture in the cake? I switched vegan butter for the regular butter and reduced it to 1/2 cup. I substituted tofu sour cream for the regular and used only 3/4 cup. Then I reduced the eggs to two large.

All these reductions needed to be replaced, though, and as I thought about it, I finally decided to use banana cream. For folks not familiar with this, you simply freeze banana slices to the point where they’re mostly frozen but still a little flexible. Then you pop them into your food processor and let it zoop for several minutes until the frozen banana slices become the consistency of soft ice cream, which is how many folks eat it. I used it as a replaced for the missing butter, eggs and sour cream, and it worked beautifully, adding the moisture needed but not tasting overly much like bananas.

The final few changes I made were to use mini allergy friendly chocolate chips instead of the regular larger sized ones and to reduce the amount to 1 cup. Since the chips are mini, they distribute more evenly into the batter, and you need a lot less to get the same chocolate chip to cake ratio. I also added a tablespoon of cinnamon to add flavor and to help regulate blood sugar levels.

The folks I served it to this week, thought the cake was delicious, and the person who had originally emailed was glad she could eat it without making her health issues worse.

Chocolate Chip Cake

Ingredients:

1/2 cup vegan butter

1 cup agave

3 cups banana cream*

1 tsp vanilla

2 large eggs

3 cup whole grain gluten free flour blend

1 cup gluten free oat flour**

4 tsp baking powder

1 tsp baking soda

1 tbsp ground cinnamon

3/4 cup tofu sour cream

1 cup Enjoy Life mini chocolate chips

1 tbsp apple cider vinegar

*To make banana cream: Slice bananas into three cups worth and put into the freezer. Freeze just long enough to begin to freeze but so they are still slightly flexible. If you put the banana slices until a shallow pan in an even layer, this would only take 15 to 30 minutes. You can also freeze the bananas ahead of time in a tupperware, and when you need it, microwave them for just a few seconds to keep them frozen but pliable. Put the mostly frozen pieces of bananas into a food processor and begin to process until the pieces turn into a creamy soft ice cream mixture. This will take several minutes. Make the mixture just before you are ready to add it to the wet ingredients.

**You can use store bought gluten free oat flour, but if you want more protein and fiber, take gluten free wholegrain rolled oats and put them into your food processor and process until you have oat flour. This will take several minutes.

Baking Instructions:

  1. Preheat the oven to 350 degrees. Grease and prepare a Bundt pan. (I used a non-aerosol olive oil and ground flaxseed.)
  2. In a mixer, cream the vegan butter. Scrape down, and with the mixer on low, slowly pour in the agave and blend the butter and agave until smooth.
  3. Add the banana cream and blend just until mixed. Add the vanilla.
  4. Add the eggs, one at time, mixing well with each addition. Set the wet mixture aside.
  5. Mix the flour blend, oat flour, baking powder, baking soda, and cinnamon.
  6. Add half the dry ingredients to the wet and blend. Add the tofu sour cream. Mix well, and then add the second half of the dry ingredients.
  7. Mix in the mini chocolate chips.
  8. Add the vinegar and mix just until blended.
  9. Pour the batter evenly into the prepared pan and bake for 50 to 55 minutes until the cake has puffed, is golden, and an inserted toothpick comes out clean.
  10. Allow the cake to cool in the pan for at least 15 minutes before removing to a wire rack to cool completely.

Creative Cooking: Chicken-Kale-Corn Fritters

“You deserve it….”

I have been thinking a lot lately about the idea of what people deserve. My daughters recently graduated from college and high school and received honors and recognition, and folks said, “They deserved it!” I received an award, recognizing 17 years of volunteer work in our school district, and everyone said, “It’s about time! You deserved it!” A person I know who has made bad choices was told, “You get the consequences you deserve.”

We hold notions about worth very highly in our society. The standards of worth vary from situation to situation, within contexts, and between race, gender, class, and other constructs, but the idea of folks being deemed deserving, whether of something good or something bad, hold strong and fast, even if people are not always aware that they do.

Recently, some friends and I went out to dinner, and in an age of food allergy awareness, I was surprised that this particular restaurant only offered two options for me to be able to eat out a very extensive four page menu of selections. I could have grilled chicken or grilled steak. Fortunately, I am not vegan, so I opted for the grilled chicken, but what if I had been? As I pondered this with my husband, we concluded that the restaurant might presume folks with dairy allergies would just go someplace else to eat, given that they don’t cater to that type of clientele.

There’s certainly nothing wrong with that. Plenty of other restaurants do cater to folks with multiple food allergies, and now my friends and I know not to choose that particular restaurant for a future gathering. I can’t help but wonder, though, about whether or not folks with food allergies “deserve” to be able to have more than a choice of grilled chicken or grilled steak when going out to eat to a restaurant which comes highly recommended.

Whether we think we do deserve it or not won’t change that particular restaurant’s menu for now, but it serves as yet another reminder to me that I firmly do believe all people deserve to be able to eat good food, regardless of food allergies and health restrictions. So, last week, when I decided to make chicken and corn fritters, my goal was to create something which was healthier than all the recipes I found.

I had leftover corn and chicken which I wanted to use, and when I put the ingredients into “recipes”, out popped many recipes for chicken and corn fritters. The problem, though, was that they all called for deep or pan frying with a lot of oil, as well as a lot of white flour and many eggs. I wanted something which I could feel good about eating.

So, I made several changes. First, I added kale to the chicken and corn, because I also had leftovers of that. Secondly, I opted to puree cooked carrots as the main binder which allowed me to reduced the flour substantially and use half as many eggs. I also chose oat flour for my flour to add protein and fiber, and used egg whites instead of whole eggs. Finally, instead of frying the fritters in oil, I used the Pompeian non-propellant olive oil only spray and cooked the fritters on a griddle. The result were delicious, healthier fritters which used up my leftovers and didn’t leave anyone with that heavy feeling you often get with fried foods.

Chicken-Kale-Corn Fritters

Ingredients:

3 cups chopped, cooked chicken

3 cups cooked corn, cut off the ears

1 cup cooked, chopped kale

3 cups cooked, chopped carrots

1 cup “milk” (I used soy milk but you can use whatever type you’d like)

1 cup chopped green onions

3/4 cup egg whites (can also just use 3 whole eggs or if you want an egg free version, substitute 3 tbsp ground flaxseed mixed with 9 tbsp of hot water which you let sit to thicken or use 3/4 cup of aquafaba or simply increase the flour below to 1/2 to 3/4 cup)

1/4 cup gluten free oat flour (or any high protein/high fiber flour you’d like)

1 tbsp chopped fresh herbs (I used cilantro and basil, but feel free to vary it)

2 tsp minced garlic

1/2 tsp black pepper

1/2 tsp red pepper flakes (optional but I like the flavor it adds)

Pompeian non-propellant olive oil cooking spray

Cooking Instructions:

  1. Mix the chopped chicken, kale and corn together.
  2. Puree the cooked carrots with the “milk” and add to the chicken-veggie mixture and blend well.
  3. Add the green onions.
  4. Whisk the egg whites (or whole eggs or flaxseed mixture) and add to the fritter mix, stirring well.
  5. Add the oat flour, herbs, garlic and the peppers and stir until all is well incorporated.
  6. Preheat a griddle to 350 or a shallow pan over medium heat and spray with the Pompeian olive oil spray.
  7. Stir the fritter batter and scoop mixture by the 1/4 cup and drop onto the hot griddle. Using a spatula, spread the mixture into 1/2 inch think circles.
  8. Cook for a couple of minutes on one side until browned. Flip with the spatula and cook on the other side until browned. Remove and repeat with the remaining mixture. You may need to occasionally respray the griddle with the olive oil spray. (Tip: to keep them warm, preheat the oven to the lowest temperature and put the fritters onto an oven safe plate in the oven.)


Recipe Revamping: Carbonara

“It’s just that it was one of his favorites….”

Most folks ask me to revamp baked recipes since that is what I mostly post about, but I received a request this week from a mom after she saw my roasted garlic bread recipe, asking if I might help with one of her son’s favorite recipes, carbonara. Her son is eight, and the family recently learned that much of his stomach issues were due to eggs, dairy and wheat, all three of which are in carbonara.

For anyone who might not be familiar with carbonara, it is an Italian pasta dish which is essentially a creamy, cheesy sauce over noodles which tends to use cured meat products such as bacon, pancetta, prosciutto, or Italian sausage to flavor the sauce. To make the sauce creamy, recipes usually use cream or half and half and egg yolks with a variety of fancy cheeses and then adds the cured meat and white pasta to the dish. So, as a rule, even if you do not have food allergies, you probably should not make carbonara a regular part of your diet.

Unless, of course, you can find a way to create a healthier, allergy friendly version….

My first order of business was to tackle the cheesy sauce. The beauty of a carbonara sauce is that it clings to the noodles, so the sauce needs to be a thick, heavy sauce, which is why usually cream and egg yolks are utilized. I opted to make a basic white sauce with olive oil, millet flour and dairy free milk. To that I added Daiya cheddar cheese, garlic, onions, oregano, basil, and a tiny bit of red pepper.

The next item to tackle was the cured meat. To make it a tiny bit healthier, I chose to chop just four low fat, reduced salt, no nitrates, sweet Italian style fully cooked chicken sausage links into small pieces. This distributed the flavor without all the extra added fat and sodium and nitrates.

The final decision I made was to nix pasta altogether and use spiral cut veggies. I used a mixture of turnips, yellow squash and zucchini. Because I like my food to have lots of color, I also added diced petite tomatoes, which added a slight flavor twist to the whole dish. The result was quite yummy!

Vegetable “Noodle” Carbonara

(This recipe makes a lot because I wanted to feed a family of five and have leftovers for a second meal. You may want to halve the recipe.)

Ingredients:

2 tbsp extra light olive oil (you don’t want a heavy taste)

1/4 cup millet flour (or any other variety you’d like to use)

2 cups dairy free “milk” (I used soy but any variety will work)

8 oz shredded Daiya cheddar cheese

garlic, onions, oregano, basil, and red pepper (to your taste and liking)

16 oz each spiral cut turnip, yellow squash, and zucchini (you can change up the spiral cut noodle veggies as long as you have 48 oz total so the sauce and “noodle” amounts are in a good sauce to noodle clinging ratio)

4 low fat, reduced salt, no nitrates sweet Italian style fully cooked chicken sausage links

garlic, onions, oregano, basil, and red pepper (to your taste and liking)

14 oz can of no salt, no sugar added petite diced tomatoes (optional)

Cooking Instructions:

  1. In a shallow sauce pan, heat the olive oil for a minute over medium-low heat, and then stir in the millet flour until well mixed and cook for another 30 seconds.
  2. Slowly add one cup of the milk, stirring until the flour mixture is incorporated into the milk. Let the mixture begin to thicken. Time will vary, depending on how shallow your pan is but shouldn’t take more than a couple of minutes.
  3. Slowly add the second cup of milk, stirring to evenly mix the sauce.
  4. Add the Daiya cheese and stir well. Add the spices, and stir until the cheese is all melted, and turn the heat to low, stirring occasionally.
  5. In a larger shallow nonstick pan (if you aren’t using a nonstick pan, drizzle a tiny bit of olive oil), cook the turnips until softened, usually about 3 to 5 minutes.
  6. Dice the sausage links into small bits and add to the turnips. Mix well and cook for a minute.
  7. Add the yellow squash and zucchini with the spices, and cook just until the squash and zucchini begin to soften.
  8. If you are using the tomatoes, add the diced tomatoes to the cheese sauce and stir well. Then add the sauce to the veggie noodles, mix well and serve. (As a garnish, you may sprinkle a mixture of fresh basil and chopped garlic as I did in the picture.)
  9. If you are not using the tomatoes, simply add the cheese sauce to the veggie noodles, mix well, and serve.


Roasted Garlic Bread

“It’s the simple pleasures….”

I celebrated another birthday this year, and unlike many people, I don’t mind that I did. While I am not thrilled that my metabolism is slowing down and that aches tend to last longer, I am grateful for the maturing process which only aging and experience can bring. One gets to know oneself better as time goes on, and that’s a good thing, in my opinion, because only then can you really embrace your strengths, recognize and work on your weaknesses, and allow yourself to be the best version of yourself.

My husband wanted to know what I wanted to do for my birthday this weekend, because we have had a particularly stressful couple of weeks with a funeral and a graduation and time at a hospital with a dear friend. As I thought about what I wanted, I realized I simply wanted to hang with my family, particularly to have a good meal and to watch a movie while all three of my children were actually with me on my birthday for the first time in a few years.

Now, both cooking and watching a movie are not my husband’s ideas of a good time, but as a loving husband, he dutifully grilled the zucchini and chicken I prepared and sat through a movie. My gift to him for being kind enough to grill for me was to figure out a starch to go with the meal. Since I do have that slowing-down metabolism, I tend to eat less carbs these days, but I know that my husband thinks a meal is not complete without bread.

So, I decided I’d make garlic bread, but I didn’t want to use traditional white bread or the large amounts of butter. As I thought about garlic bread, I realized what I love best is the garlic so it occurred to me that garlic should be the the “showpiece” of garlic bread as opposed to the minced versions usually made, which led me to the idea of roasting the garlic and making a garlic bread similar to bruschetta which used olive oil, tomatoes and basil, only I used a gluten free whole grain bread instead.

The roasted garlic bread was ridiculously easy to make and added a nice dimension to the grilled dinner!

Roasted Garlic Bread

Ingredients:

peeled garlic cloves

olive oil

whole grain bread (gluten free or whole wheat or multi-grain)

fresh basil

grape tomatoes (optional)

Cooking Instructions:

  1. Preheat the oven to 500 degrees.
  2. Mix a couple of cups of peeled garlic cloves (how much you need depends on how many slices of bread you are making; also if you buy them already peeled, it makes life easier) with just enough olive oil to coat them, and roast them in the oven, turning them every five minutes until the garlic has darkened in color. (Usually this only takes ten to 15 minutes.)
  3. Remove the garlic from the oven and reduce the oven to 350 degrees. Let the garlic cool for a few minutes.
  4. While the garlic is cooling, slice your whole grain bread (whether gluten free or not) into thin slices (unless you bought the already sliced version, in which case you’re set) and place the slices on a cookie sheet or shallow pan.
  5. Chop up a couple of cups of fresh basil into small sprinkle-able pieces (how much you need depends on how many slices of bread you are making; also, if you don’t have fresh basil, you can also use dried basil, but you’d only need a couple of teaspoons then).
  6. Slice the roasted garlic into thin slices and sprinkle evenly among all the bread slices. Then sprinkle the basil. (Optional: slice grape tomatoes into think slices and sprinkle in between the garlic before sprinkling the basil.)
  7. Drizzle a small amount of olive oil over each bread.
  8. Bake in the reduced-heat oven for five to ten minutes until the bread is toasted.
  9. Serve immediately and enjoy.
  10. Leftovers keep well in the fridge. Simply reheat in the oven for a few minutes for crispy bread or microwave for a few seconds if you simply want it warm.

Recipe Revamping: Cardamom Citrus Bars

“It was so nice of someone to think of us….”

The first full week in May is designated as appreciation week for teachers and nurses, and in our schools, the local PTO plans a week of nice surprises for the teaching staff. One day might be a luncheon. Another could be a day of raffles and winning prizes which have been donated. Sometimes they provide a breakfast. A few years included massage therapists coming in for 10 minute chair massage opportunities.

In the past I’ve helped to coordinate appreciation week for our schools but recently I’ve stepped down and help just by donating food for whatever special opportunities are being provided. This year, I made a couple of soups for the luncheon and signed up to bring in desserts for a special salty and sweet day the PTO planned.

Since I wasn’t sure what to make for the dessert, I asked for ideas from the staff, and someone mentioned that it would be lovely if I could make lemon bars for those with dairy, soy, gluten and nut allergies, all of which were prevalent among a number of the teachers. Since usually the bars I make are made from tofu, which was one of the allergies, I looked up a basic lemon bar recipe to revamp.

The recipes I found were all pretty much the same: To make the crust, mix 2 cups of flour, 1 cup butter, and 1/2 cup sugar, which was baked in a variety of pans sized from 8 x 8 to 7 x 11. The filling was usually 4 eggs, 2 cups sugar, 1/4 cup flour, and lemon juice which strangely ranged from 1/3 cup to 3/4.

Revamping the recipe:

For the flour: It was easy to simply substitute the flour with a gluten free flour blend. I chose King Arthur’s whole grain blend which is my current favorite since it is easy to get at the grocery store and has more protein and fiber than the other blends.

For the butter: To make the bars dairy free, I simply used Earth Balance’s soy free vegan butter.

For the sugar: The sugar was where I simply had to make some cuts. 2 1/2 cups of sugar in bars in an 8 x 8 or 7 x 11 or 9 x 9 pan is just too much sugar. I opted to use only 2 tablespoons in the crust, switching powdered sugar for the white sugar because it would combine more easily with the flour. And for the filling, I reduced the amount to 1/2 cup of white sugar and used 1/4 cup agave. As a final change, I used a 9 x 13 pan for thinner bars.

For the lemon: As a general rule, I suggest folks use fresh lemons for lemon bars. As I was looking at the recipe, I decided that I wanted to change things up a bit, so I opted to make citrus bars instead where I mixed freshly squeezed lemon and orange juice together. I also decided to add cardamom which is a spice that I like, just to further change things up a bit. Since the recipes varied greatly in amount, I cut the difference and used 1/2 cup of juice.

When I went to the school later in the day to help clean up, several staff stopped me to say how much they enjoyed the citrus bars, mostly because someone thought to make something they could eat, but also because they liked that the bars had so much less sugar but still tasted good.

Cardamom Citrus Bars

Ingredients:

2 cups gluten free flour blend (I used King Arthur’s whole grain version)

1/2 tsp cardamom

2 tbsp powdered sugar

1 cup vegan soy free butter

4 eggs

1/2 cup sugar

1/4 cup agave

1/4 cup gluten free flour of choice (I used sorghum flour)

1/4 tsp cardamom

1/2 cup freshly squeezed lemon and orange juice (I used 1/4 cup of each)

Baking Instructions:

  1. Line a 9 x 13 pan with parchment paper. Preheat the oven to 350 degrees.
  2. Mix the gluten free flour, powdered sugar and cardamom together. Using a pastry knife or two knives, cut the butter into the flour mixture until crumbly.
  3. Spread the crust mixture into the prepared pan and use your clean fingers to press the mixture evenly into the pan.
  4. Bake in the preheated oven for about 15 minutes until the crust is puffed and golden.
  5. While the crust is baking, mix together the eggs, sugar, agave, flour, cardamom, and lemon and orange juices.
  6. Pour the citrus mixture over the hot crust and spread evenly.
  7. Bake in the oven, another 15-20 minutes until the filling has solidified.
  8. Cool completely on a wire rack.
  9. Just before serving, sprinkle with powdered sugar. (Note: The bars absorb the powdered sugar, so sprinkling just before serving allows you to serve pretty bars without having to add more sugar than you ought to be eating.)


Recipe Revamping: Flourless Chocolate Torte

“That’s a lot of butter and chocolate….”

We had company the other night, and I wanted to make a more “special” gluten and dairy free dessert. My oldest was home for Spring break from college, and as we bounced ideas around, we thought about a flourless chocolate torte. Immediately we looked up a recipe from a well-known chef. We both had a heart attack just reading the recipe.

The recipe? 16 oz semi sweet chocolate; 2 1/2 sticks of butter; 7 eggs, separated, 1 1/2 cups sugar; 2 T. rum; 1 tsp vanilla; 1 tsp salt.

I did some research and discovered that the majority of recipes by other folks called for crazy amounts as well, but I did find that a couple of folks did use smaller amounts of chocolate, sugar and butter… not greatly decreased but less. It seemed that the difference affected the density of the torte, exactly how torte-like versus cake-like versus mousse-like one wanted the dessert to be.

In the end I decided I’d make a lot of changes, and tried two different versions. Both were delicious, but one was a more dark chocolate, cakey variety, and the other more sweet and velvety. Below are both versions.

For both, I decreased the butter as well as substituted for it, and substituted alternatives for refined white sugar (0ne recipe uses coconut sugar; the other agave and truvia). I also decreased the chocolate amounts and swapped a raspberry liquor for the rum. In neither, though, did I decrease or play with the eggs because without the flour, the eggs are essentially what makes the cake! So, my apologies for folks with egg allergies. Will work at another time on creating something similar without eggs!

Flourless Chocolate Torte

Version One: Dark Chocolate Raspberry Torte (Dark Chocolate-y and More Cake-like)

Ingredients:

8 tbsp vegan soy free butter

7 ounces dairy free bittersweet chocolate

7 eggs, separated, with yolks in a large bowl and whites in a mixer

3/4 cup coconut sugar

2 tbsp raspberry liquor (optional)

1 tsp vanilla

1/4 tsp cream of tartar

1/4 cup coconut sugar

Version Two Ingredients: Semi-Sweet Chocolate Raspberry Torte (Sweeter and More Mousse-like)

Ingredients:

8 tbsp vegan soy free butter

10 ounces dairy free semi-sweet chocolate

7 eggs, separated, with yolks in a large bowl and whites in a mixer

1/2 cup Agave

2 tbsp raspberry liquor

1 tsp vanilla

1/4 tsp cream of tartar

2 tbsp truvia

Baking Instructions:

  1. Preheat the oven to 325 degrees and take out a 10 inch springform pan. Do NOT grease the pan.
  2. Chop the chocolate into smaller pieces and put into a microwave safe bowl with the vegan butter. Microwave the butter and chips 20 seconds at a time, until the act of stirring completely melts the chips. Set aside.
  3. In the large bowl with the eggs yolks, add either the coconut sugar or the agave and beat the eggs with a wire whisk for about 5 minutes until the eggs increase in volume and are light and frothy.
  4. Slowly add the chocolate/butter mixture, stirring continually as you gradually add all of the chocolate mixture.
  5. Mix in the vanilla and raspberry liquor and set aside.
  6. Add the cream of tartar to the egg whites and begin to blend on low speed.
  7. Gradually begin to increase the speed and slowly pour in either the coconut sugar or the truvia.
  8. Beat until the egg whites increase in volume, are no longer clear but white, and when you pull the mixing paddle up, the whites make peaks.
  9.  Using a rounded spatula, gently fold the egg whites into the chocolate mixture, a little at a time, until all the egg whites are completely incorporated into the mixture.
  10. Pour the batter into springform pan and bake in the preheated oven for 35 to 40 minutes. (The second version took closer to 45-50 minutes.) The cake will have puffed and the top will look dry and no longer glossy.
  11. Remove to a wire cooling rack and allow the cake to cool.
  12. If you are eating it soon, you can run a knife around the pan and release the bottom from the springform and decorate the cake with fresh raspberries and a small sprinkling of powdered sugar.
  13. If you are not going to eat the cake within a few hours, put the cake in the refrigerator and decorate the cake with fresh raspberries before you’re ready to actually eat it.


Recipe Revamping: Chocolate Tunnel Bundt

“You don’t accept me for the way I am….”

Raising children is not for the faint-hearted. If you are a parent, you know this truth. You survive endless nights of no sleep, trying to figure out the needs of an infant whose only mode of communication is a high-pitched cry worthy of being classified as a torture weapon, only to be thrust into the tantrums of the the toddler years and the beginnings of the end as your child discovers the word, “No.”

Just when you are beginning to see growth into a complete-sentence-talking, self-feeding, potty-trained, potentially reasoning-able individual, your child begins school which forces you to learn how to navigate a world fraught with “firsts” – the first time your child’s teacher calls to say your child made the whole class cry by telling them that Santa Claus was dead; the first time your child comes home crying because someone said they weren’t his friend anymore; the first recital where your child throws up from fear.

You begin to think those years will not end, but they do, only to be replaced by the middle school years which begins a roller-coaster ride through the ups and downs of your child’s emotions where you learn that the hold the perceptions they have about themselves from the outside world seems stronger than anything you say or do as the parent in her life.

You survive those years, too, but begin to wish to be back in them when the middle-schooler turns into the high school teen who hides in his cave-bedroom, believing you have no understanding, no wisdom, no sense, no anything that you can offer to his all-knowing self. You begin to actually doubt  your abilities until the day comes when she is accepted into college, and anxiety about actually leaving home mounts, and she reverts to two year old behavior, wanting and needing mommy to hug and console and be with her at all times until she leaves.

My second child, who is going to be graduating from high school has entered this last phase, and interestingly enough, her chosen way of spending time with her mother is that she suddenly wants to bake with me every other day – this of course being the same child who has been “too busy” to bake with me for the past four years and who now seems to think I should stop everything I am doing to bake with her whenever she is emotionally distraught about college.

Of course, I do drop everything, because she is my daughter, I do want to spend time with her, and I also enjoying baking. And this weekend, I taught her how to bake a chocolate bundt which I had revamped a couple of weeks ago when this same daughter had asked that I make a chocolate tunnel bundt cake for when my mother-in-law was visiting.

The original chocolate bundt cake recipe called for 3 cups of sugar, 1 1/2 cups of butter, 3 eggs, 3 cups of all purpose flour, 3/4 cup cocoa, 2 tsp baking powder, 2 tsp baking soda, 1 1/2 tsp salt, 1 cup coffee, 1 cup buttermilk, 1 cup pecans, 1 tsp vanilla, 12 oz cream cheese, another 2 eggs, another 1/4 cup sugar, 1/2 cup coconut, and 1 1/2 cup chocolate chips. It also called for a glaze made of 4 tbsp butter, 1 cup powdered sugar, 3 tbsp cocoa, 2 tsp vanilla, and 1-3 tbsp water.

To revamp the recipe, I swapped olive oil for the butter and reduced it to 1 cup, and switched coconut sugar for the refined white sugar, cutting the amount to 2 cups. I used King Arthur’s whole grain gluten free flour in place of the white flour, and chose to use the special dark chocolate unsweetened cocoa powder for the regular cocoa powder. I reduced the salt to only 1/2 tsp. I made a “buttermilk” with soy milk and apple cider vinegar, reduced the eggs to two, and omitted the pecans altogether.

For the filling: I reduced the cream cheese to 8 oz instead of 12, using the tofu version,  and halved the eggs to one. I also omitted the coconut altogether and used Enjoy Life chocolate chips, reducing the amount to 1 cup of the mini chips. For the sugar, I once again used the coconut sugar, and I added a tablespoon of the cocoa powder and 1 tsp vanilla to increase the chocolate taste. Finally, I chose not to make a glaze.

The result was a delicious cake which had less fat and sugar and calories as well as more protein and fiber. I’m including the recipe below for the cake which can be made as the tunnel cake with the cream cheese filling or as a plain chocolate bundt without the filling.

Chocolate Tunnel Bundt Cake

Ingredients:

2 cup coconut sugar

1 cup extra light olive oil

2 eggs

3 cup gluten free flour blend (I used King Arthur’s whole grain blend)

3/4 cup special dark unsweetened cocoa powder

2 tsp baking powder

2 tsp baking soda

1/2 tsp salt

1 cup strong, cooled coffee

1 cup soy milk mixed with 1 tbsp apple cider vinegar

1 tsp vanilla

For Filling:

8 oz tofu cream cheese

1/4 cup coconut sugar

1 tbsp cocoa

1 egg

1 tsp vanilla

1 cup Enjoy Life mini chocolate chips

To make the filling:

Beat the tofu cream cheese until fluffy. Mix in the coconut sugar and cocoa powder, scraping down the sides as needed. Add the egg and vanilla. Stir in the mini chocolate chips.

Baking Instructions:

  1. Preheat oven to 350 degrees. Grease and flour bundt pan with the preferred method. I use vegan butter and then sprinkle ground flax seed which coats the pan well, allows the cake to slide out easily, and adds the omegas from the flax seed to the nutrition of the cake, not to mention a pleasant tasting, textural crunch.
  2. Combine the coconut sugar, eggs, and olive oil in a mixing bowl.
  3. In a separate bowl mix together the flour, cocoa powder, baking powder, baking soda, and salt.
  4. In large measuring cup, blend the coffee and buttermilk and vanilla.
  5. Add the flour mixture to the sugar/oil mixture alternately with the wet ingredients, blending well, until the ingredients are incorporated.
  6. If making just the chocolate bundt cake, evenly spread the batter into the prepared bundt pan as is.
  7. If making the tunnel cake, evenly spread about 1/3 of the batter into the bundt pan; then evenly dollop the cream cheese mixture atop the batter, making sure to leave a wall of batter on either side of the cream cheese. Then carefully add the remaining batter on top of the cream cheese filling.
  8. Bake the cake in the preheated oven for 60 to 70 minutes until the cake is firm to the touch and a toothpick inserted into the cake comes out with just dry crumbs. The cake will be slightly pulling away from the edges of the pan.


Creative Cooking: Cinnamon Chocolate Chip Cupcakes

“Well, it’s not actually my birthday….”

Growing up, my family did not have birthday parties because every person’s birthday was near a major holiday which made parties a bit difficult. Either life was too busy to plan a party or everyone else was too busy and unable to come. So, we developed a family tradition of going to see a movie as a family, followed by pizza and ice cream cake.

I never really thought too much about how my family celebrated birthdays until I had children and their friends began inviting them to birthday parties. It seemed that every 3 year old in preschool was having a party, and not just any party, but a big blowout party at some special location charging exorbitant amounts of money to entertain the entire preschool class for two to three hours.

Never one to follow the trends, I was not inclined to throw a big birthday bash, but I did come to see how celebrating our children’s birthdays with others, even on a small scale, could be special. Unfortunately, two of our children were born in the summer and one just before Christmas which made parties difficult. So, we began a tradition of hosting birthday parties a month or two before their actual birthdays, which confused people but allowed our children to experience the joy of marking their birth with friends.

All my thoughts about birthdays swirled together this week when a mom asked about a dilemma she had: Her young daughter did not like either chocolate or yellow cupcakes but wanted cupcakes for her birthday party. She also is allergic to eggs, wheat, soy, and dairy, and can’t eat bananas or berries for non-allergy health reasons. The mom needed a suggestion for something which would be “special” for her daughter’s party.

I had just the thing: cinnamon chocolate chip cupcakes. Chocolate chips make everything special, or at least according to my children! And cinnamon is a different but complementary flavor that is not yellow or chocolate cupcakes. And if you add cinnamon frosting, it’s a hit with everyone, children and adults alike.

Cinnamon Chocolate Chip Cupcakes

(makes 24 cupcakes)

Ingredients:

2 2/3 cup gluten free flour blend (I used a whole grain sorghum flour blend by Bob’s Red Mill for this recipe)

4 tsp baking powder

1 tsp ground cinnamon

1/2 tsp salt

4 tsp egg replacer (I used Bob’s Red Mill for this recipe)

1 cup Enjoy Life mini chips

2 tbsp ground flax seed

1/2 cup “milk” (I used coconut milk for this recipe since the girl was allergic to dairy and soy but any other type will work too)

1 cup solid “fat” (I used coconut oil but a vegan soy free butter or vegan shortening will work just as well)

2 cups coconut sugar (folks can always use sugar if that is preferable)

1 cup additional “milk” (I used coconut milk for this recipe since the girl was allergic to dairy and soy but any other type will work too)

Baking Instructions:

  1. Preheat the oven to 350 degrees and line cupcake tins with paper cupcake liners.
  2. Mix the flour, baking powder, cinnamon, salt and egg replacer. Stir in the chocolate chips, and set aside.
  3. Mix the ground flax seed with the milk and set aside.
  4. Cream the coconut oil (or chosen fat) with the coconut sugar (or sugar), scraping down as needed.
  5. Add the additional milk to the thickened flax seed mixture, and add the flour and the wet ingredients to the creamed sugar mixture, alternating dry and wet in batches, blending just until all the ingredients are incorporated into one another.
  6. Divide the batter evenly among the cupcake tins.
  7. Bake for 15 minutes until the cupcakes are golden and puffed and firm to the touch.  A toothpick inserted in the center will come out with only a dry crumb or two attached.
  8. Allow the cupcakes to cool for a five minutes in the tins, and then remove them to a wire cooling rack to cool completely.
  9. Frost with favorite frosting and sprinkle with cinnamon.

Cinnamon Frosting: Cream 1/2 cup vegan butter or coconut oil or vegan shortening with 1 cup powdered sugar. Add 1/4 cup coconut cream and blend well. Mix in enough powdered sugar to make a soft frosting. (Usually another cup.) Chill the frosting in the fridge until ready to frost the cupcakes.


Recipe Revamping: Lemon Poppy Seed Cake

“What image represents me?”

If you have not had the experience yet of the college application process for a child in today’s world, you are bound to be surprised when you do. Unlike the applications of my day, students now are asked questions which, to me, seem a bit odd.

“What your favorite website is.” Presumably, colleges believe this is a window into a part of the students’ lives, an indication of what they enjoy, an inkling of where their time is spent…. Maybe?

“How did you spend your summer?” Another question probably designed to give insight but reminds me of those first week of school essays assigned in elementary school.

But my favorite: “If you had to pick an image that best represents who you are, what would it be?” As you can imagine, my daughter came downstairs from her room for that one.

“Mom, what image represents me?”

My wise, motherly response? “Huh?”

After she explained why she was asking and read the question in it’s entirety, my equally insightful, wonderful answer?  “Um. I’m not really sure, honey. Dance shoes since you’re a dancer? Books because you’re so studious? People since you are always serving others? That’s a tough question. Why don’t you go ask your father?”

At that moment, our son walked into the kitchen, so our daughter asked him, and his response? “I don’t know for you, but mama would be a ‘to-do’ list.”

Out of the mouth of babes, as they say….

I am famous for my to-do lists. Every project I work on, every task for the organizations I chair, every time we travel, every coordination email I send, every event I cater, every birthday party planned… literally everything I do is organized by a to-do list.

Part of it is my personality. I like structure and being organized. Some of it is the satisfaction of crossing off an item from the list and seeing your progress as the list gets smaller. Most of the reason, though, is that simply that I’m visual and if it’s not in writing, it doesn’t exist as far as my brain is concerned, and I won’t remember to do it. (As you can imagine, this has become more of an issue the older I become!)

This week on my to-do list was to bake a poppy seed layer cake for a luncheon my husband and I had been invited to attend. As I rummaged through cook books and googled online recipes, I noticed that while a myriad of recipes existed, they all seemed to use a lot of butter, shortening, eggs, and/or cream cheese or sour cream, all of which are high in saturated fats and cholesterol which I wanted to avoid in addition to, of course, making the cake gluten, dairy, and nut free, so I, too, could enjoy it.

This meant rethinking a few things. So, the first thing I did was opt to make a lemon poppy seed cake, because the lemon would flavor everything and reduce the need for flavor from butter or cream cheese or sour cream. The second thing I did was choose to use egg whites instead of whole eggs. The third decision was to make a “buttermilk” out of soy milk and lemon juice to replace sour cream or cream cheese in the recipe and to cut the amount to 1/2 cup. The fourth change was to use olive oil in the cake with its good fats and a vegan olive oil butter for the frosting which had a little saturated fat but much less than butter and far more good fats. And as always, I did what I could to cut the use of sugar, confining it to just the frosting. The result was a delightfully light tasting cake which all enjoyed.

Frosted Lemon Poppy Seed Layer Cake

Ingredients:

2 ½ cups your favorite Gluten Free Flour blend (I used King Arthur’s whole grain blend)

2 tsp gluten free baking powder

1/2 tsp baking soda

1/2 tsp salt

½ cup Truvia

1/2 cup poppy seeds

2/3 cup extra light olive oil

2/3 cup Agave

½ cup “buttermilk” (I used soy milk mixed with 1/2 tbsp lemon juice)

1/2 cup freshly squeezed lemon juice (depending on size of lemons, you will need anywhere from 3 to 6 lemons; you really do want to use fresh lemons if at all possible for the best taste)

1/2 cup water

6 egg whites, at room temperature

1/2 tsp cream of tartar

Baking Instructions:

1. Preheat oven to 350 degrees. Prepare three 9 inch round cake pans for use. (I just line the pans with parchment paper.)

2. Mix the flour with baking powder, baking soda, and salt. Add the truvia and poppy seeds. Set aside.

3. Mix oil, Agave, buttermilk, lemon juice and water. Set aside.

4. In a large mixer, beat the egg whites with the cream of tartar with the whisk attachment until thick, white peaks form when you lift the whisk.

5. Mix the dry ingredients into the wet ingredients. Combine well until the dry ingredients are completely moistened.  Batter will be thick.

6. Gently fold the beaten egg whites into the batter, a little at at time, until all the egg whites are fully incorporated into the batter.

7. Evenly and equally spread batter into each of the three cake pans and bake for about 15 minutes until the cake layers are puffed, golden, and a toothpick inserted into the cake comes out clean. (Mine took 17 minutes.)

8. Cool on the cake layers in their pans until completely cool.

9. Frost the layers with the lemon frosting below, and store in the refrigerator until close to serving time. Let the cake come to room temperature before serving. Enjoy!

Lemon Frosting

Ingredients:

1 cup sugar

8 tsp gluten free flour (I opted to use rice flour so the color would be white)

2 tbsp cornstarch

1/4 tsp salt

1/3 cup lemon juice (use fresh lemons if you can; depending on the size of the lemons you will need about 2 to 4 lemons)

2/3 cup milk

1 cup vegan olive oil butter (I used the Earth Balance version)

1 tsp vanilla

Cooking Instructions:

  1. Whisk together the sugar, flour, cornstarch and salt in a pan. Whisk in the “milk” until smooth.
  2. Over low heat, stir constantly until the mixture begins to boil and thicken. Depending on how shallow your pan is, this will probably take about 4 to 8 minutes.
  3. Once the mixture is thick, pour the mixture into a shallow glass container to cool. I find that a glass pie pan works very well. It usually takes an hour or more to fully cool.
  4. Once the mixture is cool, in a mixer, beat the vegan butter until light and fluffy, and then scrape down the sides of the butter.
  5. Add the cooled mixture with the vanilla and beat the frosting on a low speed to incorporate the mixture into the butter. It will look a bit curdled. Scrape down the sides.
  6. Increase the speed and beat until the mixture looks like a light and fluffy frosting. Its texture and taste will be similar to a whipped cream frosting.
  7. Use the frosting to frost between the cake layers and the outside and top of the cake. (This made enough frosting to generously frost a three layer cake.)


Breakfast Buffet: Spinach Strata

It’s already out of print….”

Last Saturday the writing collaborative I helped to found brought in an illustrator who gave me a wonderful book she had illustrated for an author who wrote about a girl who was gluten-sensitive, celebrating her birthday. The illustrator knew I did workshops for allergy-friendly baking and thought I’d enjoy the book. When I mentioned that it would be nice to purchase a few, she told me that the book had already gone out of print. (It was published in 2013.)

I was bummed. Not only because I wouldn’t be able to purchase more copies of the book but because there had been such a lack of interest in such a great book.

I should not have been surprised, though. My own experience has taught me that unless it affects folks personally, the impetus to consider other people’s plight and show consideration seems to be non-existent at times, and such a book would not need to be purchased by those of us who already know but by those who need to learn.

That does not mean that we stop trying to teach, though. Recently I met with the principal of our high school about a staff appreciation luncheon, and he, too, surprised me.  He asked me if I was considering staff with food allergies in my planning. Since this was the same principal who had held a breakfast for the senior students without any food that students with food allergies could eat, my astonishment must have shown on my face. He was quick to explain that he’d “learned his lesson” about food allergies, which I took to mean that a whole lot of parents must have called him about that breakfast!

Only when we continue to share will people start to come around. I have spoken so many times to the local PTO and my church that, though it has taken several years (years!), people finally have started to make changes. Not at every event, which they still need to consider, but at least at events where they know for sure that people with food allergies will attend.

Recently a local group called me to ask if I could make a breakfast dish for some folks with dairy and gluten allergies. I had the perfect hot dish which I had made over Christmas, a Spinach Strata. Made with gluten free bread, eggs, soy milk, and spinach sautéed with tofu cream cheese, it is cheesy and gooey and yummy. We had enjoyed it at Christmas, and the folks at the breakfast buffet the other day apparently enjoyed it as well.

The recipe is below so you can, too!

Spinach Strata

Best if prepared the night before and cooked in the morning.

Ingredients:

six slices favorite gluten free bread (I used Ancient Grains whole grain millet-chai bread; I used an 8 x 11 pan; if you use a larger pan or smaller pan, you may need to adjust the slices of bread you need to cover the bottom of the pan)

dairy free mozzarella (I used about a cup of the Daiya brand but how much will depend on what size strata you may be making; you want to cover the top of the bread cubes)

fresh spinach (I used a 16 oz package of washed baby spinach; a smaller strata may need a less; a larger strata may need more, depending on how much spinach you like)

one container tofu cream cheese (I used an 8 oz container of Tofutti brand cream cheese; unless you aer halving the recipe, slight decreases or increases in spinach does not warrant changing the amount of cream cheese used)

eggs (I was making the dish in an 8 x 11 pan and ended up using six whole eggs, but the amount will vary depending on the size pan you use; you want the egg/milk mixture to cover come to the top of the spinach mixture)

“milk” (I used soy milk but you can use whatever you like; I also used a cup and a half for the six eggs because I was making the dish in an 8 x 11 pan, but the amount will vary depending on the size pan you use and how many eggs; you want the egg/milk mixture to cover come to the top of the spinach mixture; ratio is usually about 1/2 cup of milk per egg)

herbs and spices (I used black pepper, a little bit of red pepper flakes, onion powder, oregano and thyme, but you can use what suits your tastes)

Cooking Instructions:

  1. Grease a pan of your choosing.
  2. Cut the slices of bread into small cubes and spread the bread over the bottom of your pan.
  3. Sprinkle the bread cubes with the dairy free mozarella.
  4. In a pan saute the spinach with a little bit of water just until the spinach begins to wilt. Add the tofu cream cheese and stir well until the cheese has melted into the spinach.
  5. Carefully dollop the spinach mixture over the top of the bread and mozzarella cheese.
  6. Whisk together the eggs, dairy free milk, and herbs until well blended.
  7. Carefully pour the egg mixture over the bread and spinach. You want the egg mixture to reach the top of the spinach. If you need a little bit more, simply whisk up an additional egg or two and add it to the pan.
  8. Wrap the dish well in plastic wrap or foil and let it sit overnight in the fridge. If making the same day, let it sit at least an hour in the fridge so the bread can soak up the egg mixture.
  9. Bake in a preheated 350 degree oven until the strata is puffed and golden. Time will depend on the size and shallowness of your pan. My 8 x 11 pan took about 45 minutes.
  10. Leftover strata stores well in the fridge and tastes just as good when microwaved the next day.


New Year Visions: Vegan Spanakopita

Happy New Year!

A friend of mine wrote in on December 31, 2017, that this was a day where all the adults living (as in over 18) were born in the 20th century (1900s) and all the minors (under 18) were born in the 21st century (2000s). It made me think about the changes I’ve seen in life from the 1970’s until now and also consider what I’d like to see going forward into 2018. The result was an ABC’s of wishes I wrote. If folks are interested in reading it, feel free to click here: Wishes

In addition, I thought about all the ways food has changed from the 70’s until now.  Cheese Whiz to organic, artisan cheeses… Chef Boyardee ravioli to whole wheat, butternut squash, kale ravioli…white flour noodles to gluten free quinoa pasta… Nestle Tollhouse chocolate chip cookies to Enjoy Life cookies free of 12 major food allergens. The list goes on, and the point is the same: what we consider to be “normal” eating conventions is different going into 2018.

This was evident in our home as we were deciding what to make for a New Year’s dinner we were hosting with some friends. Between food allergies and vegan children, coming up with a satisfying entree wasn’t easy. In the end we opted to make a vegan spanakopita which would have protein, fit dietary needs, and be a satisfying holiday-ish entree for the folks who neither have food allergies or are vegan. To make the dish, though, required work, specifically how best to alter a “normal” spanakopita recipe.

For folks not as familiar with spanakopita, it is a traditionally Greek dish which mixes spinach and feta cheese as a filling to go between layers of phyllo or filo dough which are thin sheets of a low-fat flour dough. Folks with gluten or wheat issues cannot use the filo dough found in stores, and folks with dairy issues cannot eat the cheese, so in the past, these folks could not have spanakopita, but those days are now gone.

How to make spanakopita:

  1. The filo dough: Folks with no wheat or gluten issues can purchase filo dough at the store. A variety of companies sell them in sheets of 20 which is what you usually need (10 sheets for the bottom and 10 sheets for the top). If people want to make their own, The Spruce has a good recipe: Filo Dough Recipe.  If folks have allergies, though, the only option currently is to make your own gluten free filo sheets.  Gluten Free on a Shoestring has the best recipe that I have tried: Gluten Free Filo Dough Recipe . It is not really all that hard, and it is worth the work.
  2. The cheese: Traditionally, spanakopita uses feta cheese. Some folks combine feta and ricotta. Others combine feta and cottage cheese, but feta is always a key ingredient. If there are no food restrictions, there are plenty of recipes online using feta which one can follow. If dairy is an issue or one is vegan, there are basically two options for replacing the cheese: nut or tofu, both of which require making your own “cheese”. For folks who might be allergic to both nuts and tofu, I have not tried any of the cheese, but One Green Planet has “cheese” recipes made from other food like zucchini and hemp and paprika which might be worth trying: Nut and Dairy Free Cheese Recipes
    1. Nut “feta”: Folks who do not have nut allergies can consider making “feta cheese” out of cashews. You simply soak cashews overnight, drain them, and crumble in a food processor with lemon juice, salt and nutritional yeast to your taste and liking and to a feta consistency.
    2. Tofu “feta”: Folks with nut allergies can crumble firm tofu into a bowl to resemble feta chunks, and mix with lemon juice, nutritional yeast, white miso and/or apple cider vinegar, and salt to your taste and liking. I have found that to get the most “feta-like” texture, that it also helps to add a little bit of “milk”. (I usually use soy milk.)
    3. “Ricotta”: If you want to have the texture of “feta” with the texture of “ricotta” in your spanakopita, you can make your own ricotta, too. For tofu ricotta, puree tofu with lemon juice and nutritional yeast to taste and until smooth. For cashew ricotta, soak cashews overnight and then puree with lemon juice, water or “milk”, and nutritional yeast to taste and liking.
  3. The filling:  Usually spanakopita is a mixture of the cheese with cooked spinach which you combine with just enough beaten eggs to hold it together. You can saute fresh spinach. You can use thawed frozen spinach. Your choice. If using frozen spinach, it is best to squeeze out as much of the excess liquid as possible.  When I made our spanakopita, however, I wasn’t going to be using eggs because I needed it to be vegan, so I used a combination of thawed frozen spinach and kale and didn’t squeeze out the liquid. Instead, I added extra nutritional yeast as well as ground flaxseed to absorb the liquid and help bind the “cheese” and veggies which worked incredibly well.
  4. The seasonings: Spanakopita traditionally uses garlic and onions to season the dish. Recipes will vary as to what else is added. Oregano and basil and black pepper are common but it really depends on your tastes and liking. You can experiment and see what you prefer.
  5. Assembling the dish: To make spanakopita, you layer the filo sheets on the bottom of your dish (at least a 9 x 13; I use an 11 x 15 pan) by brushing the dish with olive oil or melted butter, layering on a sheet, brushing the sheet with olive oil or melted butter, and repeating until the top of the last sheet has been brushed with oil or butter. (Olive oil is a healthier fat and you can brush a thinner layer of it than butter so you end up using much less than you would of the butter.) Then you spread the spinach-cheese mixture onto the filo layers and begin the process of layering filo dough on top of the spinach mixture. If your filo dough is larger than your pan, simply tuck the excess into the sides. It is important to be sure to brush the top and final sheet of filo dough with oil or butter.
  6. Baking the dish: Because the filo dough crisps and fluffs up, it can be difficult to cut after it is cooked, so it’s best to cut through the top layers before you put the spanakopita into the oven. Don’t cut through to the bottom, though. Just the top. Then when it cooks, it puffs up around your cuts and makes it easy for you to cut the final slices after it is done. You can bake the spanakopita at any temperature between 325 degrees and 375 degrees. Depending on the temperature you choose, it will take between a half an hour and a hour usually to brown and crisp.

Paula’s Vegan Spanakopita Recipe:

Ingredients:

Tofu Ricotta: 14 oz firm tofu, 1 tsp lemon juice, 1/4 cup nutritional yeast

Tofu Feta: 14 oz firm tofu, 2 tbsp nutritional yeast, 2 tsp lemon juice, 2 tsp apple cider vinegar, 1/4 cup soy milk, 1/4 tsp salt

Seasonings: 1 tbsp minced garlic, 1/2 cup chopped onions, 1 tsp oregano, 1 tsp basil, 1/2 tsp black pepper

Veggies: 10 oz thawed frozen chopped kale, 32 oz thawed frozen chopped spinach

Filling Binders: 1/4 cup nutritional yeast, 1/4 cup ground flax seed, 8 oz Daiya mozzarella

Olive oil

20 sheets preferred type of filo dough

Cooking Instructions:

  1. Make the tofu ricotta by pureeing all the ingredients together in a food processor. Set aside.
  2. Make the tofu feta by crumbling the tofu into feta size chunks and mixing it with the rest of the ingredients in a bowl. Set aside.
  3. In a small pan, saute the seasonings with a small amount of olive oil just until fragrant. Set aside to cool.
  4. In a small bowl, mix the filling binders together and set aside.
  5. In a large bowl, combine the thawed kale and spinach with the ricotta and feta and seasonings. Add the filling binder.
  6. Preheat the oven to 350 degrees.
  7. Brush an 11 by 15 pan with olive oil. Just enough to very lightly coat it.
  8. Layer a filo sheet and lightly brush the layer with olive oil. Repeat until ten sheets have been done.
  9. Spread the spinach mixture atop the filo layers.
  10. Layer a filo sheet and lightly brush the layer with olive oil. Repeat until ten sheets have been done. Be sure to brush the top layer.
  11. Cut the spanakopita into slices, slicing only through the top layers of filo dough and not the bottom.
  12. Bake in the preheated oven 30 minutes, then turn the spanakopita around and bake for another 15 to 30 minutes, until the top has browned and crisped and the filling is hot.