Healthy Habits: Aquafaba

website souffles

“What?”

I travel to libraries to give workshops on allergy friendly and healthier baking. Last weekend, at a workshop, I spoke with a group of about 30, and I received an email this week with a follow up question about aquafaba.

If you have not heard about the new rage, aquafaba, it’s apparently the words for water and beans and refers to the liquid you find in a can of chick peas or after you cook dry chick peas.  The chemistry of the liquid is yet to be determined but what is known is that it makes for a wonderful egg and dairy substitute. You can whip it like eggs to make meringues or replace eggs in baked goods or mayo or waffles and more.  You can whip it like heavy cream to replace dairy in whipped cream, mousse, or ice cream and more.

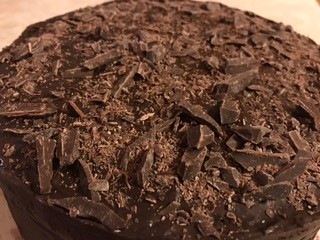
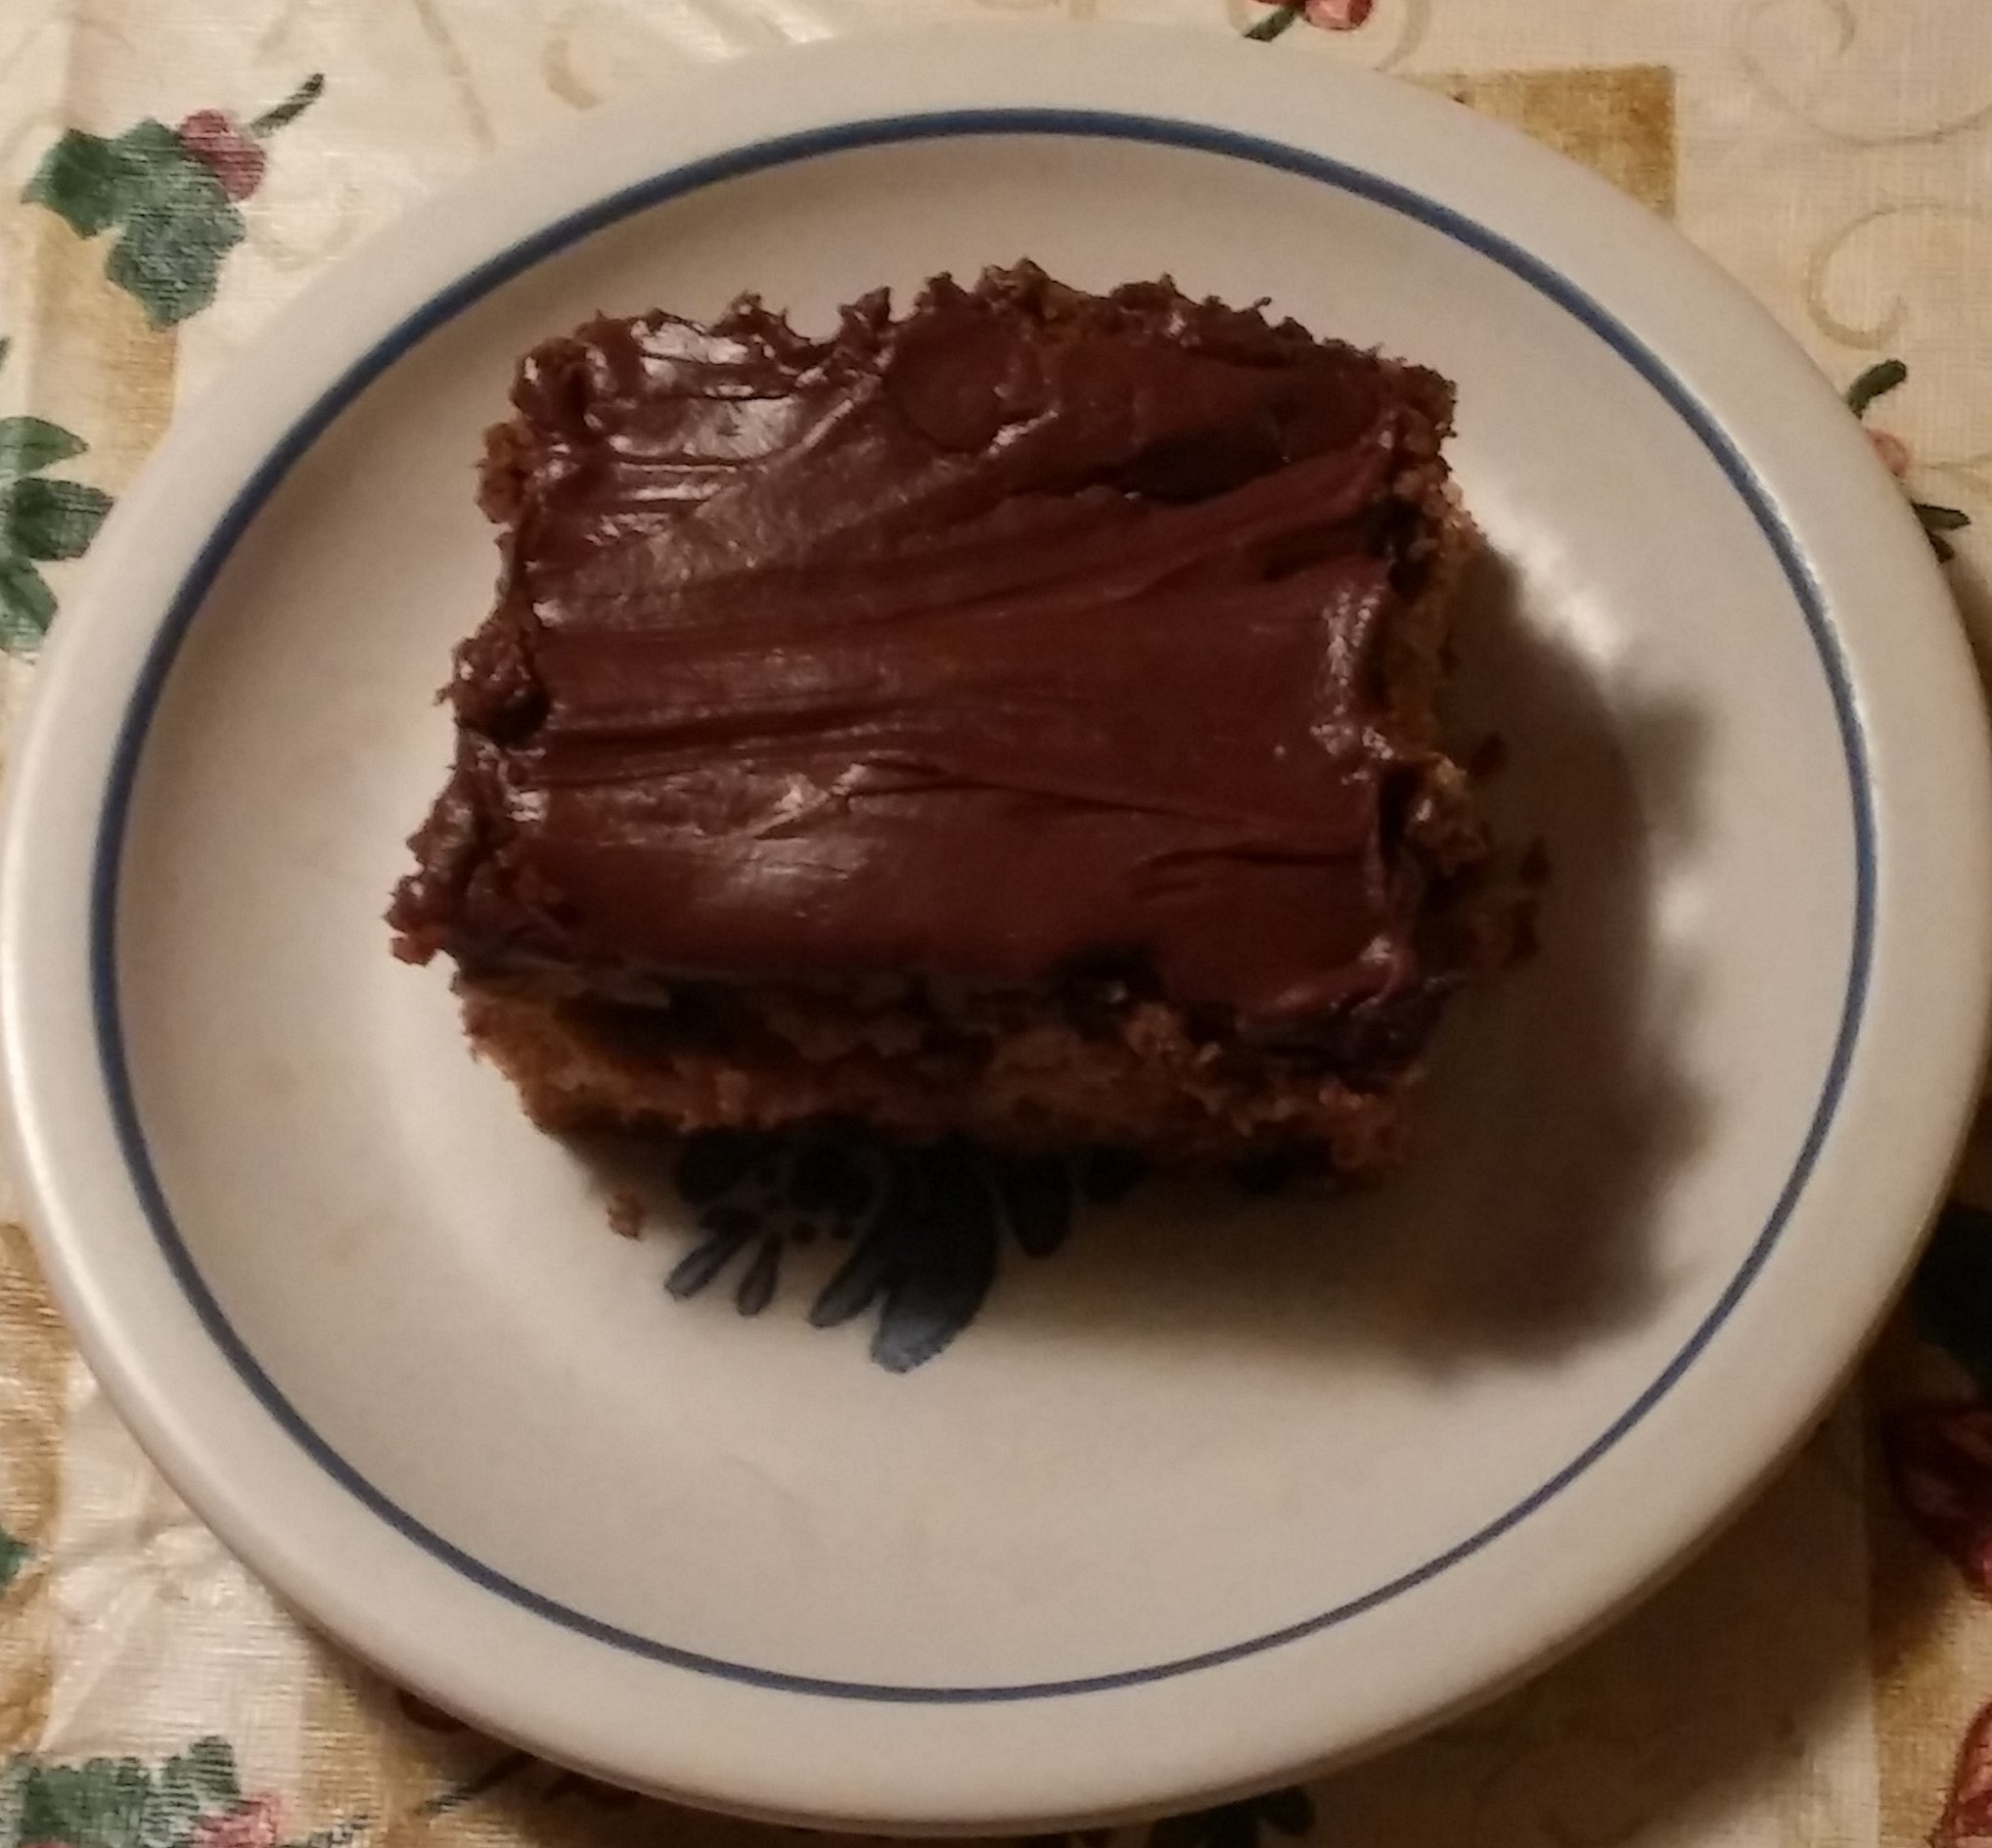
For my workshops, I always bring samples so folks will know that I’m telling the truth about being able to “have your cake and eat it, too”, and I try to provide a variety of desserts which are gluten, dairy, nut, peanut, soy and egg free. Depending on the season, the particular items I bake vary. For this workshop, I made meringues with the aquafaba and a chocolate cream pie with an aquafaba topping so folks could see how the aquafaba worked as both an egg and a heavy cream substitute.

The participant in the workshop who had emailed me did so because she was looking for the meringue recipe which wasn’t actually on this site. So, I’m remedying that situation by including it below. *grin* I’m also including some other tips for how you can use aquafaba in recipes.

Tips for using aquafaba:

  1. Purchase no salt, no sugar added versions of the chick peas if you are using canned chick peas. This helps you to control the sodium and sugar levels. You simply drain the liquid into a bowl and use your chick peas for another recipe at another time. If you prefer to use dry beans, soak them until doubled in size, bring the water to a boil, then simmer until the beans are soft. Drain the liquid into a bowl for your use and save the chick peas for another recipe.
  2. To use the aquafaba as a regular egg sustitute, simply measure out 1/4 cup per egg needed and whisk the egg with a fork just until frothy. Then use in your recipe as you would an egg. Works well for baked goods and French toast.
  3. To use the aquafaba as eggs which need to be whipped for angel food cake or Belgium waffles, start with room temperature aquafaba, add between 1/4 to 1/2 tsp cream of tartar and whip with the whisk handle of your mixer until stiff peaks form (as pictured above). Fold into your mixtures are indicated in your recipes.
  4. If you want to whip the aquafaba for a meringue topping or meringue cookies or to use as a whipped cream topping or as a substitute for heavy cream in ice cream, when you add the cream of tartar to the room temperature liquid, you should also add your sweetener at the same time. If you try to fold in the sweetener after you’ve whipped the aquafaba, it will deflate and soften. I find that powdered sugar works the best because it’s the lightest weight. Depending on how sweet you like your foods, 1/2 cup to 1 cup of powdered sugar per 15 oz can of liquid works well for most recipes. After you have added both the cream of tartar and powdered sugar, then you can whip the aquafaba to the desired stiffness. It’s best to check if the sweetness is to your liking when soft peaks have begun to form so you can add more if needed before you reach the stiff peak stage.

How to Make Aquafaba Meringues:

To make the aquafaba meringues you simply need a 15 oz can of chickpeas.  Drain the liquid into your mixing bowl and put the chickpeas in the fridge for another use.   Add at least 1/4 tsp and up to 1/2 tsp of cream of tartar.  Then add powdered sugar to your liking.  Start with 1/2 cup to 1 cup of powdered sugar. You can always add more later if you find it’s not sweet enough for you. Add 1 tsp of vanilla alone or with 1/4 cup of unsweetened cocoa powder if you want vanilla or chocolate flavor.

After you’ve put everything into your mixer, use the wire whisk handle to whip the aquafaba until it looks like the picture above.  It usually doesn’t take very long.  (When the peaks are still soft, check the sweetness to see if you need to add any more before whipping to stiff peaks.)

After it’s whipped to stiff peaks, put some into a gallon zip lock bag and snip off the end.  Preheat your oven to 250 degrees and line a cookie sheet with parchment paper. Using the ziplock bag, pipe meringues onto the parchment paper.  I usually make them about tablespoon size. I also like to make the meringues pretty by sprinkling a mixture of unsweetened cocoa powder and powder sugar on top of each meringue before putting them into the oven.

Once you’ve filled the cookie sheet with your meringues, pop them into the oven and bake them for at least an hour.  Then check them.  When they are done, they’ll be hard and dry.  If they’re not quite done, cook them longer for 15 minutes at a time until they are.  (If you make them tablespoon size, they’ll be done after an hour.  If you made them larger, they may take more time.)

Once they’re done, turn off the oven and let them cool in the oven for half an hour.  Then take them out and let them cool completely on a wire cooling rack.  When you go to take them off the parchment paper after they’ve cooled, carefully lift them off and place them into a tupperware, using parchment paper or plastic wrap to layer them.  They’ll keep for a good while in the tupperware.

Valentine Greetings: Chocolate Surprise Cupcakes

choc-surprise-cupcakes

“Yay! Another snow day!”

After a winter of warm days and relatively little snow, Mother Nature decided that we needed three feet to fall within a week and a half. My middle child is vexed that the three tests she was supposed to have had a week ago still have not been administered due to two snow days and three start of school delays. My oldest and youngest, however, have been thrilled for the extra time to hang out in dorms with no classes (my oldest at college) and to play at home with the family (my youngest in middle school).

As a family, we’ve made use of the snowbound time to catch up on the never-ending t0-do list and to spend time together since the youngest really wanted us to play with him. Many hours sledding in our backyard, playing board games, competing on the Wii, and watching reruns of old shows left the family in the mood for something “special” to eat.

Since Valentine’s Day is tomorrow, we decided to make some Chocolate Surprise Cupcakes, one of the family’s favorites. You make a chocolate raspberry center which you tuck into the cupcake batter so when you eat it, you enjoy a nice creamy flavor surprise.  What’s nice about this recipe is that it’s free of most foods folks tend to be allergic to, so just about anyone can enjoy them.

Chocolate Surprise Cupcakes

Filling Ingredients:

1 cup Enjoy Life mini chocolate chips

2 tbsp Polaner’s seedless raspberry All-Fruit

2 tbsp Earth Balance vegan, soy free butter

Cooking Instructions:

  1. In a microwave safe large glass container, place all three ingredients and microwave for 1 minute. Stir until the mixture is completely smooth.
  2. Place the container in the refrigerator and let the mixture cool and begin to thicken. It can take anywhere from 10-30 minutes, depending on how hot your microwave makes the chocolate, how exact your measuring is, etc…. What you want is for the mixture to be thick enough when you spoon it that you can mound the chocolate onto a cookie sheet.
  3. When the chocolate has thickened enough to form little mounds, place a piece of wax paper on a cookie sheet and create 24 chocolate mounds using a teaspoon to scoop out the chocolate mixture. You essentially are making a little “hershey kiss” of your own.
  4. Once you have 24 more or less equally sized chocolate mounds, put them into the fridge to harden while you make the cupcake batter.

Cupcake Ingredients:

3 cups favorite gluten free flour blend

1/2 cup unsweetened Hershey’s Special Dark cocoa powder

3 tsp baking soda

1 tsp salt

1 cup agave

3/4 cup safflower oil

2 cups water

2 tsp vanilla

3 tbsp vinegar

Baking Instructions:

  1. Preheat oven to 350 degrees and line 24 cupcake tins with cupcake liners.
  2. Mix the flour, cocoa powder, baking soda and salt well and set aside.
  3. Mix the agave, oil, water, and vanilla and add to the dry ingredients with the vinegar. Mix well until the dry ingredients are moistened.
  4. Put 1 1/2 tbsp of batter into each of the 24 cupcake tins.
  5. Carefully peel and place one of the chocolate raspberry mounds into the center of each of the cupcake tins.
  6. Divide the remaining batter evenly among the cupcake tins (about 1 1/12 tbsp) to cover the chocolate mounds.
  7. Bake in the preheated oven for 15 to 20 minutes. The cupcakes will be rounded, firm to the touch, and a toothpick inserted into the center will come out clean. My oven always bakes them in 15 minutes but a friend said hers took 20.
  8. Let the cupcakes sit in the tins for 5 minutes. Then remove them to a wire cooling rack to cool completely.
  9. Frost with your favorite frosting recipe or use the one below is one I’ve adapted from Elana’s Pantry.

Frosting Ingredients:

1 cup Enjoy Life mini chocolate chips

1/2 cup avocado oil

2 tbsp agave

2 tsp vanilla

your preference of “milk”

Cooking Instructions:

  1. Mix the chips, oil, and agave together in a microwave safe glass container.
  2. Heat the chips for 1 minute. Stir. If it needs to be heated more, do so 20 seconds at a time until you can stir the chips smooth.
  3. Add the vanilla and stir well.
  4. Transfer the mixture to your mixer bowl.
  5. Put into the freezer until the mixture begins to hard around the edges but is still softer in the center.  This can take between 15 to 30 minutes.
  6. Using your mixer, blend the chocolate mixture on high speed until the mixture becomes thick and smooth. You may need to scrape down the sides a couple of times.
  7. Add “milk”, a teaspoon at a time until the mixture is to the creamy consistency you prefer for frosting your cupcakes.


Healthy Habits: Tofu

“The parts all contribute to the whole.”

As a drama director my job is to help folks bring every aspect of a character to life. Some excel at body language. Others mimic voices well. Most know how to speak with emotion but not always how to use facial expressions to enhance the emotion. When I work with folks, I get questions like, “But I sound just like an old lady. Isn’t that enough?” Or “What difference does it make how I walk?” And then I have to explain that every aspect of a character – how they speak, walk, dress, gesture – has to be spot on for the audience to believe in the illusion we are creating.

When I received an email this week from a wife who wants to get her husband to eat more tofu, I thought about the types of illusions created by food and cooking. Restaurant chefs learn how to garnish plated food artistically because “beautiful” food is better tasting. Right? Not necessarily but the illusion is created and our brains believe it, so our palate does too… sometimes. *grin* When we’re sad or upset, and we eat, it’s because somewhere along the line the illusion was created that “comfort” food is comforting. And sometimes it is, but most of the times it just makes us fat. *wry grin*

That doesn’t mean all illusions are bad, though, when it comes to food. For food like tofu, creating illusions is precisely what helps when a wife wants her husband to eat more of it so he can live a longer, healthier life. *grin* When one’s husband really wants a meat chili, what can you do to get his brain to believe in the satisfaction of a tofu chili instead? If he wants chicken in his stir fry, how can you make tofu an acceptable substitute?

The answer lies in the parts contributing to the whole. For example, what makes chili taste like chili? It’s the spices and the traditional add-in’s. Almost every chili recipe calls for chili powder or actual chili peppers. Most include onions and peppers, regardless of whatever else is also added. So, the key is to infuse all the part of a tofu chili with the flavoring which your taste buds associate with a chili. The other important factor in chili is the texture. People are particular about chili – that’s why you see all the debates about chunks of meat versus ground meat and meat only versus meat with beans. So, you have to mimic the texture of the type of chili you’re trying to substitute tofu into. I have a recipe below which I use which a lot of folks have liked in the past.

Another example of how to create illusions with tofu is baked tofu recipes. Commonly folks will substitute tofu in a stir fry or recipe by simply adding chopped tofu instead of chicken or beef. The problem is that folks were expecting a “meaty” taste and texture, but plain tofu is not going to supply that. Baked tofu, however, does. When tofu is baked, it becomes crispy on the outside and meaty, chewy in the center, the way beef and chicken can be. It’s obviously not the exact same, but if you flavor the tofu as you would the beef or chicken in a stir fry, you’ll find that the brain can buy into the substitution. Below I’ve pasted in some tips for making baked tofu.

Crockpot Tofu Chili

Ingredients:

2 cups chopped kale

2 cups sweet white corn

1/2 cup chopped onions

1 1/2 cup chopped peppers (I like to mix red, yellow and green for color)

2 cups chopped butternut squash

1 tsp minced garlic

1 tsp ground chili powder

1/2 tsp ground cumin

28 ounce no salt added diced tomatoes

16 oz can drained, rinsed no salt added dark red kidney beans

1 tsp minced garlic

1 tsp ground chili powder

1/2 tsp ground cumin

2 tsp olive oil

1/2 tsp ground cumin

1 tsp ground chili powder

1 tsp minced garlic

1 tsp ground onion powder

2 14-16 ounce extra firm tofu

1 tsp ground cumin

1 tsp ground chili powder

1 tsp minced garlic

Cooking Instructions:

  1. Mix the kale, corn, onions, peppers, and squash with the garlic, chili powder, and cumin in a 6 cup crockpot.
  2. In a bowl mix the tomatoes and beans with the garlic, cumin and chili powder and then add them to the vegetable mixture in the crockpot.
  3. In a large pan, saute the olive oil with the cumin, chili powder, garlic and onion powder for about 30 seconds. Using your hands crumble the tofu into the pan so that they are in large chunks that look like ground meat. Mix the tofu into the hot seasonings well and saute until the water has evaporated out of the tofu mixture. Add to the mixture in the crockpot.
  4. Mix all the ingredients with the final dashes of cumin, chili powder and garlic. Cook on low for 4 to 6 hours.
  5. NOTE:  If you do not cook out all the water from the tofu, the chili will become watery. If that happens, simply use a spoon to scoop out the excess water and then remix your chili.

Tips for Making Baked Tofu:

  1. The tofu: Make sure you are using at least firm tofu. Extra or super firm is best.
  2. The seasonings: You can use whatever you want. Soy sauce, sesame oil, herbs, spices, pesto, black pepper, bottled sauces, whatever you like. You want to make sure to completely coat your tofu cubes well before you begin to bake them. If you use something like minced garlic, you should add that to the tofu later in the baking time so the minced garlic doesn’t burn. If you want to use a sauce, you can toss the tofu with oil and bake it and then toss them with the sauce after they’re done as opposed to before you bake them.
  3. Oil: Baked tofu works best if you have a little bit of fat to help with the crisping. I prefer to use oil. You can use olive oil or sesame oil or a nut oil or another plant oil… it all depends on the flavor you want and the seasonings you want to complement. Toss the tofu in the oil before tossing them with the seasoning you want to use.
  4. Shape: Cut the tofu into cubes for best baking. I like 1 inch cubes.
  5. Oven: 350 degrees is a good temperature to slowly bake the moisture out of the tofu and to create a crispy exterior.
  6. Baking Sheet: The best way to bake tofu is on a cookie sheet lined with parchment. It helps to absorb the moisture without causing the tofu to stick and allows the heat to reach all sides of the tofu.
  7. The baking: It’s good to place the tofu in a single layer and to turn them over at some point so the bottom side gets some of the circulating heat on it. The time will vary, depending on how watery your tofu is and how many you have on a sheet. Some tofu will be done in 15 minutes, others can take 30 minutes or longer. Some recipes will tell you to toss the tofu in cornstarch. This helps to reduce the moisture which can cut down on the time in the oven and can create a crispier texture. Other recipes will tell you to place items on top of the tofu to squeeze out the extra moisture before baking. This can cut down on the time, too. I never do that because I have no problem with baking the tofu a little longer while I do have issues with too many steps and the risk of squashing my tofu so I can’t have my neat little cubes.

Healthy Habits: Orange Cranberry Muffins and Pancakes

“Of course you’re sick….”

It never fails. A day or two into our holiday break, one of the children or my husband starts sniffling and coughing. Then one by one, they all fall victim and within three to five days all four are sick. The same thing happens during the February winter break. The adrenaline which keeps their immune system pumping through the semesters seems to slow down, and their bodies’ immune systems drop their defenses. Fortunately, over the years, my body appears to have become immune to their sicknesses so 98% of the time now, I’m healthy as I nurse them as opposed to the earlier years where I was sick as a dog, too, but had to be the mom who took care of everyone else!

While everyone is sick, I’m always trying to find ways to get more good nutrients like vitamin C into them. One of the ways they prefer is when I make foods which have ingredients high in vitamins and minerals. Oranges and cranberries are both good for the immune system so I’ve created muffin and pancake recipes which the family likes to eat.

To help boost the “good” in the muffins and pancakes I use high fiber, high protein flours and add both orange juice and cranberries. I freeze fresh whole cranberries in the freezer in two cup bags which I can just pull out when I need them, and I keep unsweetened frozen orange juice concentrate in the freezer as well. For both recipes, I use the frozen cranberries and orange juice concentrate as is without any thawing.

Enjoy!

Orange Cranberry Pankcakes

(These make a lot: enough for a family of five with leftovers for the school week

so if you don’t want that many make half the recipe instead.)

Ingredients:

4 cups milk of choice (cow, soy, flax, etc…)

1/4 cup lemon juice

1/3 cup vegan soy free butter

1 tbsp safflower oil (or canola or grapeseed or sunflower or other type you prefer)

2 cups cranberries (fresh or frozen, not dried)

1/2 cup unsweetened orange juice concentrate (frozen is fine)

1/2 cup Agave

2 eggs (or 2 tbsp ground flaxseed mixed with 6 tbsp water or 1/2 cup aquafaba*)

4 cups of your favorite high fiber, high protein gluten free flour blend **

1 tsp salt

5 tsp baking powder

Cooking Instructions:

  1. Preheat a pancake griddle to 350 and grease with preferred method. If using a pan, don’t warm the pan until you’re ready to cook the pancakes and cook the pancakes on medium heat.
  2. Mix the milk with the lemon juice and set aside.
  3. Melt the butter in a microwave for a few seconds and mix it with the oil. Set aside.
  4. In a food processor, chop up the cranberries with the orange juice concentrate and agave. Stir in the milk and the butter with the two eggs. Set aside.
  5. Mix the flour with the salt and baking powder.
  6. Add the wet ingredients to the dry ingredients and mix just until everything is moistened and the batter begins to bubble a bit.
  7. Use a 1/4 cup to pour batter onto the prepared griddle. When the pancake edges are dry and the pancake batter begins to pop little bubbles, turn them over and cook a minute on the other side to complete the pancake.
  8. If making a lot of pancakes to store for the week, put them in single layers on a cooling rack to cool completely before putting them into the fridge. To keep warm for eating, put the pancakes on an oven proof plate in the oven on the lowest temperature setting.

Notes: *Aquafaba is the liquid from a can of chickpeas. To substitute for eggs, use 1/4 cup per egg and whisk until frothy (foamy but still clear and not white like a meringue.)

** See Food FAQs under Ingredients to see some recipes for GF blends https://pajamaliving.com/flour/

Orange Cranberry Muffins

Ingredients:

2 cups cranberries (fresh or frozen, not dried)

1/2 cup unsweetened orange juice concentrate (frozen is fine)

1/2 cup Agave

1 cup milk of choice (cow, soy, flax, etc….)

1/2 cup sorghum flour

1/2 cup quinoa flour

1 cup tapioca starch

1 cup potato starch

1 tbsp baking powder

1/2 tsp salt

1/2 tsp cloves

1 tsp cinnamon

1/2 tsp xanthan gum

1/2 cup vegan soy free butter

1/2 cup Agave

2 eggs

Baking Instructions:

  1. Preheat the oven to 350 degrees. Line 24 cupcake liners in muffin tins or grease the muffin tins with your preferred method.
  2. In a food processor, chop up the cranberries with the orange juice concentrate and agave. Stir in the milk and set aside.
  3. Mix together the sorghum flour, quinoa flour, tapioca starch, potato starch, baking powder, salt, cloves, cinnamon and xanthan gum. Set aside.
  4. Cream the vegan butter with mixer. Scrape down the sides. Slowly add the agave, mixing on low until the butter is creamy.
  5. Add the eggs, one at a time, mixing the first in well before adding the second.
  6. Scrape down the sides and add the dry ingredients alternately with the cranberry milk mixture, beginning and ending with the dry ingredients, scraping down the side as needed.
  7. Fill the cupcake liners evenly with the batter (will be about 3/4 full).
  8. Bake for 15 minutes until cupcakes are puffed, golden and a toothpick inserted in the center comes out clean.
  9. Cool muffins on a wire cooling rack.

Happy New Year: Chocolate Torte

mint-torte

“It’s great! You get to choose….”

When I was a child in the ’70s, a new type of story was filling the market. It was a story book where you got to choose what happened. You’d be introduced to the characters and a situation but then you’d reach the end of the first chapter where you were told to choose which action then would happen. If you chose one, you’d be sent to a certain page. If you chose the other, you’d turn to another page. When you had finished whichever chapter you chose, you were given another set of choices, and this continued until you reached the end of the book.

For a young reader it was a fun way to extend the adventures in the book because you could keep reading the same book over and over, making different choices each time for a completely new story.

As an adult, I love the complexities of life which are subtly shown by this “pick the next action” type of storytelling. Our lives are made up of little daily decisions which lead to other little decisions, to regrets, to rewards, to joys, to sorrows, to bigger choices, to serious consequences, to surprises… and there are times when we wish we could go back and make another choice, and other times when we are grateful we made the choices we did.

New Year’s is usually a time when we find ourselves thinking back upon the choices of the year which just passed and thinking about the decisions we’ll need to make for the new year to come. For most, our years are a mixture of both good and bad, and New Year’s is when we think about how to make more good in the year to come. The truth, though, is that every minute of every day, all year long, is an opportunity because we continually are writing our life stories with every decision, every thought, every word, every action we pursue.

So, as we begin 2017, I invite and encourage you to consider the choices you’ll make for a healthier, happier you. Whatever the choices you make in 2017, my hope and prayer for you is that the new year will be filled with much light, much love, and much laughter.

And in the spirit of choices, I give you a recipe for a chocolate torte which allows you to choose how you want to make it to fit your particular dietary needs and preferences. You can make the cake layers plain chocolate, minty chocolate, almond chocolate or fruity chocolate. You can make the filling any of the same flavors and in a variety of ways. You can top it any way that you want.  You can make it gluten, dairy, nut, soy, egg or all of the above free. It’s your choice!

Happy New Year!

Chocolate Torte

Cake Layer Ingredients for You to Choose:

2 cups flour (favorite gluten free blend or whole wheat)

1 cup unsweetened cocoa powder (natural unsweetened or special dark)

1 to 2 cups sweetener (2 cups sugar or 2 cups coconut sugar or 1 cup agave)

3 tsp leavener (2 tsp baking soda and 1 tsp baking powder for gluten free flour or 1 1/2 tsp baking soda and 1 1/2 tsp baking powder for wheat flour)

1 tsp salt

1/2 cup binder (2 whole eggs or 1/2 cup liquid egg whites or 2 tbsp ground golden flaxseed mixed with 6 tbsp of water or 6 tbsp aquafaba**)

1 cup “milk” (if using wheat flour, any type of milk such as cow, soy, flax, oat, hemp, almond or if using gluten free flour any type of milk such as cow, soy, flax, oat, hemp, almond mixed with 1 tbsp either lemon juice or vinegar to make a buttermilk)

1/2 cup plant oil (safflower or sunflower or grapeseed or canola or light olive oil or a nut oil)

2 tsp extract ( 2 tsp vanilla or 1 tsp vanilla and 1 tsp mint or 1 tsp vanilla and 1 tsp almond or 1 tsp vanilla and 1 tsp orange extract)

1 cup boiling water

1 tbsp vinegar or lemon juice (white distilled vinegar or apple cider vinegar or raspberry vinegar or lemon juice)

Caking Baking Instructions:

  1. Preheat oven to 350 degrees and prepare four 9 inch cake pans by either lining them with parchment paper or greasing and flouring them or spraying them with Pam spray. Move the racks in your oven so they are evening spaced for putting two cake pans on each rack.
  2. Mix together the flour, cocoa powder, sweetener (if using sugar or coconut sugar), baking soda, baking powder and salt. Set aside.
  3. Mix together the binder, “milk”, oil, extract and sweetener (if using agave).
  4. Add the wet ingredients to the dry with the boiling water and the vinegar or lemon juice. Blend just until dry ingredients are moistened.
  5. Divide the batter evening among the four prepared pans. Bake in the oven for 15 minutes, switching the cake pans between the two racks halfway through. Cakes will be slightly puffed, pulling away from the edges, and a toothpick inserted in the center will come out clean.
  6. Leave the cake layers in the their pans and allow them to cool on a wire cooling rack.

Note: ** Aquafaba is the liquid from a can of chickpeas. To substitute for eggs, use 1/4 cup per egg and whisk until frothy (foamy but still clear and not white like a meringue.)

Torte Fillings for You to Choose:

Option One Ingredients: A Light Dairy and Egg Free Mousse-like Filling

Liquid from one 15 ounce can of chickpeas

1/4 tsp cream of tartar

1/4 cup powdered sugar

1/2 cup dark chocolate or semi sweet chocolate (regular type or Enjoy Life allergen free type)

1 tsp vanilla extract or 1 tsp mint extract or 1 tsp almond extract

Cooking Instructions:

  1. If you have a Kitchen Aid or other heavy duty mixer, use it. Drain the liquid from the can of chickpeas into the mixing bowl. (Use the chickpeas for making hummus or a curry dinner entree or in your salad or for a roasted snack.)
  2. Add the cream of tartar and begin mixing the liquid on low speed, slowly increasing to the highest. As the liquid begins to become frothy and foamy, add the powdered sugar, one tablespoon at a time. Mix until the liquid becomes thick white peaks like an egg meringue.
  3. Put the chocolate pieces into a microwave safe dish for a minute and stir until the pieces are all melted or put the chocolate pieces in a pan over another pan filled with boiling water and heat and stir until the chocolate is all melted.
  4. Add the extract of choice to the chocolate and mix well.
  5. Add a little bit of the chickpea meringue to the chocolate mixture and gently fold it into the chocolate. Then add the chocolate mixture to the bowl of meringue, folding in just a little at a time until all the chocolate has been added and folded into the meringue. Transfer to the fridge to thicken until needed to fill the torte cake layers.

Option Two Ingredients: A Heavier Mousse-like Filling (can be made dairy free)

2 cups of heavy cream or cold coconut cream (put coconut cream into the fridge to cool overnight, turn the can over and open so that the liquid is at the bottom, drain the liquid, and use the cold cream in place of the heavy cream)

1 1/2 tsp vanilla extract or mint or almond or orange

1/4 cup sugar or 1/4 cup powdered sugar or 1/4 cup coconut sugar or 2 tbsp agave

Cooking Instructions:

  1. Mix the cream with the extract and beat at a high speed until soft peaks begin to form. Add the sweetener of choice, a little at a time, and continue beating until stiff peaks form. Put the whipped filling in the fridge until needed to assemble the torte cake layers.

Option Three Ingredients: A Creamier Filling

5 ounces chocolate pieces (dark or semi-sweet, regular or Enjoy Life)

12 ounce whipped topping, thawed (regular or dairy free coconut version)

8 ounce cream cheese (regular or dairy free soy version)

1 tsp vanilla extract or mint or almond or orange

Cooking Instructions:

  1. Mix the chocolate pieces with 1/2 cup of the whipped topping and microwave 30 to 60 seconds until melted and smooth. (Stir after 30 seconds to see if you need more time.)
  2. In a mixer, whisk the cream cheese until smooth. Add the chocolate mixture and beat well.
  3. Add the remaining whipped topping and blend well. Put into the fridge until needed to assemble the torte cake layers.

Options Four and Five: Thicker Fillings

Make your favorite mousse recipe as a filling or simply your favorite frosting recipe as the filling.

Assembling the Torte:

  1. On a cake platter lay the first cake layer. Spread one third of the filling you chose to make.
  2. Top the filling with the second cake layer and spread the second third of the filling.
  3. Top the filling with the third cake layer and spread the last of the filling.
  4. Place the last cake layer on top.
  5. Choose a topping option to cover the sides and top of the torte.

Topping the Torte:

Option One (which is pictured at the beginning of this post):

Melt dark chocolate or semisweet chocolate chips (regular or Enjoy Life variety) in your microwave and stir until smooth. using a frosting spreader, coat the sides and top of the cake with the melted chocolate in a very think layer. Before the chocolate solidifies, sprinkle the top with chopped chocolate pieces.

Option Two:

Make your favorite frosting recipe and frost the sides and top of the torte.

Option Three:

Make a ganache: Warm 1 cup heavy cream or coconut cream in a microwave just until hot to the touch. Pour over 8 ounces of dark chocolate or semisweet or bittersweet chocolate pieces (regular or Enjoy Life variety) and stir until completely smooth and silky. Allow ganache to cool to a spreadable consistency.


Creative Cooking: Brussel Sprout Chocolate Chip Cake

brussel-sprout-cake

“The secret ingredient is what?”

After one day of Thanksgiving leftovers, my husband is usually ready for something different. So, over the past few days we’ve had a turkey shepherds’ pie (using leftover turkey, some of the roasted carrots and cauliflower, and the mashed potato timbale), turkey-vegetable soup (using leftover turkey, the rest of the roasted carrots and cauliflower, and the leek gravy), stuffing muffins (using leftover stuffing and some of the leftover turkey sausage stuffed mushrooms), cranberry waffles (using leftover whole berry cranberry sauce), cranberry muffins (using leftover cranberry-orange relish), and quiche (using the rest of the leftover turkey sausage stuffed mushrooms).

Yesterday as I was rummaging through the fridge to see what we still had leftover, I found the roasted brussel sprouts which I hadn’t used in any of the above meals. While searching online to see if there might be anything interesting I could use them for, I found a recipe for brussel sprout cake. I was intrigued but a closer look at the multitude of recipes — which I discovered to actually be the same two recipes just remade by many, many people — revealed a lot which I didn’t like about the cake.

One was simply that the cake seemed to be a variation of a fruit cake recipe, only with vegetables added, so the bake time was lengthy and the cake, more dense than I’d like. Two, the recipes called for two cups of sugar and two cups of oil.  Third, all the extras which make the cake more like a fruit cake — the raisins, walnuts or pecans, shredded coconut, etc… — were not ingredients my children would like in a cake. Four, the recipes, were of course, not allergy friendly for wheat, dairy and nuts.

So, I decided I’d create my own brussel sprout cake which used gluten free flour in place of the wheat, agave instead of sugar and in half the amount, applesauce for some of the oil, and a small amount of mini chocolate chips in place of the original “extras”. When the cake was done, we topped it with a dark chocolate frosting, and the result was an extremely tasty cake which now contained the health benefits of brussel sprouts which includes being high in protein and vitamins C and K.

Brussel Sprout Chocolate Chip Cake

Ingredients:

2 cups roasted brussel sprouts

1/2 cup safflower oil

1/2 cup unsweetened applesauce

1 cup agave

1 tbsp vanilla

4 eggs (if you are watching cholesterol, use 1 cup liquid egg whites instead)

2 cups gluten free flour blend (I used Pillsbury brand for this cake)

1 cup gluten free oat flour

2 tsp baking powder

1 1/2 tsp baking soda

1 tsp salt (you can reduce this if you are watching sodium intake)

2 tsp ground cinnamon

1 tsp ground nutmeg

1/2 tsp ground ginger

1/2 tsp ground cloves

1 cup Enjoy Life allergen free mini chocolate chips

2 tbsp apple cider vinegar

Baking Instructions:

  1. Preheat the oven to 350 degrees and line an 11 x 15 pan with parchment paper.
  2. Coarsely chop up the brussel sprouts in a food processor for a few seconds or with a knife on a cutting board.
  3. In a large bowl, combine the brussel sprouts with the oil, applesauce, agave and vanilla.
  4. Beat the eggs and add them to the brussel sprout bowl. Set aside.
  5. Combine the gluten free flour with the oat flour, baking powder, baking soda, salt, cinnamon, nutmeg, ginger and cloves.
  6. Stir in the mini chocolate chips.
  7. Add the dry ingredients to the wet ingredients, along with the cider vinegar, and mix just until the dry ingredients are moistened.
  8. Pour into the prepared pan and bake for 30 to 35 minutes until the cake has puffed, is golden, and a toothpick inserted in the center comes out clean.
  9. Cool on a wire rack.
  10. Frost with favorite frosting recipe. (We made dark chocolate but I think a cream cheese frosting or vanilla or cinnamon frosting would be equally tasty.)


Holiday Happenings: Cranberry Sauce

bags-of-cranberries

“Apparently cranberry sauce is underappreciated….”

My husband came home the other day and told me about a news story on the radio. The topic was cranberry sauce and how it was not as appreciated as other foods eaten during the Thanksgiving meal. This, of course, spurred discussion among our family about our own cranberry preferences. My son will only eat jellied cranberry sauce with no chunks. My oldest, my husband and I love cranberry sauce in any form. My other daughter won’t eat it, no matter the texture.

Cranberries, however, are very good for your health, containing antioxidants, fiber, and many nutrients needed by the body. What I find, though, is that because they have such a tart flavor, folks use way too much sugar when cooking with them. So, I like to make my own cranberry sauce instead of purchasing it from the store.

When I tell folks that I make cranberry sauce, they always seemed to be surprised, which I find surprising since cranberry sauce is the easiest food to make. You simply put cranberries into a pot with water and sweetener and let it cook down. The entire process takes about 10-15 minutes, at the most.

Where the creativity comes in is deciding what type of cranberry sauce you’d like for Thanksgiving. You can add other fruits to the cranberries like pears or apples or tangerines or oranges or apricots or cherries to add a contrasting fruity flavor to the cranberries. You can add red wine or port or bourban if you’d like a more complex flavor. You can add ginger or maple or anise or jalapeno if you’re looking to try something a little different this year. You can use water, orange juice, apple cider or any other liquid you can imagine to change the flavor. You can add nuts or dried fruits to add crunch and texture. You can even change up the texture of the sauce, making it chunky, relish-style or jellied.

And after Thanksgiving the cranberry sauce can be “recycled” in many ways. Swirl it into your favorite cheesecake recipe. Add the sauce as a fixing for your favorite sandwich. Mix it into a muffin recipe. Top pancakes or waffles with it. Combine it with another fruit to make the filling for a pie. Stir it into your breakfast oatmeal. Use it as a spread for a slice of quick bread like banana or zucchini. Combine it with cream cheese for a dip. Top vanilla ice cream with it. The ideas are endless.

A food as versatile as cranberry sauce is truly just begging for you to experiment this year. And what’s great is that unless you’re allergic to cranberries, people with food allergies can eat it!

Some tips:

  1. The cranberries: It doesn’t matter whether you use fresh or frozen cranberries. The general rule of thumb is that about 12 ounces of cranberries requires about 1 cup of liquid.
  2. The sweetener: For most recipes, for 12 ounces of cranberries, they’ll call for 1 cup of sugar. I’d suggest you cut that in half and save your health or use 1/4 cup Agave or 1/2 cup of coconut sugar or 1/3 cup truvia.
  3. The add-ins: Decide what type of cranberry sauce you’d like to make and add the ingredients in with the cranberries so that they all cook together and the flavors meld.
  4. Traditional Style: To make traditional cranberry sauce, simply put all your ingredients into a pot, bring the liquid to a boil, let it simmer for about 5-10 minutes until the cranberries pop and are the texture you’d like, remove from the heat, let it cool, and then refrigerate until you’re ready to use it.
  5. Relish Style: Simply use your food processor to chop up the cranberries, sweetener and additions and refrigerate. You should decrease the liquid, though, and only add just enough to moisten the relish.
  6. Jellied Style: Prepare the sauce as you would for the traditional but then push everything through a strainer, mashing the ingredients as much as you can to get as much as you can into the sauce and then refrigerate what you’ve pushed through the strainer.


Recipe Revamping: Tiramisu

website-tiramisu

“But you don’t like coffee….”

When we came to the States from Japan, we lived on a military base just outside of New York City which meant I had access to all the city had to offer such as Little Italy where you could go to a restaurant and get tiramisu freshly made with chef-made whipped cream.

For folks who know me, they are confused by my love for tiramisu because I am not a coffee drinker. I like to smell everyone’s coffee but I never drink it. I prefer tea. Coffee has a bitterness to it which I have never had an appreciation for. I do, however, like coffee flavored foods. Before I developed my dairy allergy, coffee ice cream was one of my favorites, and tiramisu was my favorite dessert splurge.

For folks unfamiliar with tiramisu, it’s an Italian dessert which layers sponge cake dipped in coffee between a mixture of mascarpone cheese and whipped cream or mascarpone cheese and egg yolks. Most recipes make it “mocha” style and call for sprinkling cocoa powder in between the layers and on top. You can also make cinnamon tiramisu which sprinkles cinnamon instead of the cocoa powder.

If you have gluten and dairy allergies, though, tiramisu can be a thing of the past for you… made the traditional way, that is. I’ve come up with a way to make it for me, though, which is not only tasty but just as creamy. It does, however, use coconut whipped cream, so if you have an allergy to coconut, I’m afraid my recipe won’t work for you.

I have learned, though, from folks that you can make whipped cream from canned chickpea liquid which I haven’t personally tried in tiramisu yet but I’m thinking I’ll experiment in the future with it. The recipes I’ve found say that you take the liquid from 2 cans of chickpeas, mix it with ¼ teaspoon of cream of tartar, 2 teaspoons vanilla and 1 cup of sugar, and then whip it all up into whipped cream. It may be that this version can be used as a substitute for the coconut whipped cream if legume aren’t an issue for you.

Tiramisu

Ingredients:

Two containers Tofutti dairy free cream cheese, at room temperature

One container So Delicious dairy free coconut whipped cream, partially thawed (I usually just take it out of the freezer and let it sit while I’m pulling together everything else)

Two containers Schar’s gluten free ladyfingers

4 cups strong coffee (I use double the coffee called for per cup)

unsweetened cocoa powder or ground cinnamon

Optional: shaved chocolate or cinnamon sticks

Assembling Instructions:

  1. Use a 8 x 11 rectangular glass pan. It perfectly fits the two boxes worth of ladyfingers.
  2. Using a mixer, whip the cream cheese until light and fluffy. Scrape down the sides.
  3. Mix in the coconut whipped cream until well blended and creamy.
  4. Open one of the packages of ladyfingers and dip both sides of each ladyfinger into the prepared coffee. Layer the ladyfingers in the pan.
  5. Spread half of the whipped cream cheese/cream mixture over the ladyfingers and sprinkle either unsweetened cocoa powder or ground cinnamon over the top.
  6. Open the second box of ladyfingers, dip both sides of each into the coffee and layer the ladyfingers on top of the whipped cream cheese/cream mixture.
  7. Spread the remaining half of the whipped cream cheese/cream mixture over the ladyfingers and sprinkle either unsweetened cocoa powder or ground cinnamon on top. If you like, you can decorate it with shaved dairy free chocolate pieces or cinnamon stick shavings.
  8. Refrigerate for at least several hours. (This is one of those desserts which tastes even better the second day when everything has “settled” well.)

Autumn Appetites: Winter Squash-Kale-Bean Soup

“Grandma’s wisdom….”

Last week I read that the folks at America’s Test Kitchen learned something which my grandmother had taught me 30 years ago and which she had known for many more years than that before she taught me. Not for the first time, I was surprised that those culinary “experts” hadn’t known something which I had figured was known by many.

As I thought more about it, though, I realized that there’s a difference between folks who have culinary jobs and people who have years and years of cooking experience. My grandmother raised eleven children and had to find ways to stretch food as much as she could, and she learned the best ways to make food and how to keep things as simple as possible whenever she could.

What I had learned from my grandmother, which America’s Test Kitchen apparently just learned this month according to their magazine, is that you never boil corn on the cob. You bring water to a boil and then you let the ears of corn sit in the hot water for a set time, depending on the amount of corn. This is how I’ve made corn on the cob ever since my grandmother showed me as a teenager. I had taken it for granted that others knew, too.

I figured my grandmother had learned it from someone before her, but she may also have simply figured it out on her own after cooking for so many for so long. I started thinking about the many other tips my grandmother had given me over the years when I was younger before she passed away, and I realized a lot of my cooking depends on things I learned from her. Just this past weekend, I made one of my family’s favorite soups, which uses tips I learned specifically from my grandmother.

My grandmother rarely had “fresh” food in the house. Dependent on food from local farms, which tended to be seasonal, certain foods simply weren’t accessible year round. So, she always had meat and vegetables frozen in a big freezer and jars of canned beans, jellies, sauces, and fruits in the “pantry” which was the walk-through area between the garage and their double-wide trailer. From her, I learned how to create foods which use staples from the freezer and pantry and which can be quickly put together to feed a lot of people.

The winter squash, kale and bean soup I made uses frozen squash, which I roasted last year, pureed, and froze; frozen kale which I always keep on hand, purchasing them by the bagfuls at the grocery store when they’re in season (early Spring and then again in the Fall); canned, unsalted, no sugar added beans, which I keep in my pantry; and no salt, fat free vegetable broth which I also keep in my pantry. I mixed everything together in my crock pot with some herbs and let it cook all day. When evening came, we had a hearty soup for dinner which warmed both the heart and the tummy.

Winter Squash-Kale-Bean Soup

Ingredients:

9 cups thawed, frozen pureed cooked winter squash (equivalent to 6 of those 12 oz packages you can purchase in the freezer section of the grocery store)

1 cup frozen chopped kale (equivalent to half a 16 oz bag you can purchase in the frozen section of the grocery store)

One 16 oz can of no salt, no sugar added white or northern or cannellini beans, rinsed and drained

1/2 tsp dried thyme, crushed between your fingers before putting in

1 tsp onion powder

1/2 to 1 tsp salt

1/4 tsp black pepper

No salt, fat free vegetable broth (amount will depend on how thick or think you like your soup, between 1 to 3 cups)

Cooking Instructions:

In a crock pot (4 1/2 quart will work), mix the thawed squash with the frozen kale, the can of beans, the thyme, onion powder, salt and black pepper. Add the desired amount of vegetable broth and let it cook in the crock pot on low all day (6-8 hrs) or on high for half the day (3-4 hrs).


Appealing Appetites: Just the Same Chocolate Cake

chocolate-cake

“There can’t be any difference.”

One of the many heartbreaking moments for me as a mother of children on the autism spectrum was when my oldest started kindergarten. Several weeks into the year, I found my daughter in a corner crying. Apparently every day at recess since school had started, she sat alone on a swing because no one would play with her. As I gathered her into my lap, my own tears ran at her heartache. The autism meant she lacked the social skills needed to make friends, but it didn’t mean that she didn’t want or need friends nor that she couldn’t feel the hurt of not having any.

I arranged a meeting with the kindergarten teacher because I was a little surprised that at the age of five, students were already alienating other students. Isn’t everyone friends at the age of five? (Yes, I was naive. I was a young parent and didn’t know better yet!) When we met, I asked why no one was playing with my daughter, and the teacher said, “Well, Mrs. Castner, your daughter is a little… different.”

Different. If you look up the definition, you’ll see wonderful phrases like “not ordinary” and “distinct in nature” which appear to be good traits, but then you’ll continue reading to find “dissimilar”, “not identical”, “unusual”, “separate”. We live in a world where tension exists between sameness and difference. We encourage children to be themselves, to embrace what makes them unique… different… from everyone else while simultaneously wanting them to “fit in” and be like others around them… to be the same.

Too often the push toward sameness wins out over the desire to encourage individuality, and for my daughter, her difference meant children as young as five didn’t want to be her friend. She was too different, and therefore, they didn’t understand her. Without understanding, it can be difficult to draw into another’s experience.

Because I do understand, my heart ached again this past week when I received an email from a mother whose daughter is feeling “different” from her classmates because she has food allergies and can’t eat what others eat. We can ask as I did all those years ago, “What’s the big deal about being different?” The answer is that it IS a big deal because children at a young age don’t understand the difference and can react in negative ways. For this daughter, she felt she “wasn’t normal” because the other children wanted to know why she never ate cake at the birthday parties they attended and why her bread looked different at lunch.

The mother was reaching out because the girl was inviting classmates to her house for a birthday party, and she was anxious about the birthday cake. She didn’t want her birthday cake to be “different” because apparently children were asking her if there would be cake and whether it would taste the “same” as other birthday cakes.

I confess. I cried reading the email because it broke my heart to think of that much anxiety in a seven year old… all because of cake. I understood what was happening, though, because the fact is that many cakes which are gluten free and dairy free do have a different texture and different taste from “normal” cakes, and children know what they like and are often very picky about trying something “different”.

Fortunately, while the young girl in question couldn’t have gluten or dairy, she had no other food issues, so it was easy for me to create a chocolate cake “just like real chocolate cake” for her. The mother wanted it to be an “easy” cake which she could make with flour blends from her grocery store, so I used Bob’s Red Mill and Krusteaz blends which she could find at her store. I combined the two because, despite what you’ll read on the packages, a “simple substitution” of  just one of the blends makes for either a crumbly or a fallen cake. To achieve the “same” texture as regular cake, I needed to combine the two different types of flour blends. For the dairy, I used vanilla soy milk because it’s consistency matches milk in most cake recipes and the vanilla enhances the chocolate flavor. Instead of refined white sugar, I used coconut sugar which adds a subtle undertone to the chocolate as opposed to a sickening sweetness. Instead of butter, I added safflower oil which has a neutral taste but adds the fat needed to retain moisture in the cake. Instead of regular unsweetened cocoa powder, I used the Special Dark because it has a deeper chocolate flavor, and I added a cup of mini chocolate chips (allergy friendly) to give another level of chocolate taste.

We made the below cake for the French exchange student we had staying with us, and she never knew the “difference”. It was just as chocolately, just as fluffy, just as moist, just as tasty. I was confident that the little girl’s schoolmates would never suspect that it was actually “different”. *grin*

Just the Same Chocolate Cake

Ingredients:

2 cups coconut sugar

1 cup Krusteaz gluten free all purpose flour

1 cup Bob’s Red Mill all purpose baking flour (the one in the red package made from bean flours; not the rice blend)

1 cup Hershey’s Special Dark unsweetened cocoa powder (the one with the red lining; not the regular unsweetened cocoa powder)

2 tsp baking powder

1 1/2 tsp baking soda

1 tsp salt

2 eggs

1 1/2 cup vanilla soy milk

1/2 cup safflower oil

2 tsp gluten free vanilla

1 cup Enjoy Life mini chocolate chips

1 cup boiling water

2 tbsp apple cider vinegar

Baking Instructions:

  1. Preheat the oven to 350 degrees. Line three 9 inch cake pans with parchment paper.
  2. In a large bowl, combine the coconut sugar, the two flour blends, the cocoa powder, the baking powder, baking soda, and salt. Set aside.
  3. Mix together in another bowl, the eggs, soy milk, safflower oil and vanilla.
  4. Stir the chocolate chips into the dry ingredients. Pour the bowling water on top, and add the wet ingredients along with the vinegar. Whisk everything together until it’s well combined.
  5. Divide the batter evenly among the three cake pans.
  6. Bake in the oven for 20 minutes until the cakes are puffed and pulling away from the sides and toothpick inserted in the center comes out clean. (I had set the timer for 15 minutes, checked, and put them on for another 5.)
  7. Cool the cake layers in their pans for at least 10 to 15 minutes before removing them to a wire rack to cool completely. (I actually stacked them one on top of the other with the parchment paper in between the layers and put them onto a plate in the freezer for about 10 to 15 minutes to cool them faster!)
  8. Frost the layers and then the whole cake with your favorite frosting. (What is pictured above is a cinnamon frosting made with vegan butter, powdered sugar, cinnamon and soy milk.)


Recipe Revamping: Saltine Brickle

“Please, can you help me?”

I receive emails from various types of people. Folks who have toddlers with food allergies. Mature adults whose doctors have put them on restricted diets. People who have suddenly developed food allergies after years of eating anything they wanted. Diet conscious folks who want to eat healthier. What all these folks have in common, though, is that they’ve always been adults.

This week I received an email for the first time from a child who had stumbled upon my site. She is ten and apparently really likes saltine brickle, which she had tried at a friend’s house. Her mother, however, had told her it had too much fat and sugar and wasn’t good for her. Like many folks of her generation, she went online to see if there was a solution to her problem.

In her email to me, she wanted to know if I could “fix” the recipe so it wouldn’t have as much fat and sugar but still taste good.

I confess, I found her and her email just too cute! Of course, I had to do what I could to help her out. It turned out that she has both a nut and dairy allergy, so I needed to accommodate those in the revamping of the recipe.

When you google saltine brickle recipes, you’ll find that the recipes call for anywhere from 1 to 2 cups of butter, usually about 1 cup of sugar, and anywhere from 1 1/2 to 3 cups of semi-sweet chocolate chips. The first order of business became all that butter. I opted to cut the amount down to 1/2 cup, and for the dairy allergy I used vegan soy free butter. The second item to tackle was the sugar. I could have simply cut the amount, but since I don’t like to use sugar as a general rule, I chose to use agave and cut the amount down to only 1/4 cup of it. For the chocolate, I swapped dairy and nut free dark chocolate mini chips for the regular sized semi-sweet chocolate chips, and I reduced the amount to 1 cup. To make the dessert slightly “better” I used a whole grain cracker instead of the white flour saltines. I tried Market Basket whole grain saltines, Manischewitz whole grain matzo, and Van’s whole grain gluten free crackers. For the final change, I decided to add some protein to the dessert and sprinkled pumpkin seeds on top.

The final creations were all tasty and worth the effort, and the young girl wrote to tell me that her mom let her make my version because she, one, thought it was great that her daughter showed initiative, and two, because she agreed that the reduction in sugar and butter and the addition of whole grains and protein made them “better” for eating.

Saltine Brickle

Ingredients:

40 whole grain saltine sized crackers, your choice of wheat or gluten free (you want to make a 16 inch x 10 inch rectangle; if using the matzo crackers, you’ll obviously use less because they are larger crackers) 

1/2 cup vegan soy free butter

1/4 cup agave

1 cup allergy friendly dark chocolate mini chips

1/2 to 1 cup pumpkin seeds (I used the no salt added version but I tried both roasted and raw and liked both; if you have no allergies to nuts or peanuts, try using those if you don’t like pumpkin seeds; the amount to use depends on whether you just want a few seeds on each cracker or want the crackers to be covered with them.)

Baking Instructions:

  1. Preheat the oven to 425 degrees.  Line a rectangle 17 x 11 inch pan with aluminum foil. Generously grease the foil with your favorite method.
  2. Place the crackers on the foil lined pan to make a 16 x 10 inch rectangle.
  3. Melt the vegan butter in a small saucepan over low heat, stirring frequently (should take only about a minute). Add the agave.
  4. Carefully pour the butter mixture over the crackers so each cracker is covered.
  5. Bake the crackers in the oven for  4 minutes. Remove the pan and turn off the oven.
  6. Sprinkle the mini chocolate chips over the crackers and put the pan back in the turned off oven for 1 minute.
  7. Using a spatula, carefully spread the melted chocolate so all the crackers are covered.
  8. Sprinkle the pumpkin seeds over the top of the chocolate.
  9. Put the pan into the freezer for about 10 minutes until the chocolate has solidified.
  10. Break apart the brickle and enjoy!

Autumn Appetites: Spiced Apple Bundt Cake

apple-bundt

“Life is too short to not bake.”

To my great sadness, a friend and neighbor unexpectedly passed away. She had been fine but then wasn’t feeling well one day, discovered she had stage four pancreatic cancer, and died within two weeks of the diagnosis. The funeral was this past Friday, a week after her passing. As I dealt with the sorrow of losing her this weekend, I turned to those things which give me solace: my faith, family and friends, writing, and cooking. In their own way, each provides me comfort and renewal.

Fortunately for me, my husband is teaching a class on Sundays which I tend to bake for, so I had the perfect opportunity to create a recipe. Because a friend generously gave me tons and tons of my favorite Honey Crisp apples, I knew I wanted to make something apple-y. I wanted something a little special, though — something wonderful like my friend. A bundt cake came to mind.

In a previous post, talking about bundt cakes, I mentioned that they’re tasty, dense cakes which are pretty to serve because they retain the shape of their molded pans. Usually bundt cakes are filled with goodies like fruit and nuts and chocolate, so they’re even pretty once they’re cut into slices. Since I had the abundance of apples, I decided that a spiced apple bundt cake would be perfect.

The batter is very important to a bundt cake. I decided that I’d combine sorghum and millet flour with arrowroot starch for my gluten free blend with a little bit of xanthan gum. For the spices I opted for cardamom, cinnamon, nutmeg, ginger and cloves because they remind me of Autumn. With the sweetness of the apples, I didn’t really need to much for a sweetener so I chose to add Agave which would add mild sweetness as well as some liquid moisture to the cake. For the fat, I decided safflower oil would be best because of it’s light taste. To add some more spice to the cake, I mixed the apples with the same spices as the batter. Then to finish the cake, I drizzled a little mixture of cinnamon and powdered sugar mixed with flax milk on top of the cake. The result was both pretty and tasty.

Spiced Apple Bundt Cake

Ingredients:

3 cups of finely diced peeled and cored Honey Crisp apples, about 3 to 4 apples (My daughter and I liked the batter to apple ratio in the cake but my son and husband suggested that next time I increase the apple pieces to four cups so there would be “apple pieces in every bite”; I’ll let you decide what you’d prefer to do. *grin*)

1 tsp cinnamon

1/2 tsp cardamom

1 cup sorghum flour

1 cup millet flour

1 cup arrowroot starch (you can also use tapioca or potato starch if you’d prefer)

1 1/2 tsp xanthan gum

1 tsp salt

1 tsp ground cinnamon

1/2 tsp ground cardamom

1/2 tsp ground nutmeg

1/2 tsp ground ginger

1/4 tsp ground cloves

2 tsp baking powder

1/2 tsp baking soda

3/4 cup safflower oil (I like a drier cake which goes well with tea and coffee or glass of milk so this was perfect in my opinion, but I know some folks prefer a moister cake, so if you do, increase the oil to 1 cup)

1 cup agave

2 eggs

1 1/2 tsp gluten free vanilla

1 tbsp apple cider vinegar

Baking Instructions:

  1. Preheat the oven to 350 degrees and liberally grease a bundt pan with your preferred method and then dust it with your preferred flour. (I used vegan shortening and brown rice flour.)
  2. Mixed the peeled, diced apple pieces with the cinnamon and cardamom and set aside.
  3. Blend the sorghum and millet flours, arrowroot starch, xanthan cup, salt, cinnamon, cardamom, nutmeg, ginger, cloves, baking powder and baking soda. Set aside.
  4. Whisk together the oil, agave, eggs and vanilla.
  5. Add the dry ingredients to the wet with the apple cider vinegar and mix just until the dry ingredients are moistened.
  6. Carefully fold in the apple pieces until the apples are fully incorporated into the batter.
  7. Spoon the batter into the prepared bundt pan.
  8. Bake for 50 minutes until the cake is golden and pulling away from the sides and a toothpick inserted into the center comes out clean.
  9. Let the cake sit in the pan on a cooling rack for at 15 to 25 minutes.
  10. Turn the cake over onto the cooling rack to cool completely.
  11. The cake can be served as is or you can top it with a sprinkling of powdered sugar or a mixture of powdered sugar and cinnamon, or you can glaze it. I glazed it by mixing a couple tablespoons of powdered sugar with 1/2 tsp of cinnamon and just enough flax milk to make a drizzable glaze.
  12. Enjoy!