Thanksgiving Thoughts: Vegan Pumpkin Pie, Two Ways

“But pie….”

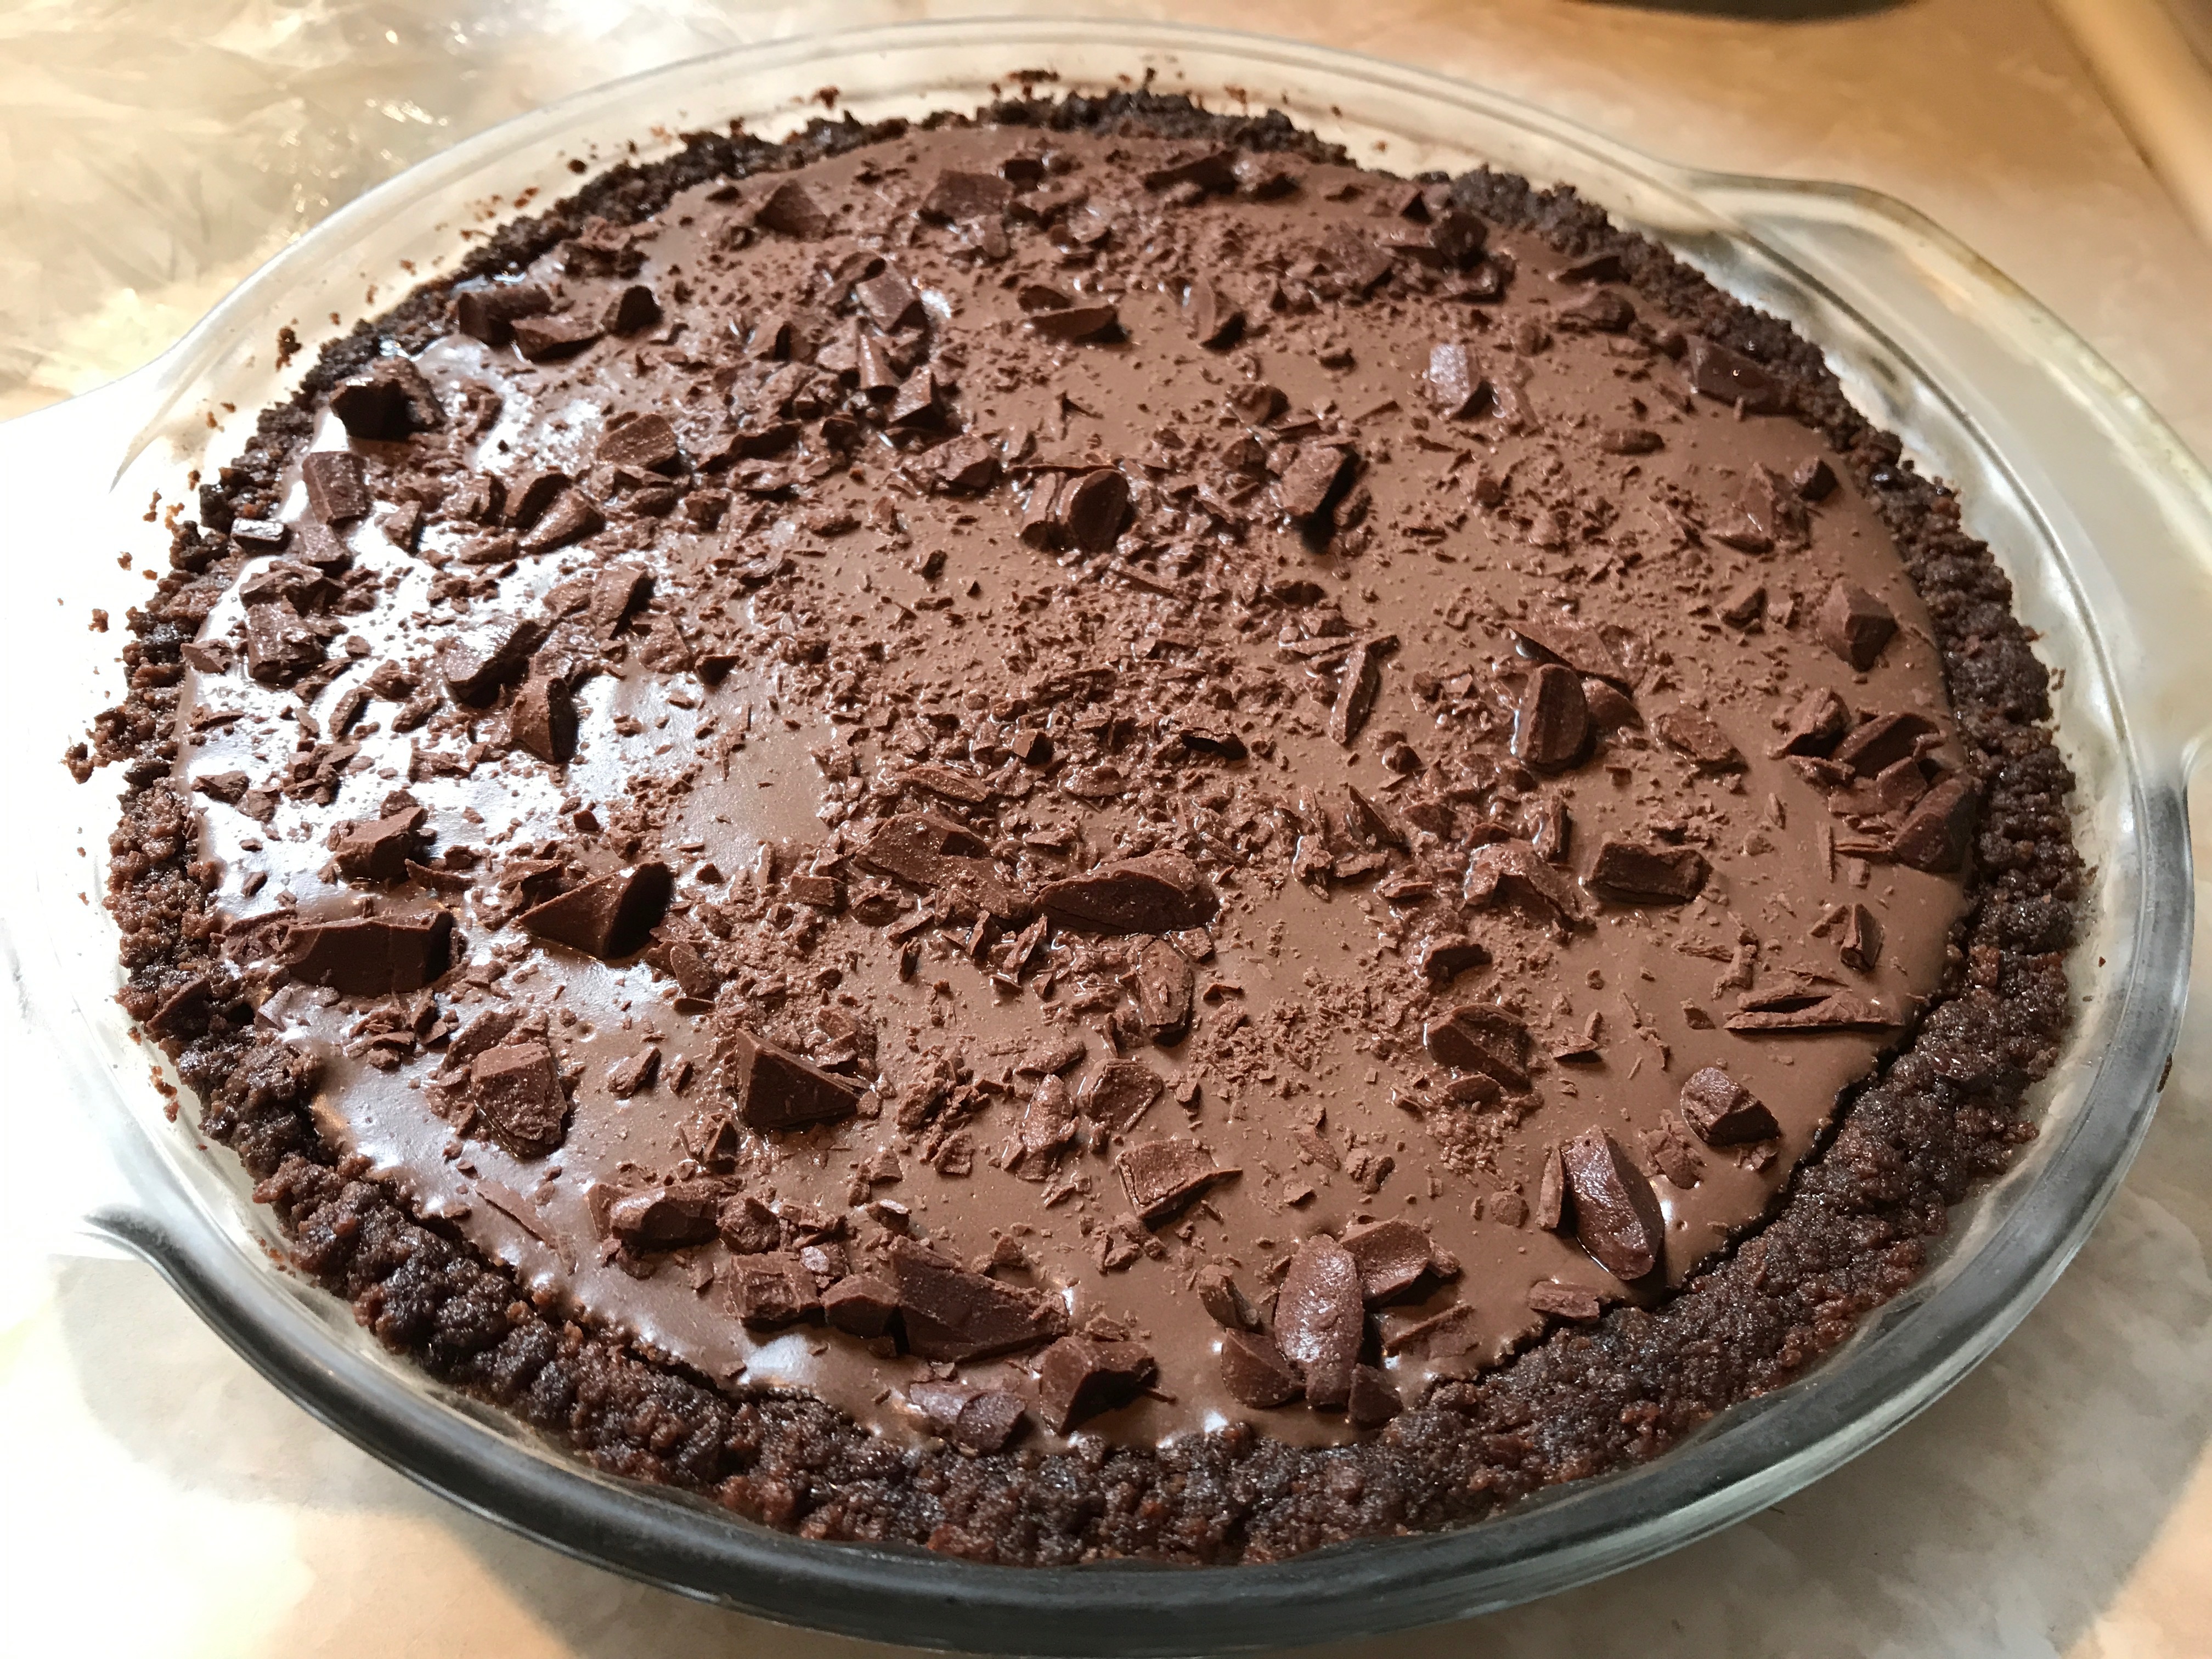
After posting the black bean-kale soup recipe, I received a question about pies. More than any other holiday, Thanksgiving tends to be about the pies. Pumpkin, apple, cranberry-pear, and mince meat tend to be the more traditional pies associated with Thanksgiving, but I have seen people put out other types like lemon meringue and chocolate pies as well. For today’s post, I’ll focus on the question asked which was for a vegan pumpkin pie, but below are links to other pies I’ve posted about in the past.

Apple Pies

Struesel Cranberry Pear Pies

Peach Pies

Chocolate Pies

Making a pumpkin pie vegan is easy. For the crust, folks can simply substitute vegan butter, vegan shortening or coconut oil for the butter or shortening in any pie crust recipe without anything else needing to be done to the recipe.

For the pumpkin filling, the first ingredient which makes pumpkin pie non-vegan is the eggs, and in pumpkin pie, the eggs simply act as a binder, which is simple to replace. To make a pumpkin pie which is just like regular egg-filled pumpkin pie, the easiest substitute for the eggs is a flour or a starch. Most recipes you’ll find use cornstarch. Many folks, however, are allergic to corn, and I personally like to add protein and/or fiber if possible when I can, so I opt to use a gluten free flour like oat or millet or sorghum.

The other ingredient in pumpkin pie which is dairy is the milk, whether it’s evaporated milk or heavy cream which is used. To substitute for milk in a pumpkin pie, one can choose a plant based “milk” like almond or soy or hemp or flax or any other type on the market which you prefer.  Usually 1 1/2 cups of a “milk” is equivalent to a can of evaporated milk.

For folks who might want a slightly different pumpkin pie and who are not allergic to soy, I also make a pie using tofu which tends to be a heartier, more protein filled pie. Pureed tofu then acts as the binder which eliminates the need for flour, and the pie also does not require any “milk” at all.

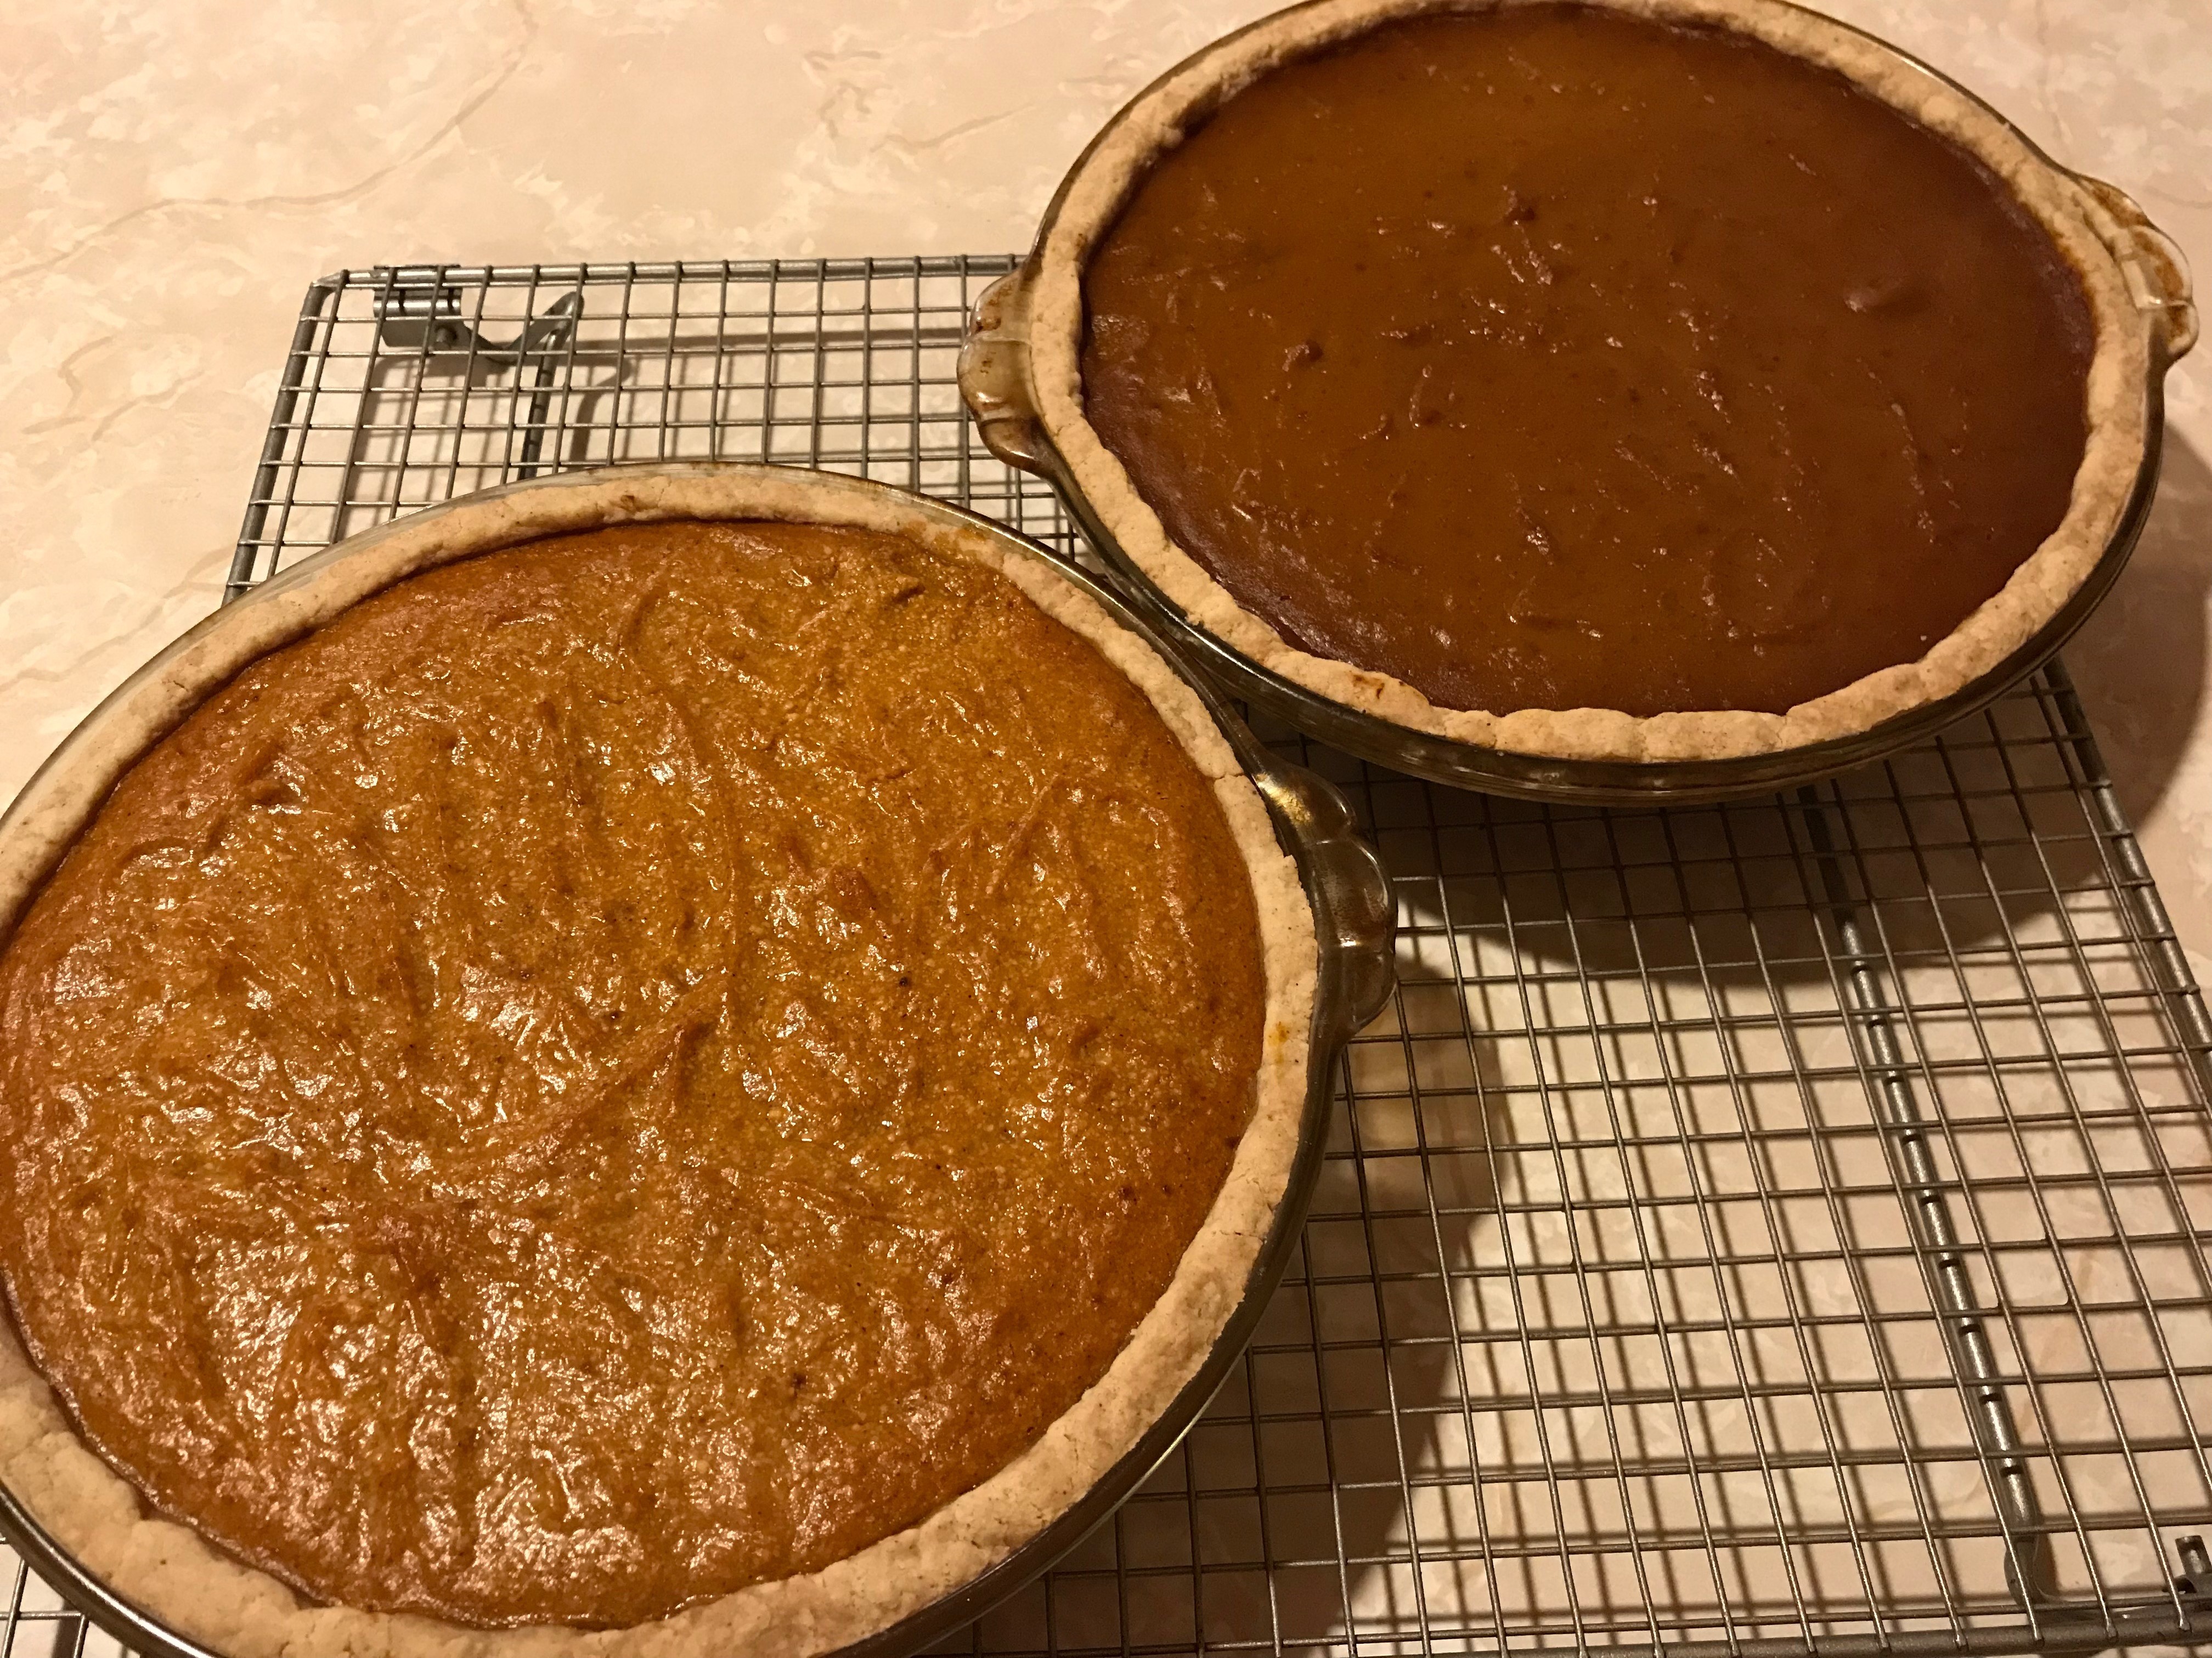
For both types of pumpkin pie, I reduce the “sugar” amount substantially and use an alternative to refined white sugar – coconut sugar for the more traditional type of pumpkin pie and agave for the tofu pumpkin pie. Folks who have eaten my pies never say it’s not sweet enough and always comment on how the pumpkin flavor really shines.

Below are recipes for both versions.

Pumpkin Pie Recipes

Ingredients:

Pie crusts (click the link for tips on making Allergy Friendly Pie Crusts)

Version 1 Filling:

2 cups cooked, pureed pumpkin (canned works, too)

1/2 cup coconut sugar

2 tsp spices (I use a mixture of cinnamon, nutmeg, ginger, allspice, cloves and/or cardamom)

I 1/2 cup plant based “milk” (I prefer to use flax or soy milk)

1/4 to 1/2 cup gluten free flour (use the lower amount for a more silky pie; the higher amount for a sturdier pie; I like to use millet or sorghum or GF oat flour to add some protein and fiber)

Version 2 Filling:

2 cups cooked, pureed pumpkin (canned works too)

1/2 cup agave (I like to use the maple flavor agave for this pie; if you can’t find it, you can mix 2 tbsp of maple syrup with enough agave to make 1/2 cup – this gives you the flavor but substantially reduces the amount of calories you’d get from using 1/2 cup of maple syrup)

2 tsp spices (I use a mixture of cinnamon, nutmeg, ginger, allspice, cloves and/or cardamom)

16 oz silken tofu, pureed to be smooth and creamy

Baking Instructions:

  1. Preheat the oven to 350 degrees.
  2. Prepare the pie crust and put into a 9.5 inch glass pie pan. Set aside.
  3. Choose which pumpkin pie filling to make, and mix all the ingredients until well blended.
  4. Pour into the prepared pie crust.
  5. Cover the edges of the pie crust with aluminium foil, leaving the center of the pie uncovered.
  6. Bake for 60 to 65 minutes until the pie is set and the center only jiggles a bit.
  7. Put into the fridge to completely cool. Best to cool overnight but at the very least, several hours. Without the eggs, the cooling is what solidifies the pie.


Advertisement

Thanksgiving Thoughts: Vegan Black Bean Kale Soup

“It is wonderful that she can see other people eat like this….”

I had a workshop last weekend where a mother brought her entire family. She explained that she wanted her daughter to see that they were not the only family who had to eat the way they did – meaning allergy friendly. Over the course of the two hour workshop, I watched the daughter enjoy treat after treat, surprised that her mother had told her she could eat anything she wanted from the table.

Too often the holidays are difficult for folks with health and/or food allergies because we know that much of what is on the table we can’t eat. At Thanksgiving, this can be especially depressing since Thanksgiving is celebrated largely through food.

Over the past couple of weeks I have been trying to post Thanksgiving ideas which are not as traditional, just to give folks something new to consider. From the emails I’ve received, it seems folks liked the the notion of vegan, gluten free cornbread stuffing and vegan, gluten free butternut squash swirled cheesecake. Today I’m going to suggest a hearty soup for folks who like to serve a soup course for Thanksgiving.

For any traditionalists who may have people with food allergies or health needs coming to dinner, making a roasted vegetable soup is a good way to go. The Roasting Vegetables post shares how to roast vegetables in a quick and easy way. To make what you’ve roasted into a soup, simply add to the roasted vegetables your favorite no salt, no sugar added vegetable broth, herbs, garlic and onions and puree to the consistency of your choice. Then on Thanksgiving day, just put it into your crockpot and let it cook until your guests arrive. Serve with allergy friendly crushed croutons, “cheese”, “sour cream”, and/or sunflower or pumpkin seeds.

Anyone who may be looking for something a bit heartier and different, though, I offer a black bean, kale soup, just as easy to prepare as the roasted vegetable soup but which adds not just another flavor to the meal, but which can be a more “filling” soup for vegans who have come for dinner.

Black Bean-Kale Soup 

(serves 6 to 8, depending on size of bowls)

Ingredients:

14 oz can no salt, no sugar added lentils

one tsp olive oil

minced garlic to taste

chopped onions to taste

crushed thyme leaves to taste

ground cumin to taste

black pepper to taste

one to two cups frozen or fresh finely chopped kale

1/4 to 1/2 cup finely diced yellow pepper

14 oz can of black beans, drained and rinsed

2 tbsp to 1/4 cup finely diced vegan ham

32 oz no salt, no sugar added vegetable broth

salsa to taste

Cooking Instructions:

  1. In a food processor or blender, empty the contents of the can of lentils and puree/blend until smooth. Set aside.
  2. In a large-width pan shallower (not a narrow soup pot) which has at least 2 inch sides, add the olive oil, garlic, onions, thyme, cumin and black pepper. Saute over medium-low heat for a minute to release the flavors, stirring so nothing burns.
  3. Add the kale and yellow pepper and saute for another couple of minutes to release the water from the vegetables.
  4. Add the drained and rinsed black beans and vegan ham bits, and saute for a minute, mixing them well with the herbs and vegetables.
  5. Add the vegetable broth and salsa to taste, and simmer for 10 to 15 minutes over low heat until the soup has reduced a bit and is thicker.
  6. Serve with allergy friendly sour cream and “cheese”, if desired.


Thanksgiving Thoughts: Vegan, Gluten Free Butternut Squash Swirl Cheesecake

“Why not?”

A few years back, a cousin of Tim’s brought chocolate cupcakes to a Thanksgiving dinner, and when asked, “Why?”, she responded, “Why not?” Since we knew her fondness for chocolate it made sense, but of course the traditionalists of the family thought it was odd to not bring pie. As someone who is not fond of making pies, I was silently in her camp about a different type of Thanksgiving dessert being okay.

Where I did differ, though, is that I felt if you’re going to upset the apple cart, so to speak, then you might want to keep the “new” dessert in line with Thanksgiving flavors. With that in mind, I looked around for different types of desserts folks tended to make for Thanksgiving and noticed that cheesecake was actually the number one “non-pie” dessert eaten. I found many recipes for swirled cheesecakes using pumpkin which seemed interesting.

I picked one to use as a base and immediately realized that it needed work. The original recipe called for 2 1/2 cups of graham cracker crumbs for the crust, mixed with 1/2 cup of butter, 1/3 cup sugar, and 2 tsp molasses. The filling was 3 packages of cream cheese, 3/4 cup sugar, 1/2 cup maple syrup, 3 tbsp molasses, 1 tsp vanilla, 4 eggs, 2 cups sour cream, 1 tsp spices (cinnamon, nutmeg and ginger), and 1 cup of pumpkin. If you’ve followed my blog for any length of time, you know how I reacted to all that “sugar” in the recipe and that I was figuring out how I could cut the fat to at least some degree.

To revamp the crust, I cut the sugar and molasses completely from it. All graham crackers, whether they are wheat based, gluten free and/or sugar free, have sweeteners of some sort in them. There is no need to add any more. I also reduced the butter to 5 tbsp and swapped a vegan butter because you just need enough to moisten the crumbs so they’ll stick when baking. For the flavoring, which is what I presumed the extra molasses was for, I added 1 tsp of pumpkin pie spice.

For the cheesecake filling, I swapped Tofutti dairy free cream cheese for the regular, and for the sweetener, I mixed 1/4 cup agave with 1/4 cup maple syrup. This kept the maple taste but with much less calories and sugars. I cut the white sugar out completely and reduced the molasses to 1 tbsp which would keep the molasses flavor but also reduce the sugars. To do something about the fat, I reduced the sour cream to 1 1/2 cups (a 12 oz container) and eliminated the eggs entirely so vegan folks could eat it, using instead 1/4 cup of arrowroot starch. Instead of the vanilla I opted to use 1 tsp of pumpkin pie spice plus 1/4 tsp cloves which tend to be the flavors of Thanksgiving pies.

My final swap was to use roasted, pureed butternut squash but that simply was because I didn’t want to make a pumpkin cheesecake when there was going to be pumpkin pie, but folks can always choose to make it a pumpkin cheesecake, should you desire to do so.

Vegan, Gluten Free Butternut Squash Swirled Cheesecake

Ingredients:

For Crust:

2 1/2 cups gluten free crushed graham cracker crumbs

1 tsp pumpkin pie spice

5 tbsp melted vegan butter

For the Filling:

Three 8 oz dairy free cream cheese, at room temperature

1/4 cup maple syrup

1/4 cup agave

1 tsp pumpkin pie spice

1/4 tsp ground cloves

12 oz (1 1/2 cup) dairy sour cream

1 tbsp molasses

1/4 cup arrowroot starch

1 cup pureed roasted butternut squash (or canned squash or pumpkin)

Baking Instructions:

Preheat the oven to 325 degrees. Wrap aluminum foil around the base of a 10 inch spring form pan. Line the bottom of the pan with parchment paper.

  1. Mix together the graham crumbs and pumpkin pie spice. Mix in the melted vegan butter. Spread the mixture evenly on the bottom of the spring form pan and bake for 15 to 20 minutes until the crust is puffed and golden. Set aside to cool.
  2. In a mixer, blend the dairy free cream cheese until smooth.
  3. Mix the maple syrup with the agave and slowly pour it into the cream cheese mixture while the mixer is on low, until all is incorporated into the cream cheese.
  4. Add the pumpkin pie spice and ground cloves and mix.
  5. Add the dairy free sour cream and molasses and mix.
  6. Add the arrowroot starch and mix until it is fully incorporated and the filling is smooth.
  7. Remove 1 1/2 cups of the cheesecake filling and mix that with the pureed butternut squash.
  8. Dot the top of the crust with half of the cheesecake filling, using a spoon to drop spoonfuls onto the crust. Then using another spoon, drop spoonfuls of the squash filling to fill in the holes of the cheesecake filling.
  9. Using the second half of each of the fillings, drop spoonfuls of the squash filling on top of the first layer of cheesecake filling, and drop spoonfuls of the cheesecake filling on top of the layer of squash filling.
  10. Once both batters are completely in the pan, use a knife to swirl through the layers and then smooth down the top of the cheesecake to make sure the batter is even.
  11. Put the spring form pan into a larger pan, pour hot water in the pan until it’s about 1/3 to 1/2 way up the sides of the spring form pan.
  12. Bake for 50 to 60 minutes until the cheesecake is mostly firm and just jiggles a bit in the center.
  13. Turn off the heat, open the oven door and allow the cheesecake to cool for an hour and a half, before removing to the fridge to cool overnight.
  14. Before you are going to serve it, run a knife around the edges to loosen it. If you want to garnish it, to make it prettier, you can sprinkle ground cinnamon or decorate with dairy free whipped cream or do both as I did in the picture.


Holiday Happenings: Holiday Dried Fruit Cake

“I just don’t understand why….”

Recently I picked up a Cooking Light magazine which had slow cooker recipes. (If you’ve followed my blog for any length of time, you know how much I love my crock pots!) To my disappointment, the recipes only proved how crazy this world is when it comes to healthy eating.

Cooking Light is a magazine which focuses on healthier eating, so can someone explain to me why their recipe for apple cider, which has a lot of natural sugars from the apples, tells you to add brown sugar?! Or why a recipe for green beans calls for sugar in the balsamic glaze when balsamic vinegar is usually used by chefs precisely for its sweetness?! Or why a pork chop recipe uses a can of Coke?! Coke!!

This is a perfect example of how the world falls into the trap of compartmentalizing. Cooking Light‘s idea of healthier eating is focusing on reducing fat and introducing more whole grains, which does add to healthier eating but it’s not the whole story. Similarly, folks who buy store bought products will find reduce fat food with higher levels of sugar or sugar free foods with higher levels of fat.

Healthy eating is about moderation in all respects. That doesn’t mean giving up all foods which might not be the best for you. It just means doing what you can to make those foods healthier for you when you do eat them.

Several weeks ago, someone asked me about fruit cake. She wanted to know if it was possible to make one without all the sugar usually in fruit cake and whether it could be made “vegan” and gluten free. Since she asked, I decided to try, and the result was actually such that a person at a recent workshop I came up to me at the end and said, “You shouldn’t call it fruit cake.”

“Why,” I asked, “it is fruit cake.”

“Yes, but I wasn’t going to try it because it said, ‘fruit cake,’ but I did and it’s so good.”

And it is good. For folks who like fruit cake or for folks who would like to try a vegan, gluten free, reduced sugar fruit cake, the recipe follows below. This version has no added white refined sugar because the fruit and peel mix has more than enough! It does use natural sugars from bananas and other dried fruit to give it a sweetness which is just enough but not overpowering. In addition, I chose some higher fiber and protein flour to add to its nutritional heft to help counter some of those natural sugars, and I reduced the fat to just 1/2 cup and used a healthier plant based oil at that.

Holiday Dried Fruit Cake

Ingredients:

1 1/2 cups ripe, mashed bananas

1/2 cup avocado oil

3 tbsp ground flax seed mixed with 6 tbsp of water

16 oz pkg of Paradise Old English Fruit and Peel mix

1/2 cup currants

3/4 cup dried chopped dates

2 cups boiling water

2 cups gluten free flour blend (I used King Arthur’s whole grain version)

1 cup gluten free oat flour

2 tbsp Hershey’s Special Dark unsweetened cocoa powder

1 tbsp ground cinnamon

1 tsp baking soda

1 tbsp apple cider vinegar

Baking Instructions:

  1. Preheat the oven to 350 degrees and line eight 4 x 6 pans with parchment paper so you have wings on all four sides to pull the breads out at the end.
  2. In a large bowl mix the mashed bananas and oil.
  3. In a small bowl mix the ground flax seed and water.
  4. In a medium bowl mix the Old English mix, currants, dates, and boiling water.
  5. In another medium bowl, mix the gluten free flour, oat flour, cocoa powder, cinnamon, and baking soda.
  6. To the large bowl with the bananas and oil, add the flax seed mix, the dried fruit mix and the dry ingredients, along with the vinegar, and blend really well until everything is moist and incorporated.
  7. Divide the batter evenly among the eight pans and put them onto a cookie sheet large enough to hold all eight pans.
  8. Slide the cookie sheet into the oven and bake the breads for 20 minutes. Then turn them around and bake for another 20 minutes. When the breads are done they’ll be slightly puffed and a toothpick inserted in the center will come out clean.
  9. Remove the breads to a cooling rack by pulling them out of the pans by the wings you created.
  10. Let the breads cool for about 15 minutes before removing the parchment paper and allowing them to cool completely on the wire racks.
  11. The breads can be stored by wrapping them well in plastic wrap and putting them in the fridge. They also freeze well if you then wrap them again in aluminum foil and put them into the freezer.

Holiday Happenings: Cranberry Cheesecake

“If you have a good allergy…”

My oldest went to a restaurant where the menu said, “If you have a good allergy, let your server know.” She texted the picture of this typo to me, and when I responded, she said that it got worse. The rest of the blurb: “We have a glue tin free menu.”

Now, I am willing to believe the owners/managers of the restaurant didn’t catch the mistakes when they were ready to print the menus and afterwards decided that the costs of reprinting were prohibitive, but this serves as a good illustration of why folks with food allergies sometimes feel like people don’t care about their feelings.

After all, what is a good allergy? If we have the bad ones, we can’t let our server know? And it’s great that their food is free of glue and tin but what about those of us who can’t eat gluten? It’s easy for the restaurant owners/managers to wave off the typos, but for folks who live with the reality of life-threatening allergies, their dismissal can feel marginalizing.

Having had four too many anaphylactic episodes in the past several years (for most, it was how I learned I had these new food allergies!), I tend to be rather careful about food other people prepare. It meant a lot to me when my brother called to ask what he’d need to do to make the mashed potatoes dairy free for me to eat. It showed that he was taking my allergy seriously and that he wanted me to be able to partake of all the offerings and not be limited.

For most of us with food allergies, we’re not asking that people always accommodate us. We know it’s not easy and convenient to do at all times. We do ask, though, that folks at least be sensitive to the fact that we have allergies and that it’s not always easy for us either.

I always make sure to make and bring food which I can eat so that it’s not a hardship on the folks hosting, and this Thanksgiving was no exception. I ended up making those mashed potatoes for my brother, simply because I had all the ingredients and he didn’t, but I was glad he asked. And I contributed a green bean dish and homemade cranberry sauce, made without sugar, since I don’t encourage anyone to eat sugar.

There was enough of the cranberry sauce left for me to ponder a use for it, and this past week I made a gluten, dairy free cranberry cheesecake for a brunch I hosted. It came out so creamy, and the tang of the cranberries was a wonderful complement to the cheesecake. I used only one half a cup of agave to sweeten the entire cake. It was so good! I’m going to include the recipe below. For folks who need tips on making cheesecake, see Cheesecake Tips

Cranberry Cheesecake

Ingredients:

3 8 oz containers of tofu cream cheese, at room temperature

1/2 cup agave

1 tsp vanilla

3 eggs, at room temperature

1 cup tofu sour cream, at room temperature

1 cup leftover cranberry sauce (I made a homemade version which was just fresh cranberries with water and two tablespoons of agave)

1/4 cup unsweetened orange juice

Baking Instructions:

  1. Preheat the oven to 325 degrees. Cover the bottom of a cheesecake springform pan with aluminum foil so it’s completely covered. You may need two or three layers to make it waterproof. I used an 8 inch pan for this cake to make it thicker but you can use a 9 inch pan for a thinner cheesecake. You’ll just need to adjust the cooking time. Grease the pan with your favorite method.  I just used vegan butter.
  2. In a mixer, blend the tofu cream cheese until smooth.
  3. Slowly pour in the agave, mixing the entire time on low. Scrape down as needed.
  4. Add the vanilla.
  5. Add the eggs, one at a time, blending well after each addition.
  6. Pour the cream cheese mixture into your prepare pan.
  7. If you want the chunkiness of the cranberries, then just dollop the leftover cranberries on top of the cheesecake and swirl through. If you want it smooth like I made it (because my autistic children have a thing about chunks!), put the leftover cranberry sauce in a blender or food processor with the orange juice and puree. Then dollop onto the cheesecake and swirl.
  8. Put the cheesecake pan into a larger pan and fill the larger pan with hot water, halfway up the cheesecake pan.
  9. Bake in the preheated over until the cheesecake is firm around the edges (a knife inserted will come out clean) but still a bit jiggly in the center. If you used the 8 inch pan, it may take 75 to 80 minutes or so. If you used the 9 inch pan, it may be slightly less. Don’t stress if you “overcook” by a little bit of time. It’ll just give you a firmer cheesecake, which some people actually prefer.
  10. When the cheesecake is done, turn off the oven and leave the door open and let the cheesecake cool in the oven before putting it into the fridge to chill.
  11. When you’re ready to serve it, you can drip some melted allergy-friendly chocolate as I did to make it festive or just serve as is or serve with an allergy friendly whipped cream.
  12. Enjoy!


Holiday Happenings: Chocolate Mousse and Chocolate Pudding Pies

“Well, I prefer chocolate….”

Thanksgiving is just around the corner, and that means pies. If your family is like ours, everyone has a different favorite. My husband prefers apple pies. My son and mom like pumpkin. My dad wishes folks would go back to making traditional minced meat pies. I enjoy experimenting and making pies like pear-cranberry or sweet potato. My oldest will eat any pie. For my younger daughter, however, who is a chocoholic, there’s nothing like a chocolate pie.

For folks who are in agreement with her, there are two different ways that I make a chocolate pie, one version uses my dark chocolate mousse recipe which is made with tofu. The other adapts a chocolate pudding recipe because some folks are allergic to soy.

For both I make a chocolate cookie crumb crust. Often I make my own chocolate cookies but when I’m pressed for time I like to use Enjoy Life’s chocolate or chocolate mint cookies because they are free of 12 of the major food allergies.  Most recipes call for 1 1/2 cup to 2 cups of crumbs mixed with 1/3 cup to 1/2 cup butter.  Since I tend to use a 10 inch pie pan, I process enough chocolate cookies to make 2 cups of crumbs but I have found that 2 tbsp of a fat is all you really need. So, choose a plant based oil or melted vegan butter or coconut oil and mix it well with the crumbs. Press the crumbs into your pan to cover the bottom and all the way up the side. Then you can choose to either bake the crust in a preheated 325 degree oven for 10 to 15 minutes to set the crust or you can simply freeze it for half an hour which will also set it.

To make the first version of the chocolate filling, you make the dark chocolate mousse recipe and then sprinkle two teaspoons of unflavored gelatin or agar powder or Vegan Jel over 2 tbsp of cold water. Let it sit for a couple of minutes to soften, then dissolve with 2 tbsp of hot water. Mix well into the mousse and then pour the mousse filling into your prepared pan and put it in the fridge for several hours to set.

To make the second version of the chocolate filling, you make the dark chocolate pudding recipe with whatever “milk” suits your allergy need, only before you thicken the pudding, add 1/4 to 1/2 cup of dark chocolate or mini chocolate chips and stir until they’re melted to make for a richer-tasting pudding and increase the cornstarch to 4 to 5 tbsp to make a thicker pudding. Then pour the pudding into the prepared cookie crust, cover with plastic wrap to prevent a skin from forming, and put into the fridge for several hours to set.

You can leave the pies as they are, or to make them prettier, you can sprinkle chopped dark chocolate over the top. Then enjoy!


Valentine Greetings: Chocolate Surprise Cupcakes

choc-surprise-cupcakes

“Yay! Another snow day!”

After a winter of warm days and relatively little snow, Mother Nature decided that we needed three feet to fall within a week and a half. My middle child is vexed that the three tests she was supposed to have had a week ago still have not been administered due to two snow days and three start of school delays. My oldest and youngest, however, have been thrilled for the extra time to hang out in dorms with no classes (my oldest at college) and to play at home with the family (my youngest in middle school).

As a family, we’ve made use of the snowbound time to catch up on the never-ending t0-do list and to spend time together since the youngest really wanted us to play with him. Many hours sledding in our backyard, playing board games, competing on the Wii, and watching reruns of old shows left the family in the mood for something “special” to eat.

Since Valentine’s Day is tomorrow, we decided to make some Chocolate Surprise Cupcakes, one of the family’s favorites. You make a chocolate raspberry center which you tuck into the cupcake batter so when you eat it, you enjoy a nice creamy flavor surprise.  What’s nice about this recipe is that it’s free of most foods folks tend to be allergic to, so just about anyone can enjoy them.

Chocolate Surprise Cupcakes

Filling Ingredients:

1 cup Enjoy Life mini chocolate chips

2 tbsp Polaner’s seedless raspberry All-Fruit

2 tbsp Earth Balance vegan, soy free butter

Cooking Instructions:

  1. In a microwave safe large glass container, place all three ingredients and microwave for 1 minute. Stir until the mixture is completely smooth.
  2. Place the container in the refrigerator and let the mixture cool and begin to thicken. It can take anywhere from 10-30 minutes, depending on how hot your microwave makes the chocolate, how exact your measuring is, etc…. What you want is for the mixture to be thick enough when you spoon it that you can mound the chocolate onto a cookie sheet.
  3. When the chocolate has thickened enough to form little mounds, place a piece of wax paper on a cookie sheet and create 24 chocolate mounds using a teaspoon to scoop out the chocolate mixture. You essentially are making a little “hershey kiss” of your own.
  4. Once you have 24 more or less equally sized chocolate mounds, put them into the fridge to harden while you make the cupcake batter.

Cupcake Ingredients:

3 cups favorite gluten free flour blend

1/2 cup unsweetened Hershey’s Special Dark cocoa powder

3 tsp baking soda

1 tsp salt

1 cup agave

3/4 cup safflower oil

2 cups water

2 tsp vanilla

3 tbsp vinegar

Baking Instructions:

  1. Preheat oven to 350 degrees and line 24 cupcake tins with cupcake liners.
  2. Mix the flour, cocoa powder, baking soda and salt well and set aside.
  3. Mix the agave, oil, water, and vanilla and add to the dry ingredients with the vinegar. Mix well until the dry ingredients are moistened.
  4. Put 1 1/2 tbsp of batter into each of the 24 cupcake tins.
  5. Carefully peel and place one of the chocolate raspberry mounds into the center of each of the cupcake tins.
  6. Divide the remaining batter evenly among the cupcake tins (about 1 1/12 tbsp) to cover the chocolate mounds.
  7. Bake in the preheated oven for 15 to 20 minutes. The cupcakes will be rounded, firm to the touch, and a toothpick inserted into the center will come out clean. My oven always bakes them in 15 minutes but a friend said hers took 20.
  8. Let the cupcakes sit in the tins for 5 minutes. Then remove them to a wire cooling rack to cool completely.
  9. Frost with your favorite frosting recipe or use the one below is one I’ve adapted from Elana’s Pantry.

Frosting Ingredients:

1 cup Enjoy Life mini chocolate chips

1/2 cup avocado oil

2 tbsp agave

2 tsp vanilla

your preference of “milk”

Cooking Instructions:

  1. Mix the chips, oil, and agave together in a microwave safe glass container.
  2. Heat the chips for 1 minute. Stir. If it needs to be heated more, do so 20 seconds at a time until you can stir the chips smooth.
  3. Add the vanilla and stir well.
  4. Transfer the mixture to your mixer bowl.
  5. Put into the freezer until the mixture begins to hard around the edges but is still softer in the center.  This can take between 15 to 30 minutes.
  6. Using your mixer, blend the chocolate mixture on high speed until the mixture becomes thick and smooth. You may need to scrape down the sides a couple of times.
  7. Add “milk”, a teaspoon at a time until the mixture is to the creamy consistency you prefer for frosting your cupcakes.


Happy New Year: Chocolate Torte

mint-torte

“It’s great! You get to choose….”

When I was a child in the ’70s, a new type of story was filling the market. It was a story book where you got to choose what happened. You’d be introduced to the characters and a situation but then you’d reach the end of the first chapter where you were told to choose which action then would happen. If you chose one, you’d be sent to a certain page. If you chose the other, you’d turn to another page. When you had finished whichever chapter you chose, you were given another set of choices, and this continued until you reached the end of the book.

For a young reader it was a fun way to extend the adventures in the book because you could keep reading the same book over and over, making different choices each time for a completely new story.

As an adult, I love the complexities of life which are subtly shown by this “pick the next action” type of storytelling. Our lives are made up of little daily decisions which lead to other little decisions, to regrets, to rewards, to joys, to sorrows, to bigger choices, to serious consequences, to surprises… and there are times when we wish we could go back and make another choice, and other times when we are grateful we made the choices we did.

New Year’s is usually a time when we find ourselves thinking back upon the choices of the year which just passed and thinking about the decisions we’ll need to make for the new year to come. For most, our years are a mixture of both good and bad, and New Year’s is when we think about how to make more good in the year to come. The truth, though, is that every minute of every day, all year long, is an opportunity because we continually are writing our life stories with every decision, every thought, every word, every action we pursue.

So, as we begin 2017, I invite and encourage you to consider the choices you’ll make for a healthier, happier you. Whatever the choices you make in 2017, my hope and prayer for you is that the new year will be filled with much light, much love, and much laughter.

And in the spirit of choices, I give you a recipe for a chocolate torte which allows you to choose how you want to make it to fit your particular dietary needs and preferences. You can make the cake layers plain chocolate, minty chocolate, almond chocolate or fruity chocolate. You can make the filling any of the same flavors and in a variety of ways. You can top it any way that you want.  You can make it gluten, dairy, nut, soy, egg or all of the above free. It’s your choice!

Happy New Year!

Chocolate Torte

Cake Layer Ingredients for You to Choose:

2 cups flour (favorite gluten free blend or whole wheat)

1 cup unsweetened cocoa powder (natural unsweetened or special dark)

1 to 2 cups sweetener (2 cups sugar or 2 cups coconut sugar or 1 cup agave)

3 tsp leavener (2 tsp baking soda and 1 tsp baking powder for gluten free flour or 1 1/2 tsp baking soda and 1 1/2 tsp baking powder for wheat flour)

1 tsp salt

1/2 cup binder (2 whole eggs or 1/2 cup liquid egg whites or 2 tbsp ground golden flaxseed mixed with 6 tbsp of water or 6 tbsp aquafaba**)

1 cup “milk” (if using wheat flour, any type of milk such as cow, soy, flax, oat, hemp, almond or if using gluten free flour any type of milk such as cow, soy, flax, oat, hemp, almond mixed with 1 tbsp either lemon juice or vinegar to make a buttermilk)

1/2 cup plant oil (safflower or sunflower or grapeseed or canola or light olive oil or a nut oil)

2 tsp extract ( 2 tsp vanilla or 1 tsp vanilla and 1 tsp mint or 1 tsp vanilla and 1 tsp almond or 1 tsp vanilla and 1 tsp orange extract)

1 cup boiling water

1 tbsp vinegar or lemon juice (white distilled vinegar or apple cider vinegar or raspberry vinegar or lemon juice)

Caking Baking Instructions:

  1. Preheat oven to 350 degrees and prepare four 9 inch cake pans by either lining them with parchment paper or greasing and flouring them or spraying them with Pam spray. Move the racks in your oven so they are evening spaced for putting two cake pans on each rack.
  2. Mix together the flour, cocoa powder, sweetener (if using sugar or coconut sugar), baking soda, baking powder and salt. Set aside.
  3. Mix together the binder, “milk”, oil, extract and sweetener (if using agave).
  4. Add the wet ingredients to the dry with the boiling water and the vinegar or lemon juice. Blend just until dry ingredients are moistened.
  5. Divide the batter evening among the four prepared pans. Bake in the oven for 15 minutes, switching the cake pans between the two racks halfway through. Cakes will be slightly puffed, pulling away from the edges, and a toothpick inserted in the center will come out clean.
  6. Leave the cake layers in the their pans and allow them to cool on a wire cooling rack.

Note: ** Aquafaba is the liquid from a can of chickpeas. To substitute for eggs, use 1/4 cup per egg and whisk until frothy (foamy but still clear and not white like a meringue.)

Torte Fillings for You to Choose:

Option One Ingredients: A Light Dairy and Egg Free Mousse-like Filling

Liquid from one 15 ounce can of chickpeas

1/4 tsp cream of tartar

1/4 cup powdered sugar

1/2 cup dark chocolate or semi sweet chocolate (regular type or Enjoy Life allergen free type)

1 tsp vanilla extract or 1 tsp mint extract or 1 tsp almond extract

Cooking Instructions:

  1. If you have a Kitchen Aid or other heavy duty mixer, use it. Drain the liquid from the can of chickpeas into the mixing bowl. (Use the chickpeas for making hummus or a curry dinner entree or in your salad or for a roasted snack.)
  2. Add the cream of tartar and begin mixing the liquid on low speed, slowly increasing to the highest. As the liquid begins to become frothy and foamy, add the powdered sugar, one tablespoon at a time. Mix until the liquid becomes thick white peaks like an egg meringue.
  3. Put the chocolate pieces into a microwave safe dish for a minute and stir until the pieces are all melted or put the chocolate pieces in a pan over another pan filled with boiling water and heat and stir until the chocolate is all melted.
  4. Add the extract of choice to the chocolate and mix well.
  5. Add a little bit of the chickpea meringue to the chocolate mixture and gently fold it into the chocolate. Then add the chocolate mixture to the bowl of meringue, folding in just a little at a time until all the chocolate has been added and folded into the meringue. Transfer to the fridge to thicken until needed to fill the torte cake layers.

Option Two Ingredients: A Heavier Mousse-like Filling (can be made dairy free)

2 cups of heavy cream or cold coconut cream (put coconut cream into the fridge to cool overnight, turn the can over and open so that the liquid is at the bottom, drain the liquid, and use the cold cream in place of the heavy cream)

1 1/2 tsp vanilla extract or mint or almond or orange

1/4 cup sugar or 1/4 cup powdered sugar or 1/4 cup coconut sugar or 2 tbsp agave

Cooking Instructions:

  1. Mix the cream with the extract and beat at a high speed until soft peaks begin to form. Add the sweetener of choice, a little at a time, and continue beating until stiff peaks form. Put the whipped filling in the fridge until needed to assemble the torte cake layers.

Option Three Ingredients: A Creamier Filling

5 ounces chocolate pieces (dark or semi-sweet, regular or Enjoy Life)

12 ounce whipped topping, thawed (regular or dairy free coconut version)

8 ounce cream cheese (regular or dairy free soy version)

1 tsp vanilla extract or mint or almond or orange

Cooking Instructions:

  1. Mix the chocolate pieces with 1/2 cup of the whipped topping and microwave 30 to 60 seconds until melted and smooth. (Stir after 30 seconds to see if you need more time.)
  2. In a mixer, whisk the cream cheese until smooth. Add the chocolate mixture and beat well.
  3. Add the remaining whipped topping and blend well. Put into the fridge until needed to assemble the torte cake layers.

Options Four and Five: Thicker Fillings

Make your favorite mousse recipe as a filling or simply your favorite frosting recipe as the filling.

Assembling the Torte:

  1. On a cake platter lay the first cake layer. Spread one third of the filling you chose to make.
  2. Top the filling with the second cake layer and spread the second third of the filling.
  3. Top the filling with the third cake layer and spread the last of the filling.
  4. Place the last cake layer on top.
  5. Choose a topping option to cover the sides and top of the torte.

Topping the Torte:

Option One (which is pictured at the beginning of this post):

Melt dark chocolate or semisweet chocolate chips (regular or Enjoy Life variety) in your microwave and stir until smooth. using a frosting spreader, coat the sides and top of the cake with the melted chocolate in a very think layer. Before the chocolate solidifies, sprinkle the top with chopped chocolate pieces.

Option Two:

Make your favorite frosting recipe and frost the sides and top of the torte.

Option Three:

Make a ganache: Warm 1 cup heavy cream or coconut cream in a microwave just until hot to the touch. Pour over 8 ounces of dark chocolate or semisweet or bittersweet chocolate pieces (regular or Enjoy Life variety) and stir until completely smooth and silky. Allow ganache to cool to a spreadable consistency.


Holiday Happenin’s: Stick Cookies and Cranberry Drops

holiday-cookies

“You’re done already?”

The summer between my sophomore and junior year of high school, a couple of my girlfriends and I decided to host a special dinner for friends of our who had graduated and would be leaving in August for college or boot camp. We spent hours scouring our parents’ cookbooks and one we took out from the library (no google back then!). On the day of the dinner, we worked for just as many hours in the kitchen, prepping, cooking, baking, and cleaning up.

When the guys arrived for dinner, we proudly served all the dishes we had literally slaved over all day long. Imagine our shock when in the time it took us to finish bringing out the entire meal, they had already scarfed down the food! It couldn’t have been more than 10 to 15 minutes from the time they began eating and the time they finished. (Did I mention these were football and baseball players?)

The guys didn’t understand why we were upset. We tried to explain that they hadn’t taken the time to enjoy the food we had spent so much time preparing, but in hindsight, I realize we 16 year old girls were expecting an awful lot from 18 year old boys!

I was reminded of that dinner when I received an email this week asking if there were any holiday cookie recipes which didn’t require all the rolling and cutting and fancy decorating. The mother explained that her children ate the cookies so quickly that the time put into them seemed far and above what one should invest. Remembering that fateful dinner, I understood exactly where this mom was coming from!

For our family, making the rolled sugar and ginger cookies I have on this site is a family tradition, and spending the day as a family, listening to Christmas music and decorating them together is something we enjoy. But for folks who are looking for an easier and shorter way to have family time, I have a couple of cookies which are just perfect.

The first are stick cookies. They are a peppermint candy cookie which you simply roll into a rectangle, cut into sticks and then bake. If you want to decorate them as my children did in the picture, you simply drop a few sprinkles on top and press. Easy, peasy as my son likes to say!

The other is a cranberry cookie which you just roll into a ball and flatten. On its own, it’s a nice, not too sweet cookie. If your children do want to have fun, though, they can roll them in colored sugar as my kids did in the picture before flattening them.

Cranberry Drops

Ingredients:

2 cups favorite gluten free flour blend

1/2 cup millet flour

1/2 cup sorghum flour

1/2 tsp salt

1 cup Enjoy Life mini chocolate chips

1 cup julienne dried cranberries (If your store doesn’t sell them that way, just chop up regular dried cranberries in a food processor or simply use them whole instead in smaller pieces)

1 cup vegan butter

8 oz Toffuti cream cheese

1/2 cup Agave

2 tsp vanilla

Baking Instructions:

  1. Preheat oven to 350 degrees and line cookie sheets with parchment paper.
  2. Blend together the gluten free flour, millet flour, sorghum flour and salt.
  3. Stir in the chocolate chips and cranberries
  4. Cream the vegan butter until smooth, scraping down the sides.
  5. Add the tofu cream cheese and cream together, scraping down the sides.
  6. Slowly add the agave while the mixer is on low until the mixture is completely blended together, scraping down the sides.
  7. Add the vanilla and mix just until blended.
  8. Add the dry ingredients and mix well.
  9. Form balls made of 1 1/2 tablespoons of dough. If decorating, roll the balls into colored sugar before putting onto the prepared pan. If baking plain, just put onto the prepared pan. For both, flatten the balls a little bit with the bottom of a cup or your clean hands.
  10. Bake for 14 to 16 minutes, rotating halfway through the cookie time until the cookies are puffed and firm to the touch.

Stick Cookies

Ingredients:

1 cup vegan soy free butter

1 cup coconut sugar

1 egg

1 tsp vanilla

1 tsp peppermint extract

2 cup favorite gluten free flour blend

1/2 cup sorghum flour

1/2 cup millet flour

1 1/4 tsp baking powder

1 cup Enjoy Life mini chocolate chips

1/2 cup crushed peppermint candies

Baking Instructions:

  1. Preheat oven to 350 degrees and line cookie sheets with parchment paper.
  2. Cream the vegan butter until smooth. Add the coconut sugar and mix well, scraping down the sides.
  3. Add the egg, vanilla and peppermint extract. Blend well, scraping down the sides.
  4. Blend together the gluten free flour blend, sorghum flour, millet flour, and baking powder.
  5. Mix the dry ingredients into the wet.
  6. Add the chocolate chips and crushed candies.
  7. Chill the dough for one hour.
  8. On parchment paper sprinkled with flour and using a floured rolling pin, roll the dough into a large rectangle that is 1/4 inch think.
  9. If decorating, put sprinkles on top and gently press them into the dough. Cut the dough into sticks. We usually do one inch by 4 or 5 inches.
  10. Put the cookies onto the prepared cookie sheets and bake for 8 to 10 minutes until puffed and becoming stiff to the touch.
  11. NOTE:  If you want, after pressing in the sprinkles, this dough can be cut into shapes and not just sticks.

Holiday Happenings: Cranberry Sauce

bags-of-cranberries

“Apparently cranberry sauce is underappreciated….”

My husband came home the other day and told me about a news story on the radio. The topic was cranberry sauce and how it was not as appreciated as other foods eaten during the Thanksgiving meal. This, of course, spurred discussion among our family about our own cranberry preferences. My son will only eat jellied cranberry sauce with no chunks. My oldest, my husband and I love cranberry sauce in any form. My other daughter won’t eat it, no matter the texture.

Cranberries, however, are very good for your health, containing antioxidants, fiber, and many nutrients needed by the body. What I find, though, is that because they have such a tart flavor, folks use way too much sugar when cooking with them. So, I like to make my own cranberry sauce instead of purchasing it from the store.

When I tell folks that I make cranberry sauce, they always seemed to be surprised, which I find surprising since cranberry sauce is the easiest food to make. You simply put cranberries into a pot with water and sweetener and let it cook down. The entire process takes about 10-15 minutes, at the most.

Where the creativity comes in is deciding what type of cranberry sauce you’d like for Thanksgiving. You can add other fruits to the cranberries like pears or apples or tangerines or oranges or apricots or cherries to add a contrasting fruity flavor to the cranberries. You can add red wine or port or bourban if you’d like a more complex flavor. You can add ginger or maple or anise or jalapeno if you’re looking to try something a little different this year. You can use water, orange juice, apple cider or any other liquid you can imagine to change the flavor. You can add nuts or dried fruits to add crunch and texture. You can even change up the texture of the sauce, making it chunky, relish-style or jellied.

And after Thanksgiving the cranberry sauce can be “recycled” in many ways. Swirl it into your favorite cheesecake recipe. Add the sauce as a fixing for your favorite sandwich. Mix it into a muffin recipe. Top pancakes or waffles with it. Combine it with another fruit to make the filling for a pie. Stir it into your breakfast oatmeal. Use it as a spread for a slice of quick bread like banana or zucchini. Combine it with cream cheese for a dip. Top vanilla ice cream with it. The ideas are endless.

A food as versatile as cranberry sauce is truly just begging for you to experiment this year. And what’s great is that unless you’re allergic to cranberries, people with food allergies can eat it!

Some tips:

  1. The cranberries: It doesn’t matter whether you use fresh or frozen cranberries. The general rule of thumb is that about 12 ounces of cranberries requires about 1 cup of liquid.
  2. The sweetener: For most recipes, for 12 ounces of cranberries, they’ll call for 1 cup of sugar. I’d suggest you cut that in half and save your health or use 1/4 cup Agave or 1/2 cup of coconut sugar or 1/3 cup truvia.
  3. The add-ins: Decide what type of cranberry sauce you’d like to make and add the ingredients in with the cranberries so that they all cook together and the flavors meld.
  4. Traditional Style: To make traditional cranberry sauce, simply put all your ingredients into a pot, bring the liquid to a boil, let it simmer for about 5-10 minutes until the cranberries pop and are the texture you’d like, remove from the heat, let it cool, and then refrigerate until you’re ready to use it.
  5. Relish Style: Simply use your food processor to chop up the cranberries, sweetener and additions and refrigerate. You should decrease the liquid, though, and only add just enough to moisten the relish.
  6. Jellied Style: Prepare the sauce as you would for the traditional but then push everything through a strainer, mashing the ingredients as much as you can to get as much as you can into the sauce and then refrigerate what you’ve pushed through the strainer.


Holiday Traditions: Allergy Friendly “Sugar Cookies”

website sugar cookies

“Well, they have to be the same….”

When you marry into a family who makes literally the best sugar cookies you’ll ever eat in your life, you must tread carefully about trying to revamp the recipe to be allergy friendly.

“Honey, I was thinking….”

“Yes.”

“Well, I’d really like to be able to have some sugar cookies this year… I think I could revamp the recipe to be dairy and gluten free….”

“No.”

“But what if they tasted the same?”

“Not possible.”

“Well… I think it could be possible….” I give my husband my most pleading, puppy-dog sweet face, and add… “If they don’t taste just like your family’s recipe, I’ll make another batch the “right” way.”

“Well, okay, I guess you could try….”

In the end, I only made one batch of sugar cookies because my husband and my children declared my recipe to be a success, which was good because we spent many hours baking very large batches of three different type of allergy friendly cookies this weekend, and I didn’t want to have to make any more!

So below are some hints for cut-out cookies which I’ve shared previously and my revised recipe for rolled, cut-out sugar cookies. (We’ll keep the original a family secret… *grin*)

Tips for Making Rolled, Cut-out Cookies

1.  Use wax paper to roll out the dough.  Simply cut a sheet that overlaps around a large cutting board or piece of cardboard and tape it down.  Then when you sprinkle your flour over the wax paper, your dough won’t stick to the board.

2.  Use sifter to put flour onto your cutting board and rolling pin.  If you sprinkle it on with your fingers, you’re more likely to clump the flour in places which then get stuck to your cookie dough.

3.  Use a long, thin metal spatula to periodically release your dough from the board while you’re rolling it, and before you use your cookie cutters, be sure to go completely under the entire rolled out piece of dough so that your cookies won’t stick to the board when you’re cutting the shapes.

4.  Invest in some smaller cookie shapes which you can use to cut little cookies from the dough left after you cut out the big cookie shapes.  This cuts down on the amount of dough you need to re-roll.  Put one cookie sheet aside specifically for the little cookies, which you fill up as you go along and then bake at the end.

5.  Make sure your dough for rolling is very cold and firm.  Most recipes will tell you to chill for an hour, but in reality you’re better off planning ahead and chilling your dough for several hours or overnight.  When you’re making the cookies, be sure to put the dough back into the fridge in between scooping out new dough to roll.

6.  Put all your re-roll dough into a small bowl which you then put into the freezer while you’re finishing up the regular dough.  This will make the dough firm enough for you to re-roll immediately as opposed to having to wait for it to firm back up again.

7.  Make your own colored sugars.  Put 1/4 cup of sugar into a bowl and add two to four drops of food coloring.  Carefully work the color into the sugar, using the back of a spoon to continualy “spread” the color completely into the sugar.  You can store extra, leftover sugar in a sandwich baggie for a very long time!

8.  Use parchment paper to line your cookie sheets.  Your cookies will never stick. You won’t have to clean the cookie sheets.  And you won’t have to worry about cross-contamination of your cookies.  I usually use the If You Care brand.  The parchment sheets can also be re-used over and over again on one cookie sheet.

9.  Be sure to completely cool your cookie sheets before putting new cookie dough shapes onto them.  I usually pop my cookie sheets into the freezer for a minute or two after removing the cookies.  Works like a charm.

10.  Invest in metal cookie cutters which you can use year after year. When you’re cutting out the shapes, put a pan of flour in the center which you can dip the cutters into so the cutters won’t stick to your dough.

11.  When you’re done with your cookie cutters, fill the sink with hot, soapy water and just let them sit for a while.  You’ll be able to simply rinse them off without having to try to “clean” the crevices.  Then pop them (as long as they’re metal) onto one of your cookie sheets and place the cookie sheet in the oven which is turned off and cooling down.  The residual heat will evaporate all the water, and your cutters will be sterilized and ready for next year’s use.

Allergy Friendly Rolled, Cut-Out Sugar Cookies

(This makes a lot of cookies; if you want less,

cut the recipe into thirds)

Ingredients:

3 cups sugar (This is the only time I ever use sugar because a sugar cookie just has to have sugar!)

2 cups Tofutti sour cream

2 cups Earth Balance soy free vegan butter

3 eggs, room temperature

1 tbsp ground nutmeg

6 Gluten Free Flour Blend (you’ll need just enough flour to make a soft dough – I used 6 cups of Authentic Foods brown rice gluten free blend)

Baking Instructions:  (The dough needs to chill so make the dough up the night before or several hours ahead of when you want to bake the cookies.)

1.  Mix the sugar with the sour cream and butter until well blended.

2.  Add the eggs, one at a time, and blend well.  Add the nutmeg.

3.  Add in the gluten free flour, a cup at a time, only as much as you need to make a soft dough.  Blend well.

4.  Cover the dough tightly with plastic wrap and chill overnight, or at least for several hours.

5.  Preheat the oven to 350 degrees.  Line cookie sheets with parchment paper.

6.  Line a board with wax paper.  Sprinkle the board and a rolling pin with flour of your choice (I used brown rice flour), and roll out small amounts of dough to a very thin thickness – thin enough to make a crispy cookie but not so thin that you can’t actually move the cut out dough to the cookie sheet.

7.  Cut out shapes with cookie cutters and place on the prepared cookie sheets.  The cookies will not spread a lot so you can put them fairly close together.

8.  Decorate the cookies with colored sugar and/or currants. (You can also just bake the cookies and then decorate them with icing when they’re cooled.)

9.  Bake in the preheated oven for 8 to 12 minutes.  Start with 8 minutes and then go up by 1 minute increments. (It really depends on how thin you are able to roll them in terms of how long the baking time needs to be.)  The cookies should be dry, crisp and slightly puffed.

10.  Let the cookies cool for a minute on the cookie sheet, and then move the cookies to a wire cooling rack and cool them completely. Once cooled, they’ll be nice and crispy sugar cookies.  If you eat them while they’re warm, they’ll be chewier.

11.  When the cookie are completely cooled, store them in a tightly covered container.  They’ll last for a few weeks, though after a couple of weeks, they’ll get a bit softer.


Holiday Traditions: Allergy Friendly “Fruitcake”

“How many fruitcakes does it take to hammer in a nail?”

You’ve probably heard all the fruitcake jokes which tend to make their round this time of year…. I personally think we should be applauding the folks who invented fruitcake, because it’s a rather ingenious cake. In a time when there is no refrigeration, people figured out how to use dried and candied fruits and nuts and alcohol to create a longer-lasting festive dessert.

While there does seem to be a lot of folks who won’t even try fruitcake, a substantial number of people do actually enjoy and make fruitcakes as part of their holiday tradition. An older gentleman emailed me a couple of weeks ago because he’s now gluten sensitive, and his wife told him he couldn’t have fruitcake anymore. He wanted to know if I could help….

Fortunately for him, I like fruitcake. I even like the versions with the traditional candied lemon and orange peels, cherries and citron. Fruitcake, however, doesn’t have to include these. I often make a fruitcake with just dried fruit like apricots, prunes, dates, and currants. What’s lovely about fruitcake is that you can do just about anything you want.

Some things to keep in mind:

The Batter:

Traditional fruitcake is basically a butter cake recipe. You can choose between a light cake recipe or a dark cake. Light means you’re using “light” sweeteners like white sugar, honey and/or corn syrup and usually lighter dried fruits and nuts (macadamia nuts, apricots, etc…); dark usually uses sweeteners like brown sugar and molasses and darker dried fruit and nuts (walnuts, pecans, currants, etc…).

Since I try to avoid refined sugars a much as possible, I tend to use a combination of coconut sugar, Agave, and date molasses because I can use much less than the sugar amounts normally called for in fruitcake. This means my fruitcake tends to be a “darker” recipe. I also cut the quantity of butter because traditional butter cake recipes use a lot of butter. And of course, because of my dairy allergies I’m really using a vegan “butter” instead of cow’s milk butter.

Fruitcake recipes also call for a lot of eggs. One, because fruitcake is really a lot of fruit and nuts with just enough batter to hold it together, so eggs are very necessary to the binding and baking process. Two, fruitcake is normally made in large quantities which requires a lot of eggs. To minimize the cholesterol, I use half egg whites and half whole eggs. You can use all egg whites but it will make for a drier fruitcake.

Whatever you decide to do for a batter, make it to your liking. Since I like spice cakes, I make my fruitcakes with spices like cardamom, cinnamon and nutmeg. If you like more of a yellow cake, use vanilla. If you like fruit, use orange or lemon peel.

The Dried Fruit and Nuts:

Traditional fruitcake has candied peels, cherries, and citron with nuts like walnuts and pecans. If you don’t like those, you don’t have to use them. You can use any type of dried fruit you prefer and any type of nuts you prefer. I omit nuts because I’m allergic to them. For the fruits I use a combination of the traditional and the non-traditional. Dates, dried plums, apricots, and currants are my favorite dried fruits to mix with the candied peels, cherries and citron.

A tip: I have found that what most people don’t like about fruitcake is that the fruit and nuts are too large. I use a food processor to chop everything into tiny pieces so they’re evenly distributed throughout the cake to give flavor without the chunkiness. Paradise also makes an Old English Fruit and Peel mix which has everything already chopped into tiny pieces.

The Alcohol:

Alcohol was traditionally used in fruitcake to keep the cake from getting moldy and stale in addition to adding flavor and moistness. The most common alcohol for fruitcake is either rum or brandy. Recipes vary as to how the alcohol is used. Some will tell you to soak the dried fruits and nuts in alcohol. Most, however, soak the cake in alcohol after it’s been baked. Many recipes do a combination of the two. Others simply put alcohol in the cake batter.

The main difference between which versions you choose is exactly how much of the “boozy” taste you want. Alcohol cooked into the batter will not be as strong as if you soak the fruits and nuts and/or the entire cake in alcohol. Another difference is time. Soaking fruits and nuts usually takes some hours before you can make up the fruitcake. Soaking the entire cake usually requires days.

I don’t use alcohol in my fruitcake recipes. One, I don’t particularly care for rum or brandy. Two, I don’t have the patience to wait for anything to soak. Three, we have refrigeration which keeps my fruitcake from getting moldy and stale. Instead I like to use unsweetened orange use or apple cider. Makes for tasty cakes without the alcohol.

The Baking:

Fruitcake needs to cook at a lower temperature to prevent the cake from becoming too dry, so usually it requires several hours to bake. I cut the time by baking my fruitcake in smaller mini-loaf pans or only filling regular size pans half full. Then instead of a couple of hours, the cakes cook in about one hour which fits with my schedule much better.

Cooking in the mini pans also means they’re a good size for gifting. I make a lovely chocolate fruitcake which I have given to neighbors for the holidays for years and which they actually really enjoy and look forward to each year. What’s nice about fruitcakes is that they store well if you wrap them well in plastic wrap and then aluminum foil.

Many recipes will tell you to cook the fruitcake at 250 or 275 degrees. I find that 300 degrees work just as well, allowing the cook time to be slightly less. If, however, you do choose to make a large fruitcake in a bundt or tube pan, you should opt for the lower temperatures to ensure even cooking throughout.

A Recipe:

My favorite fruitcake recipe is the chocolate fruitcake I mentioned above. I use a combination of two gluten free flour blends – one which is a lighter brown rice flour blend like King Arthur’s; the other a more high fiber/high protein blend like Bob Red Mill’s garbanzo bean blend. I use unsweetened cocoa powder and add allergy friendly chocolate chips to the dried fruit blend. If I use the candied peels and citron, I usually just add dried dates and plums. If I opt to use only dried fruit, I like to combine dried dates, plums, apricots, currants, and unsweetened coconut. Both versions make for tasty fruitcakes.

Allergy Friendly Chocolate Fruit Cake

(This recipe makes 12 mini 4 x 8 loaves)

Ingredients:

7 cups favorite dried fruits, nuts, and/or candied peels, cherries and/or citron, chopped into tiny pieces

1 cup Enjoy Life miniature chocolate chips

1 1/2 cup vegan olive oil “butter”, melted

2 cups coconut sugar

1/4 cup date molasses

3/4 cup Agave

1 cup unsweetened orange juice

1 cup liquid egg whites

4 eggs

2 cups high protein/high fiber gluten free flour blend (like Bob Red Mill’s garbanzo bean flour)

2 cups brown rice flour blend (like King Arthur)

1 cup gluten free oat flour

1 tsp cardamom

1 tsp cinnamon

1/2 tsp nutmeg

1/2 cup unsweetened cocoa powder

2 tsp baking powder

2 tsp baking soda

1 tsp salt

2 tbsp apple cider vinegar

Baking Instructions:

  1. Preheat the oven to 300 degrees. Arrange your oven racks so they are evenly spaced so you can cook on both racks at teh same time. Line 12 mini loaf pans with parchment paper so the paper hangs over the side like wings. This will make it easier to pull the cake out of the pans. Arrange the pans on two cookie sheets so they have some space around each pan for air to circulate.
  2. Mix the dried fruit, nuts, and/or candied peels and fruit with the chocolate chips. Set aside
  3. Mix the melted butter with the coconut sugar, date molasses, agave, orange juice, egg whites, and eggs. Set aside.
  4. Combine the two gluten free flour blends with the oat flour, cardamom, cinnamon, nutmeg, cocoa powder, baking powder, baking soda, and salt.
  5. Stir the wet ingredients well before adding the dried fruit mixture to it. Carefully add the dry ingredients, along with the apple cider vinegar.
  6. Mix the batter well until all the dry ingredients are thoroughly moistened.
  7. Divide the batter evenly among the 12 loaf pans. The pans will be only 2/3 full. (If you’d like to make these in larger 9 x 5 pans, fill the loaf pans only half full.)
  8. Bake the loaves for about 30 minutes and then switch the cookie sheets between the two racks for even cooking of both trays of mini-loaves. Bake for another 20-30 minutes until the fruitcakes are puffed, pulling from the sides, and a toothpick inserted into the center comes out clean.
  9. Remove the cookie sheets from the oven and put the mini loaf pans onto a wire cooling rack. Cool for 10 minutes, and then carefully remove the cakes by lifting the parchment paper wings. Cool the cakes completely on the wire racks.
  10. To store the cakes, wrap them tightly in plastic wrap and then in foil. They store in the fridge for about a week or you can double wrap them with foil and freeze them for a couple of months.